Cylinder Head Installation Left
Tools Required
J 36660-A Electronic Torque Angle Meter
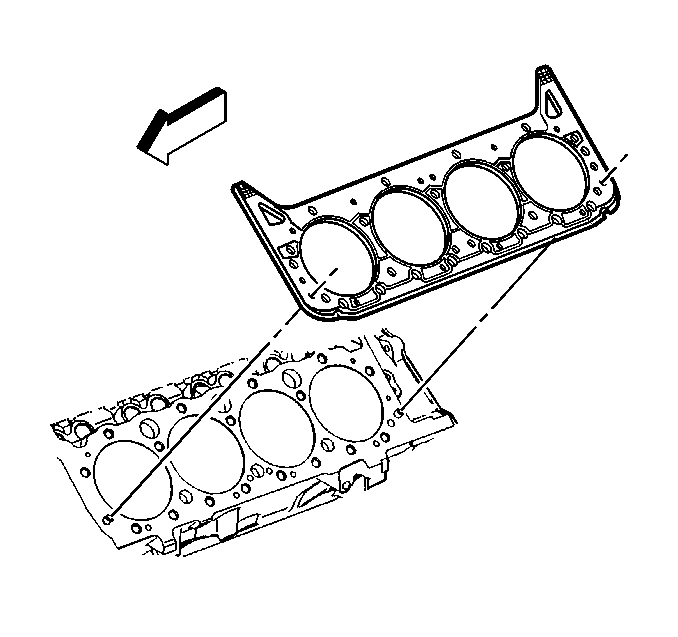
- Clean the cylinder gasket surfaces on the engine block.
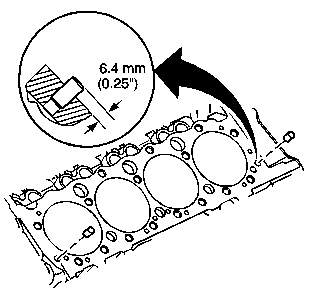
- Inspect the dowel pins (cylinder head locator) for proper installation.
- Clean the cylinder head gasket surfaces on the cylinder head.
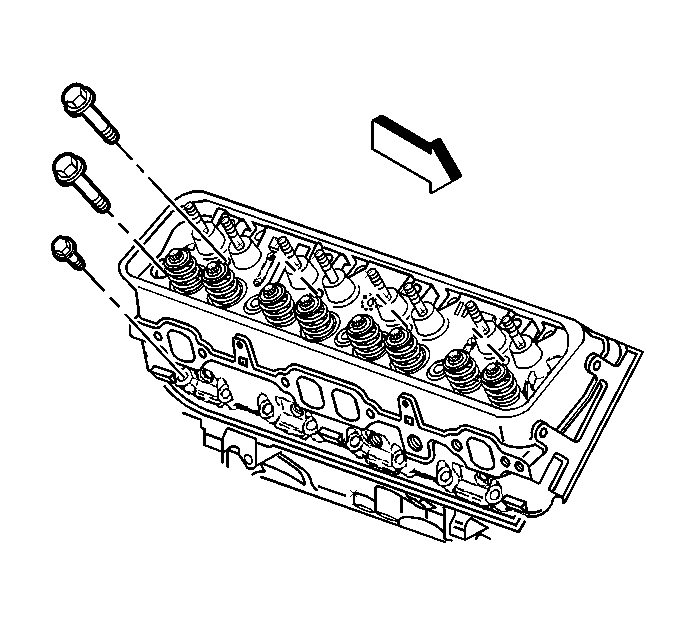
- Place the NEW cylinder head gasket in position over the dowel pins (cylinder head locator).
- Install the cylinder head to the engine block.
- Apply sealant GM P/N 12346004 or equivalent to the threads of the cylinder head bolts.
- Install the cylinder head bolts.
- Use the J 36660-A in order to tighten the cylinder head bolts in sequence on the final pass.
- Measure the NEW spark plugs for the proper gap.
- Install the NEW spark plugs.
- If reusing the engine coolant temperature (ECT) gauge sensor, apply sealant GM P/N 12346004 to the threads of the ECT gauge sensor.
- Install the ECT gauge sensor.
Important: Do not use any type sealer on the cylinder head gasket (unless specified).
The cylinder head gasket is not directional and may be installed using either side facing the engine block.
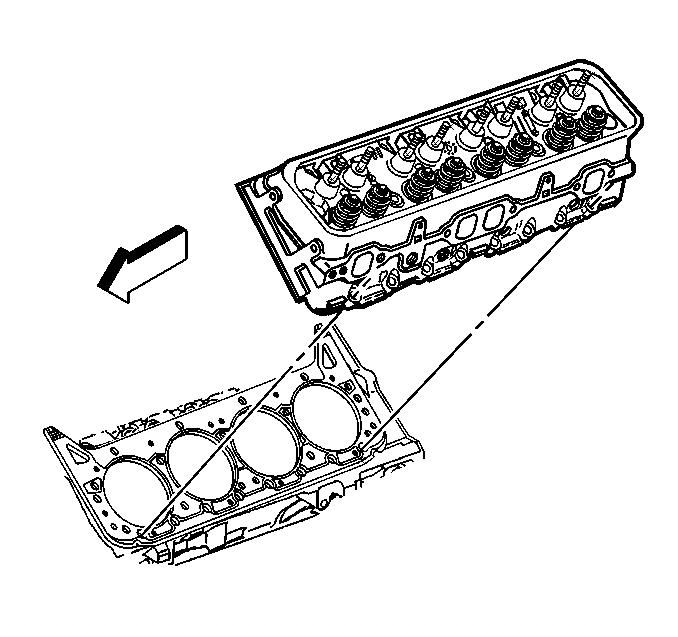
Guide the cylinder head carefully into place over the dowel pins and the cylinder head gasket.
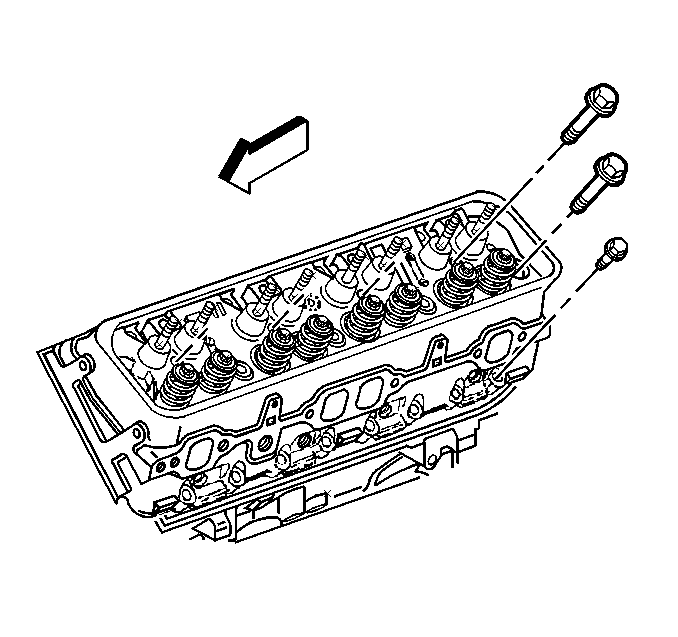
Notice: Use the correct fastener in the correct location. Replacement fasteners must be the correct part number for that application. Fasteners requiring replacement or fasteners requiring the use of thread locking compound or sealant are identified in the service procedure. Do not use paints, lubricants, or corrosion inhibitors on fasteners or fastener joint surfaces unless specified. These coatings affect fastener torque and joint clamping force and may damage the fastener. Use the correct tightening sequence and specifications when installing fasteners in order to avoid damage to parts and systems.
Tighten
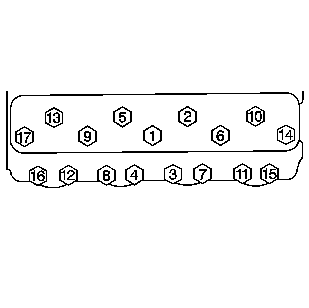
Tighten the bolts in sequence on the first pass to 30 N·m
(22 lb ft).
Tighten
| • | Tighten the long bolts (1, 2, 5, 6, 9, 10, and 13) on the final pass in sequence to 75 degrees. |
| • | Tighten the medium bolts (14 and 17) on the final pass in sequence to 65 degrees. |
| • | Tighten the short bolts (3, 4, 7, 8, 11, 12, 15, and 16) on the final pass in sequence to 55 degrees. |
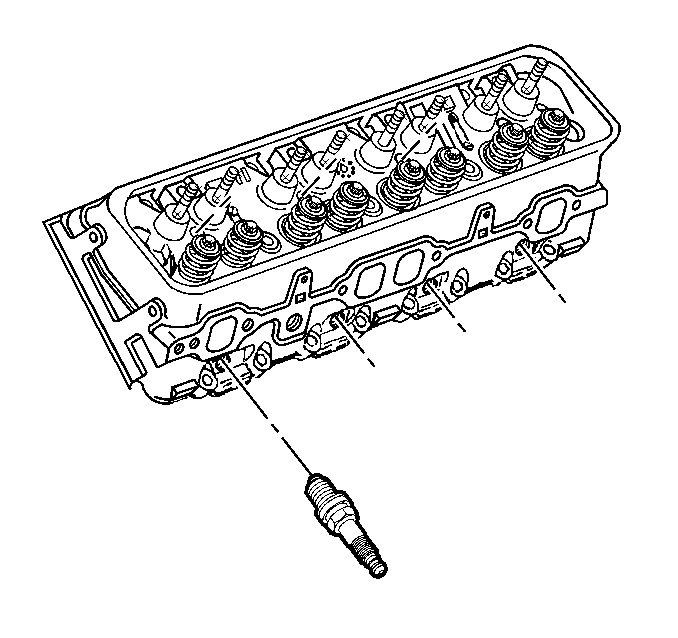
Adjust the spark plug gap if necessary.
Specification
Spark plug gap to 1.52 mm (0.060 in)
Tighten
| • | Tighten the spark plugs for a USED cylinder head to 15 N·m (11 lb ft). |
| • | Tighten the spark plugs for the initial installation of a NEW cylinder head to 30 N·m (22 lb ft). |

Tighten
Tighten the ECT gauge sensor to 20 N·m (15 lb ft).
Cylinder Head Installation Right
Tools Required
J 36660-A Electronic Torque Angle Meter
- Clean the cylinder gasket surfaces on the engine block.
- Inspect the dowel pins (cylinder head locator) for proper installation.
- Clean the cylinder head gasket surfaces on the cylinder head.
- Place the NEW cylinder head gasket in position over the dowel pins (cylinder head locator).
- Install the cylinder head to the engine block.
- Apply sealant GM P/N 12346004 or equivalent to the threads of the cylinder head bolts.
- Install the cylinder head bolts.
- Use the J 36660-A in order to tighten the cylinder head bolts in sequence on the second pass.
- Measure the NEW spark plugs for the proper gap.
- Install the NEW spark plugs.
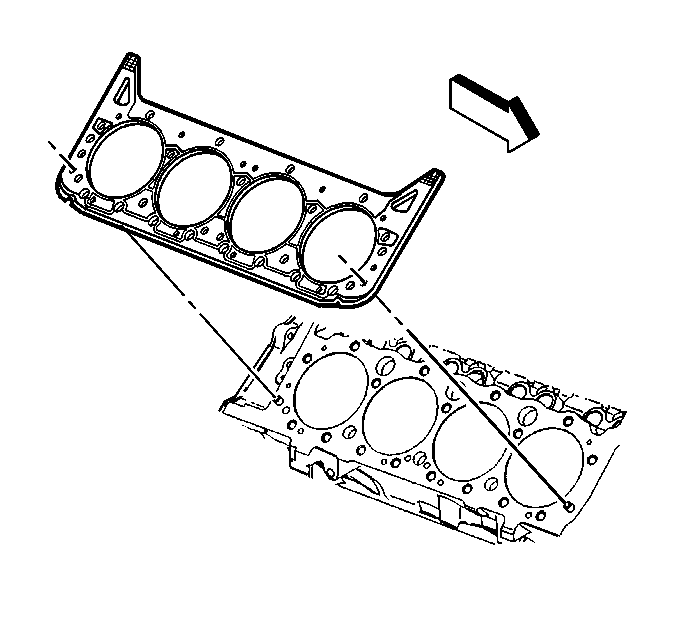
Important: Do not use any type sealer on the cylinder head gasket (unless specified).
The cylinder head gasket is not directional and may be installed using either side facing the engine block.
Guide the cylinder head carefully into place over the dowel pins and the head gasket.
Notice: Use the correct fastener in the correct location. Replacement fasteners must be the correct part number for that application. Fasteners requiring replacement or fasteners requiring the use of thread locking compound or sealant are identified in the service procedure. Do not use paints, lubricants, or corrosion inhibitors on fasteners or fastener joint surfaces unless specified. These coatings affect fastener torque and joint clamping force and may damage the fastener. Use the correct tightening sequence and specifications when installing fasteners in order to avoid damage to parts and systems.
Tighten
Tighten the bolts in sequence on the first pass to 30 N·m
(22 lb ft).
Tighten
| • | Tighten the long bolts (1, 2, 5, 6, 9, 10, and 13) on the second pass in sequence to 75 degrees. |
| • | Tighten the medium bolts (14 and 17) on the second pass in sequence to 65 degrees. |
| • | Tighten the short bolts (3, 4, 7, 8, 11, 12, 15, and 16) on the second pass in sequence to 55 degrees. |
Adjust the spark plug gap if necessary.
Specifications
Spark plug gap to 1.52 mm (0.060 in).
Tighten
| • | Tighten the spark plugs for a USED cylinder head to 15 N·m (11 lb ft). |
| • | Tighten the spark plugs for the initial installation of a NEW cylinder head to 30 N·m (22 lb ft). |
