Tools Required
J 5590 Installer
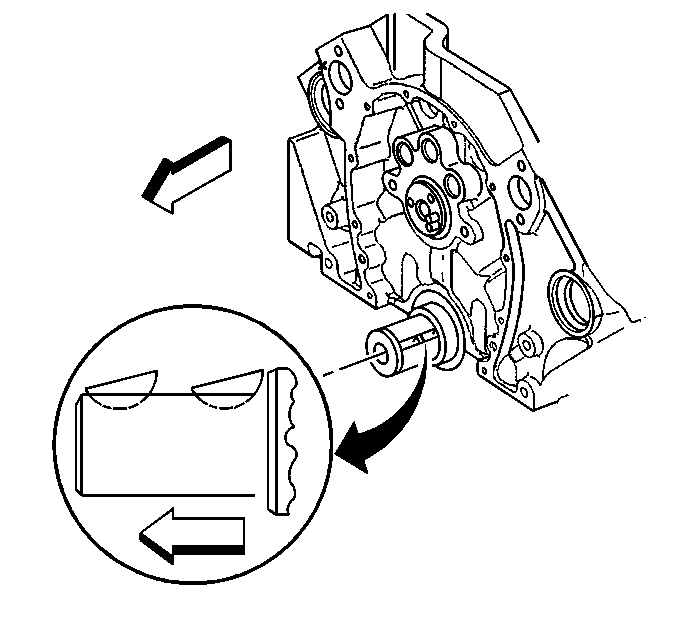
- Install the crankshaft balancer woodruff keys into the crankshaft keyway.
- Align the keyway of the crankshaft sprocket with the crankshaft balancer woodruff key.
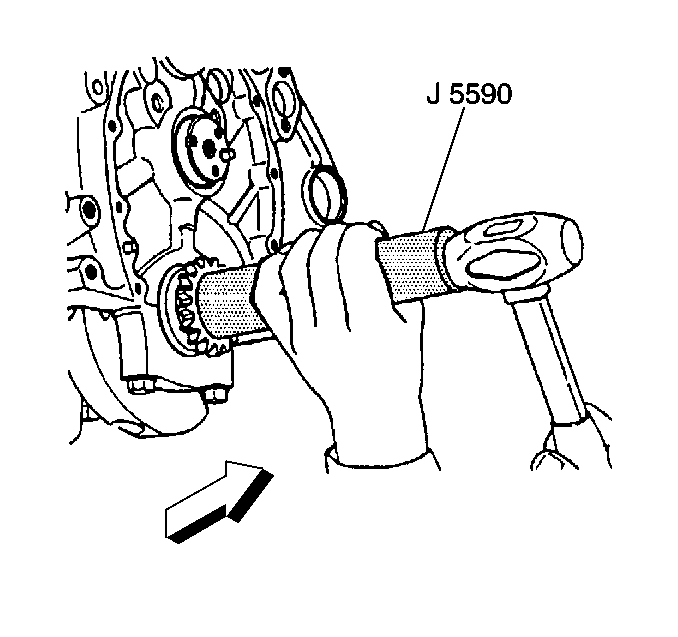
- Use the J 5590 in order to install the crankshaft sprocket.
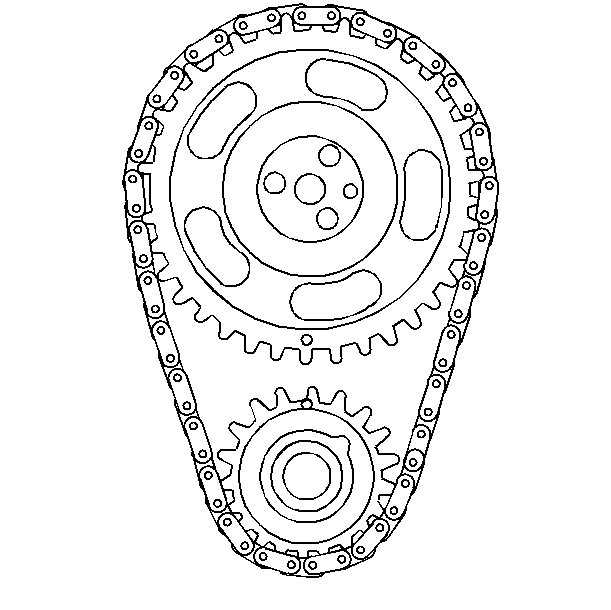
- Rotate the crankshaft until the crankshaft sprocket alignment mark is in the 12 o'clock position.
- Install the camshaft sprocket and the camshaft timing chain.
- Rotate the camshaft until the camshaft and crankshaft sprocket alignment marks are in the proper position.
- Install camshaft sprocket bolts.
- Install the crankshaft position sensor reluctor ring.
Caution: Wear safety glasses in order to avoid eye damage.
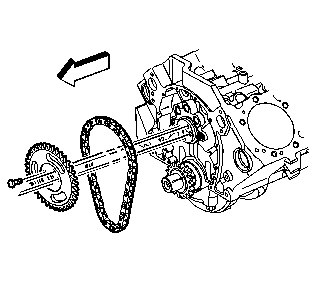
Install the camshaft sprocket with the alignment mark in the 6 o'clock position.
Notice: Do not use tools to force the camshaft sprocket onto the camshaft. The camshaft sprocket is a slip fit onto the camshaft and does not require tools to install. Using force against the camshaft can cause component damage and cause the expansion plug at the rear of the block to move out of position. The expansion plug out of position can leak engine oil or fall out. A missing or leaking expansion plug at the rear of the camshaft bearings can cause a loss of oil and oil pressure leading to extensive engine damage.
Notice: Use the correct fastener in the correct location. Replacement fasteners must be the correct part number for that application. Fasteners requiring replacement or fasteners requiring the use of thread locking compound or sealant are identified in the service procedure. Do not use paints, lubricants, or corrosion inhibitors on fasteners or fastener joint surfaces unless specified. These coatings affect fastener torque and joint clamping force and may damage the fastener. Use the correct tightening sequence and specifications when installing fasteners in order to avoid damage to parts and systems.
Tighten
Tighten the camshaft sprocket bolts to 25 N·m (18 lb ft).
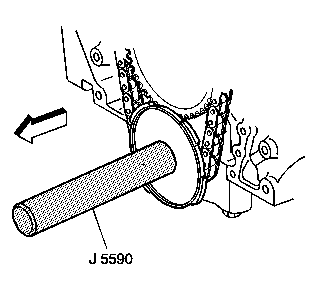
Important: Align the keyway on the crankshaft position sensor reluctor ring with the crankshaft balancer woodruff key in the crankshaft. Install the crankshaft position sensor reluctor ring onto the crankshaft until completely seated against the crankshaft sprocket.
| 8.1. | Align the keyway on the crankshaft position sensor reluctor ring with the crankshaft balancer woodruff key in the crankshaft. |
| 8.2. | Use the J 5590 in order to push the crankshaft position sensor reluctor ring onto the crankshaft until completely seated against the crankshaft sprocket. |
