Tools Required
J 8037 Ring Compressor
The connecting rod bearings are precision insert connecting rod bearings, and do not require shims for adjustment. Do not file the rods or the rod caps. If the engine has excessive clearances, install a new bearing. Service bearings are available in standards size, with yellow color for identification, and 0.026 mm (0.001 in) undersized, with green color for identification.
Selective fitting of the rod and the crankshaft is necessary in order to obtain close tolerances. For example, use one-half of a 0.026 mm (0.0010 in) undersized insert, which will decrease the clearance by 0.013 mm (0.0005 in), rather than using a full standard bearing.
Important:
• When using selective fit rod bearings, always use the standard
bearing in the connecting rod, and use the undersized bearing in the end of
the rod cap. • Note that the color-coding for selective fit rod bearings is different
from the color-coding for the crankshaft bearings. • Connecting rod bearings are available in 0.026 mm (0.0010 in)
undersized for select fitting. • The L65 engines may have both, standard and 0.08 mm (0.0010 in)
oversize connecting rod bearings. The oversize connecting rod cap's lower
end is stamped with OS.
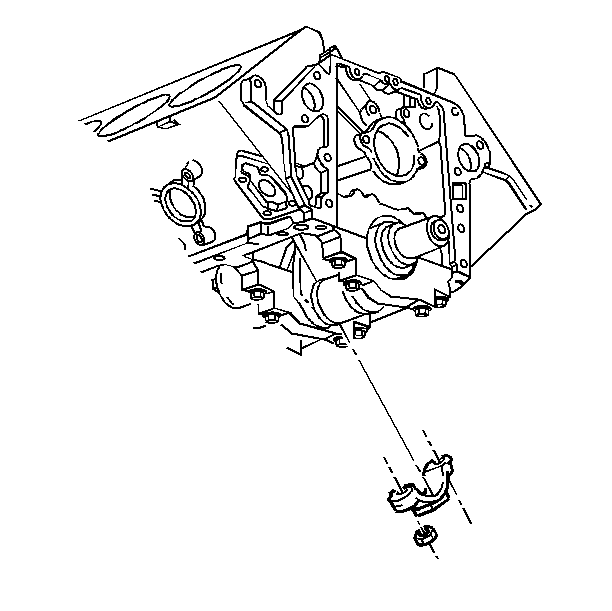
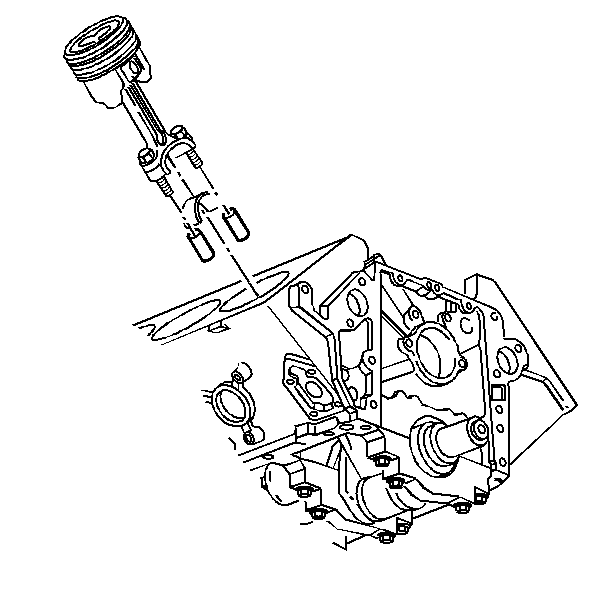
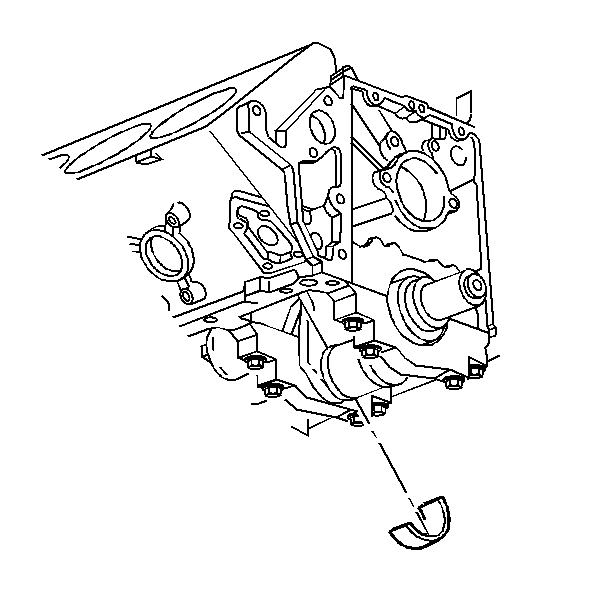
- Remove the connecting rod cap from the piston and connecting rod assembly.
- Install two 10 mm (3/8 in) hose onto the connecting rod studs.
- Locate the piston ring end gaps, with the piston viewed with the swirl indent up, in the following way:
- Without disturbing the ring end gap location, install the J 8037 .
- Install the piston so that the depression in the piston crown is toward the outside of the engine.
- Tap the piston down into the bore using light blows with a hammer handle, while guiding the connecting rod to the journal from beneath the engine.
- Hold the ring compressor against the block until all rings have entered the cylinder bore.
- Remove the hoses from the connecting rod bolts.
- Apply engine oil to the connecting rod bearings.
- Install the connecting rod cap and the nuts, with the bearing.
- Measure the connecting rod side clearance.
Important:
• Make sure that the cylinder walls are clean. • Lightly lubricate the cylinder walls with engine oil. • Make sure that the pistons install in their matching cylinder. - Install used pistons in the cylinders from which they were removed. - Install new pistons in their fitted cylinders.
| 3.1. | The oil ring expander gap at 45 degrees left of the swirl indent |
| 3.2. | The oil control ring gaps at 180 degrees opposite of the oil expander ring |
| 3.3. | The second compression ring gap at the piston top and under the swirl indent |
| 3.4. | The first compression ring 180 degrees opposite of the second ring. Lubricate the piston and rings with engine oil. |
Important: Each connecting rod and bearing cap should be marked, beginning at the front of the engine. Cylinders 1, 3, 5, and 7 are the left bank and 2, 4, 6, and 8 are the right bank. The numbers on the connecting rod and bearing cap must be on the same side when installed in the cylinder bore. If a connecting rod is transposed from one block or cylinder to another, new connecting rod bearings should be fitted and the connecting rod should be numbered to correspond with the new cylinder number.
Notice: Use the correct fastener in the correct location. Replacement fasteners must be the correct part number for that application. Fasteners requiring replacement or fasteners requiring the use of thread locking compound or sealant are identified in the service procedure. Do not use paints, lubricants, or corrosion inhibitors on fasteners or fastener joint surfaces unless specified. These coatings affect fastener torque and joint clamping force and may damage the fastener. Use the correct tightening sequence and specifications when installing fasteners in order to avoid damage to parts and systems.
Tighten
Tighten the connecting rod cap nuts to 65 N·m (48 lb ft).
| • | Use a feeler gauge between the connecting rod and the crankshaft. |
| • | The correct clearance is 0.17-0.63 mm (0.007-0.025 in). |
