Tools Required
J 7872 Magnetic Base
Dial Indicator
Caution: Wear safety glasses to avoid injury when using compressed air
or any cleaning solvent. Bodily injury may occur if fumes are inhaled or if
skin is exposed to chemicals.
- Using a soft cloth and clean solvent, clean the crankshaft. Do not scratch
the crankshaft bearing journals.
- Using compressed air, clean the crankshaft oil passages.
- Using a soft cloth and clean solvent, clean the crankshaft bearing
inserts. Do not scratch the crankshaft bearing inserts.
- Inspect the crankshaft for cracks using the Magnaflux Spot-check
dye method or the equivalent.
- Inspect the crankshaft bearing journals and thrust surfaces for
the following conditions:
| • | Damage caused by lack of lubrication |
- Inspect the crankshaft bearing inserts and thrust surfaces for
the following conditions:
| • | Damage caused by lack of lubrication |
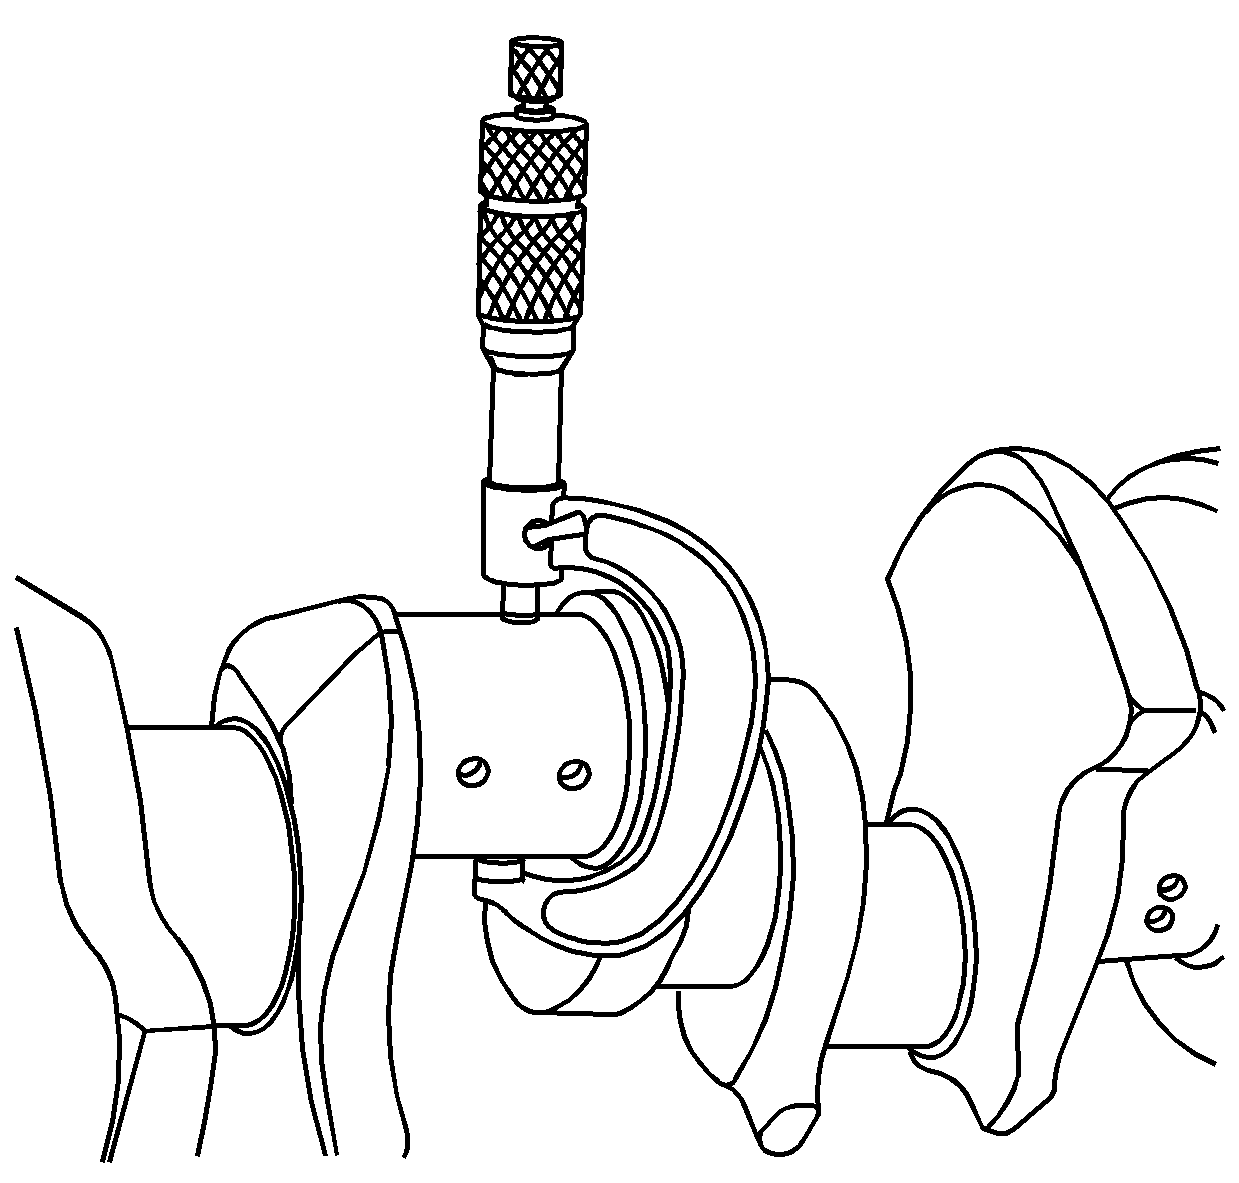
- Using a suitable measuring
device, measure the crankshaft journal diameter and taper in several places,
approximately 90 degrees apart. Refer to Engine Mechanical Specifications.
| • | The connecting rod and the crankshaft journal sizes are color
coded with paint markings. |
| • | Crankshaft journal markings are blue, orange/red, or white. |
| • | Connecting rod journal markings are yellow or green. |
- Record the measurements.
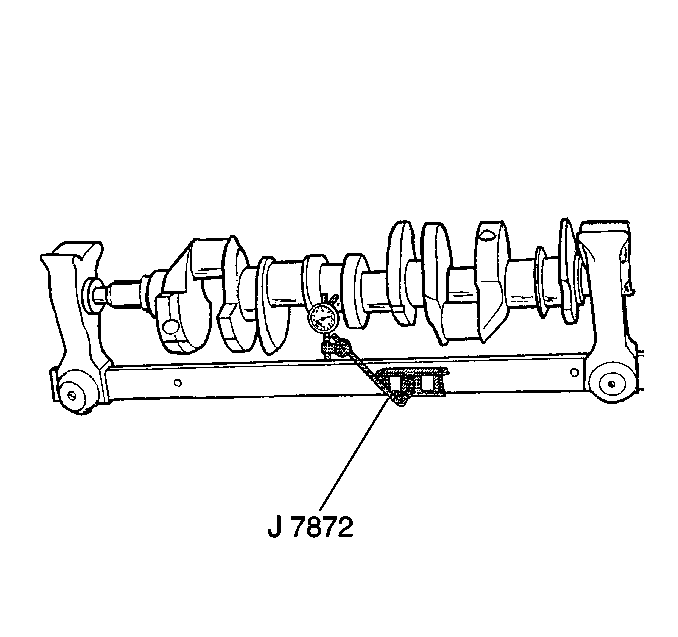
- Mount the crankshaft in
V-blocks at crankshaft journals one and five.
- Using theJ 7872
measure crankshaft journal runout at crankshaft journal three. Refer to Engine
Mechanical Specifications.
- Record the measurements.
Notice: The crankshaft bearing and the connecting rod journals are machined
with deep, rolled fillets for strength. Grinding the crankshaft may disturb
the fillets and weaken the crankshaft. Replace the crankshaft if it is damaged.
Notice: Perform TDC Offset Recovery procedure if the timing chain, timing gears,
engine front cover, crankshaft position sensor, crankshaft or
other components affecting the timing are replaced.
Notice: Do not shim, scrape, or file bearing inserts. Do not touch the bearing
surface of the insert with bare fingers. Skin oil and acids will etch the
bearing surface.
- Measure the crankshaft
bearing clearance.
| 1.1. | Install the crankshaft bearings into the crankshaft caps and engine
block. |
| 1.2. | Install the crankshaft caps and bolts. |
| 1.3. | Tighten crankshaft bolts. Refer to Engine Mechanical Specifications. |
| 1.4. | Using a suitable measuring device, measure the bearing inside
diameter (I.D.), in several places, approximately 90 degrees apart.
Refer to Engine Mechanical Specifications. |
| 1.5. | Record the measurements. |
| 1.6. | Subtract the journal diameter from the bearing inside diameter
in order to obtain the bearing clearance. Refer to Engine Mechanical Specifications. |
- Replace damaged/worn crankshaft bearings as required.
| • | If the bearing clearance is not within specifications, replace
the bearing. Always replace both upper and lower bearing inserts as a set. |
| • | If a bearing is being fitted to an out-of-round journal, be sure
to fit to the maximum diameter of the journal. If the bearing is fitted to
the minimum diameter, interference between the bearing and the journal
will result in rapid bearing failure. |
| • | A standard or undersize bearing combination may result in the
proper clearance. If the proper bearing clearance cannot be achieved using
standard or undersize bearings, replace the crankshaft. |
| • | The connecting rod and the crankshaft journal sizes are color
coded with paint markings. |
| • | Crankshaft journal markings are blue, orange/red, or white. |
| • | Connecting rod journal markings are yellow or green. |
