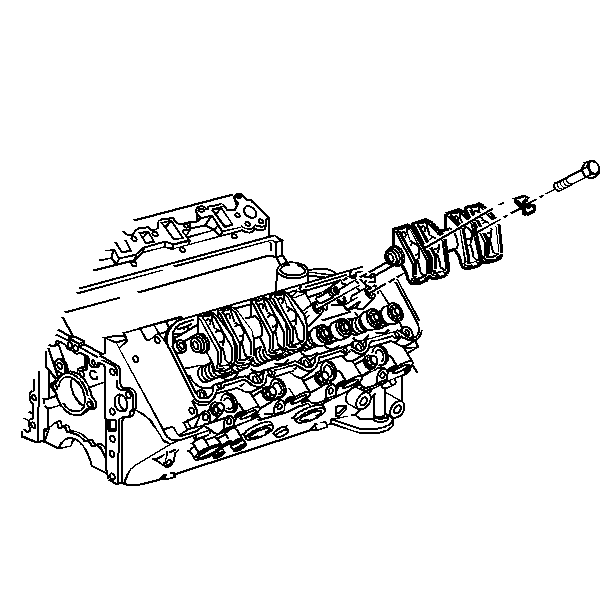
- Install the valve pushrods with the copper-colored, painted or marked end upwards.
- Install the valve rocker arm shaft assembly.
- Install the bolts.
- Rotate the crankshaft in order to make sure that there is free-movement of the valve train.

Notice: Install the valve pushrods with the copper-colored, painted, or marked end up in order to avoid damage or premature wear.
Important: Ensure that the ball ends of the valve pushrods seat in the valve rocker arms.
Notice: Improper installation of the valve rocker arm shaft bolts may cause valve rocker arm shaft breakage and piston to valve contact.
Notice: Use the correct fastener in the correct location. Replacement fasteners must be the correct part number for that application. Fasteners requiring replacement or fasteners requiring the use of thread locking compound or sealant are identified in the service procedure. Do not use paints, lubricants, or corrosion inhibitors on fasteners or fastener joint surfaces unless specified. These coatings affect fastener torque and joint clamping force and may damage the fastener. Use the correct tightening sequence and specifications when installing fasteners in order to avoid damage to parts and systems.
| 3.1. | Rotate the crankshaft, until the mark on the crankshaft balancer is at the 2 o'clock position. |
| 3.2. | Rotate the crankshaft counterclockwise 88 mm (3 1/2 in), aligning the crankshaft balancer mark with the first lower water pump bolt, at approximately the 12:30 position. |
| 3.3. | This procedure will position the engine so that no valves are close to a piston crown. |
| 3.4. | Finger-tighten the bolts. |
Tighten
Alternately tighten the bolts to 55 N·m (40 lb ft).
