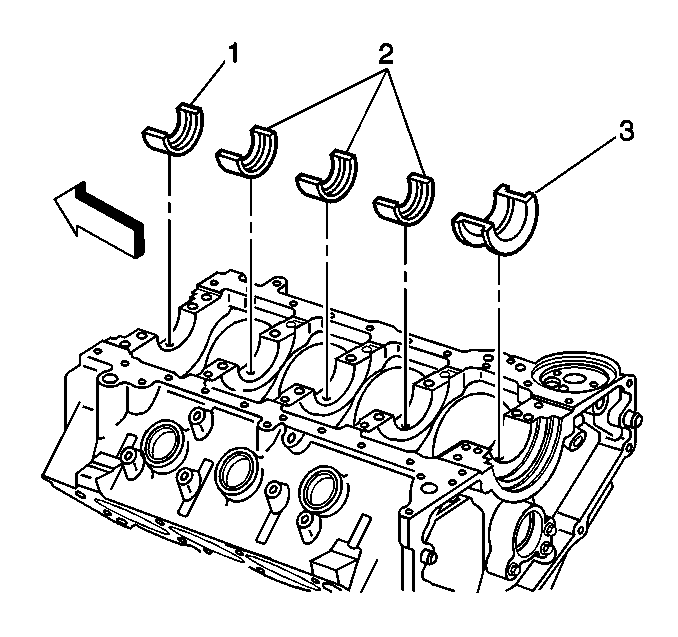
- Install the crankshaft upper bearings (1-3) into the block.
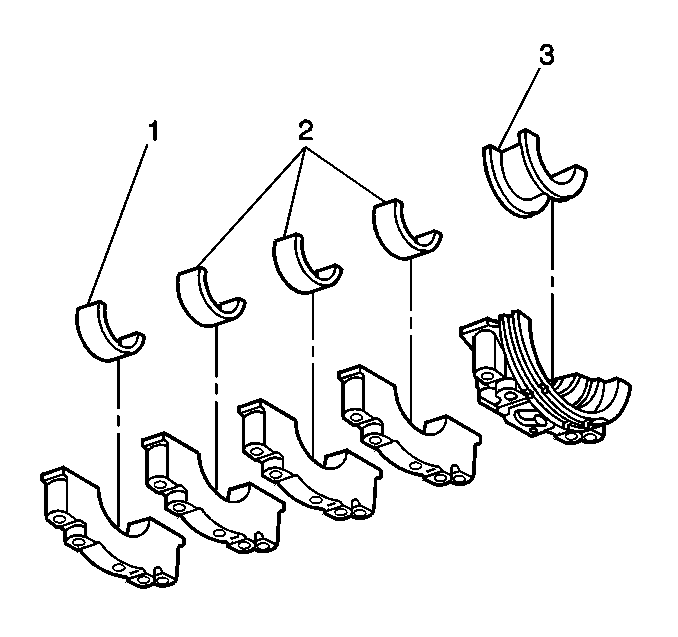
- Install the crankshaft lower bearings (1-3) into the crankshaft bearing caps.
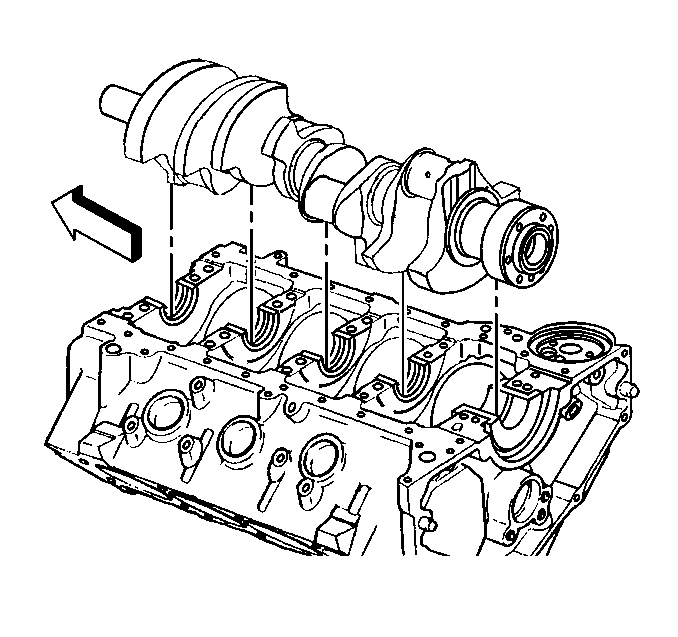
- Install the crankshaft.
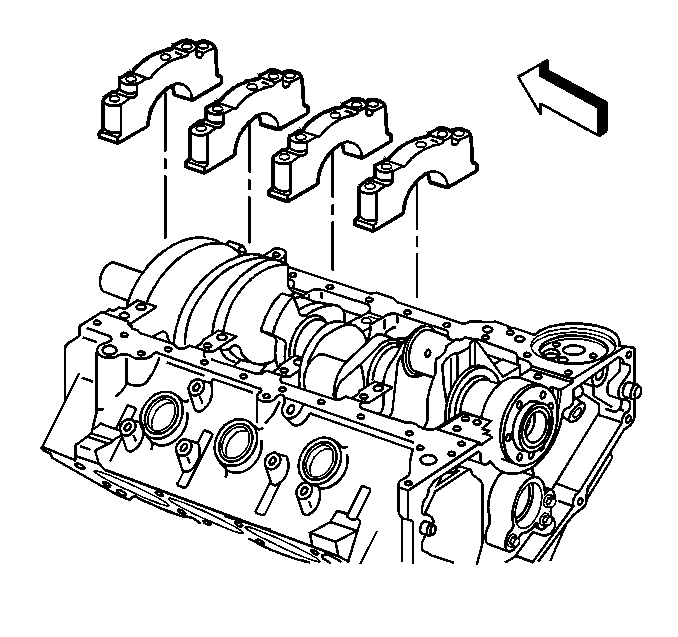
- Install the crankshaft bearing caps.
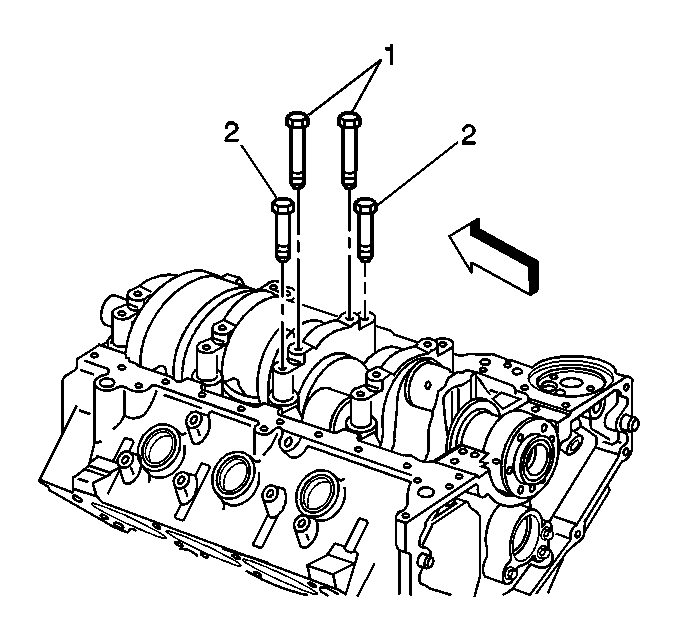
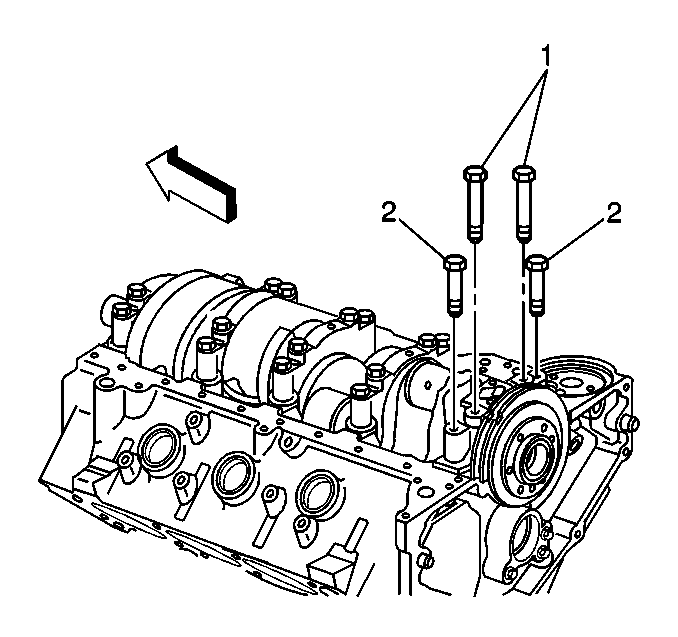
- Install the crankshaft bearing cap bolts (1, 2).
- Tighten the crankshaft bearing cap inner bolts (1) to 138 N·m (102 lb ft).
- Tighten the crankshaft bearing cap outer bolts (2) to 138 N·m (102 lb ft).
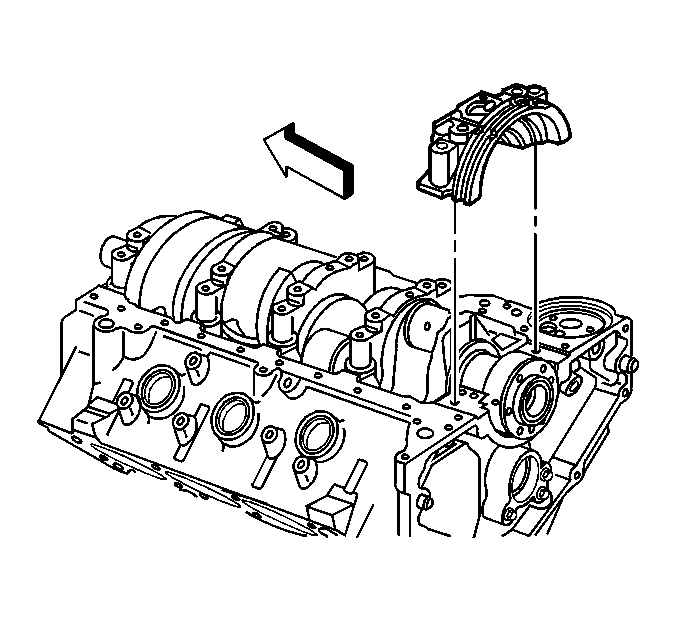
- Install the crankshaft rear bearing cap oil seal.
- Apply a 4 mm (0.158 in) bead of sealant GM P/N 12345739 or equivalent to the rear bearing cap sealing face or to the rear bearing cap channel of the engine block (1).
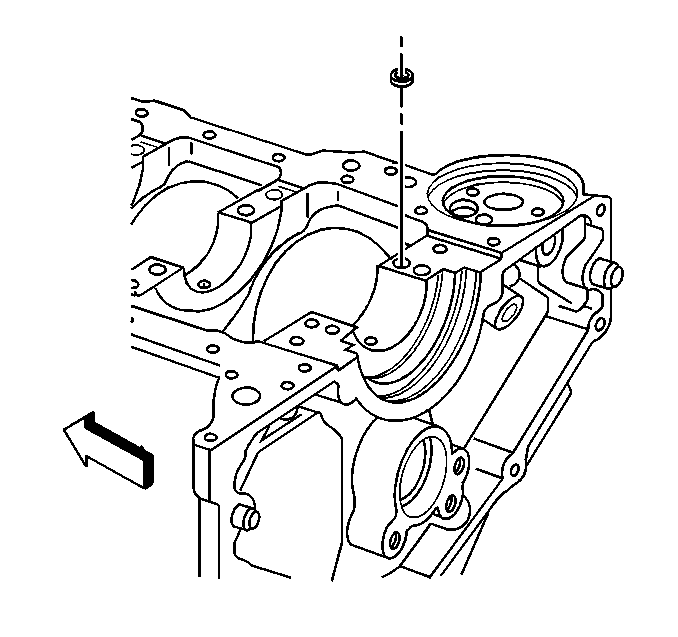
- Install the crankshaft rear bearing cap.
- Install the crankshaft rear bearing cap bolts (1, 2) to the block.
- Measure the crankshaft end play as follows:
- With the crankshaft wedged forward, insert a feeler gauge between the thrust bearing and crankshaft thrust surface.
- Rotate the crankshaft and check for binding.
- A lack of bearing clearance may be caused by the following conditions:
- Tighten the crankshaft rear bearing cap bolts (1, 2).
- Tighten the crankshaft rear bearing cap inner bolts (1) to 138 N·m (102 lb ft).
- Tighten the crankshaft rear bearing cap outer bolts (2) to 138 N·m (102 lb ft).
Notice: Do not shim, scrape, or file bearing inserts. Do not touch the bearing surface of the insert with bare fingers. Skin oil and acids will etch the bearing surface.
Important: If undersized bearings are used, ensure that the bearings are fitted to the proper journals. Lubricate the crankshaft bearings and crankshaft with clean engine oil.
Notice: In order to prevent the possibility of cylinder block or crankshaft bearing cap damage, the crankshaft bearing caps are tapped into the cylinder block cavity using a brass, lead, or a leather mallet before the attaching bolts are installed. Do not use attaching bolts to pull the crankshaft bearing caps into the seats. Failure to use this process may damage a cylinder block or a bearing cap.
Important: Ensure that the triangle symbol on the crankshaft bearings caps are facing the front of the engine. DO NOT install the crankshaft rear bearing cap at this time.
Notice: Use the correct fastener in the correct location. Replacement fasteners must be the correct part number for that application. Fasteners requiring replacement or fasteners requiring the use of thread locking compound or sealant are identified in the service procedure. Do not use paints, lubricants, or corrosion inhibitors on fasteners or fastener joint surfaces unless specified. These coatings affect fastener torque and joint clamping force and may damage the fastener. Use the correct tightening sequence and specifications when installing fasteners in order to avoid damage to parts and systems.
Important: Tighten the crankshaft bearing cap inner bolts (1) before tightening the crankshaft bearing cap outer bolts (2).
Tighten
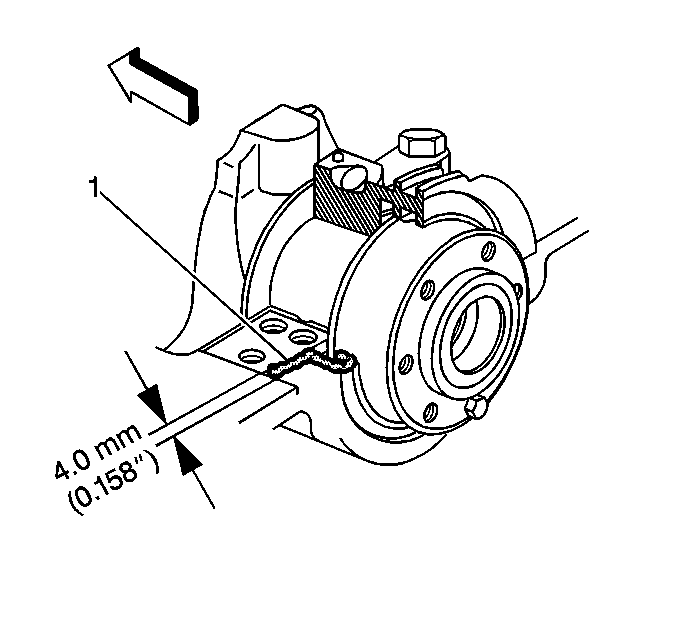
Apply the sealant from the corner of the rear thrust bearing pocket to the edge of the channel.
Important: Tighten the crankshaft bearing cap inner bolts (1) before tightening the crankshaft bearing cap outer bolts (2).
Tighten
Tighten the crankshaft rear bearing cap bolts (1, 2) to 4 N·m
(35 lb in).
Firmly thrust the crankshaft first rearward then forward. This will line up the rear crankshaft bearing and the crankshaft thrust surfaces.

The proper clearance is 0.127-0.279 mm (0.005-0.011 in)
If the crankshaft does not turn freely, loosen the crankshaft bearing cap bolts on one cap at a time until the tight bearing is located.
A bent crankshaft or lack of bearing clearance may cause binding.
| • | Burrs on the bearing cap |
| • | Foreign material between the bearing and the block |
| • | Foreign material between the bearing and the bearing cap |
| • | Damaged bearing |
| • | Improper size bearing |
Important: Tighten the crankshaft bearing cap inner bolts (1) before tightening the crankshaft bearing cap outer bolts (2).
Tighten
