Headlining Trim Panel Replacement Pickup
Removal Procedure
- Remove the sunshades. Refer to
Sunshade Replacement
.
- Remove the assist handles, if equipped. Refer to
Assist Handle Replacement
.
- Remove the rear window lower molding. Refer to
Rear Window Lower Garnish Molding Replacement
.
- Remove the upper windshield garnish molding. Refer to
Garnish Molding Replacement - Upper
.
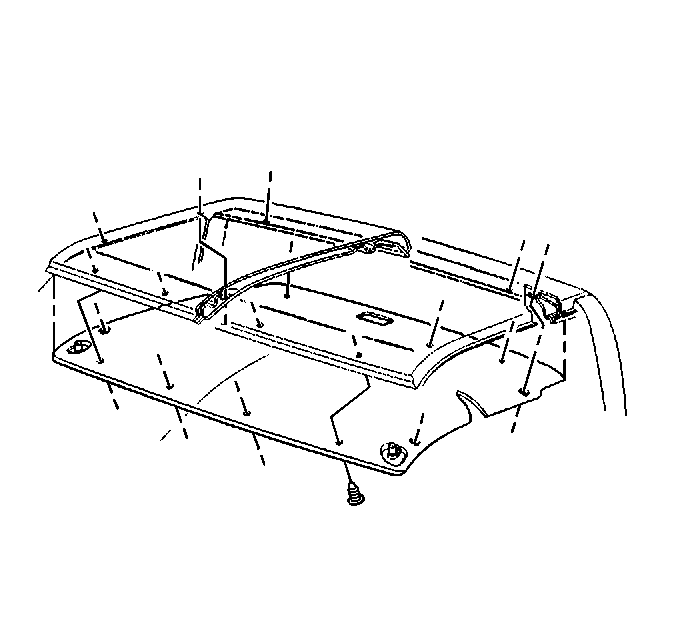
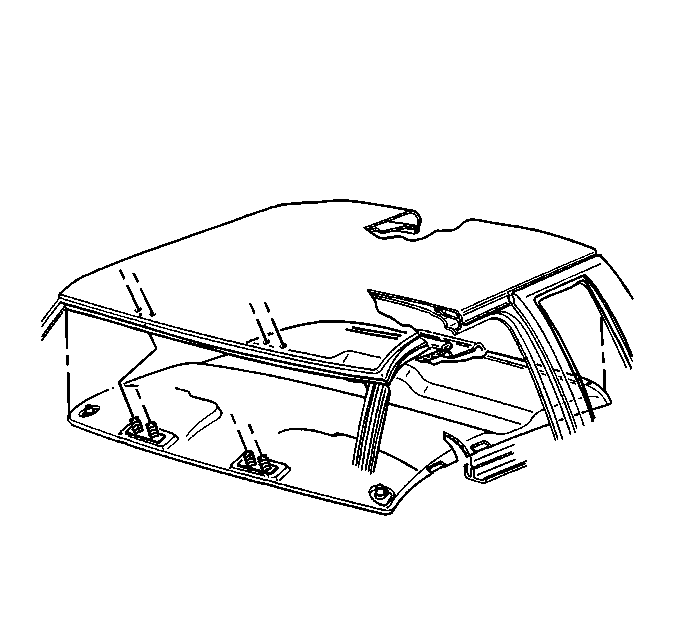
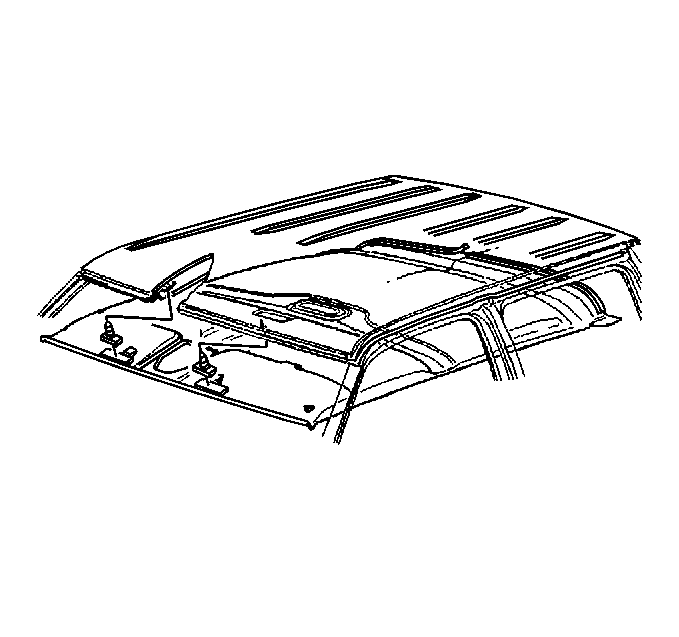
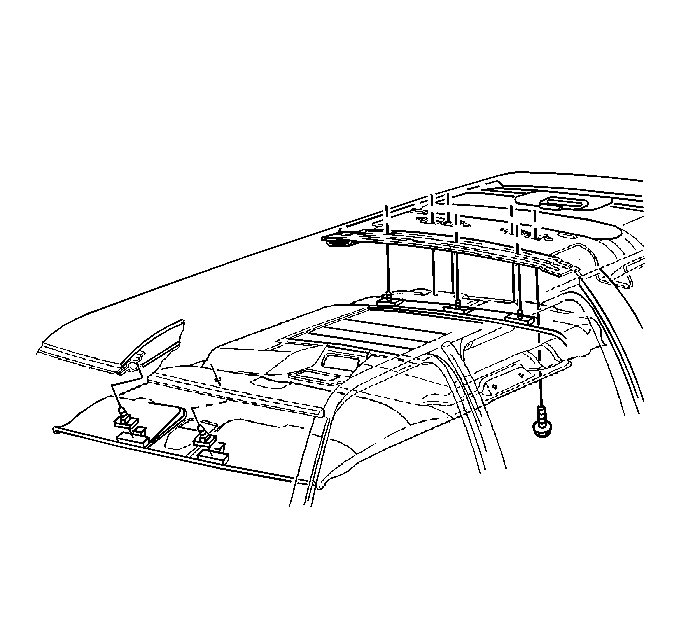
- Remove the headliner.
| 5.1. | Grasp the panel on the left side and the right side near the front
of the cab. |
| 5.2. | Disengage the front of the panel from the roof. |
- Remove the retainers from the trim panel.
Installation Procedure
- Install the retainers
to the trim panel.
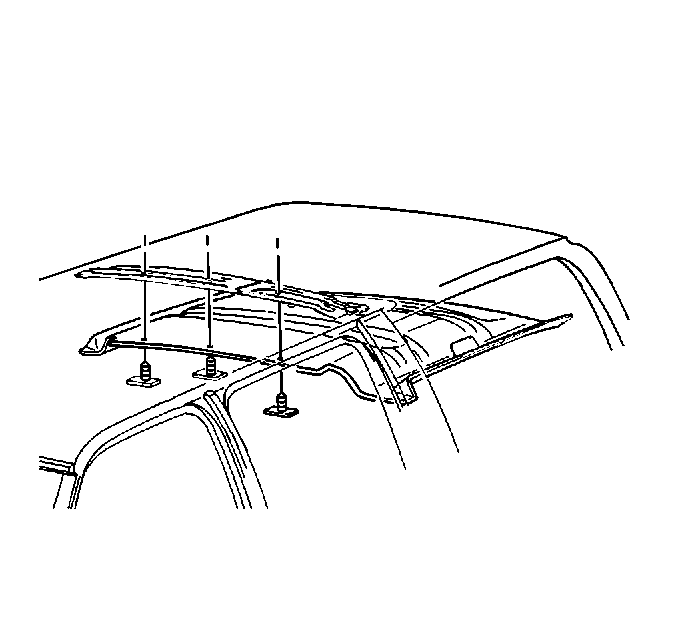
- Install the headliner to the vehicle.
- Insert the retainers into the windshield frame.
- Install the upper windshield garnish molding. Refer to
Garnish Molding Replacement - Upper
.
- Install the rear window upper molding. Refer to
Rear Window Upper Molding Replacement
.
- Install the quarter panel trim. Refer to
Rear Quarter Trim Panel Replacement
.
- Install the rear window lower molding. Refer to
Rear Window Lower Garnish Molding Replacement
.
- Install the assist handle, if equipped. Refer to
Assist Handle Replacement
.
- Install the sunshades. Refer to
Sunshade Replacement
.
Headlining Trim Panel Replacement Extended Cab
Removal Procedure
- Remove the sunshades. Refer to
Sunshade Replacement
.
- Remove the assist handles, if equipped. Refer to
Assist Handle Replacement
.
- Remove the rear window lower molding. Refer to
Rear Window Lower Garnish Molding Replacement
.
- Remove the upper windshield garnish molding. Refer to
Garnish Molding Replacement - Upper
.
- Remove the headliner.
| 5.1. | Grasp the panel on the left side and the right side near the front
of the cab. |
| 5.2. | Disengage the front of the panel from the roof. |
- Remove the retainers from the trim panel.
Installation Procedure
- Install the retainers
to the trim panel.
- Install the headliner to the vehicle.
- Insert the retainers into the windshield frame.
- Install the upper windshield garnish molding. Refer to
Garnish Molding Replacement - Upper
.
- Install the rear window upper molding. Refer to
Rear Window Upper Molding Replacement
.
- Install the quarter panel trim. Refer to
Rear Quarter Trim Panel Replacement
.
- Install the rear window lower molding. Refer to
Rear Window Lower Garnish Molding Replacement
.
- Install the assist handle, if equipped. Refer to
Assist Handle Replacement
.
- Install the sunshades. Refer to
Sunshade Replacement
.
Headlining Trim Panel Replacement Crew Cab
Removal Procedure
- Remove the sunshades. Refer to
Sunshade Replacement
.
- Remove the assist handles, if equipped. Refer to
Assist Handle Replacement
.
- Remove the rear window lower molding. Refer to
Rear Window Lower Garnish Molding Replacement
.
- Remove the upper windshield garnish molding. Refer to
Garnish Molding Replacement - Upper
.
- Remove the headliner.
| 5.1. | Grasp the panel on the left side and the right side near the front
of the cab. |
| 5.2. | Disengage the front of the panel from the roof. |
- Remove the retainers from the trim panel.
Installation Procedure
- Install the retainers
to the trim panel.
- Install the headliner to the vehicle.
- Insert the retainers into the windshield frame.
- Install the upper windshield garnish molding. Refer to
Garnish Molding Replacement - Upper
.
- Install the rear window upper molding. Refer to
Rear Window Upper Molding Replacement
.
- Install the quarter panel trim. Refer to
Rear Quarter Trim Panel Replacement
.
- Install the rear window lower molding. Refer to
Rear Window Lower Garnish Molding Replacement
.
- Install the assist handle, if equipped. Refer to
Assist Handle Replacement
.
- Install the sunshades. Refer to
Sunshade Replacement
.
Headlining Trim Panel Replacement Suburban
Removal Procedure
- Remove the assist handles, if equipped. Refer to
Assist Handle Replacement
.
- Remove the sunshades. Refer to
Sunshade Replacement
.
- Remove the windshield garnish moldings. Refer to
Windshield Pillar Garnish Molding Replacement
.
- Remove the coat hooks. Refer to
Coat Hook Replacement
.
- Remove the dome lamps.
- Remove the HVAC control assembly, if equipped. Refer to
Control Assembly Replacement - Auxiliary
in Heater,
Ventilation, and Air Conditioning.
- Remove the upper windshield garnish moldings. Refer to
Garnish Molding Replacement - Upper
.
- Remove the rear seat belt upper trim covers.
- Remove the side door lock pillar molding.
- Remove the upper center trim panel.
- Remove the cargo door lock pillar molding panel.
- Remove the overhead console. Refer to
Roof Console Replacement
.
Installation Procedure
- Install the overhead console.
- Install the cargo door lock pillar molding panel.
- Install the upper center trim panel.
- Install the side door lock pillar molding.
- Install the rear seat belt upper trim covers.
- Install the upper windshield garnish moldings.
- Install
the HVAC control assembly, if equipped.
- Install the dome lamps.
- Install the coat hooks.
- Install the windshield garnish moldings.
- Install the sunshades.
- Install the assist handles, if equipped.
Headlining Trim Panel Replacement Utility
Removal Procedure

- Remove the assist handles,
if equipped. Refer to
Assist Handle Replacement
.
- Remove the sunshades. Refer to
Sunshade Replacement
.
- Remove the windshield garnish moldings. Refer to
Windshield Pillar Garnish Molding Replacement
.
- Remove the coat hooks. Refer to
Coat Hook Replacement
.
- Remove the dome lamps.
- Remove the HVAC control assembly, if equipped. Refer to
Control Assembly Replacement - Auxiliary
in Heater, Ventilation, and Air Conditioning.
- Remove the upper windshield garnish moldings. Refer to
Garnish Molding Replacement - Upper
.
- Remove the rear seat belt upper trim covers.
- Remove the side door lock pillar molding.
- Remove the upper center trim panel.
- Remove the cargo door lock pillar molding panel.
- Remove the overhead console. Refer to
Roof Console Replacement
Installation Procedure
- Install the overhead console.
- Install the cargo door lock pillar molding panel.
- Install the upper center trim panel.
- Install the side door lock pillar molding.
- Install the rear seat belt upper trim covers.
- Install the upper windshield garnish moldings.
- Install the HVAC control assembly, if equipped.
- Install the dome lamps.
- Install the coat hooks.
- Install the windshield garnish moldings.
- Install the sunshades.
- Install the assist handles, if equipped.
