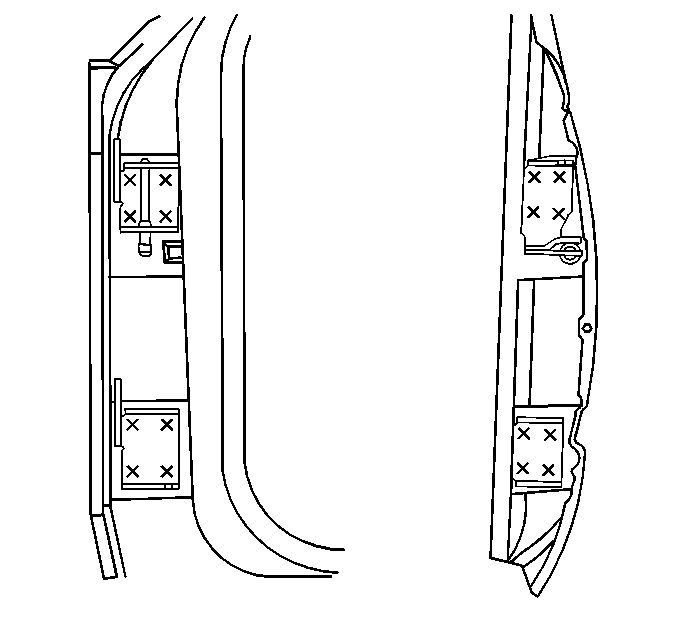
Removal Procedure
- Remove the door from the body. Refer to
Rear Door Replacement
.
- Remove the excess sealer surrounding the hinge.

- Scribe the location of
the existing hinges on the body pillar and the door.
- Center punch each of the weld marks on the original hinge, so
that all of the weld is removed during the drilling.
- Drill a 3.0 mm (0.12 in) pilot hole through the
welds to a depth that penetrates only the hinge base.
- Using the smaller hole as a pilot, drill a 13.0 mm (0.51 in)
hole only through the hinge base.
- Drive a chisel between the hinge and the door pillar.
Installation Procedure

- Install the bolt-on hinges
to the pillar and the door by completing the following steps:
| 1.1. | Position the bolt-on service replacement hinges within the scribe
marks made on the body hinge pillar at the time of the removal. |
| 1.2. | Center punch each bolt hole location on the body hinge pillar
and/or on the door. |
| 1.3. | Drill a 13.0 mm (0.51 in) hinge attaching hole in
3 steps in order to assure the proper placement of the hinge. |
- Prepare the surface for the replacement hinges using a file or
a similar tool.
- Coat the mating surfaces of the hinges with a medium-bodied sealer.
Notice: Use the correct fastener in the correct location. Replacement fasteners
must be the correct part number for that application. Fasteners requiring
replacement or fasteners requiring the use of thread locking compound or sealant
are identified in the service procedure. Do not use paints, lubricants, or
corrosion inhibitors on fasteners or fastener joint surfaces unless specified.
These coatings affect fastener torque and joint clamping force and may damage
the fastener. Use the correct tightening sequence and specifications when
installing fasteners in order to avoid damage to parts and systems.
- Install the hinges,
the backing plate, the bolts, and the nuts by completing the following steps:
| 4.1. | Align the hinge, the pillar, and/or the door with the holes in
the hinge pillar and the door. |
| 4.2. | Place the bolts through the hinge, the pillar and/or the door,
and the backing plate. |
Tighten
Tighten the nuts to 35 N·m (26 lb ft).
- Install the door to the body. Refer to
Rear Door Replacement
.
- Apply sealer around the hinges.


