For 1990-2009 cars only
Ignition Coil Not Operating Properly 4.3L Only
Tools Required
J 39200 Digital Multimeter
- Remove the ignition Coil. Refer to Ignition Coil and Ignition Coil Module Replacement .
- Connect an ohmmeter.
- Connect an ohmmeter.
- Connect an ohmmeter as shown.
Notice: Do not insert the J 39200 digital multimeter probe into the ignition coil connectors. The female terminals could be deformed, resulting in intermittent operation. Only make contact with the front edge of the terminals.
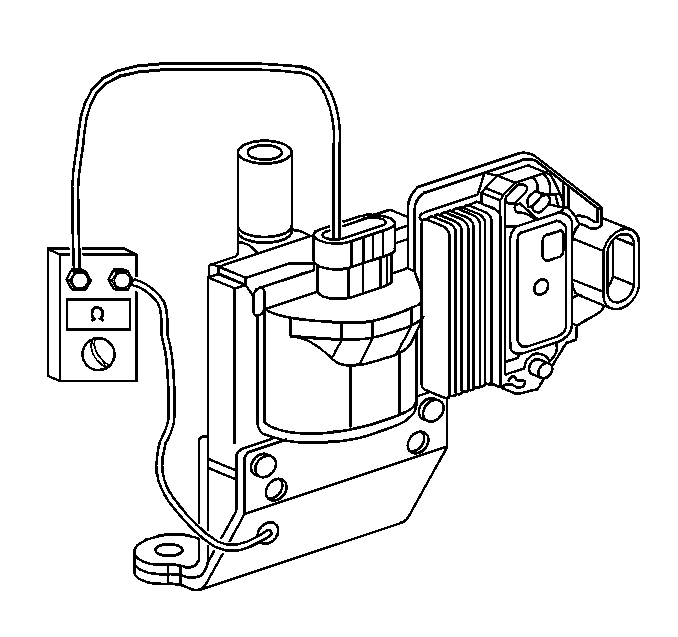
| • | Use the high scale. |
| • | If the reading is not infinite, replace the coil. Refer to Ignition Coil and Ignition Coil Module Replacement . |
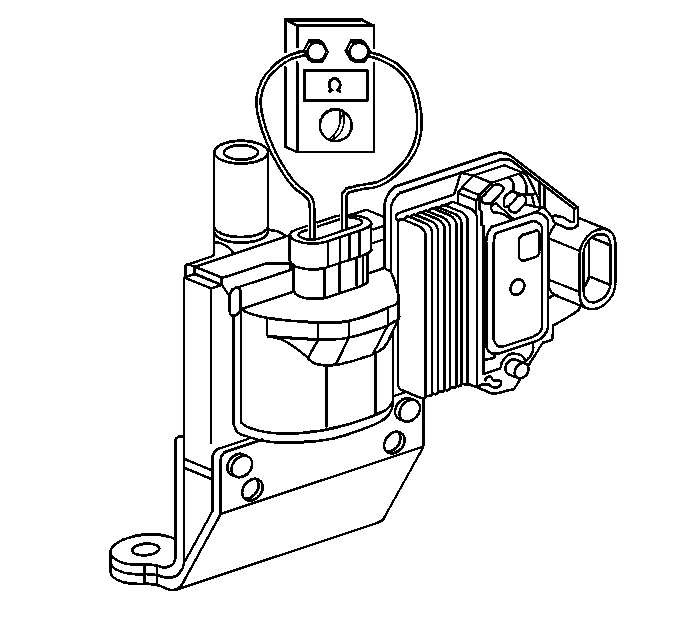
| • | Use the low scale. |
| • | The reading should be 0.1 ohms. If not, replace the coil. Refer to Ignition Coil and Ignition Coil Module Replacement . |
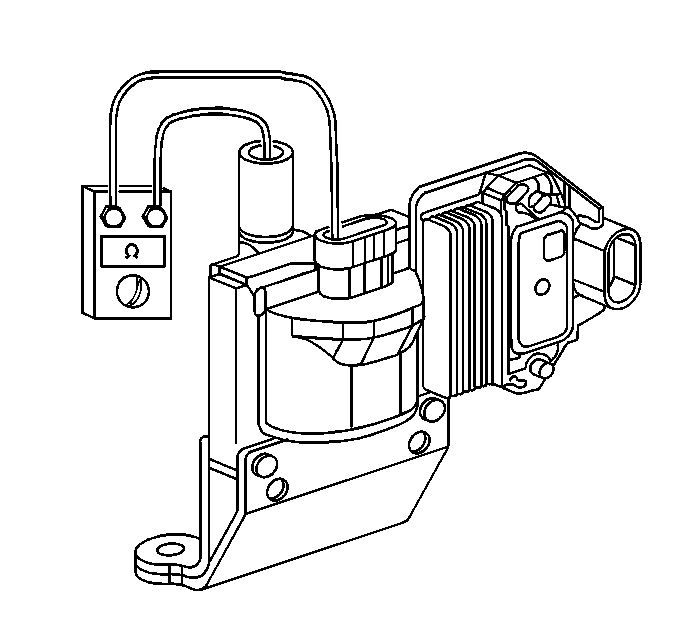
| • | Use the high scale. |
| • | If the reading is not 5-25k ohms, replace the coil. Refer to Ignition Coil and Ignition Coil Module Replacement . |
Ignition Coil Not Operating Properly 4.8L, 5.3L, 6.0L
Refer to Electronic Ignition (EI) System Diagnosis in Engine Controls.
Ignition Coil Not Operating Properly Delphi Coils
Tools Required
J 39200 Digital Multimeter
- Turn off the ignition switch.
- Disconnect the spark plug wire from the ignition coil.
- Disconnect the 4-pin ignition coil connector from the coil.
- Use a J 39200 Digital Multimeter to measure the resistance of the secondary winding in the ignition coil (1).
- Set the J 39200 Digital Multimeter on the high scale.
- Connect the J 39200 Digital Multimeter between pin A(2) in the 4-pin connector and the metal tower contact in the coil (3).
- Use a J 39200 Digital Multimeter to check continuity between the shield and the electrical connector ground pin (4).
- Set the J 39200 Digital Multimeter on the high scale.
- Connect the J 39200 Digital Multimeter between pin A (2) in the 4-pin connector and the shield mounting flange (5). Make sure the paint is removed from the mounting flange contact point to provide a good electrical connection.
- If the reading is not 0 ohms - 10K ohms at room temperature, replace the coil. Refer to Ignition Coil Replacement
- Connect the 4-pin ignition coil connector from the coil.
- Connect the spark plug wire from the ignition coil.
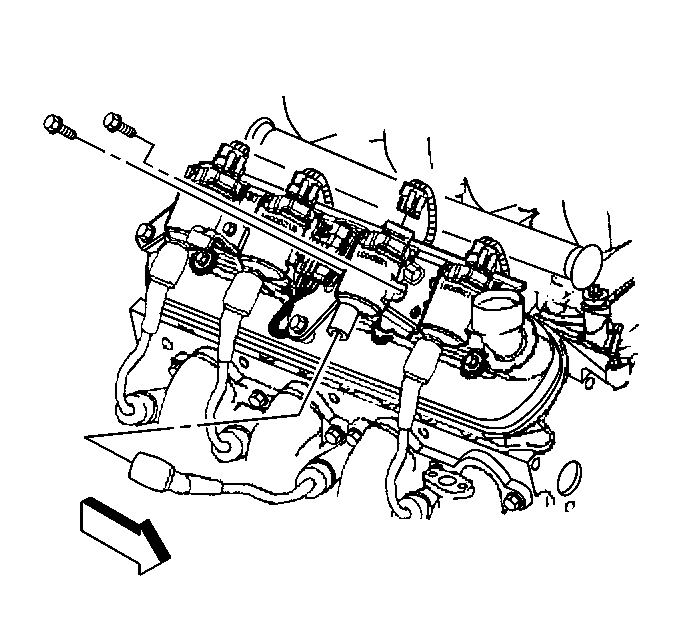
Important: Do not insert the J-39200 probe into the ignition coil connector. The terminals could be damaged, resulting in intermittent operation. Only make contact with the front edge of the terminals.
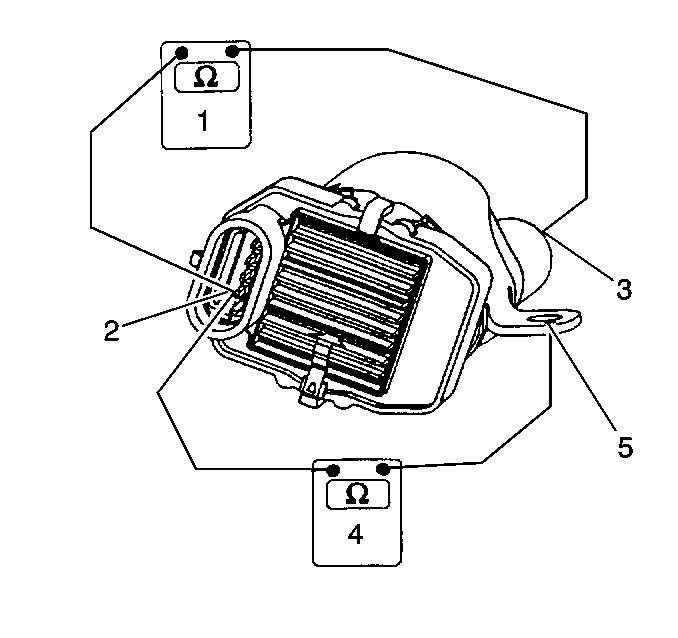
If the reading is not 3K-7Kohms at room temperature, replace the coil. Refer to Ignition Coil Replacement


