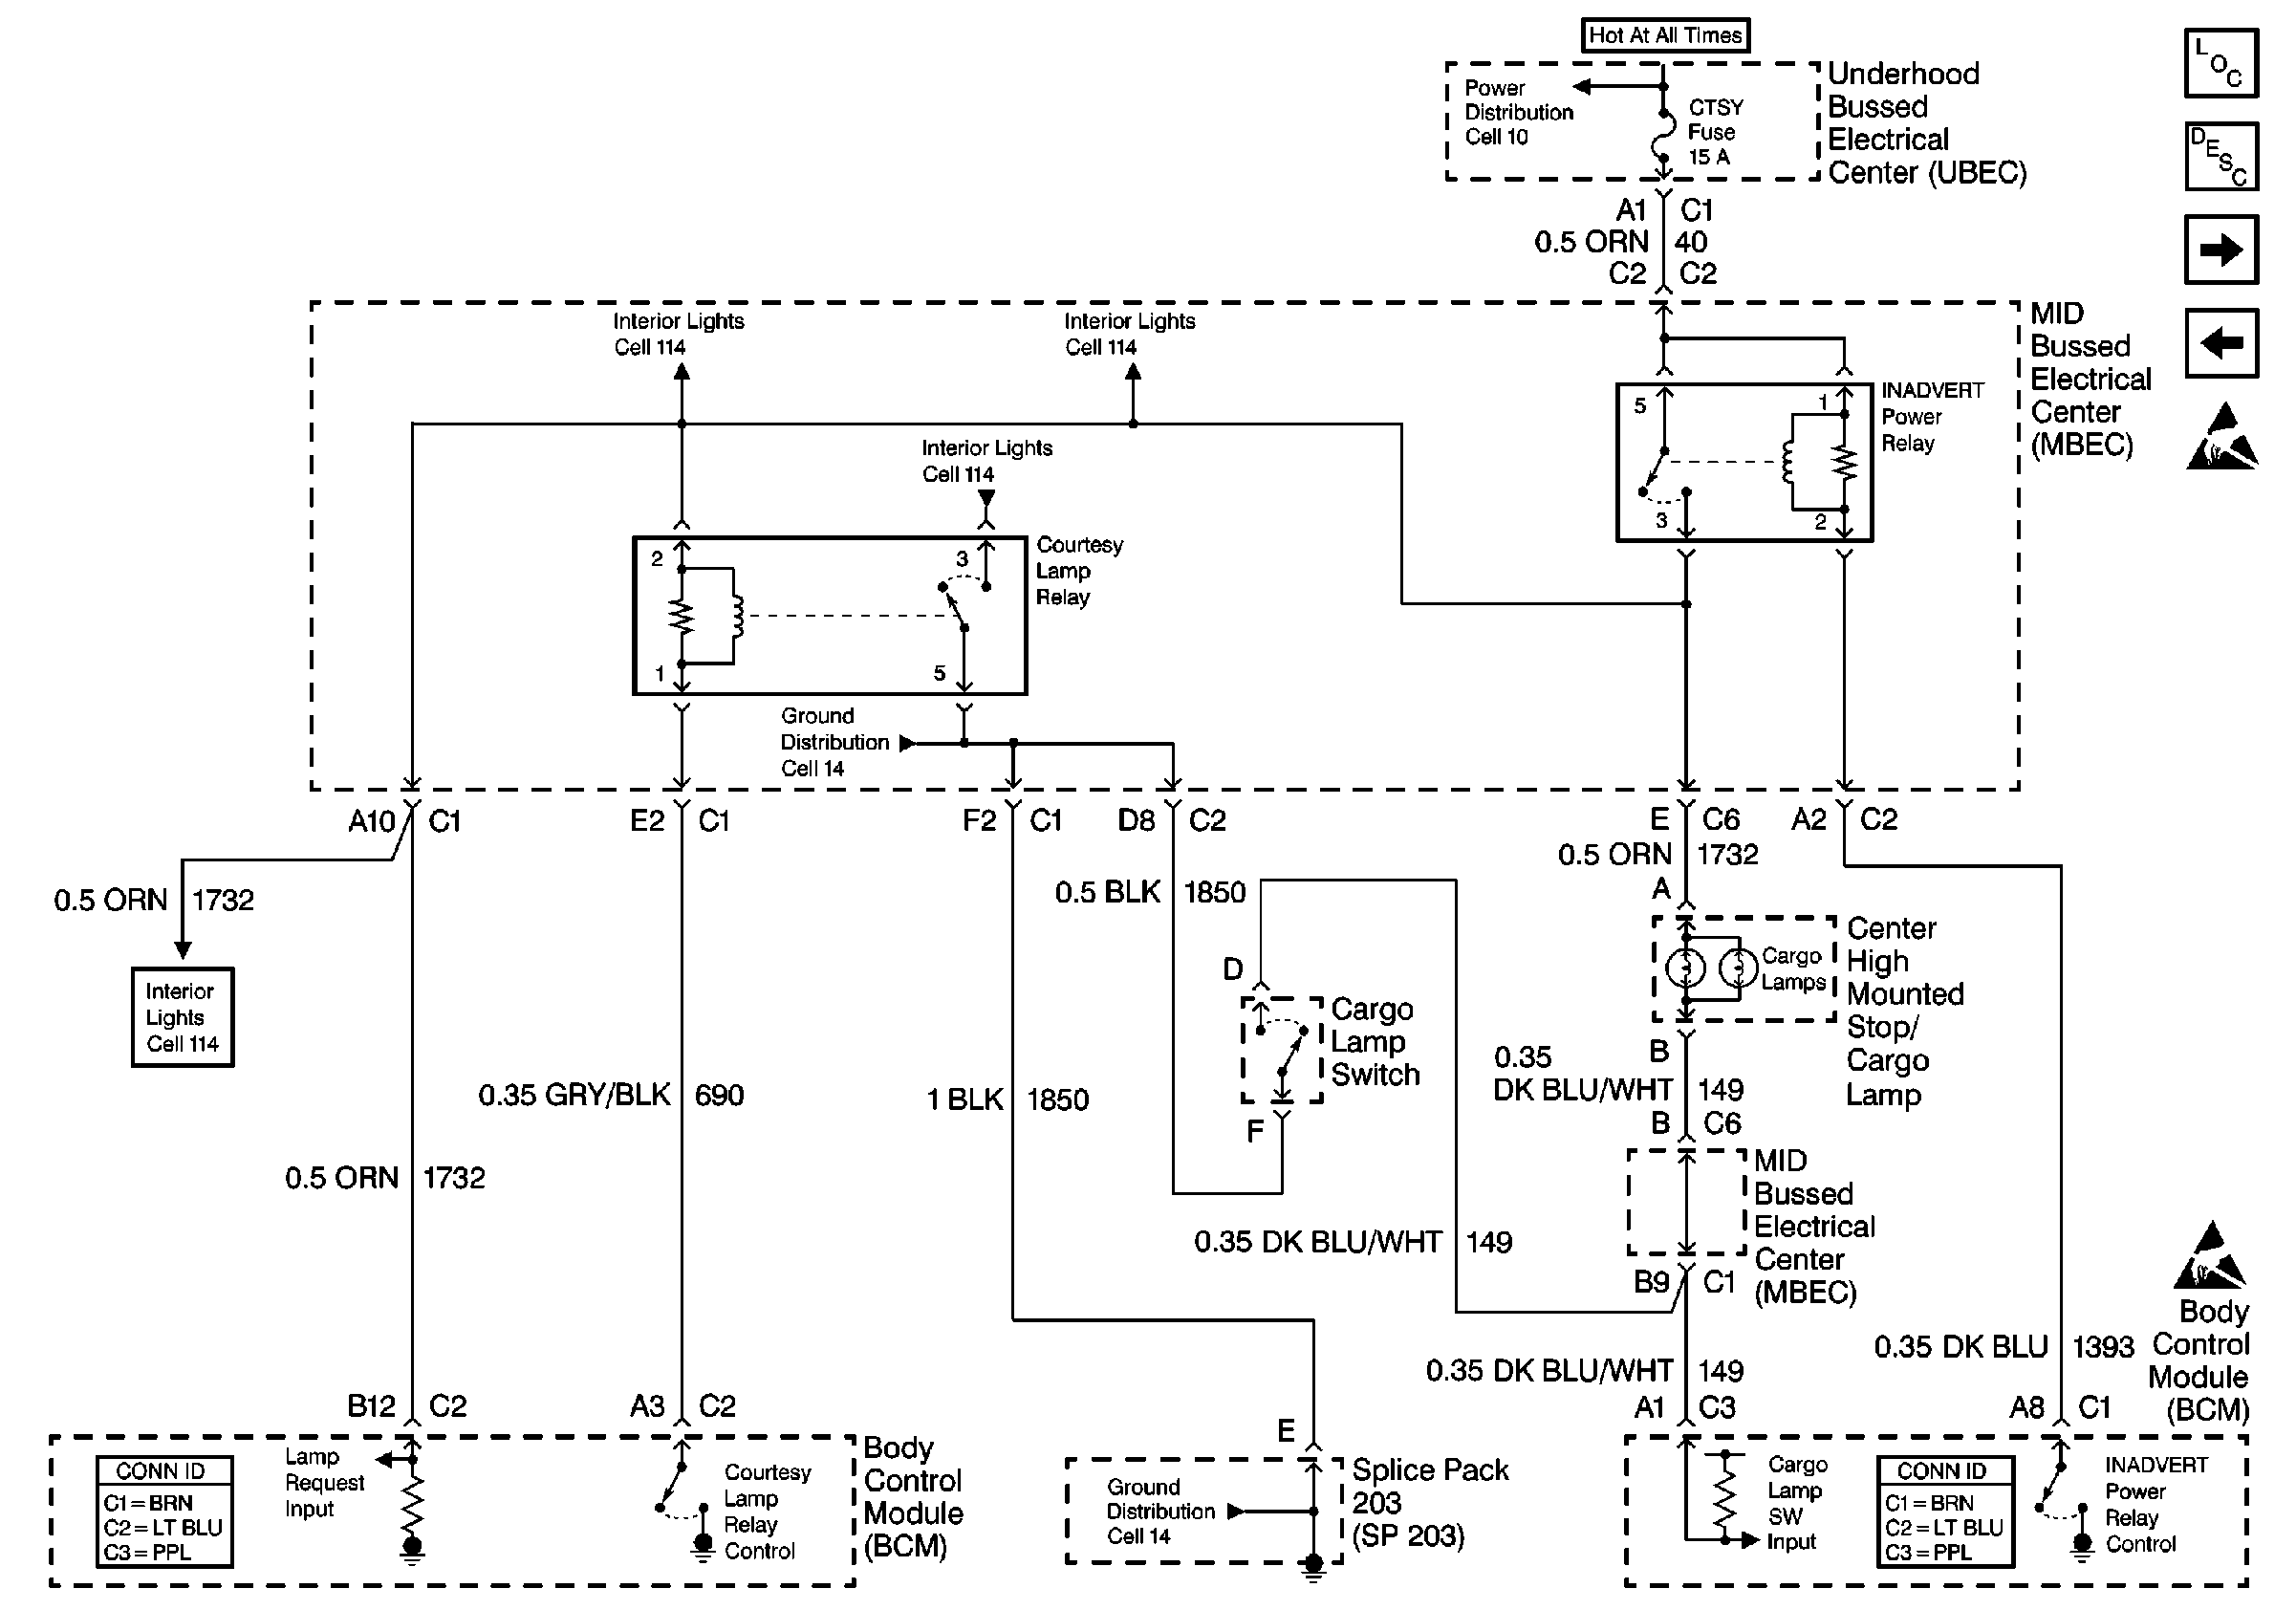
For a full page schematic, refer to
Cell 51: Inadvertent Power Relay, Courtesy Lamp Relay

in Body Control
Module Schematics.
Circuit Description
The body control module (BCM) monitors the voltage and controls the ground of the courtesy lamp relay on CKT 690. When the BCM receives a signal from a mini-wedge (door jamb) switch, an Remote Function Actuation (RFA) signal to unlock the doors from the remote control door lock receiver module or the dome lamp switch is turned ON, the BCM will ground the relay and turn ON the courtesy lamps.
Conditions for Setting the DTC
To set B2617, the following conditions must be present:
| • | All courtesy lamps OFF. |
| • | CKT 690 is open or shorted to ground. |
| • | The system voltage must be between 9.0-16.0 volts. |
| • | All the above conditions must be met for 0.5 seconds. |
Action Taken When the DTC Sets
| • | The courtesy lights will not function if the circuit is open. |
| • | The courtesy lights will be ON at all times if circuit is shorted to ground. |
Conditions for Clearing the MIL/DTC
| • | This DTC will clear immediately after the condition for setting the fault is corrected. |
| • | A history DTC will clear after 100 consecutive ignition cycles without a fault present. |
| • | Use a scan tool in order to clear history and current DTCs. |
Diagnostic Aids
| Important: Use the appropriate probe from the J 35616 connector test adapter kit for any probing of the bussed electrical centers (BECs) in this table to avoid damage to the BECs. |
| • | Always perform the first DTC listed on the scan tool if more than one is displayed. |
| • | Always diagnose the first DTC listed on the scan tool. |
| • | The scan tool must display DTC B1480 as a current code before performing diagnostics. |
| • | B2617 must be set as a current DTC before diagnostics can be performed. |
| • | Perform a visual inspection for loose or poor connections at all related components |
| • | Refer to Intermittents and Poor Connections Diagnosis Wiring Systems for intermittent and poor connections. |
Test Description
Step number(s) below refer to the same step number(s) in the Diagnostic Table
-
This step determines if CKT 690 is shorted or open between the courtesy lamp relay and the BCM.
-
This step determines if the BCM is defective or CKT 690 is shorted to ground.
-
This step determines if the MBEC is providing power from the courtesy lamp relay.
-
This step determines if the courtesy lamp relay coil is not OPEN.
-
This step determines if CKT 690 is open between the BCM and the courtesy lamp relay or the BCM is defective.
Step | Action | Value(s) | Yes | No |
|---|---|---|---|---|
1 | Was the BCM Diagnostic System Check performed? | -- | ||
2 |
Are the courtesy lights ON at all times? | -- | ||
3 |
Does the J 39200 DMM display battery voltage? | -- | ||
4 | Locate and repair the short to ground CKT 690 (GRY/BLK) between the BCM and the courtesy lamp relay. Is the repair complete? | -- | -- | |
5 | Using a fused jumper, backprobe the blue BCM (C2) connector CKT 690 (GRY/BLK) cavity A3 to ground. Do the courtesy lamps come ON? | -- | ||
6 |
Does the J 39200 DMM display resistance between the specified range? | 0-5ohms | ||
7 |
Does the J 39200 DMM display battery voltage? | -- | ||
8 | Replace the courtesy lamp relay in the mid bussed electrical center (MBEC). Is the repair complete? | -- | -- | |
9 | Replace the mid bussed electrical center (MBEC). Is the repair complete? | -- | -- | |
10 | Locate and repair the open in CKT 690 (GRY/BLK) between the BCM and the courtesy lamp relay. Is the repair complete? | -- | -- | |
11 |
Is the repair complete? | -- | System OK | -- |
12 | Clear the DTCs. Refer to Clearing DTCs . Is the action complete? | -- | System OK | -- |
