For 1990-2009 cars only
Removal Procedure
- Set the air flow control to the instrument panel (IP) vent position if equipped with air conditioning (A/C).
- Disconnect the negative battery cable(s).
- Disable the SIR system. Refer to Disabling the SIR System in SIR.
- Apply the parking brake to prevent the vehicle from moving.
- Move the shift lever all the way down (if the transmission is automatic).
- Tilt the steering wheel to the full down position.
- Remove the IP cluster trim plate bezel. Refer to Instrument Panel Cluster Trim Plate Bezel Replacement .
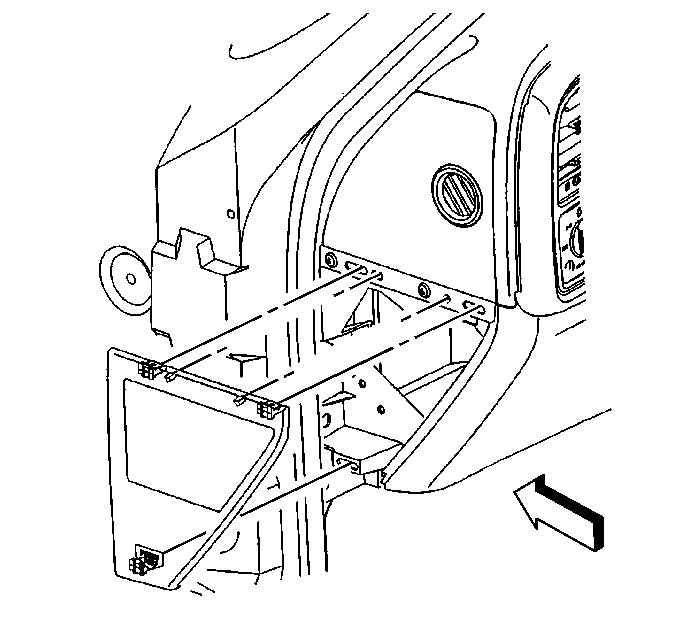
- Remove the end panels. Left is shown, right is similar.
- Remove the right side air outlets. Refer to Instrument Panel Air Outlet Replacement in Heating and Ventilation (Non-A/C) or Instrument Panel Air Outlet Replacement in HVAC Systems with A/C-Manual.
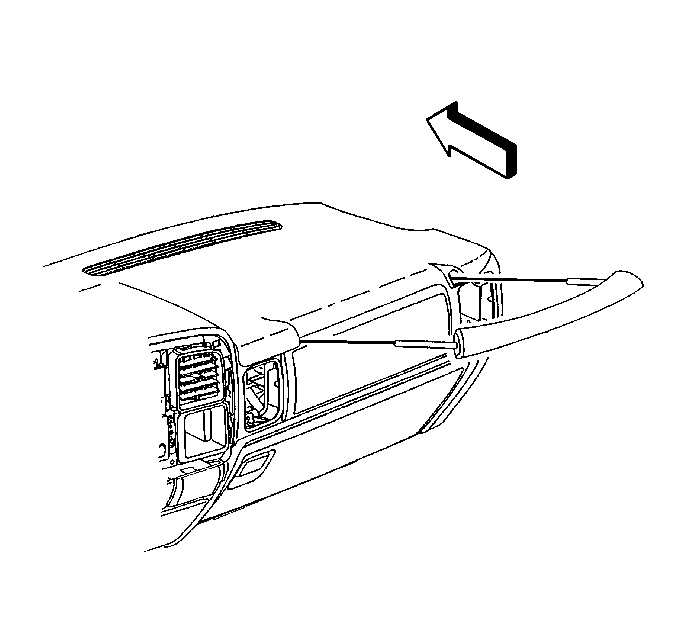
- Remove the assist handle. Depress the release tabs accessed through the air outlet duct holes.
- Remove the windshield pillar garnish moldings. Refer to Windshield Pillar Garnish Molding Replacement in Interior Trim.
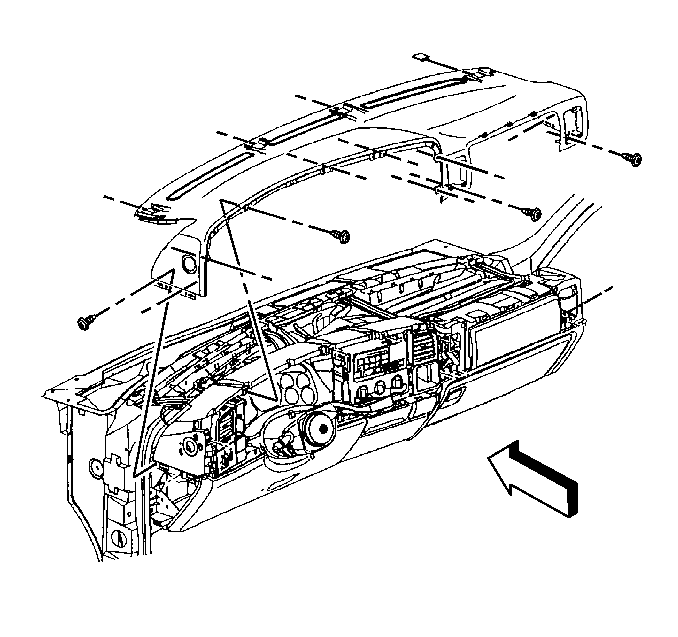
- Remove the top cover.
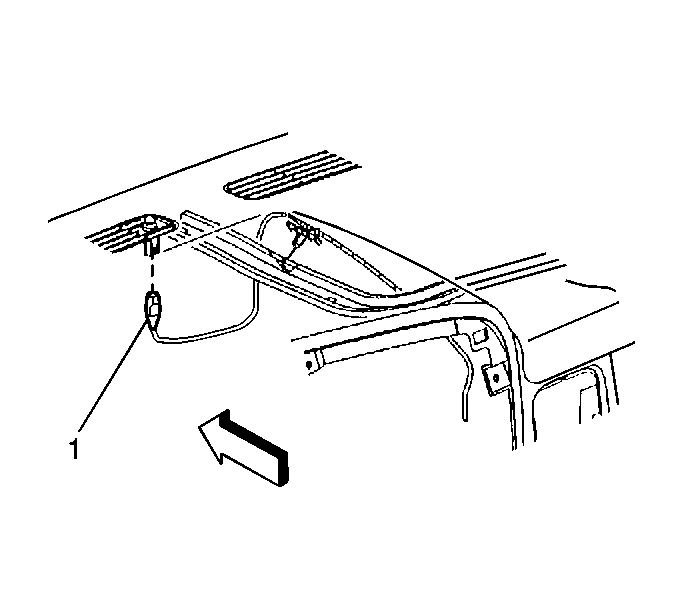
- Disconnect the electrical connector (1) to the ambient light sensor on the underside of the top cover.
Caution: Unless directed otherwise, the ignition and start switch must be in the OFF or LOCK position, and all electrical loads must be OFF before servicing any electrical component. Disconnect the negative battery cable to prevent an electrical spark should a tool or equipment come in contact with an exposed electrical terminal. Failure to follow these precautions may result in personal injury and/or damage to the vehicle or its components.


Installation Procedure
- Connect the electrical connector (1) to the ambient light sensor on the underside of the top cover.
- Install the top cover.
- Install the windshield pillar garnish moldings. Refer to Windshield Pillar Garnish Molding Replacement in Interior Trim.
- Install the assist handle.
- Install the right side air outlets. Refer to Instrument Panel Air Outlet Replacement in Heating and Ventilation (Non-A/C) or Instrument Panel Air Outlet Replacement in HVAC Systems with A/C-Manual.
- Install the end panels. Left is shown, right is similar.
- Install the IP cluster trim plate bezel. Refer to Instrument Panel Cluster Trim Plate Bezel Replacement .
- Tilt the steering wheel to the normal driving position.
- Move the shift lever to the park position (if the transmission is automatic).
- Disengage the parking brake.
- Enable the SIR system. Refer to Enabling the SIR System in SIR.


Tighten the top cover screws until the screws are fully driven, seated and not stripped.


