Info - Availability of Rear Wheel Mud Flaps to Reduce Debris Build-up on Rear Brake Calipers and/or Rear Wheels

| Subject: | Availability of Rear Wheel Mud Flaps to Reduce Debris Build-up on Rear Brake Calipers and/or Rear Wheels |
| Models: | 1999-2004 Chevrolet Silverado Pickup Models |
| 1999-2004 GMC Sierra Pickup Models |
This bulletin is to inform dealers of the release of rear wheel mud flaps. The above models that are exposed to extensive off-paved roads may benefit from the mud flaps. The mud flaps have been developed to minimize the amount of stones and/or mud that can impact and collect on the rear caliper and/or wheel rim.
Please advise customers that the installation of these mud flaps and following the recommended off-road driving information provided in their Owner's Manual should greatly reduce the possibility of accelerated rear brake component wear and/or rim damage.
Install the mud flap forward of each rear wheel using the following procedure.
Important: Always work from outboard to inboard, drilling one hole at a time and securing with a fastener. Follow the sequence of the procedure. This will prevent distortion of the mud flap.
- Raise the vehicle. Support the vehicle.
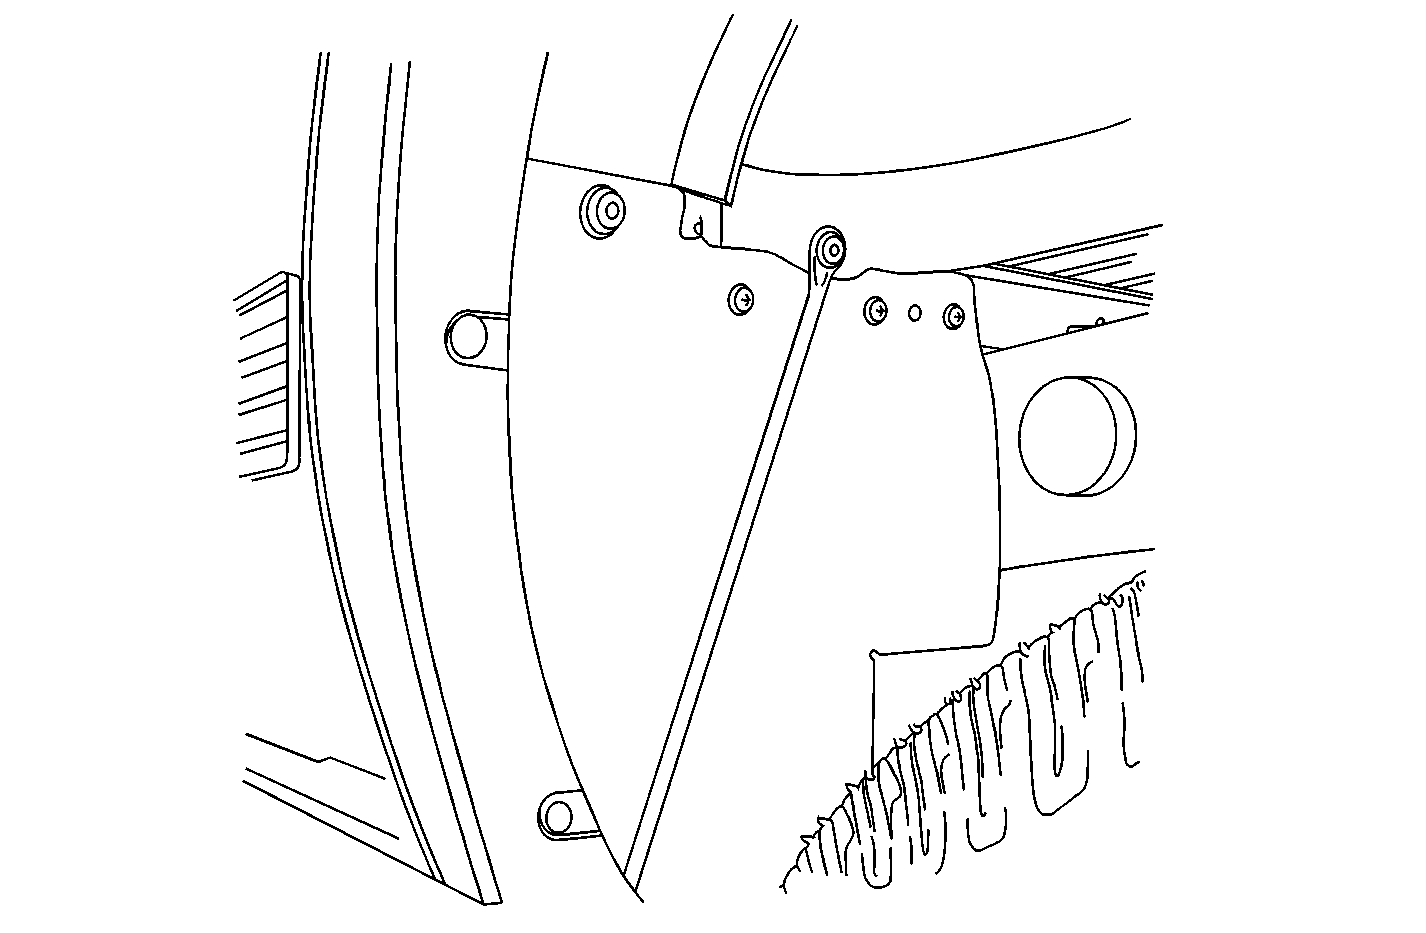
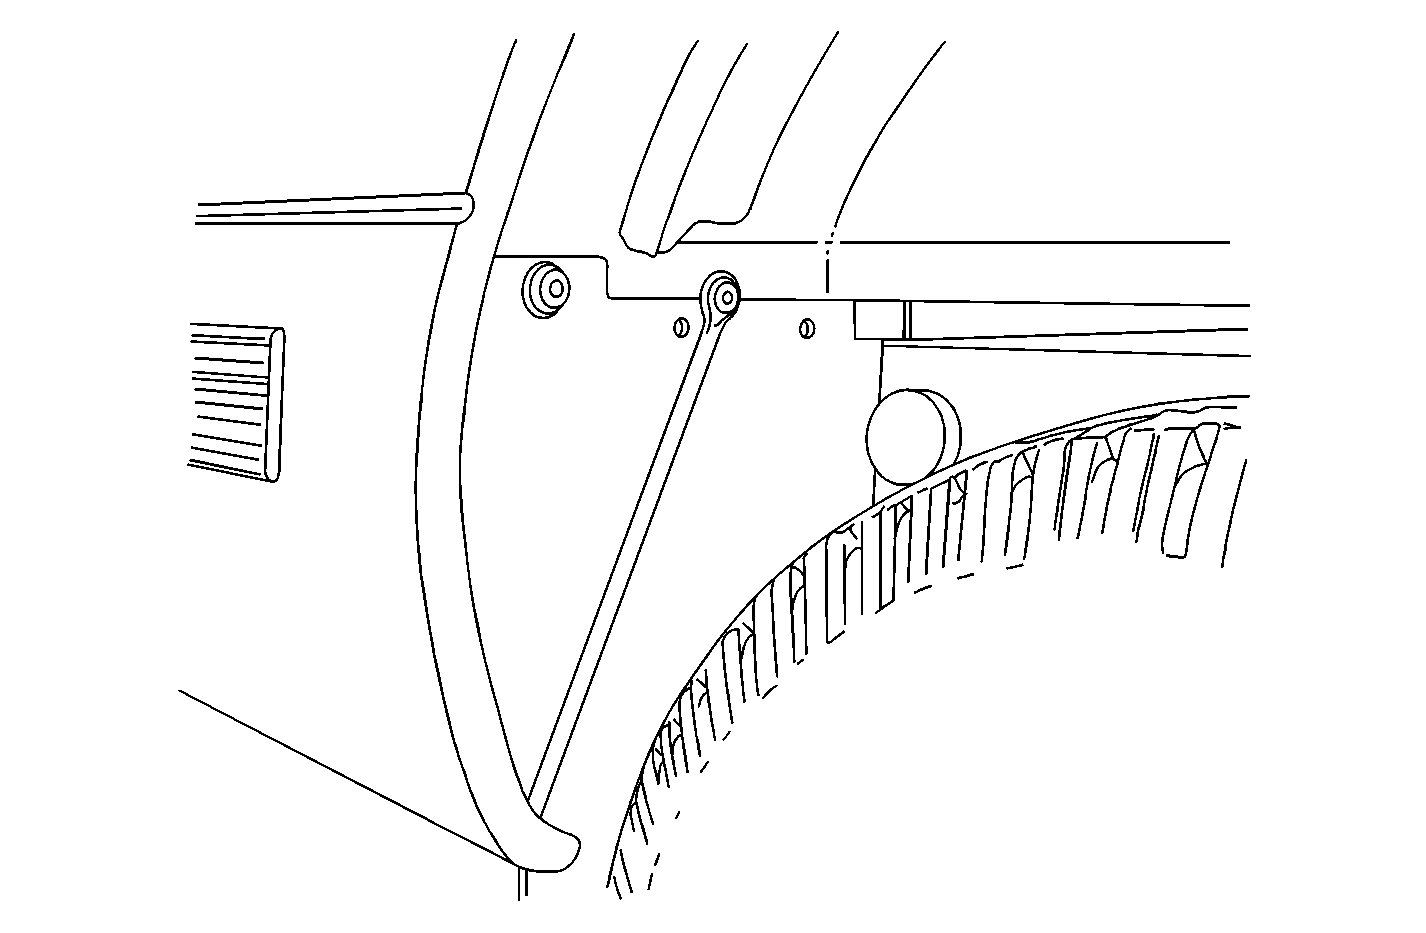
- Locate the pickup box side panel rear brace.
- Remove the existing outboard upper fastener on the brace.
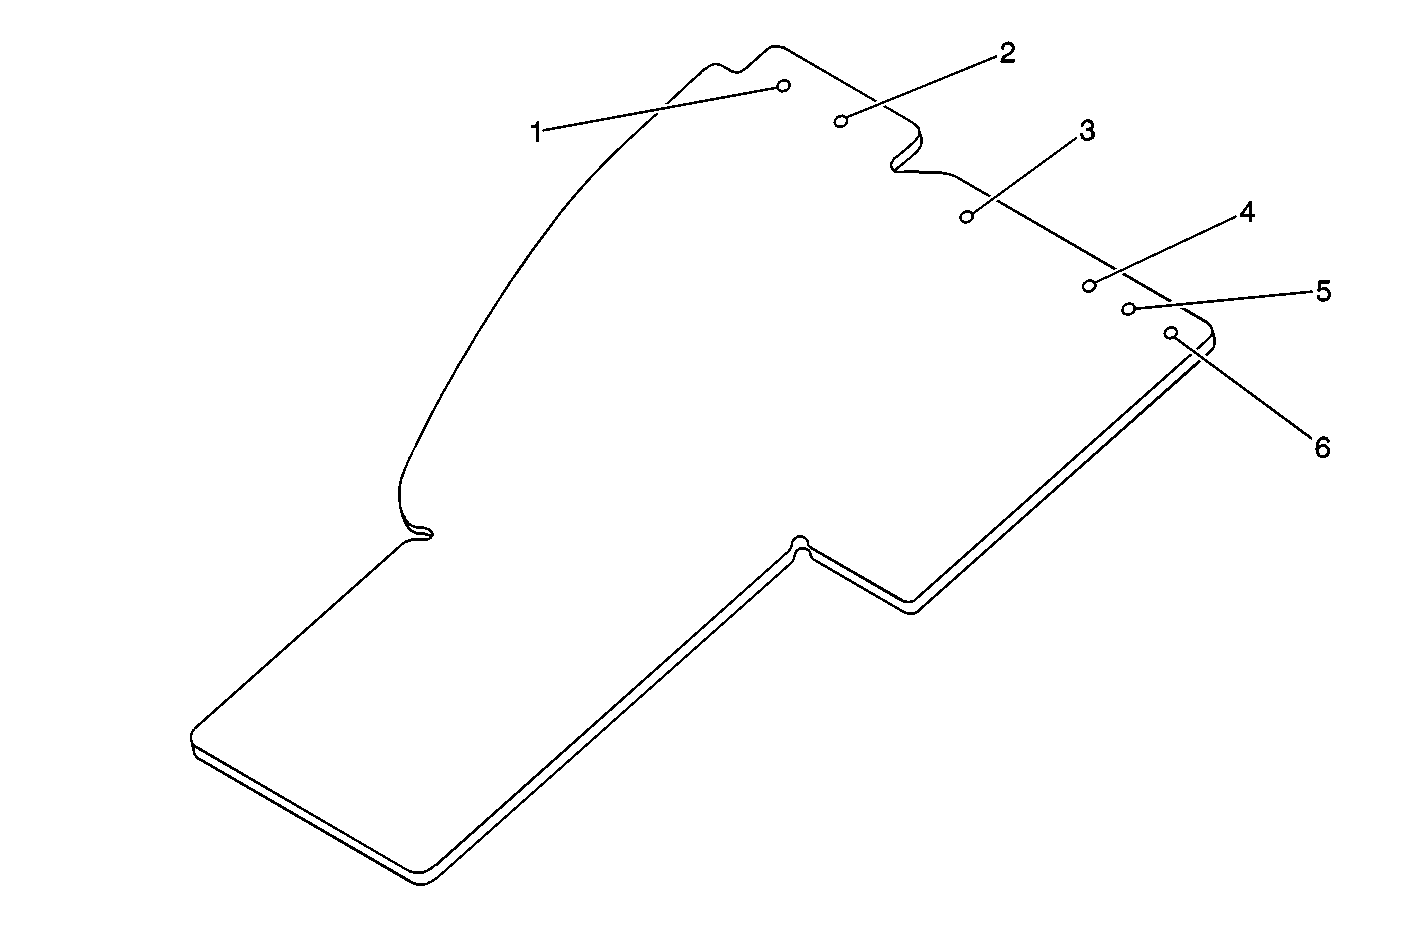
- Install the mud flap through the "V" of the brace. Install the previously removed fastener in the hole (2) of the mud flap to the brace. Do not tighten the fastener at this time.
- Using the mud flap as a template, locate and mark the location of the hole (1) in the pickup box wheel house.
- Center punch the marked location and drill a 6.35 mm (1/4 in) hole. Install the plastic retainer in the hole (1) of the mud flap.
- Tighten fastener at the hole (2) location of the mud flap.
- For vehicles with short box, use the following procedure:
- For vehicles with long box, use the following procedure:
- Repeat the above steps for the opposite side.
Important: After drilling the holes, apply the appropriate anti-corrosion primer. Refer to the GM Refinish Material Booklet #4901M-D (English) or #4901-D-F (French) for additional information.
Tighten
Tighten the fastener to 25 N·m (18 lb ft).
| 8.1. | Push the mud flap to make contact with the rear side of the underbody cross sill and mark the location of the hole (3) of the mud flap. |
| 8.2. | Center punch the marked location and drill a 5.159 mm (13/64 in) hole. |
| 8.3. | Install the screw. |
Tighten
Tighten the screw to 4 N·m (35 lb in).
| 8.4. | Repeat the above steps for hole locations 4 and 6. |
| 9.1. | Push the mud flap to make contact with the front side of the underbody cross sill and mark location of the hole (5) of the mud flap. |
| 9.2. | Center punch the marked location and drill a 5.159 mm (13/64 in) hole. |
| 9.3. | Install the screw. |
Tighten
Tighten the screw to 4 N·m (35 lb in).
| 9.4. | Repeat the above steps for hole location 6. |
Parts Information
Part Number | Description | Qty |
|---|---|---|
15765007 | Flap Package - Rear Mud | 1 |
Parts are expected to be available from GMSPO on June 30, 2004.
Warranty Information
Please advise the customer that the mud flaps can be purchased as an accessory. Installation and/or cost of the mud flaps will not be covered under the vehicle's warranty.
