
| Subject: | Manual Transmission Comes Out of Gear (Install New Shift
Shaft Lever) |
| Models: | 1999-2000 Chevrolet and GMC C/K, S/T Pickup Models |
| with NV3500 5SP Manual Transmission (RPOs MG5, M50) |
Condition
Some owners may comment on the transmission coming out of gear. Typically
1st gear is most affected.
Cause
This condition may be due to a design change of the shift shaft lever
that eliminated the detent plunger hole, spring and plunger.
Correction
Install the new shift lever that has been updated with the detent plunger
hole.
Removal Procedure
Tools Required
| • | J 23907 Slide Hammer with Bearing Adapter |
| • | J 36509 Detent Spring Plug Remover |
| • | J 36511 Oil Fill and Drain Plug Hex Bit - 17 mm |
| • | J 36850 Transmission Assembly Lubricant |
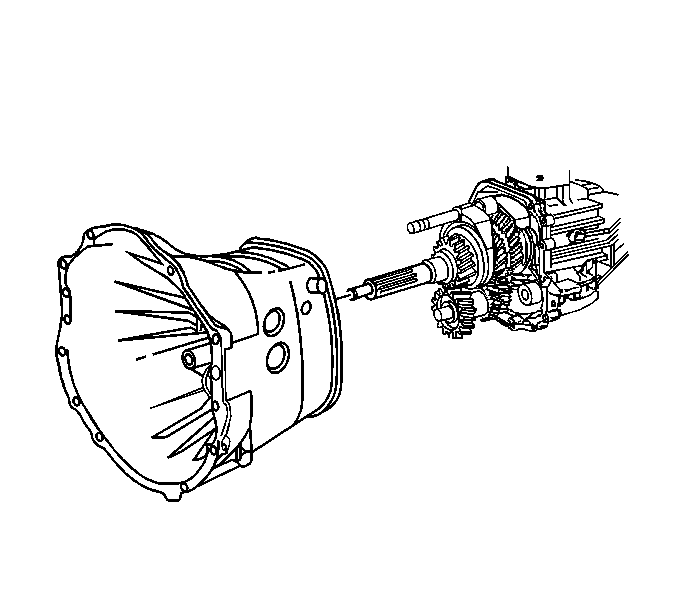
- Remove the transmission. Refer to Transmission Replacement in
Transmission/Transaxle - Manual Transmission.
- Remove the oil fill plug.
Important: The transmission must remain in 3rd or 5th gear in order to prevent
losing the shift shaft lever spring and plunger.
- If the transmission is not in 3rd or 5th gear, reinstall the shift control
housing and shift the transmission in 3rd or 5th gear.
- Place a suitable container under the transmission assembly in
order to drain the remaining transmission fluid.

- Remove the oil drain plug.
- Remove the gasket material from the housing.
- Remove the back-up lamp switch.
- If RWD, remove the bolt for the vehicle
speed sensor.
- Remove the vehicle speed sensor and O-ring.
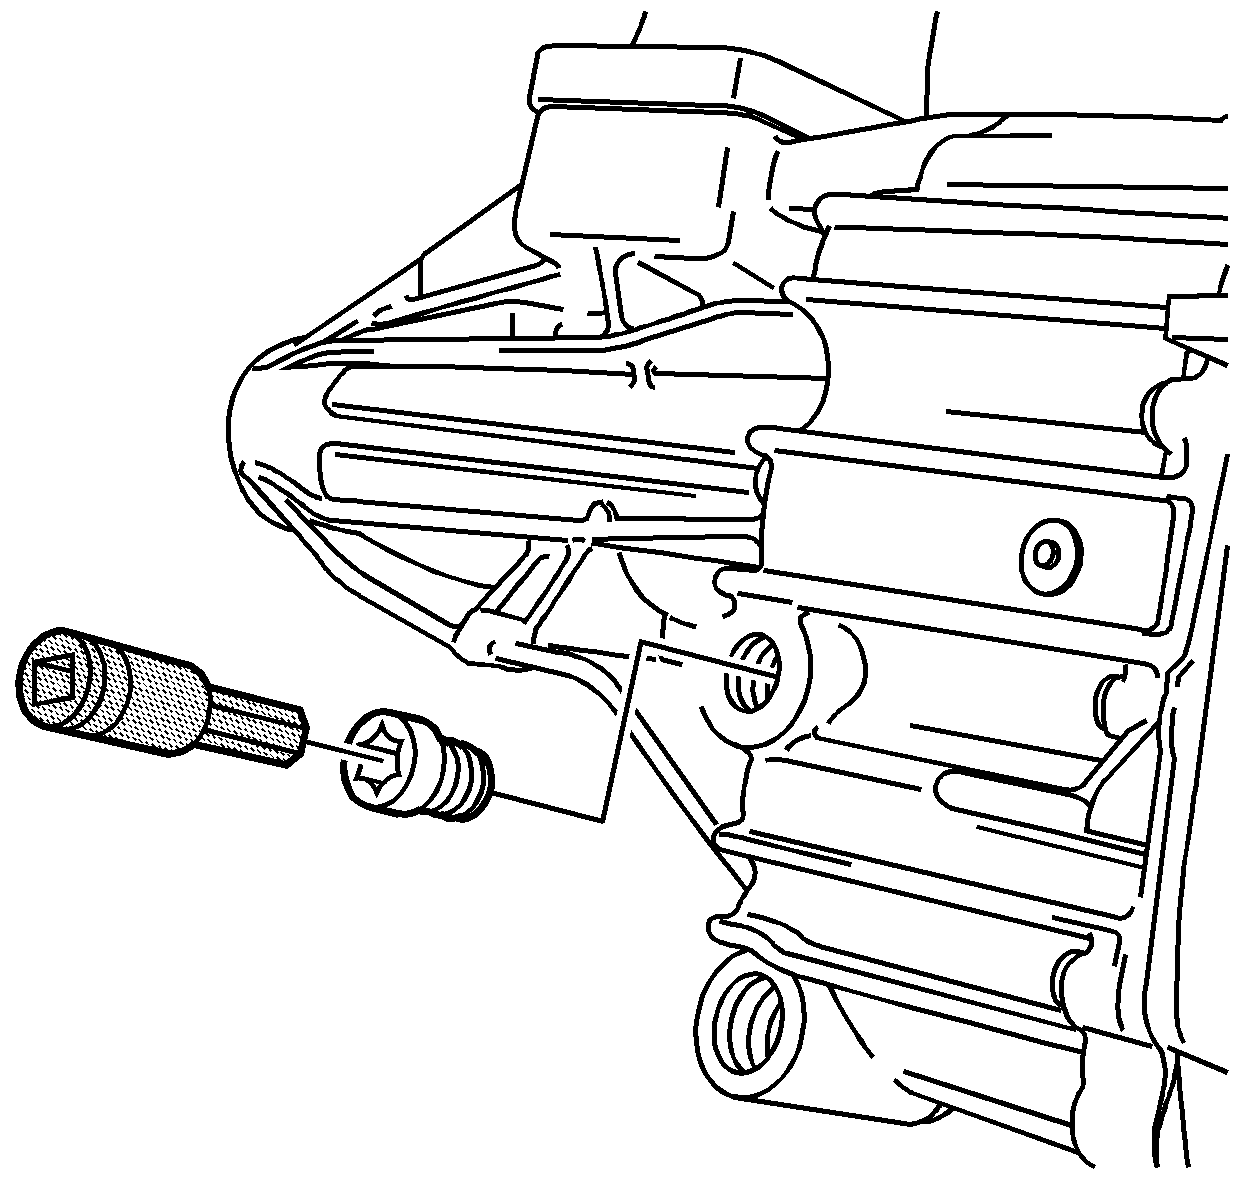
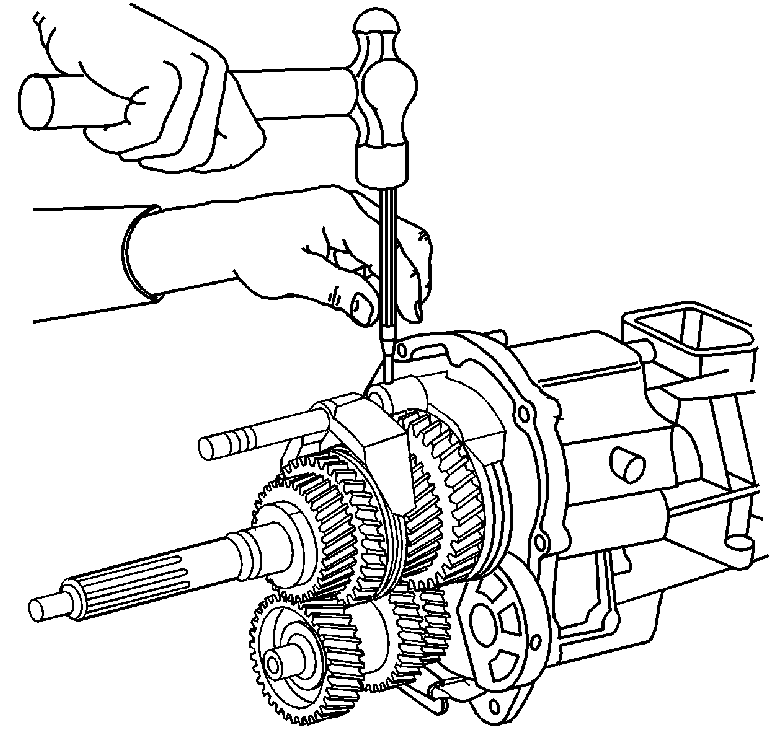
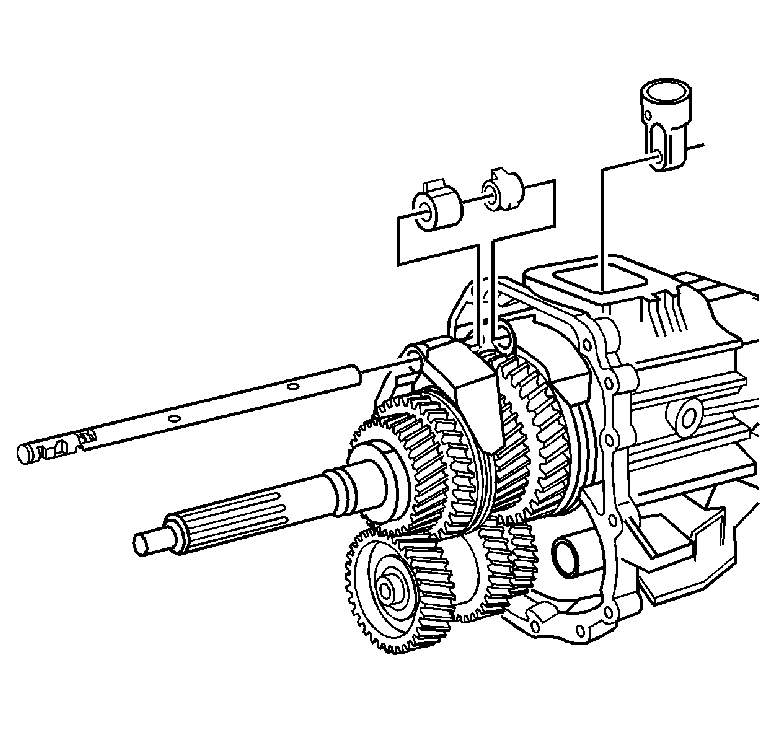
- Remove the shift shaft detent pin.
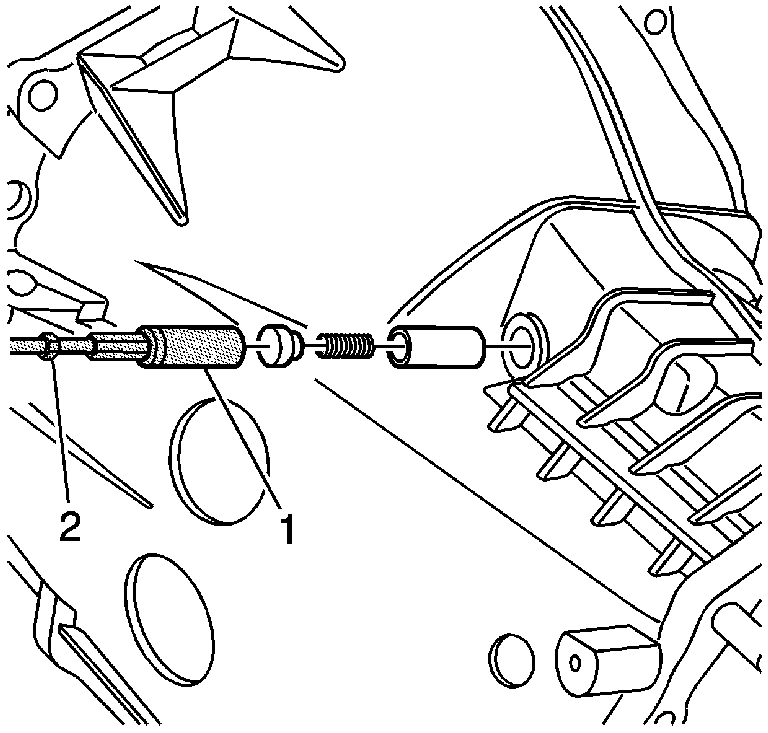
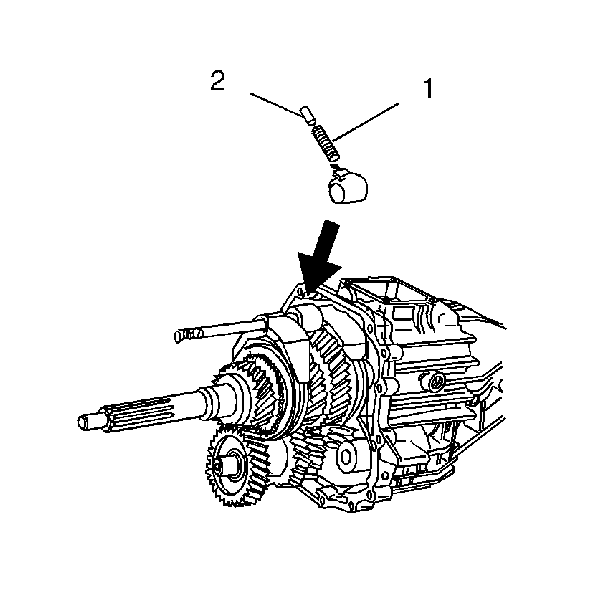
- Using special tools J 36509 (1)
and J 23907 (2) , remove the detent plug, spring, and detent plunger.
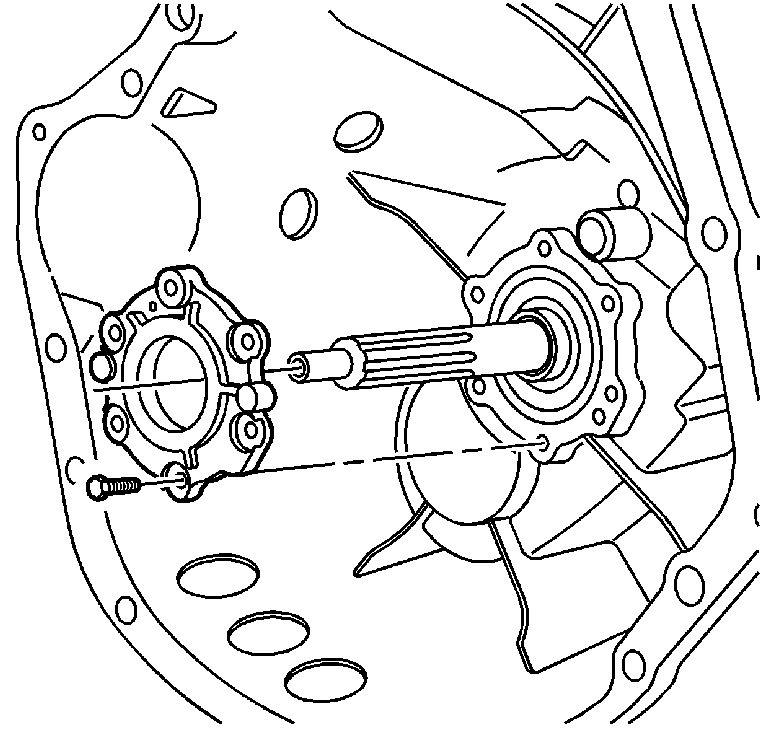
- Remove the 6 bolts securing the
input shaft bearing retainer to the clutch housing.
- Remove the retainer by screwing two of the removed bolts into
the threaded holes in the retainer.
- Remove the input shaft bearing retainer
ring.
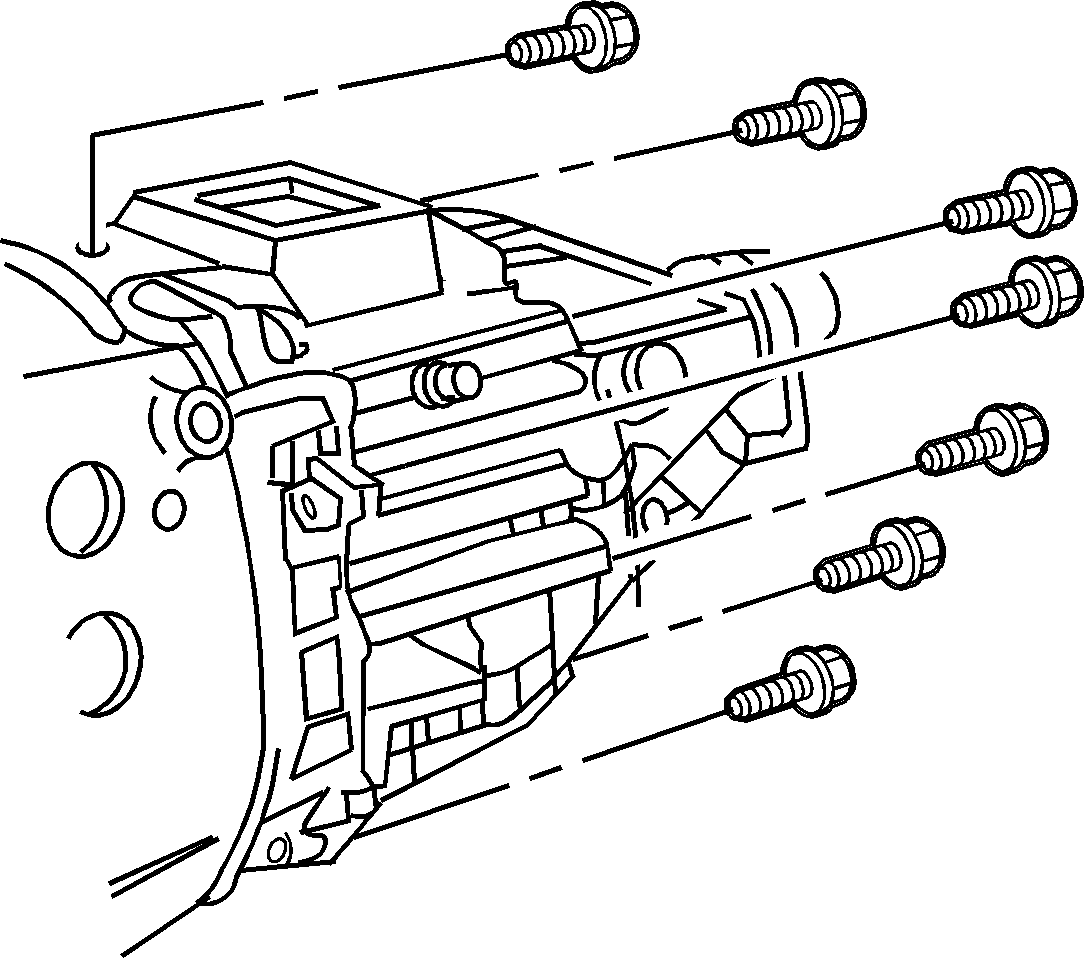
- Remove the bolts securing the clutch
housing to the rear case.
Notice: The case sealing surface is a machined surface. Prevent the case sealing
surface from getting nicks, scratches or other damage. Damage to the case
sealing surface may cause leakage.
- Separate the clutch housing from the rear case using a soft-face hammer.
Do not pry at the sealing surfaces.
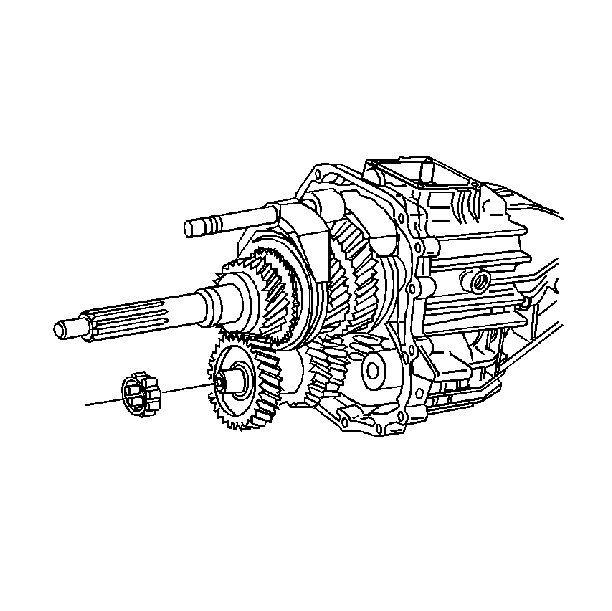
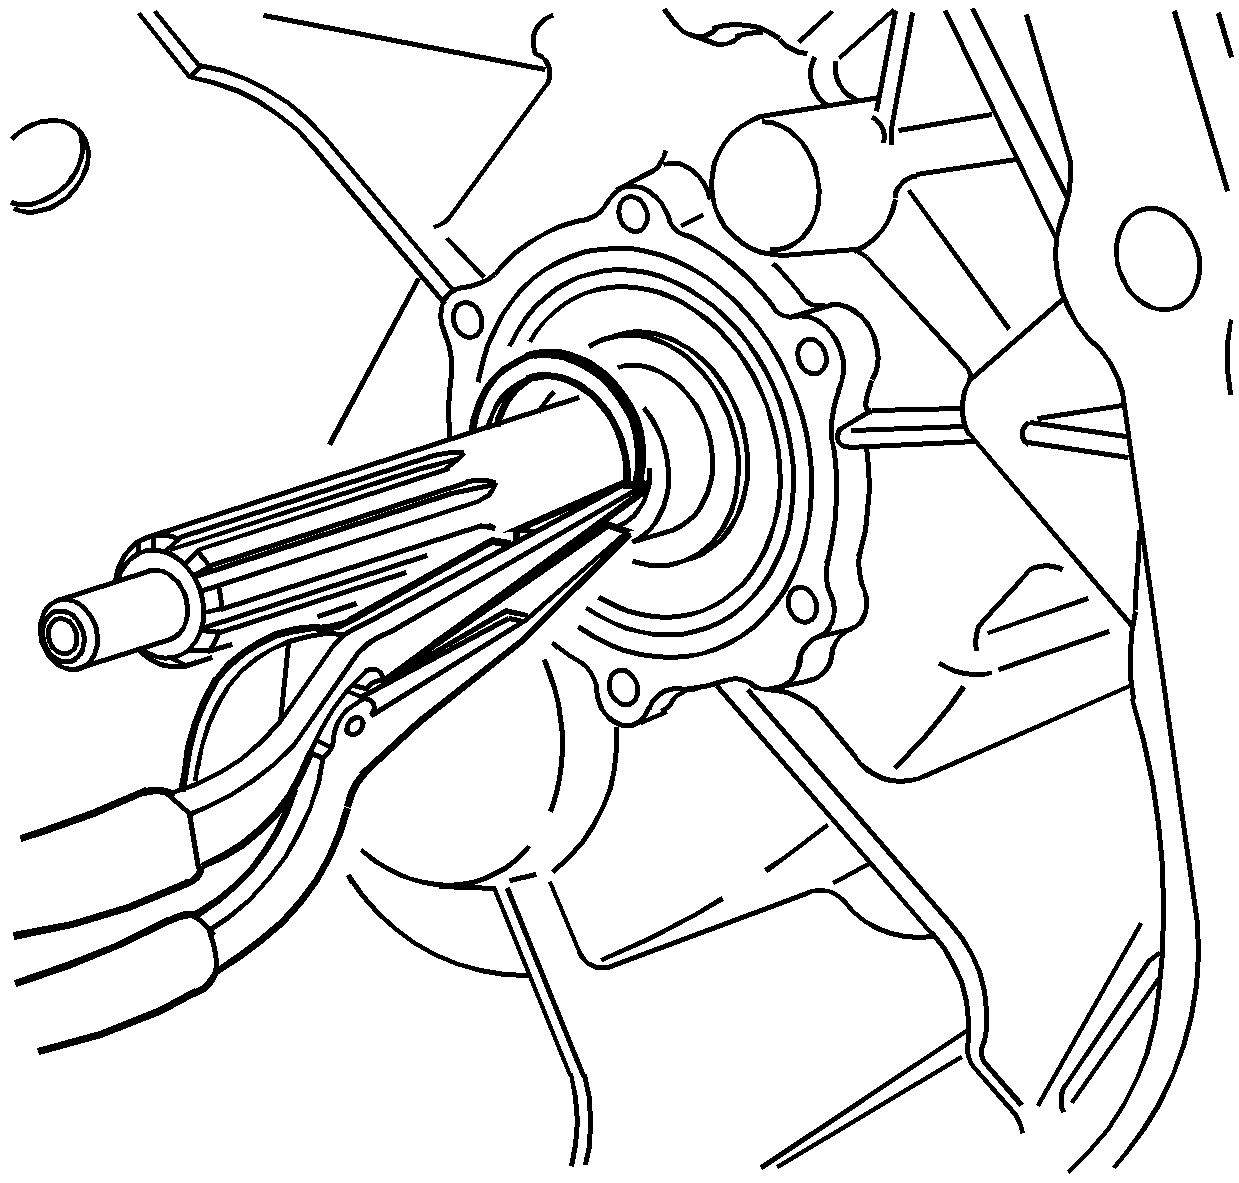
- Remove the countershaft front bearing.
- Remove the shift shaft lever roll pin.
| 18.1. | Rotate the shift shaft lever finger down. |
| 18.2. | Support the shift shaft end. |
| 18.3. | Drive out the roll pin. |
| 18.4. | Ensure that the roll pin clears the 2nd speed gear. |
- Remove the shift shaft socket roll pin.
| 19.1. | Align the shift shaft socket in the center of the case opening. |
| 19.2. | Using a 5 mm (3/16 in) punch, remove the roll pin. |
- Remove the following components:
| 20.2. | The shift shaft socket |
| 20.3. | The shift shaft lever |
| 20.4. | The shift shaft block out bushing |
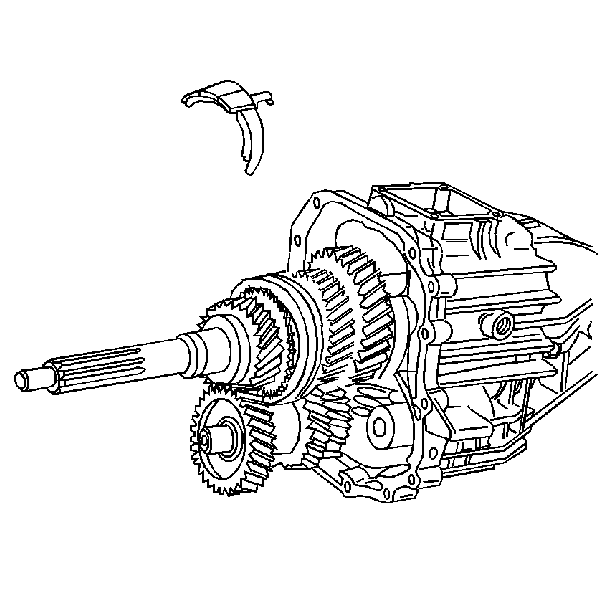
- Rotate the 3rd/4th speed gear shift fork
counterclockwise.
- Remove the 3rd/4th speed gear shift fork from the transmission
case.
Assembly Procedure
- Install the 3rd/4th speed gear shift fork
onto the 3rd/4th speed gear synchronizer sleeve.
- Slide the shift shaft through the following
parts:
| 2.1. | The 3rd/4th speed gear shift fork. Ensure that the detent reliefs,
in the shift shaft, point to the front of the transmission. |
| 2.3. | The block-out bushing |
| 2.4. | The 1st/2nd speed gear shift fork |
| 2.5. | The 5th/Reverse shift fork |
| 2.6. | The rear case bushing and bearing |
- Install a NEW roll pin into the shift lever.
The end of the spiral must face toward the direction of the thrust.
| 3.1. | Rotate the shift shaft and the shift lever/block-out bushing assembly.
Ensure the roll pin holes are aligned and horizontal. |
| 3.2. | Support the shift shaft while installing the roll pin. |
| 3.3. | Install the roll pin flush with the shift lever. |
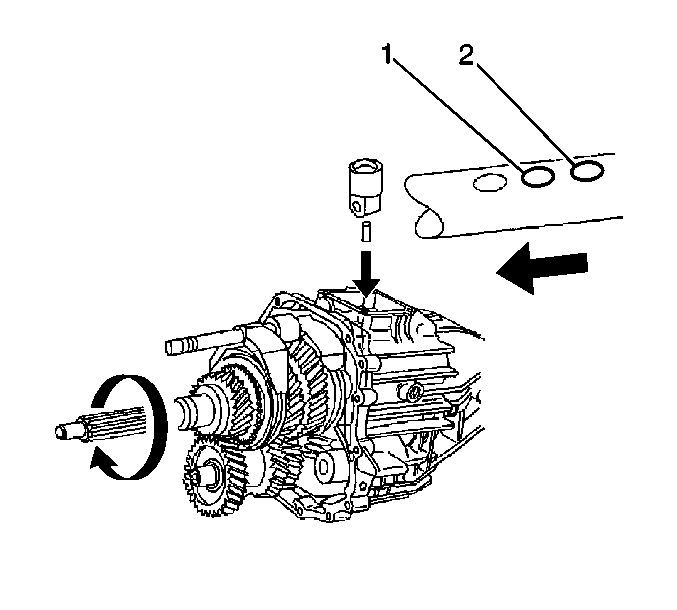
Important: On the S/T trucks, the shift shaft has only one hole. The C/K trucks
have 2 holes on the shift shaft; use the front roll pin hole (1).
- Install the shift shaft and shift shaft socket and roll pin.
| 4.1. | Align the holes in the shift shaft socket and the shift shaft. |
| 4.2. | Drive the roll pin flush with the bottom of the shift shaft socket. |
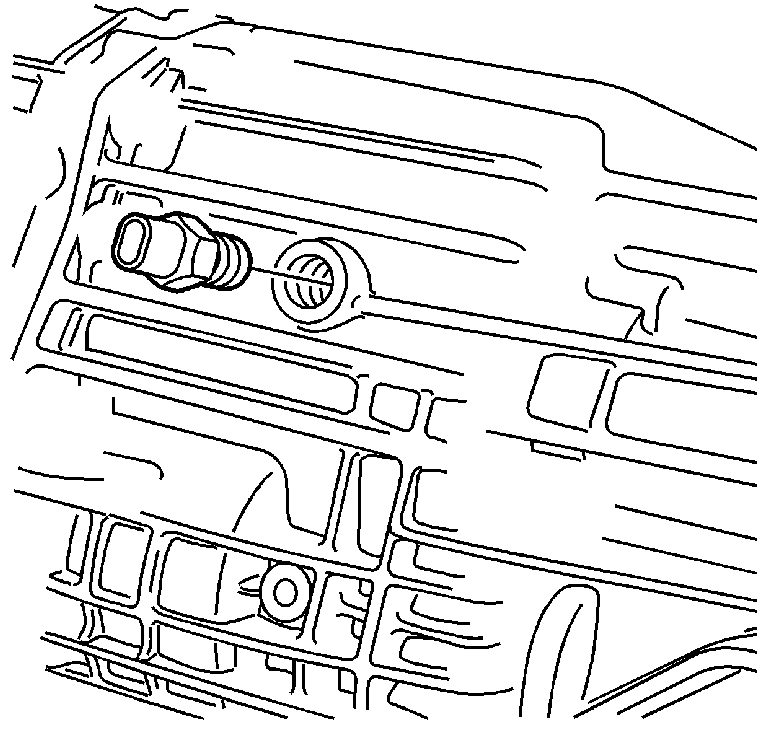
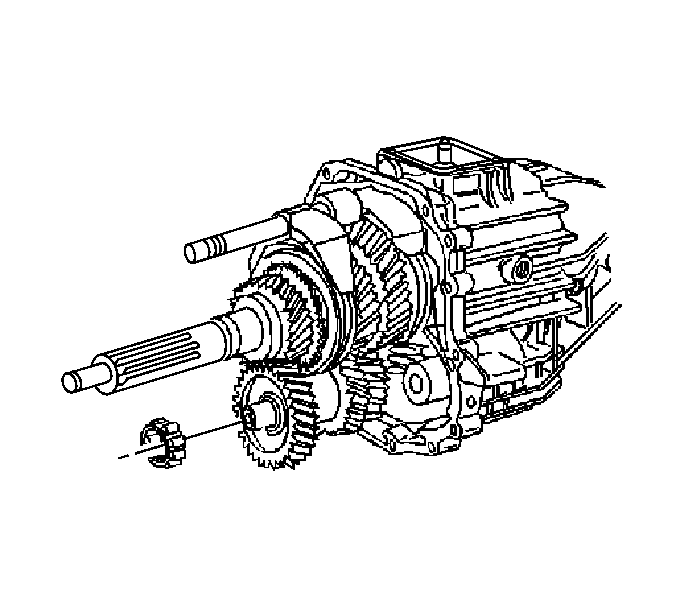
- Install the detent spring and the ball
plunger into the hole in the shift lever.
| 5.1. | Rotate the shift shaft counterclockwise. The shift lever should
be almost into the 5th/Reverse speed gear insert notch. |
| 5.2. | Install the spring and the ball plunger (1) into the shift lever
(2). |
| 5.3. | Rotate the shift shaft until the shift lever aligns with the 3rd/4th
speed gear insert. |
Important: The transmission must remain in 3rd or 5th gear in order to prevent
losing the shift shaft lever spring and plunger.
- Shift the transmission into 3rd or 5th gear.
Important: The smaller diameter of the bearing cage goes into the bearing race.
- Install the countershaft bearing onto the countershaft. Ensure the smaller
diameter side of the bearing is positioned toward the front case half.
- Fill the front countershaft bearing race with J 36850,
transmission assembly lubricant, or equivalent.
- Apply gasket maker, P/N 1052943
(in Canada use 109534791), or equivalent to the front housing sealing surface.
- Align the dowel pins in the clutch housing to the rear case.
- Install the clutch housing to the rear case.
Important: Do not tighten the housing bolts.
- Install the housing bolts.
- Install a new retaining ring on the input
shaft. It may be necessary to pull out on the input shaft in order to install
the retaining ring.
Important: Do not allow sealant into the oil return hole in the housing or bearing
retainer.
- Apply RTV sealer, P/N 12345739 (in Canada use P/N 10953541),
or equivalent to the inside edge of the bearing retainer mating surface.
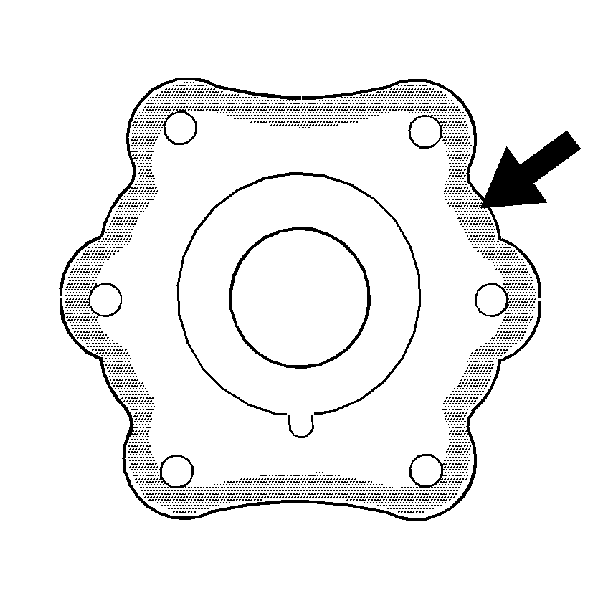
- Install the input shaft bearing retainer
to the housing with 6 bolts. Align the retainer oil drain hole with
the drain hole in the housing.
Tighten
Tighten the retainer bolts to 14 N·m (10 lb ft).
- Rotate the input shaft a few turns to align the transmission bearings
and to test for any excessive binding.
- Tighten the front to rear housing bolts.
Tighten
Tighten the housing bolts to 35 N·m (26 lb ft).
- Install the following components:
| 18.1. | The shift shaft detent plunger |
| 18.2. | The shift shaft detent spring |
| | Important: Apply pipe sealant, P/N 12346004 (in Canada use P/N 10953480),
or equivalent to the detent plug.
|
| 18.3. | The shift shaft detent plug |
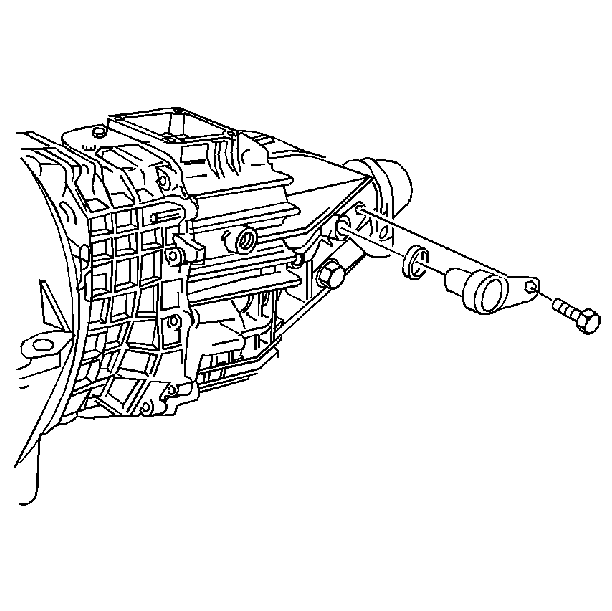
- If RWD vehicle, coat the speed sensor O-ring
with Synchromesh Transmission Fluid, P/N 12345349 (in Canada use
P/N 10953465), or equivalent.
- Install the speed sensor, O-ring, and bolt.
Tighten
Tighten the bolt to 16 N·m (12 lb ft).
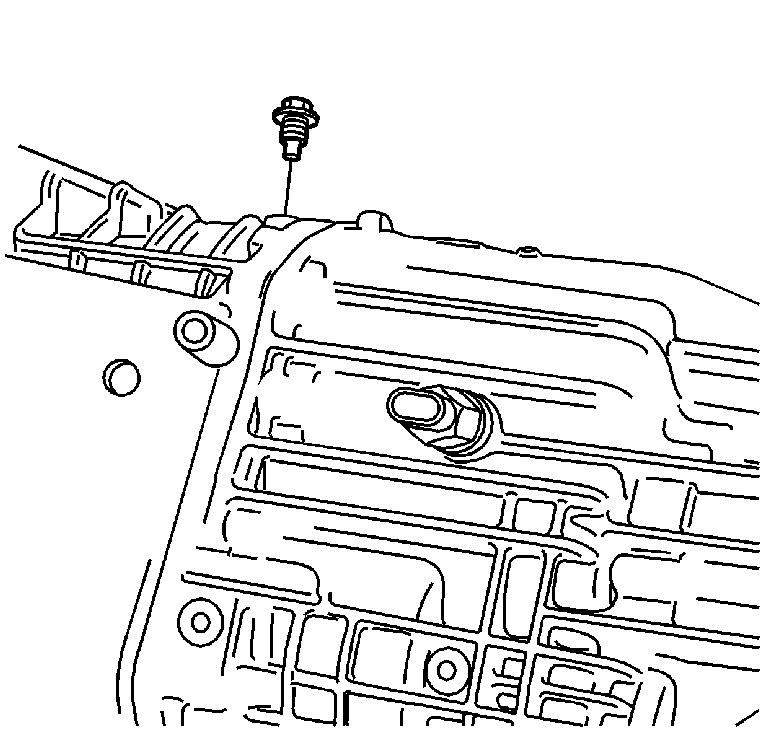
- Install the backup lamp switch. Apply
pipe sealant, P/N 12346004 (in Canada use P/N 10953480), or equivalent
to the threads of the backup lamp switch.
Tighten
Tighten the switch to 37 N·m (27 lb ft).
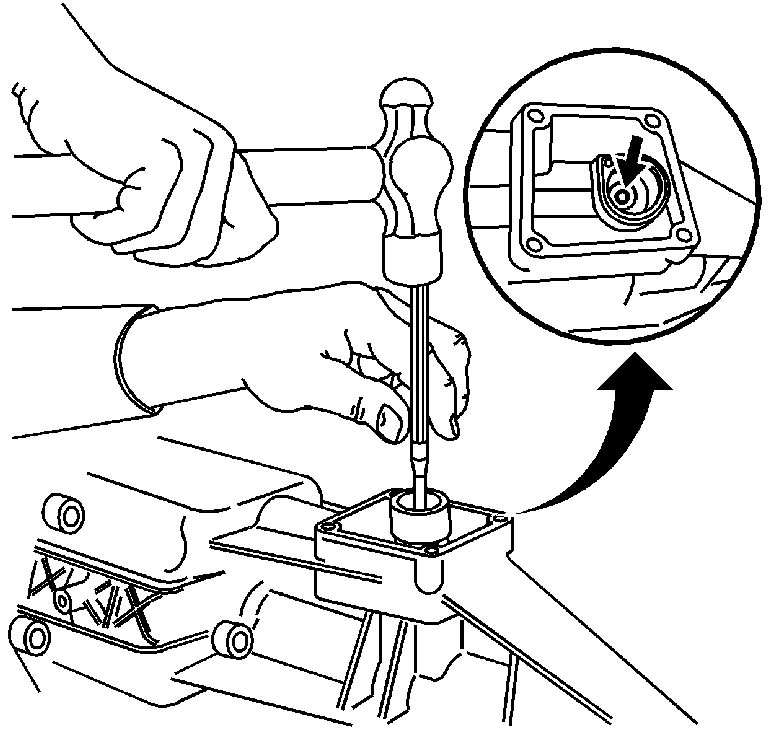
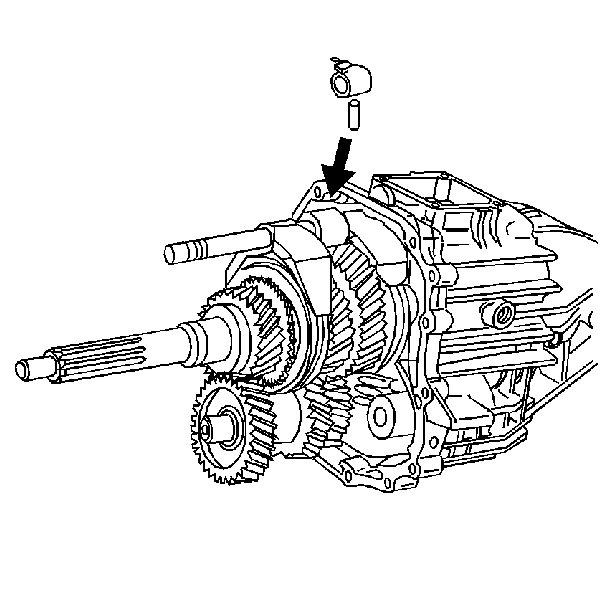
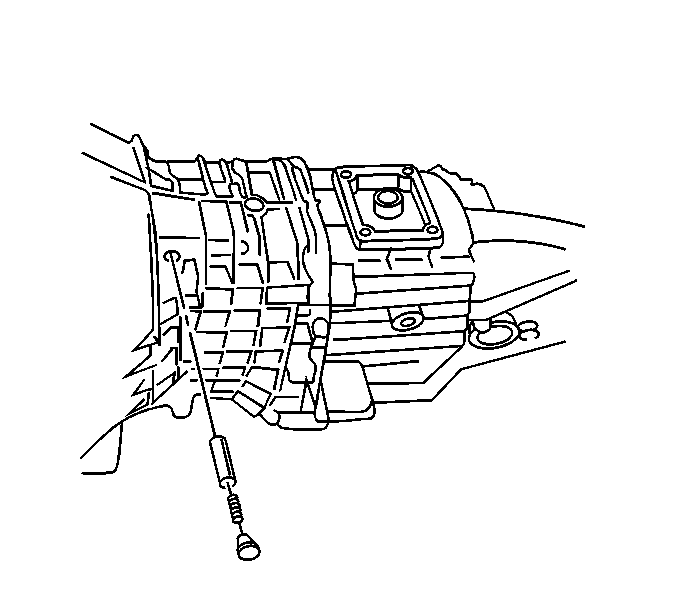
- Install the shift shaft detent pin.
Tighten
Tighten the detent pin to 25 N·m (18 lb ft).
Important: To prevent the transmission fluid from spilling while installing the
transmission in the vehicle, fill the transmission after installing with Synchromesh
Transmission Fluid, P/N 12345349 (in Canada use P/N 10953465).
- Install the transmission. Refer to Transmission Replacement in Transmission/Transaxle
- Manual Transmission.
Parts Information
Part Number
| Description
|
12475399
| Shift shaft lever
|
12545959
| Plunger
|
14082096
| Spring
|
12477934
| Roll pin
|
Parts are currently available from GMSPO.
Warranty Information
For vehicles repaired under warranty, use:
Labor Operation
| Description
| Labor Time
|
K2720
| Transmission Assembly R and R
| Use Published Labor Time
Plus add time of 0.8 hr.
|
