Removal Procedure
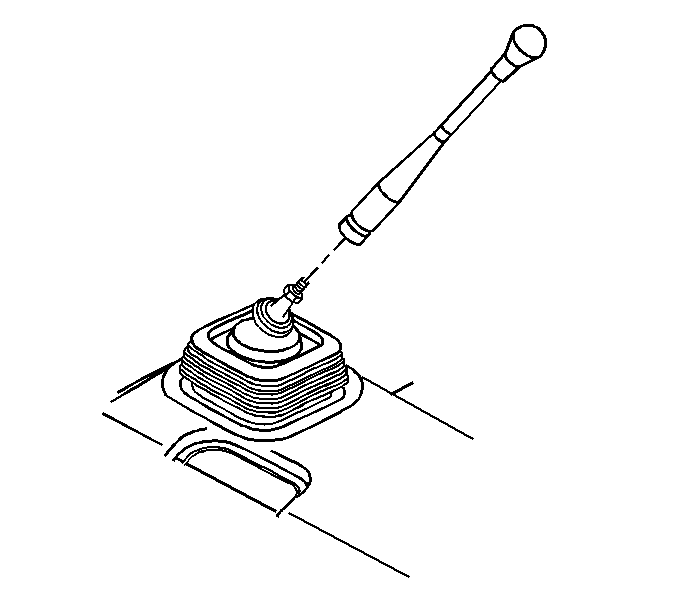
- Remove the control lever.
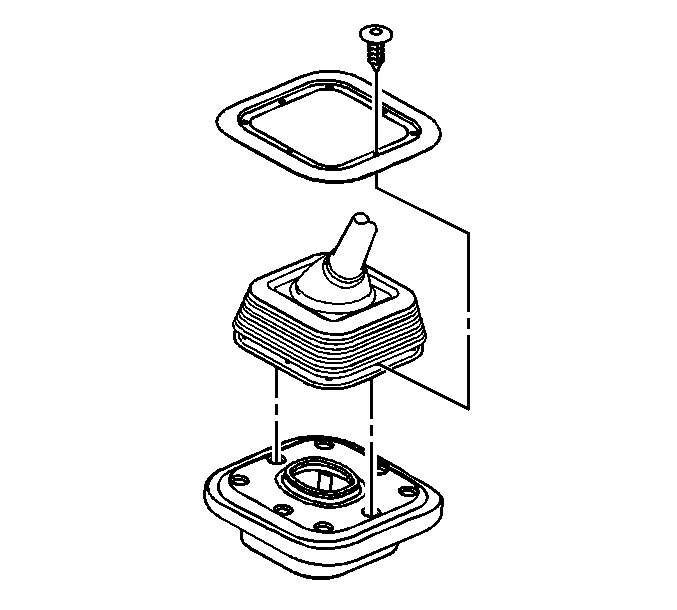
- Remove the control lever boot retainer plastic retainers, if necessary.
- Remove the control lever boot retainer, if necessary.
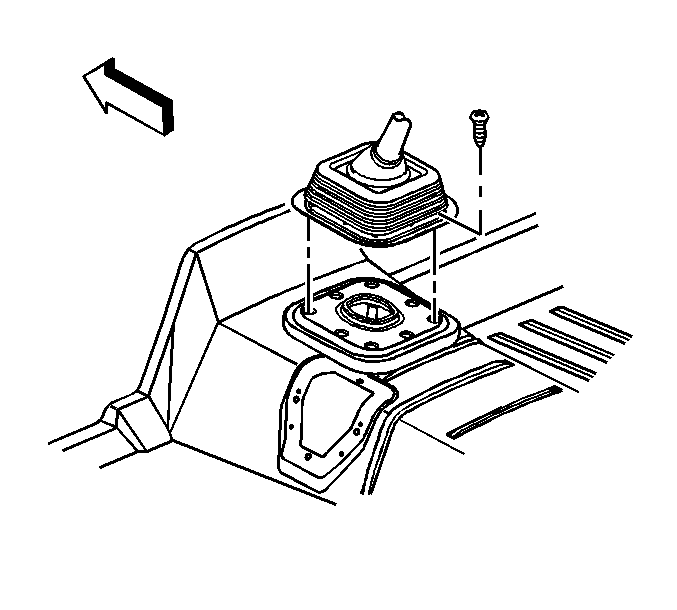
- Remove the control lever boot screws, if necessary.
- Remove the control lever boot, if necessary.
- Remove the control lever insulator, if necessary.

Important: Loosen DO NOT remove the shift lever assembly adjustment nut if replacing the control lever.


Installation Procedure
- Install the control lever insulator, if removed.
- Install the control lever boot to the control lever, if removed.
- Install the control lever.
- If alignment of the control lever is necessary, or if the shift lever assembly was replaced perform the following:
- Ensure that the index mark is located on the passenger side and that the shift pattern is aligned parallel to the vehicle centerline or rotated no more than 6 degrees clockwise.
- Hold the control lever and tighten the shift lever assembly nut against the control lever.
- Seat the control lever boot to the floor.
- Install the control lever boot screws, if removed.
- Install the control lever boot retainer, if removed.


| 4.1. | The nut must be seated at the bottom of the thread runout on the shift lever. |
| 4.2. | Seat the control lever against the shift lever assembly adjustment nut. |
| 4.3. | Back the control lever off the nut in order to align the index mark on the control lever perpendicular to the edge of the control lever boot retainer. |
Notice: Use the correct fastener in the correct location. Replacement fasteners must be the correct part number for that application. Fasteners requiring replacement or fasteners requiring the use of thread locking compound or sealant are identified in the service procedure. Do not use paints, lubricants, or corrosion inhibitors on fasteners or fastener joint surfaces unless specified. These coatings affect fastener torque and joint clamping force and may damage the fastener. Use the correct tightening sequence and specifications when installing fasteners in order to avoid damage to parts and systems.
Tighten
Tighten the nut to 37 N·m (27 lb ft).
Tighten
Tighten the screws to 1.6 N·m (14 lb in).

