A/C COMPRESSOR MOUNTING BRKT. BREAKAGE (DIAG./SERVICE PROC.)

SUBJECT: AIR COMPRESSOR MOUNTING
MODELS: 1987-1988 C6/C7, B6 AND P6 WITH 8.2L DDAD ENGINES (LH3/LH4) AND AIR BRAKES (JE4) WITH ONE PIECE AIR COMPRESSOR MOUNTING BRACKET
THIS BULLETIN CANCELS AND SUPERSEDES TRUCK SERVICE BULLETIN 88-T-67, DATED DECEMBER, 1987, ALL COPIES OF WHICH SHOULD BE DESTROYED.
THIS REVISION IS DUE TO AN INCORRECT BOLT DIMENSION LISTED IN 88-T-67.
Some of the above subject vehicles may experience air compressor bracket mounting bolt (bracket to engine) breakage, resulting in the bracket coming loose. Listed below are two possible conditions which may create poor bolt durability and the repair recommended.
1. Interference between engine left bank intake manifold and air compressor bracket, resulting in false bolt torque reading.
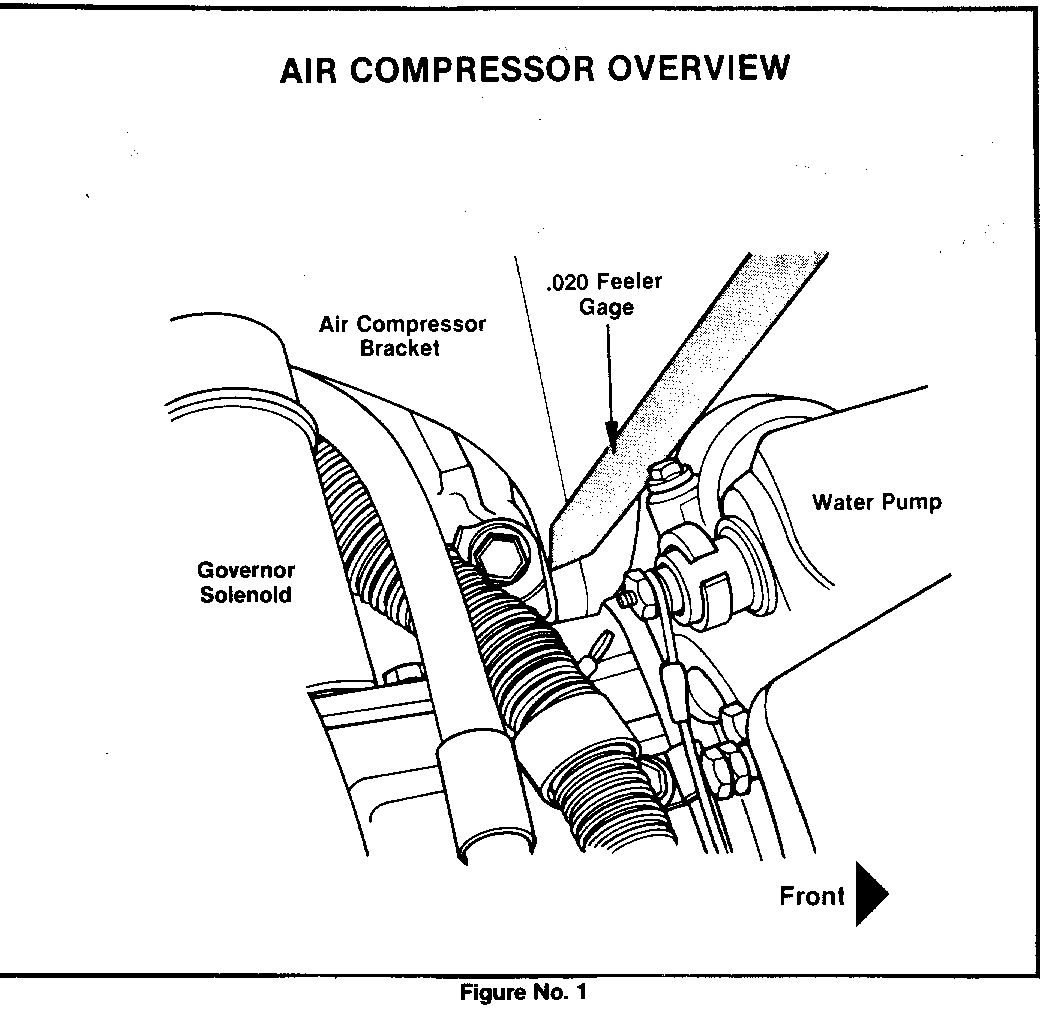
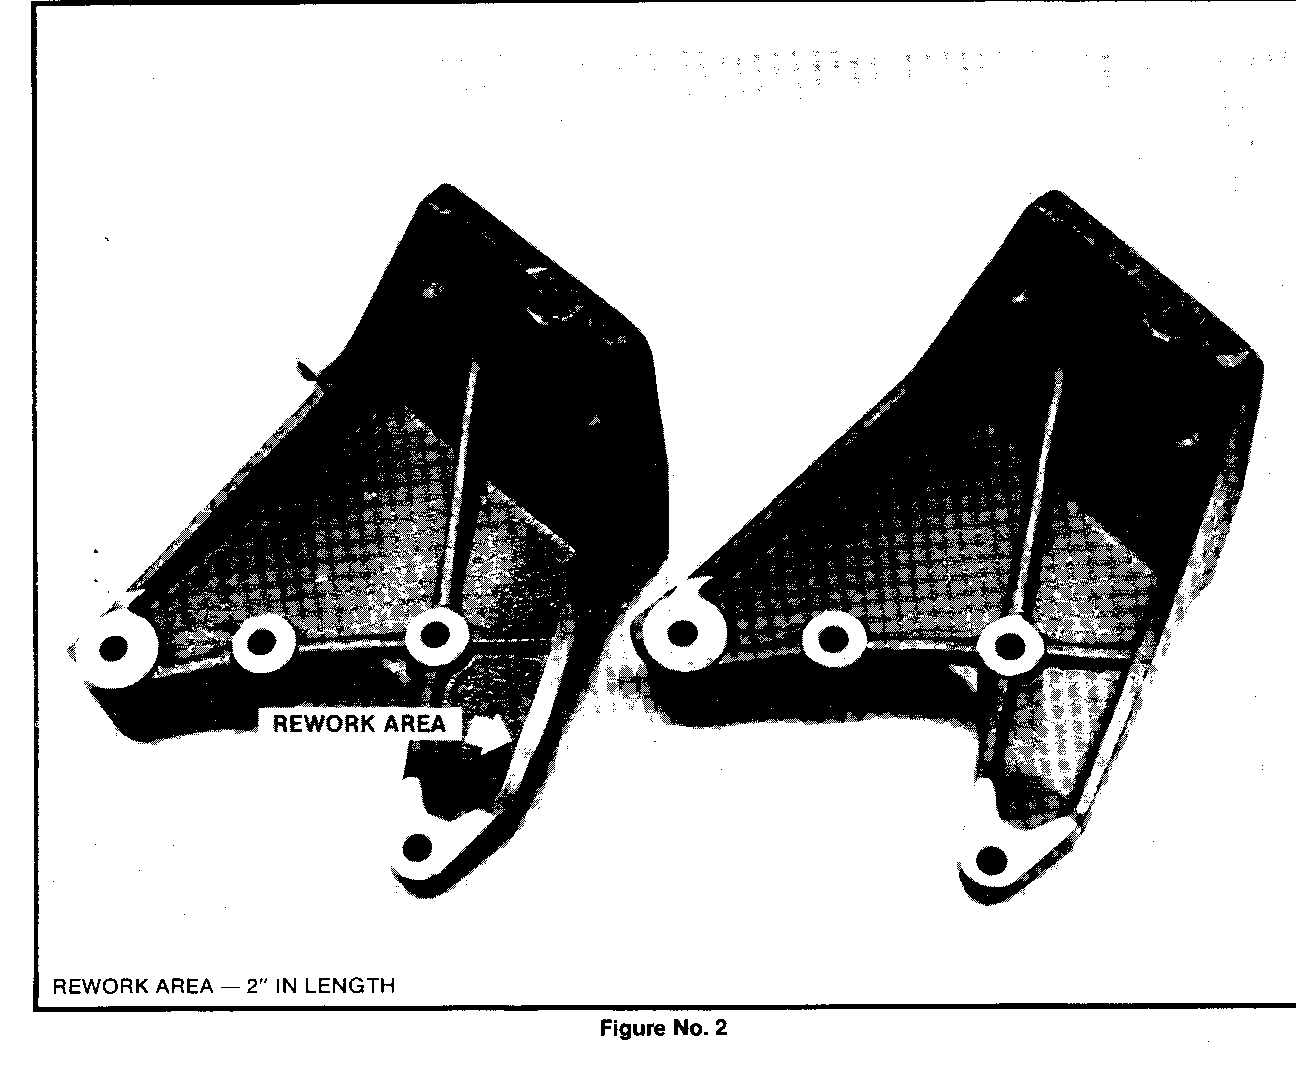
A. Check for proper clearance (.020) feeler gage between the compressor mounting bracket and the front of the left bank intake manifold with a feeler gage. See Figure No. 1 (If OK, proceed to Item 2). If the (.020) feeler gage does not fit, remove the air compressor mounting bracket and grind approximately 3mm or 1/8" from the rib above #10 bolt approximately 2" in length as shown in Figure No. 2. It is important that this rework area be smooth and free of sharp comers. After rework has been completed, install new mounting bolts.
Notice: Do not grind across the web. Grind the web in an upward or downward motion.
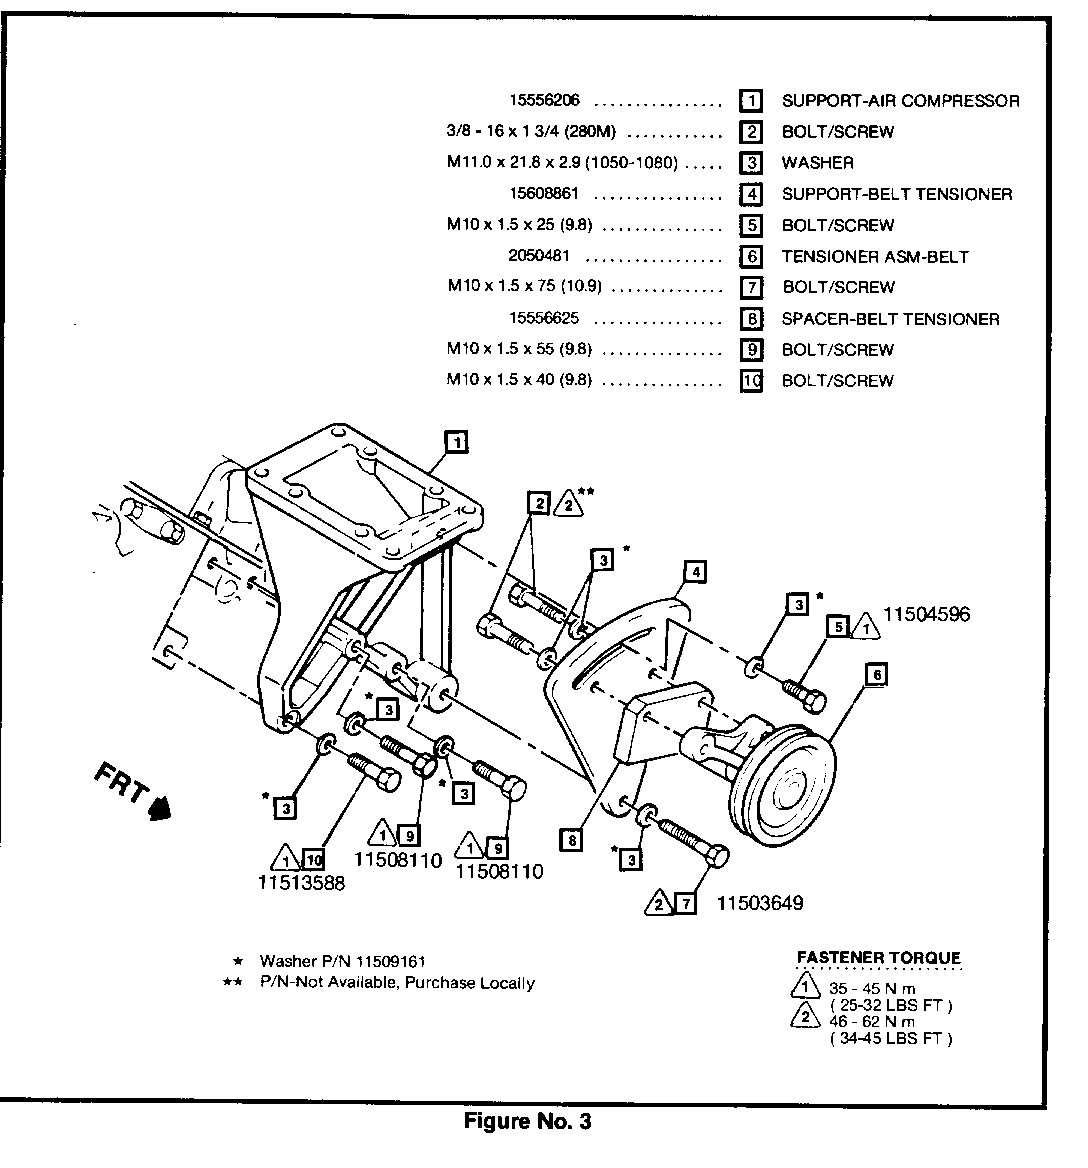
B. If the air compressor bracket has con- tacted the front of the manifold or if it is loose, check for oblong holes at bolt holes #7, #9, and #10. See Figure No. 3. If the bolt holes are oblong, replace the bracket and install new mounting bolts. If the bracket is replaced, inspection for proper clearances (#1A above) must be repeated.
2. Improper mounting bracket attaching bolts and torque.
A. To determine if the proper bolts were installed, the numbers on the head of the bolt must be inspected. With the exception of bolt #7 in Figure No. 3, all bolts should be 9.8 grade and 9.8 should be cast on the head of the bolt. Bolt #7 should be 10.9 grade and may be 75mm or 80mm in length, either of which is correct. If an improper bolt is found during inspection, it should be replaced and torqued to the specification listed below.
Notice: Bolt torque specifications for 9.8 grade bolts are different than for 10.9 grade bolts.
B. Associated fasteners and torque specifications are listed below. It is important that the proper grade bolt is used on the mounting bracket installation.
Manufacturing processing changes were made on October 12, 1987 to eliminate the potential for these conditions. Vehicle manufacturing breakpoints are listed below:
Chevrolet 1GBK6P1F7JV102763 GMC 1GDM7D1G9JV504746
ITEM QTY P/N DESCRIPTION GRADE SPECIFICATION ---- --- --- ----------- ----- ------------- 10 1 11513588 Bolt M10x1.5x40mm 9.8 45 Nm (35 lbs ft)
9 2 11508110 Bolt M10x1.5x55mm 9.8 45 Nm (35 lbs ft)
7 1 11503649 Bolt M10x1.5x75mm 10.9 62 Nm (45 lbs ft)
3 5 11509161 Washer 11.0x21.8x2.9 (1050 - 1080)


General Motors bulletins are intended for use by professional technicians, not a "do-it-yourselfer". They are written to inform those technicians of conditions that may occur on some vehicles, or to provide information that could assist in the proper service of a vehicle. Properly trained technicians have the equipment, tools, safety instructions and know-how to do a job properly and safely. If a condition is described, do not assume that the bulletin applies to your vehicle, or that your vehicle will have that condition. See a General Motors dealer servicing your brand of General Motors vehicle for information on whether your vehicle may benefit from the information.
