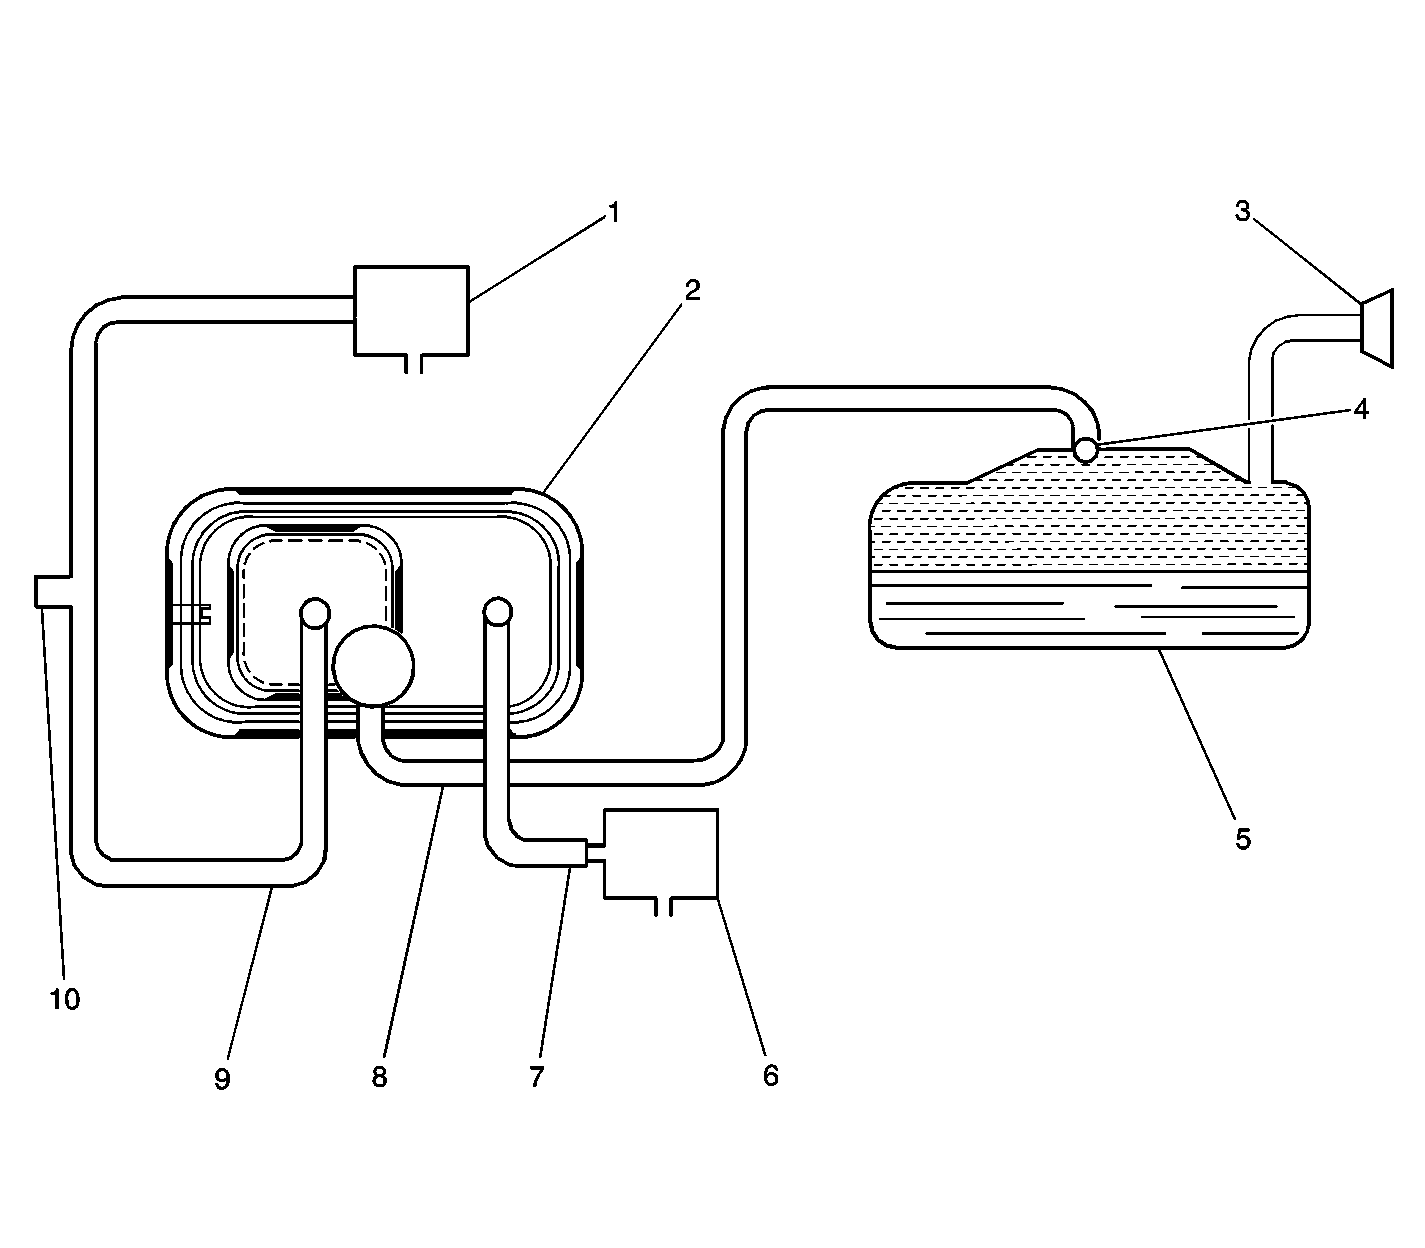
Description
The EVAP SMALL LEAK TEST is based on applying vacuum to the EVAP system and monitoring vacuum decay. This diagnosis will detect a leak as small as .040 in. in the EVAP system. The Powertrain Control Module (PCM) monitors vacuum level via the fuel tank pressure sensor input. At an appropriate time, the EVAP canister purge valve and the EVAP vent valve are turned on. This allows the engine to draw a small vacuum on the entire evaporative emission system. After the desired vacuum level has been achieved, the EVAP purge valve is turned off, sealing the system. A leak is detected by monitoring for a decrease in the vacuum level during a given time period. A small leak in the system will cause DTC P0442 to be set.
Conditions for Running the DTC
- DTC P0107. P0108, P0110, P0112, P0113, P0115, P0117, P0118, P0121, P0122, P0123, P0125, P0440, P0443, P0449, P0452, P0453, P1106. P1107, P1111, P1112, P1114, P1115, P1121 and P1122 not active.
- The system voltage is between 10-18 volts.
- The startup ECT is between 4-30°C (39-86°F), but the startup ECT is not more than 8°C (14°F) more than the startup IAT temperature.
- The startup IAT is between 4-30°C (39-86°F), but the startup IAT not more than 3°C (7°F) more than the startup ECT temperature.
- The fuel tank level is between 20-85 percent.
- The barometric pressure (BARO) is more than 75 kPa.
- The vehicle speed sensor (VSS) is less than 75 mph.
Conditions for Setting the DTC
The EVAP system can achieve vacuum but a vacuum decay is detected during the diagnostic test.
Action Taken When the DTC Sets
| • | The control module illuminates the malfunction indicator lamp (MIL) when the diagnostic runs and fails. |
| • | The control module records the operating conditions at the time the diagnostic fails. The control module stores this information in the Freeze Frame/Failure Records. |
Conditions for Clearing the MIL/DTC
| • | The control module turns OFF the malfunction indicator lamp (MIL) after 3 consecutive ignition cycles that the diagnostic runs and does not fail. |
| • | A current DTC, Last Test Failed, clears when the diagnostic runs and passes. |
| • | A history DTC clears after 40 consecutive warm-up cycles, if no failures are reported by this or any other emission related diagnostic. |
| • | Clear the MIL and the DTC with a scan tool. |
Diagnostic Aids
The EVAP system tests run when the engine is first started and meets the Conditions for Running the DTC. To aid in locating intermittent leaks, use the EVAP pressure/purge diagnostic station to pressurize the EVAP system. Move all EVAP components while testing with the Ultrasonic Leak Detector.
Test Description
The numbers below refer to the step numbers on the diagnostic table.
-
This step verifies that a failure condition is active.
-
This step verifies that repairs are complete and that no other condition is present.
Step | Action | Values | Yes | No | ||||||||||||||||||||
|---|---|---|---|---|---|---|---|---|---|---|---|---|---|---|---|---|---|---|---|---|---|---|---|---|
Schematic Reference:
| ||||||||||||||||||||||||
1 | Did you perform the Diagnostic System Check-Engine Controls? | -- | Go to Step 2 | |||||||||||||||||||||
2 | Does the scan tool indicate DTC P0443 or DTC P0449 are also set? | -- | Go to Step 3 | |||||||||||||||||||||
3 |
Did you find and correct the condition? | -- | Go to Step 6 | Go to Step 4 | ||||||||||||||||||||
Does the scan tool indicate that the service bay test passed? | -- | Go to Diagnostic Aids | Go to Step 5 | |||||||||||||||||||||
5 |
Important: Always zero the EVAP Pressure and vacuum (in. H2O) gauges on the EVAP Pressure Diagnostic Station before proceeding with diagnosis.
Important: It may be necessary to partially lower the fuel tank to inspect components located in the upper portion of the tank.
Did you find and correct the condition? | 15 in. H2O | Go to Step 6 | Go To Diagnostic Aids | ||||||||||||||||||||
Perform the Service Bay Test. Refer to Service Bay Test . Does the scan tool indicate that the service bay test passed? | -- | Go to Step 7 | Go to Step 2 | |||||||||||||||||||||
7 | With a scan tool, observe the stored information, Capture Info. Does the scan tool display any DTCs that you have not diagnosed? | -- | System OK | |||||||||||||||||||||

