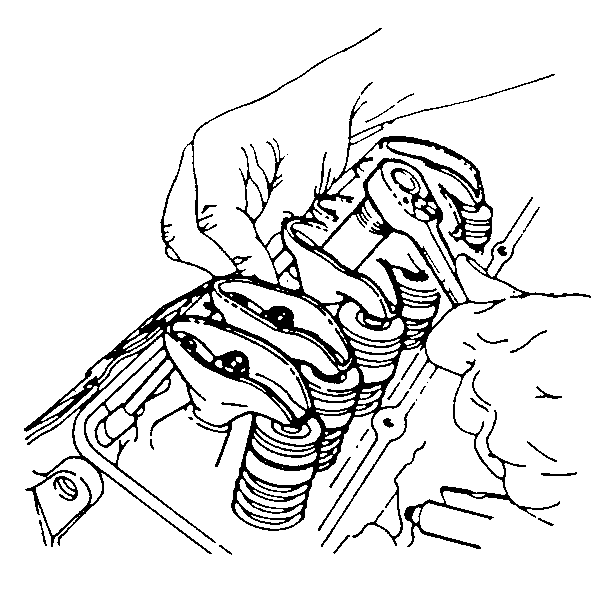
- Turn the valve rocker
arm nuts clockwise until all of the valve lash is removed.
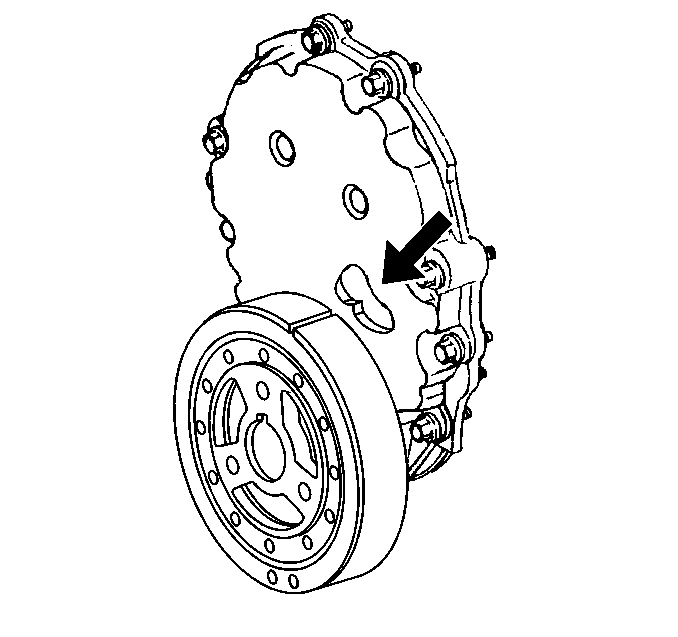
- Turn the crankshaft clockwise until the alignment mark on the
crankshaft balancer is aligned with the notch in the engine front cover tab.
- Look at the number 1 cylinder valves as the crankshaft
balancer alignment mark approaches the notch in the engine front cover tab.
If a valve moves as the alignment mark moves into position, the engine is
in the number 6 firing position. If this happens, turn the crankshaft
clockwise 1 revolution in order to reach the number 1 cylinder
firing position.

- With the engine in the
number 1 firing position, adjust the exhaust valves for cylinders
number 1, 3, 4, and 8 and the intake valves
for cylinders number 1, 2, 5, and 7.
| 4.1. | Turn the valve rocker arm nut counter clockwise until the valve
lash is felt in the valve pushrod. |
| 4.2. | Turn the valve rocker arm nut clockwise until all the valve lash
is removed. |
Zero valve lash can be felt by moving the valve pushrod up and down
between your thumb and forefinger until there is no more up and down movement
of the valve push rod.
| 4.3. | When all the valve lash is removed, then turn the valve rocker
arm nut clockwise 1 additional turn (360 degrees). |

- Turn the crankshaft clockwise
1 revolution until the alignment mark on the crankshaft balancer is
aligned with the notch in the engine front cover tab.

- With the engine in the
number 6 firing position, adjust the exhaust valves for cylinders
number 2, 5, 6, and 7 and the intake valves
for cylinders number 3, 4, 6, and 8.
| 6.1. | Turn the valve rocker arm nut counter clockwise until the valve
lash is felt in the valve pushrod. |
| 6.2. | Turn the valve rocker arm nut clockwise until all the valve lash
is removed. |
Zero valve lash can be felt by moving the valve pushrod up and down
between your thumb and forefinger until there is no more up and down movement
of the valve push rod.
| 6.3. | When all the valve lash is removed, then turn the valve rocker
arm nut clockwise 1 additional turn (360 degrees). |

- Turn the valve rocker arm nuts clockwise
until all of the valve lash is removed.
- Turn the crankshaft clockwise until the alignment mark on the
crankshaft balancer is aligned with the notch in the engine front cover tab.
- Look at the number 1 cylinder valves as the crankshaft
balancer alignment mark approaches the notch in the engine front cover tab.
If a valve moves as the alignment mark moves into position, the engine is
in the number 6 firing position. If this happens, turn the crankshaft
clockwise one revolution in order to reach the number 1 cylinder firing
position.

- With the engine in the number 1
firing position, adjust the exhaust valves for cylinders number 1, 3, 4, and
8 and the intake valves for cylinders number 1, 2, 5, and 7.
| 4.1. | Turn the valve rocker arm nut counter clockwise until the valve
lash is felt in the valve pushrod. |
| 4.2. | Turn the valve rocker arm nut clockwise until all the valve lash
is removed (zero valve lash). |
Zero valve lash can be felt by moving the valve pushrod up and down
between your thumb and forefinger until there is no more up and down movement
of the valve push rod.
| 4.3. | When all the valve lash is removed, then turn the valve rocker
arm nut clockwise 1 additional turn (360 degrees). |

- Turn the crankshaft clockwise 1 revolution
until the alignment mark on the crankshaft balancer is aligned with the notch
in the engine front cover tab.

- With the engine in the number 6 firing
position, adjust the exhaust valves for cylinders number 2, 5, 6, and 7 and
the intake valves for cylinders number 3, 4, 6, and 8.
| 6.1. | Turn the valve rocker arm nut counter clockwise until the valve
lash is felt in the valve pushrod. |
| 6.2. | Turn the valve rocker arm nut clockwise until all the valve lash
is removed (zero valve lash). |
Zero valve lash can be felt by moving the valve pushrod up and down
between your thumb and forefinger until there is no more up and down movement
of the valve push rod.
| 6.3. | When all the valve lash is removed, then turn the valve rocker
arm nut clockwise 1 additional turn (360 degrees). |


