Disassembly Procedure
- Turn OFF the ignition.
- Remove the engine cover. Refer to Engine Cover Replacement in Interior Trim.
- Remove the distributor. Refer to Distributor Replacement .
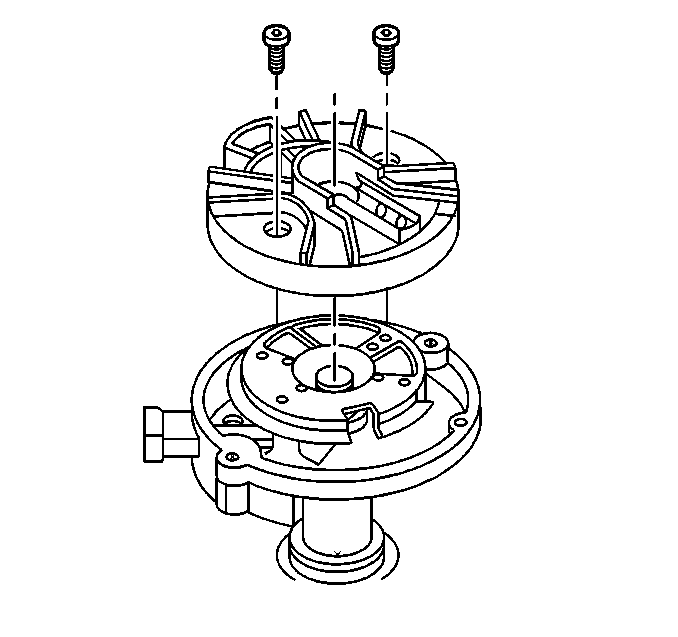
- Remove the screws from the rotor.
- Remove the rotor.
- Note the locating holes that the rotor was removed from:
- Line up the square-cut hole in the vane wheel with the CMP sensor.
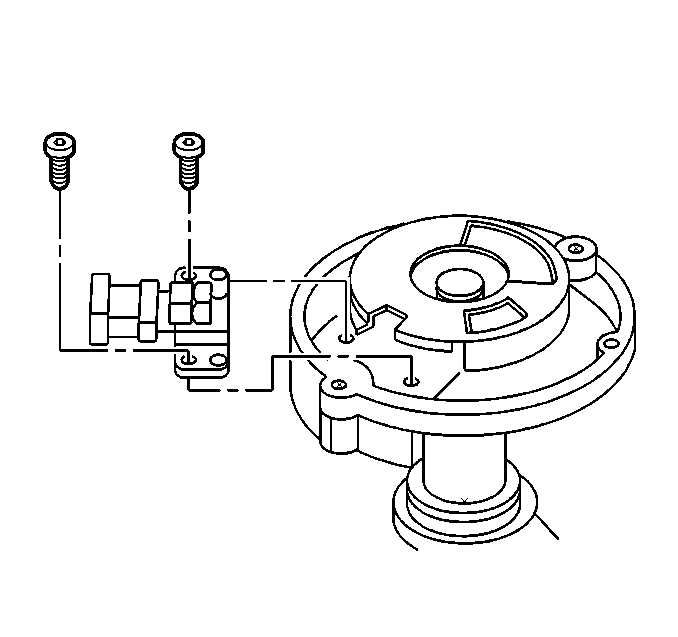
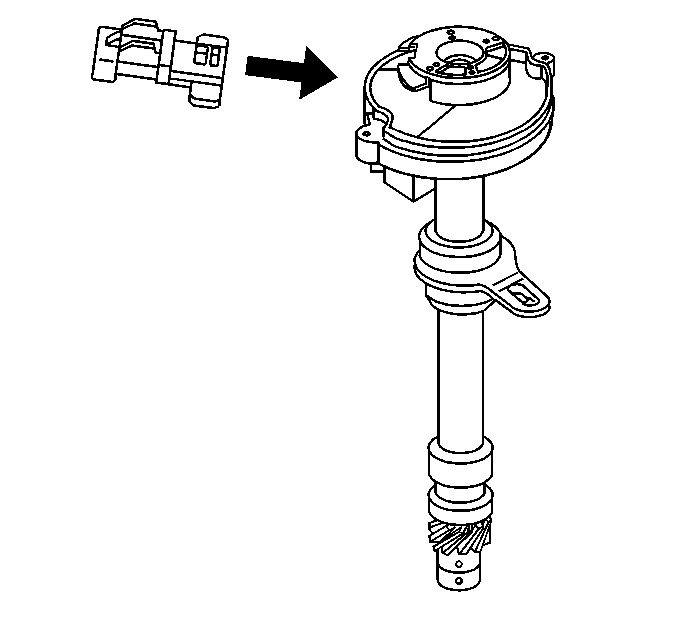
- Remove and discard the screws retaining the camshaft position (CMP) sensor.
- Remove the CMP sensor.
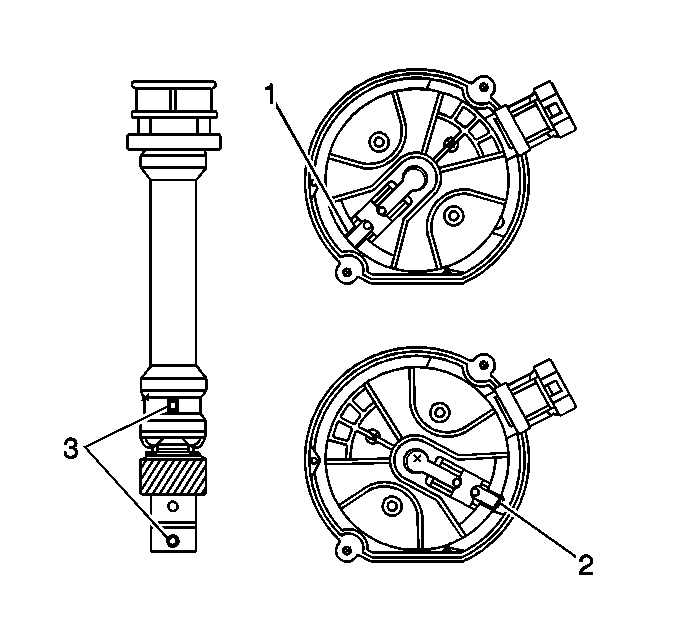
- Note the dimple (1) located below the roll pin hole on one side of the gear. The dimple will be used to properly orient the gear onto the shaft during reassembly.
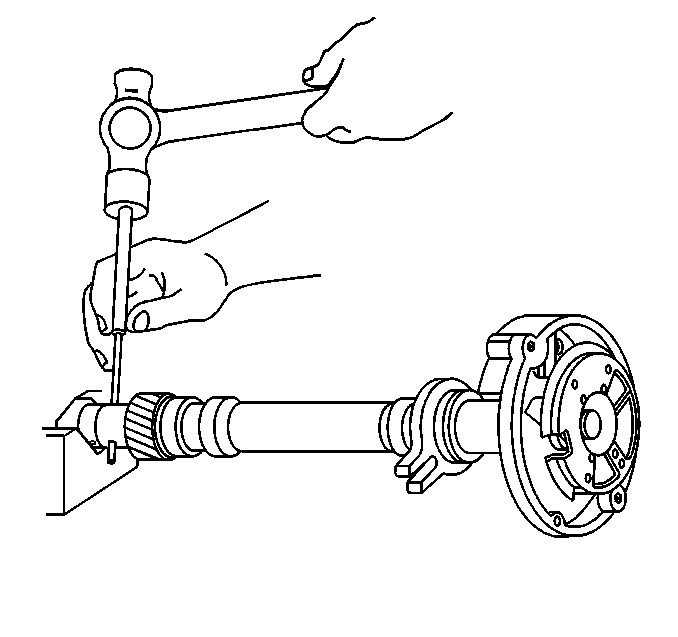
- Support the distributor drive gear in a V-block or a similar fixture.
- Drive out the roll pin with a suitable punch.
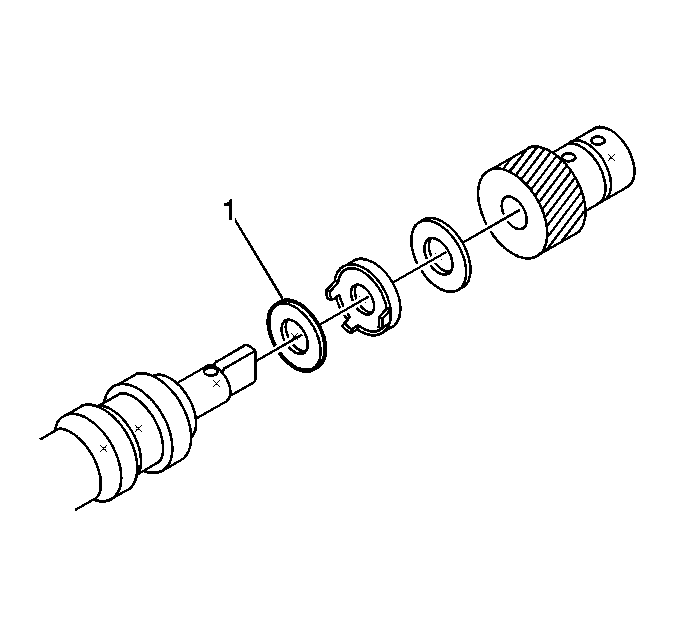
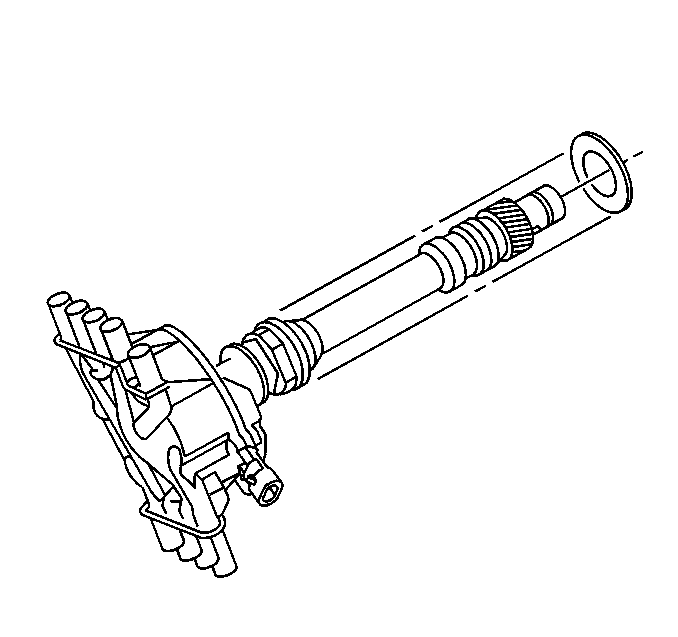
- Remove the driven gear from the distributor shaft.
- Remove the round washer.
- Remove the tang washer.
- Remove the shim washer (1).
- Remove the old oil seal gasket.
Notice: The ignition system distributor driven gear and rotor may be installed
in multiple positions. In order to avoid mistakes, mark the distributor on
the following components in order to ensure the same mounting position upon
reassembly:
• The distributor driven gear • The distributor shaft • The rotor holes
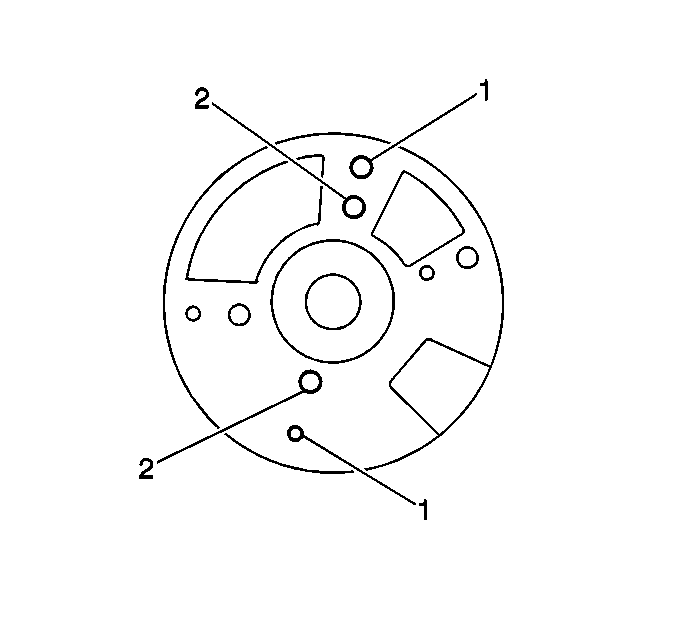
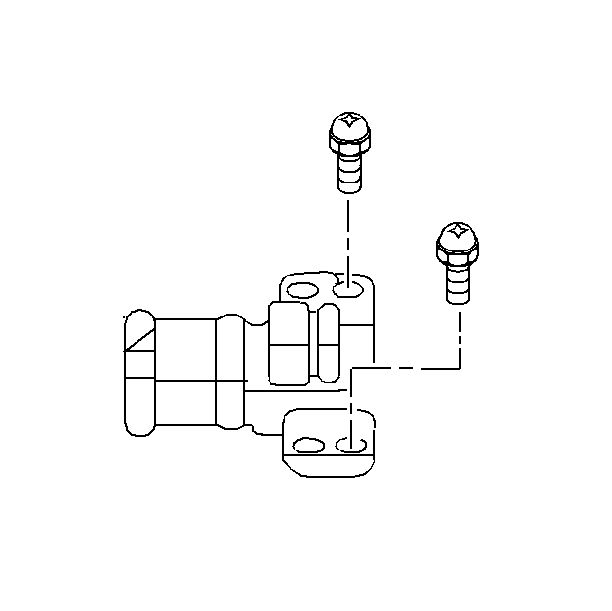
| • | The rotor screw holes (1) |
| • | The rotor locator pin holes (2) |


Caution: Wear safety glasses in order to avoid eye damage.
Assembly Procedure
- Line up the square-cut hole in the vane wheel for the camshaft position (CMP) sensor.
- Insert the sensor into the housing.
- Install new screws for the camshaft position (CMP) sensor.
- Identify the correct rotor mounting position:
- Install the distributor rotor according to the index marks.
- Install the screws that retain the rotor .
- Install the shim washer (1) on the bottom of the distributor shaft.
- Install the tang washer.
- Install the round washer.
- Install the driven gear according to the index marks.
- Install the gear and align the white paint mark on the bottom stem of the distributor and the pre-drilled indent hole in the bottom of the gear (3).
- Determine if the driven gear is installed incorrectly. The dimple will be approximately 180 degrees opposite the rotor segment when installed in the distributor.
- Support the distributor drive gear in a V-block or a similar fixture.
- Install the roll pin with a suitable punch and hammer in order to hold the driven gear in the correct position.
- Install the distributor cap.
- Install new distributor cap screws.
- Install the new oil seal gasket under the mounting flange of the distributor base.
- Install the distributor. Refer to Distributor Replacement .
- Install the electrical connector to the distributor.
- Install the spark plug wires to the distributor cap.
- Install the ignition coil wire.
- Install the engine cover. Refer to Engine Cover Replacement in Interior Trim.
Important: Installing the driven gear 180 degrees out of alignment, or locating the rotor in the wrong holes, will cause a no-start condition. Premature engine wear or damage may result.
Notice: Use the correct fastener in the correct location. Replacement fasteners must be the correct part number for that application. Fasteners requiring replacement or fasteners requiring the use of thread locking compound or sealant are identified in the service procedure. Do not use paints, lubricants, or corrosion inhibitors on fasteners or fastener joint surfaces unless specified. These coatings affect fastener torque and joint clamping force and may damage the fastener. Use the correct tightening sequence and specifications when installing fasteners in order to avoid damage to parts and systems.
Tighten
Tighten the screws to 2.2 N·m (20 lb in).
| • | At the rotor screw holes (1) |
| • | At the rotor locator pin holes (2) |
Tighten
Tighten the screws to 1.9 N·m (17 lb in).
Caution: Wear safety glasses in order to avoid eye damage.
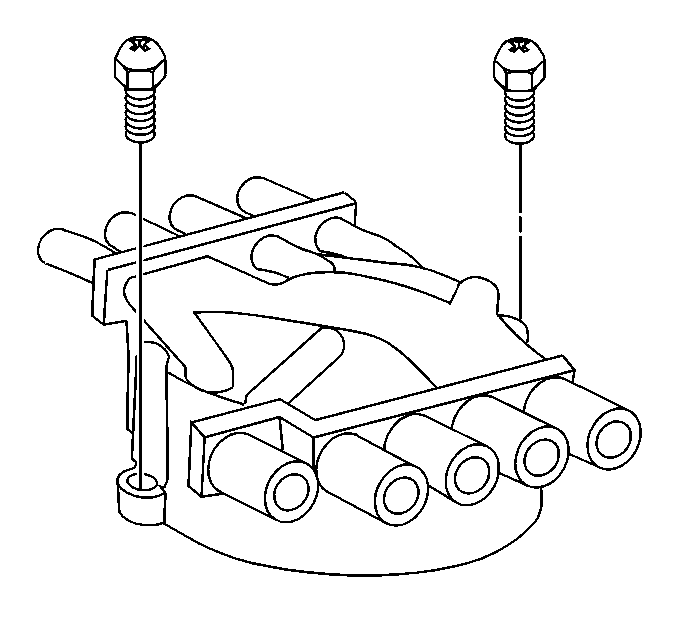
Tighten
Tighten the screws to 2.4 N·m (21 lb in).
Important: The ignition coil wire must not touch anything. Rubbing will ground or short the wire after a short time.
