Tools Required
J 21882
Oil Suction Pipe Installer
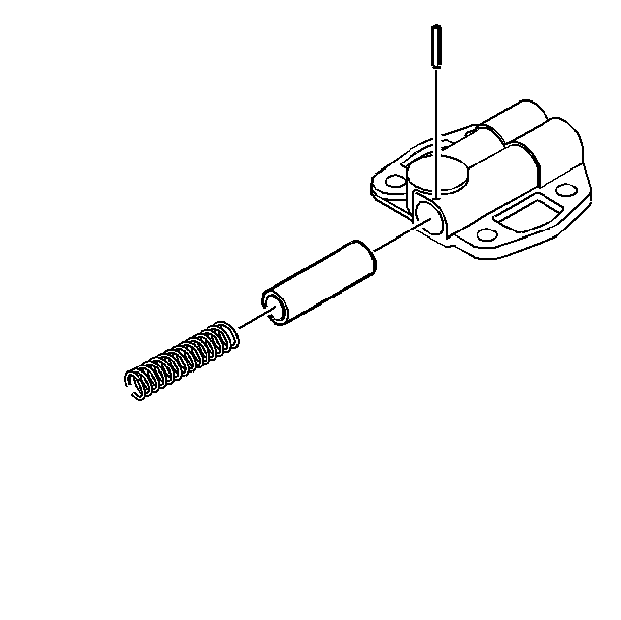
- Apply clean engine oil GM P/N 12345610
(Canadian P/N 9931930) or equivalent, to the oil pump pressure relief valve, oil pump pressure relief valve spring, and oil pump body.
Caution: Wear safety glasses in order to avoid eye damage.
Important: Replace the oil pump pressure relief valve spring when you reuse the oil pump.
- Install the following items:
| 2.1. | The oil pump pressure relief valve |
| 2.2. | The oil pump pressure relief valve spring |
| 2.3. | The oil pump pressure relief valve spring straight pin |
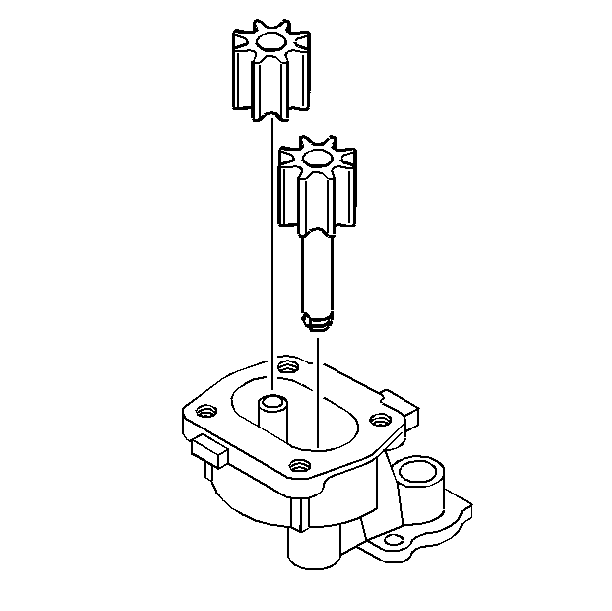
- Apply clean engine oil GM P/N 12345610 (Canadian P/N 993193)
or equivalent, to the oil pump drive gear, the oil pump driven gear, and the oil pump body internal surfaces.
- Install the oil pump drive gear and the oil pump driven gear into the oil pump body.
| 4.1. | Align the matchmarks on the oil pump drive and driven gears. |
| 4.2. | Install the smooth side of the oil pump drive and driven gears toward the oil pump cover. |
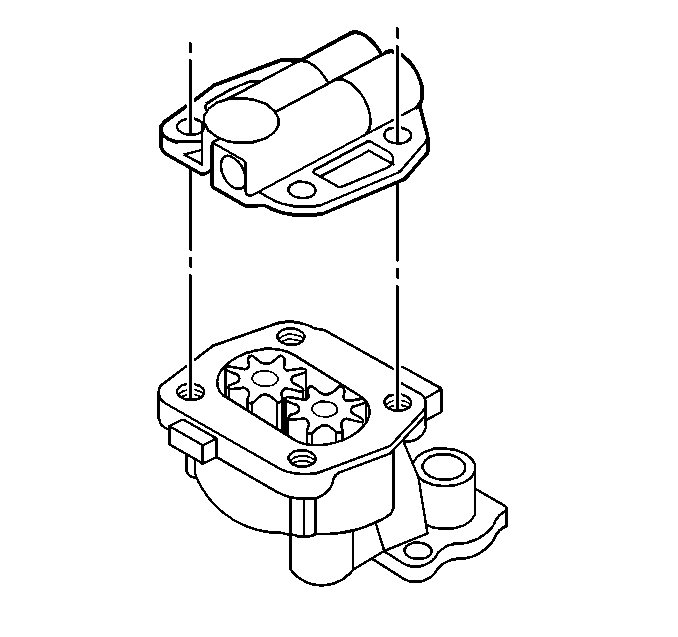
- Install the oil pump cover.
Notice: Use the correct fastener in the correct location. Replacement fasteners
must be the correct part number for that application. Fasteners requiring
replacement or fasteners requiring the use of thread locking compound or sealant
are identified in the service procedure. Do not use paints, lubricants, or
corrosion inhibitors on fasteners or fastener joint surfaces unless specified.
These coatings affect fastener torque and joint clamping force and may damage
the fastener. Use the correct tightening sequence and specifications when
installing fasteners in order to avoid damage to parts and systems.
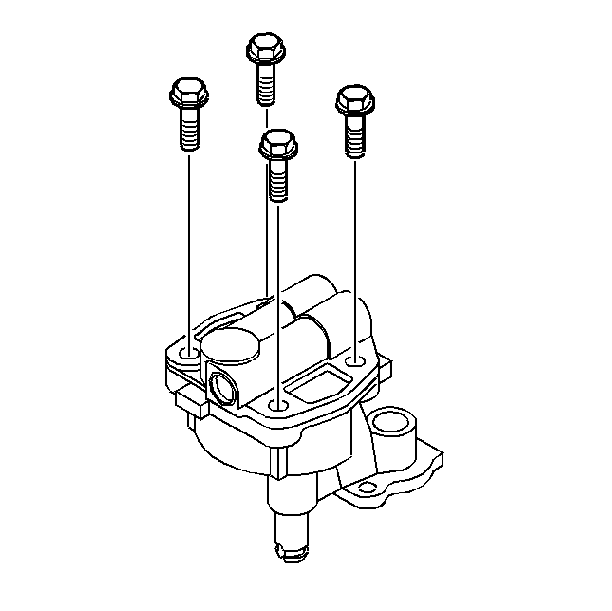
- Install the oil pump cover bolts.
Tighten
Tighten the bolts to 12 N·m (106 lb in).
- Inspect the oil pump for smoothness of operation by turning the oil pump driveshaft by hand.
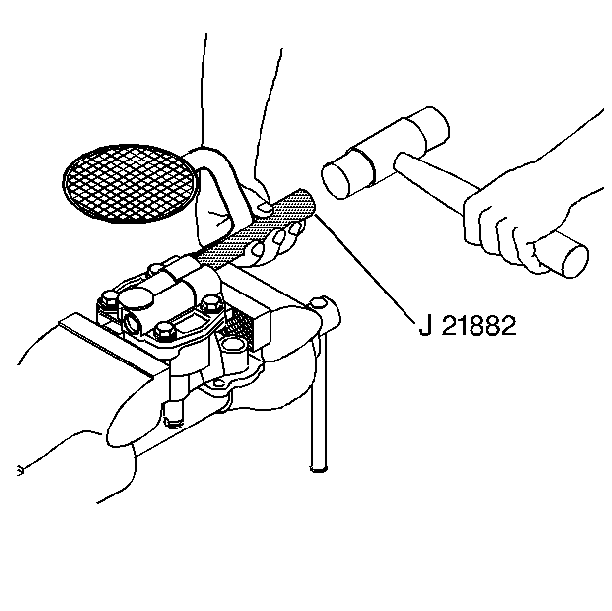
- Install the oil pump screen.
| 8.1. | If removed, replace the oil pump screen. The oil pump screen must have a good press fit into the oil pump body. |
| 8.2. | Mount the oil pump in a soft jawed vise. |
| 8.3. | Apply sealant GM P/N 12346004 (Canadian P/N 10953480) or equivalent, to the end of the oil pump screen pipe. |
| 8.4. | Use the
J 21882
and a soft-faced hammer in order to tap the oil pump screen into the pump body. |
The oil pump screen must align parallel with the bottom of the oil pan when
the oil pan is installed.
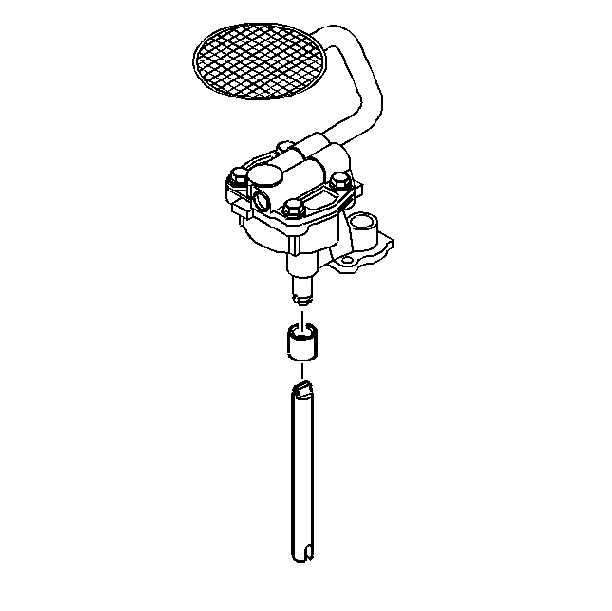
Important: Install a NEW oil pump driveshaft retainer during assembly.
- Install the oil pump driveshaft and the NEW oil pump driveshaft retainer.
Tools Required
J 21882 Oil Suction Pipe Installer

- Apply clean engine oil GM P/N 12345610
or equivalent to the oil pump pressure relief valve, oil pump pressure relief
valve spring, and oil pump body.
Caution: Wear safety glasses in order to avoid eye damage.
Important: Replace the oil pump pressure relief valve spring when you reuse the
oil pump.
- Install the following items:
| 2.1. | The oil pump pressure relief valve |
| 2.2. | The oil pump pressure relief valve spring |
| 2.3. | The oil pump pressure relief valve spring straight pin |

- Apply clean engine oil GM P/N 12345610
or equivalent to the oil pump drive gear, the oil pump driven gear, and the
oil pump body internal surfaces.
- Install the oil pump drive gear and the oil pump driven gear into
the oil pump body.
| 4.1. | Align the matchmarks on the oil pump drive and driven gears. |
| 4.2. | Install the smooth side of the oil pump drive and driven gears
toward the oil pump cover. |

- Install the oil pump cover.

Notice: Use the correct fastener in the correct location. Replacement fasteners
must be the correct part number for that application. Fasteners requiring
replacement or fasteners requiring the use of thread locking compound or sealant
are identified in the service procedure. Do not use paints, lubricants, or
corrosion inhibitors on fasteners or fastener joint surfaces unless specified.
These coatings affect fastener torque and joint clamping force and may damage
the fastener. Use the correct tightening sequence and specifications when
installing fasteners in order to avoid damage to parts and systems.
- Install the oil pump cover bolts.
Tighten
Tighten the bolts to 12 N·m (106 lb in).
- Inspect the oil pump for smoothness of operation by turning the
oil pump driveshaft by hand.

- Install the oil pump screen.
| 8.1. | If removed, replace the oil pump screen. The oil pump screen must
have a good press fit into the oil pump body. |
| 8.2. | Mount the oil pump in a soft jawed vise. |
| 8.3. | Apply sealant GM P/N 12346004 or equivalent to the
end of the oil pump screen pipe. |
| 8.4. | Use the
J 21882 and a soft-faced
hammer in order to tap the oil pump screen into the pump body. |
The oil pump screen must align parallel with the bottom of the oil pan
when the oil pan is installed.

Important: Install a NEW oil pump driveshaft retainer during assembly.
- Install the oil pump driveshaft and the NEW oil pump driveshaft retainer.


