For 1990-2009 cars only
Removal Procedure
- Remove the oil level indicator.
- Remove the PCV tube from the air cleaner outlet duct.
- Remove the air cleaner outlet duct from the throttle body. Refer to Air Cleaner Outlet Duct Replacement in Engine Controls.
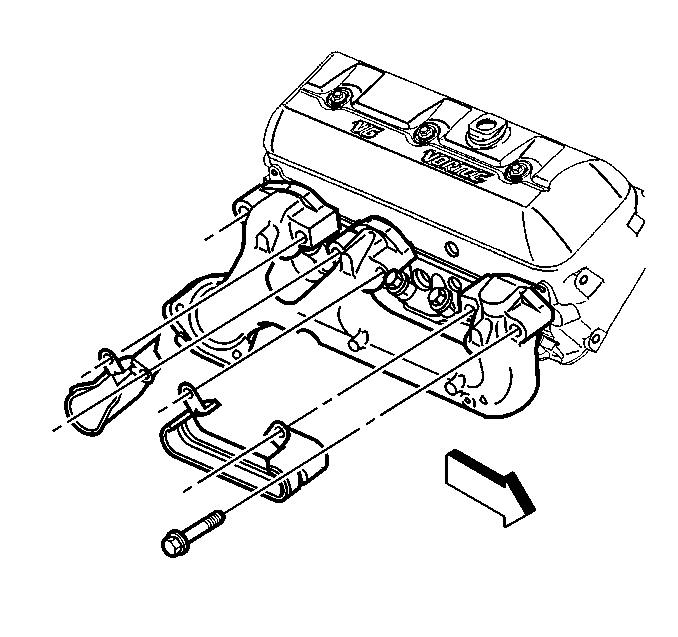
- Remove the right exhaust manifold. Refer to Exhaust Manifold Replacement .
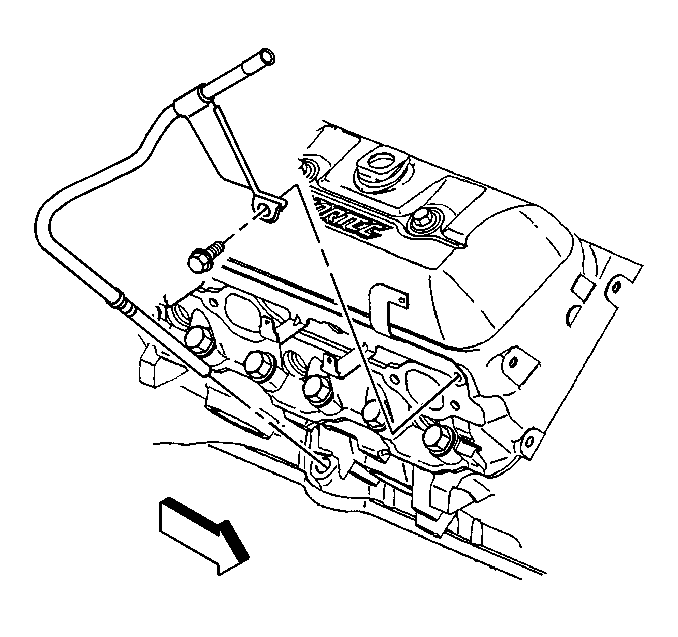
- Remove the upper tube and bolt from the oil level indicator.
- Remove the bolt from the oil level indicator tube.
- Remove the oil level indicator tube from the engine using a twisting motion.
- Clean the old sealer from the oil level indicator tube and the engine block.


Installation Procedure
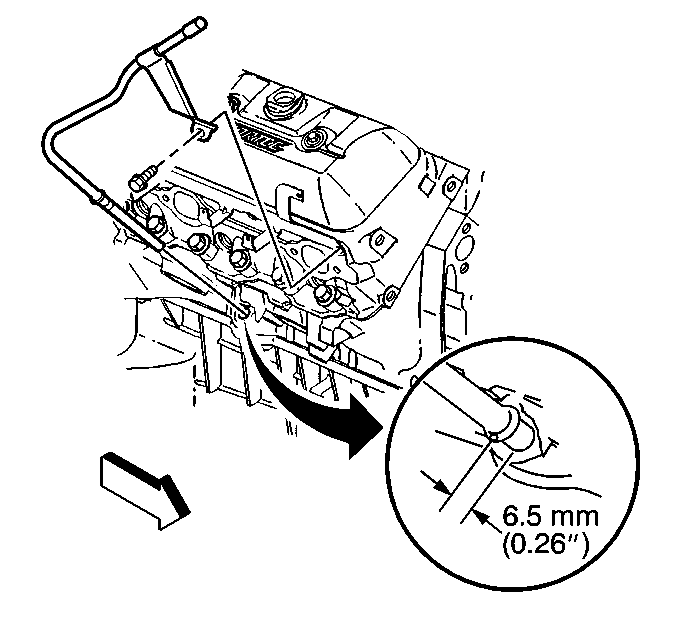
- Apply sealant GM P/N 12346004 or equivalent around the oil level indicator tube 13 mm (0.5 in) below the tube bead.
- Install the oil level indicator tube into the engine block. Rotate the oil level indicator tube into position.
- Install the oil level indicator bolt to the cylinder head.
- Install the upper tube and the bolt to the oil level indicator .
- Install the exhaust manifold. Refer to Exhaust Manifold Replacement .
- Install the air cleaner outlet duct to the throttle body. Refer to Air Cleaner Outlet Duct Replacement in Engine Controls.
- Install the PCV tube to the air cleaner outlet duct.
- Install the oil level indicator.


Notice: Use the correct fastener in the correct location. Replacement fasteners must be the correct part number for that application. Fasteners requiring replacement or fasteners requiring the use of thread locking compound or sealant are identified in the service procedure. Do not use paints, lubricants, or corrosion inhibitors on fasteners or fastener joint surfaces unless specified. These coatings affect fastener torque and joint clamping force and may damage the fastener. Use the correct tightening sequence and specifications when installing fasteners in order to avoid damage to parts and systems.
Tighten
Tighten the bolt to 12 N·m (106 lb in).
Tighten
Tighten the bolt to 25 N·m (18 lb ft).
