Removal Procedure
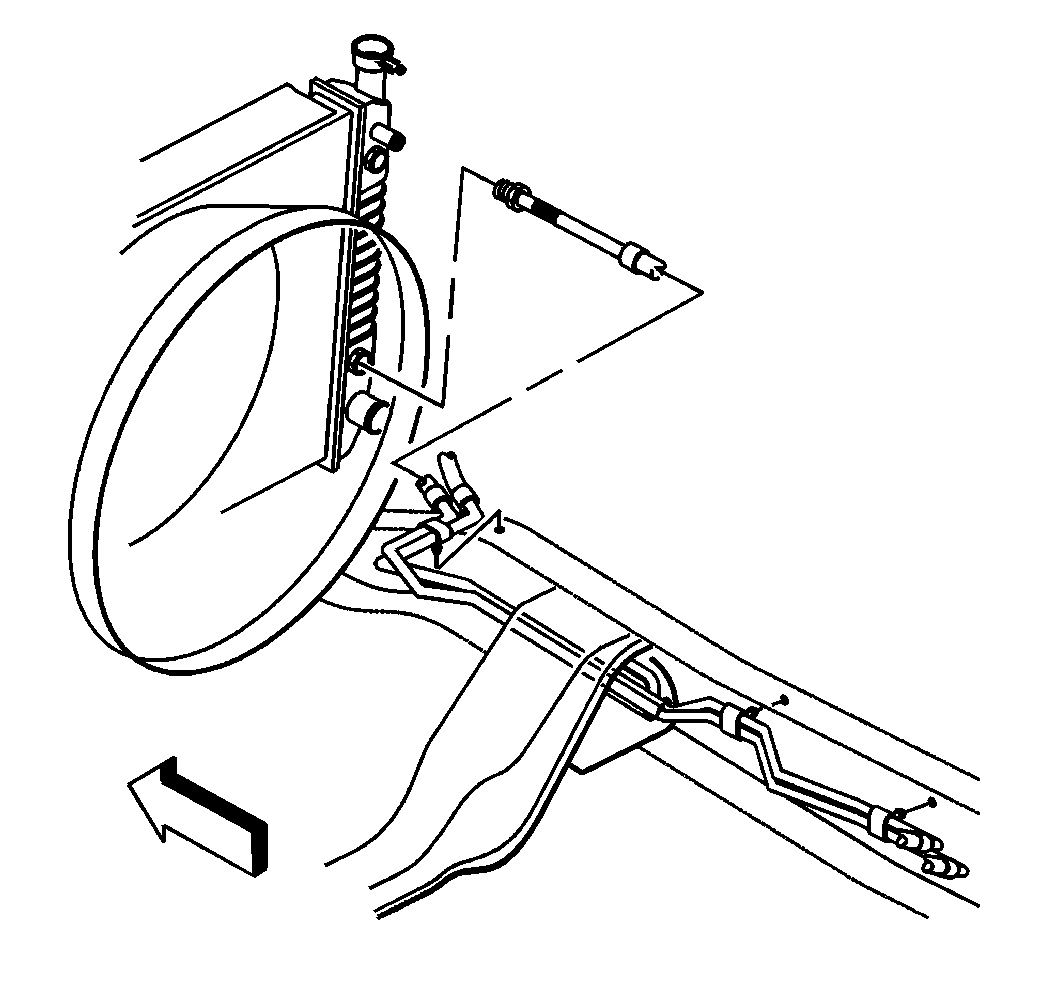
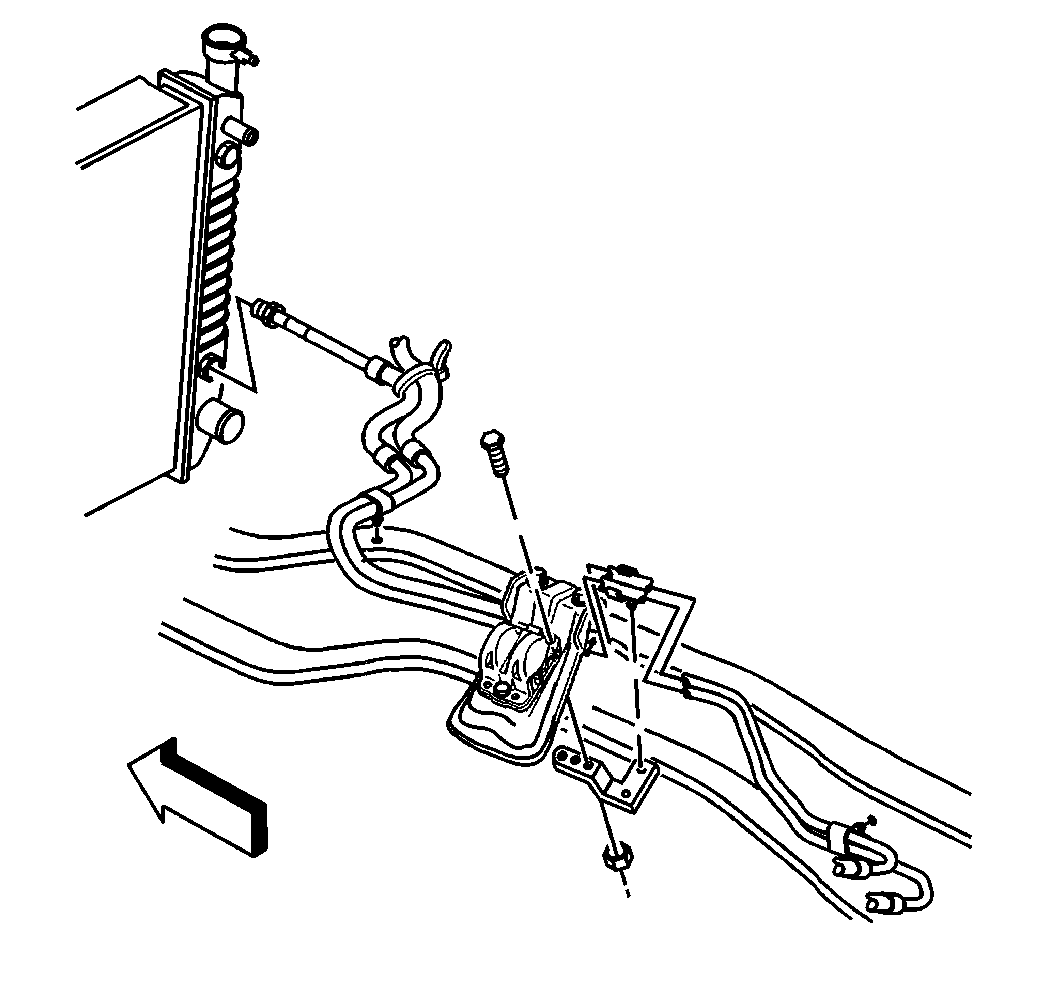
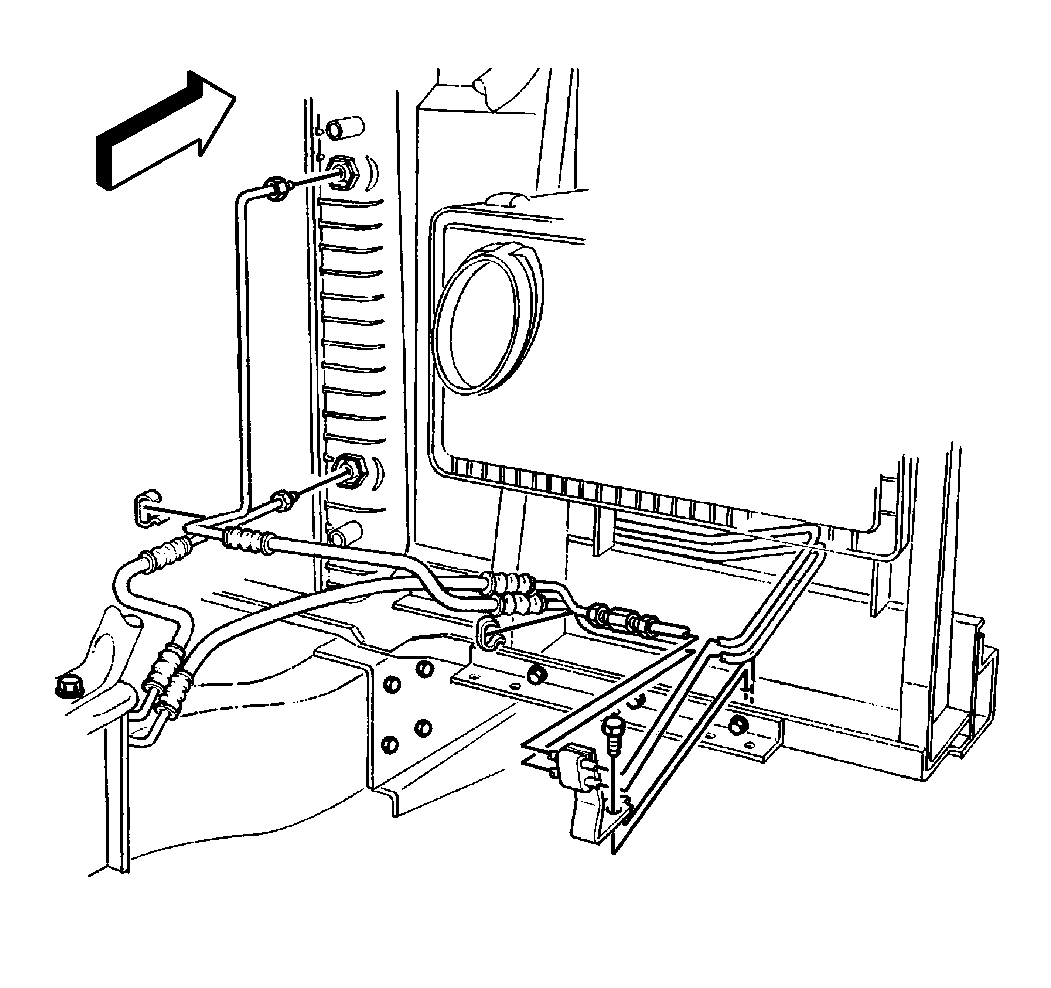
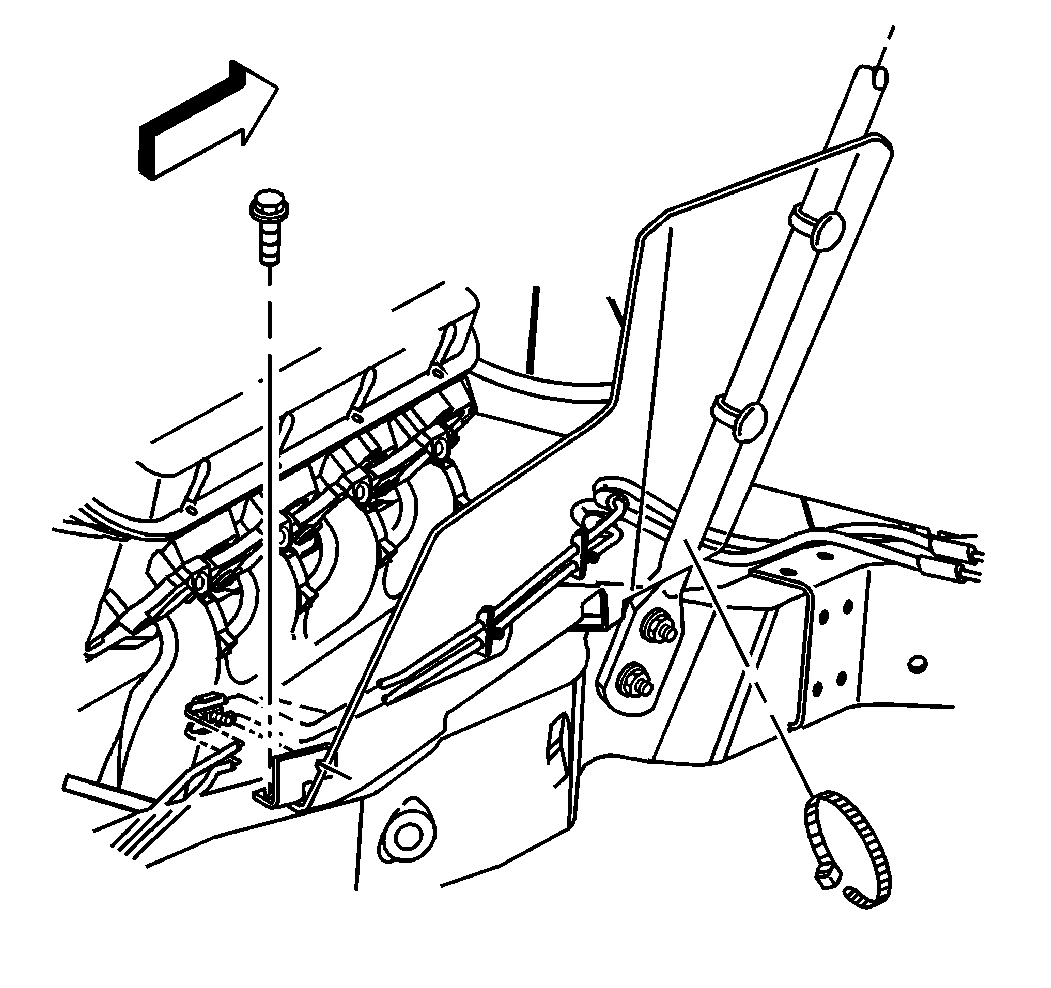
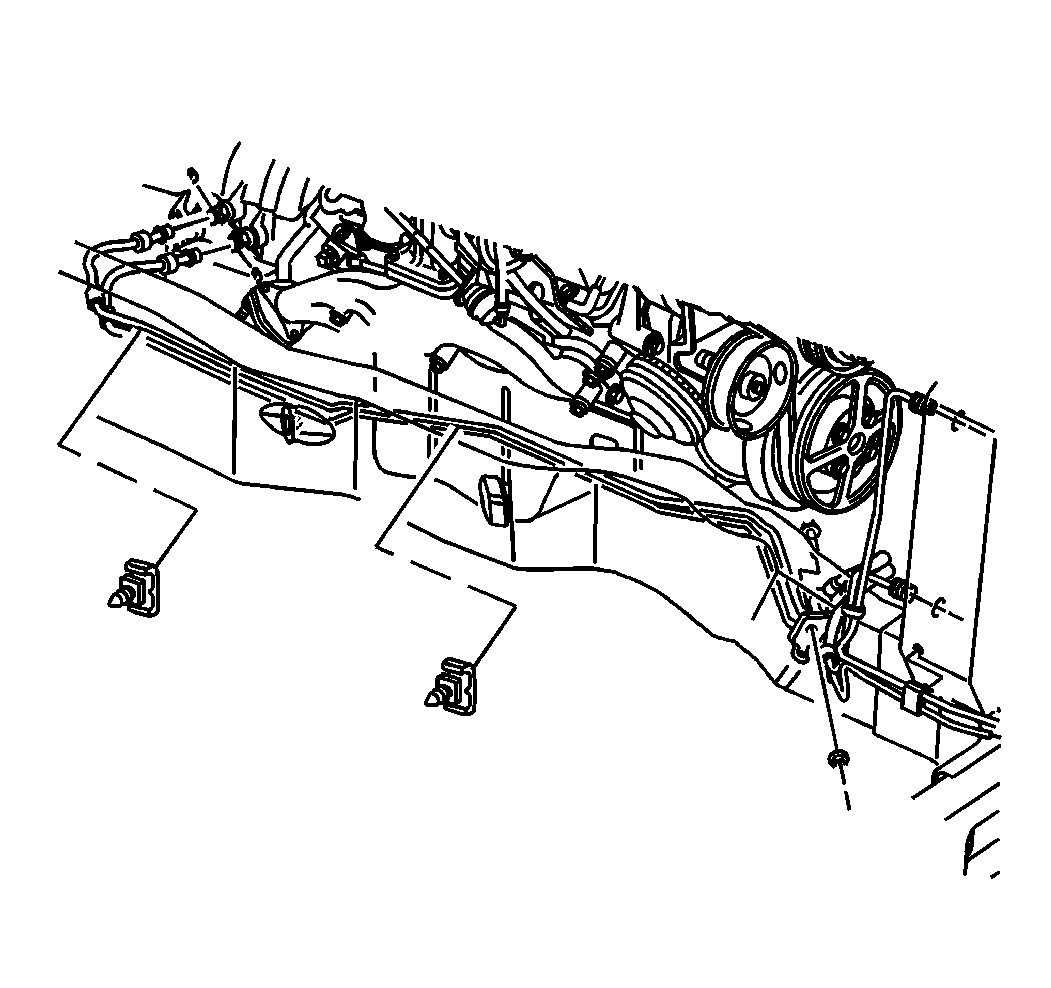
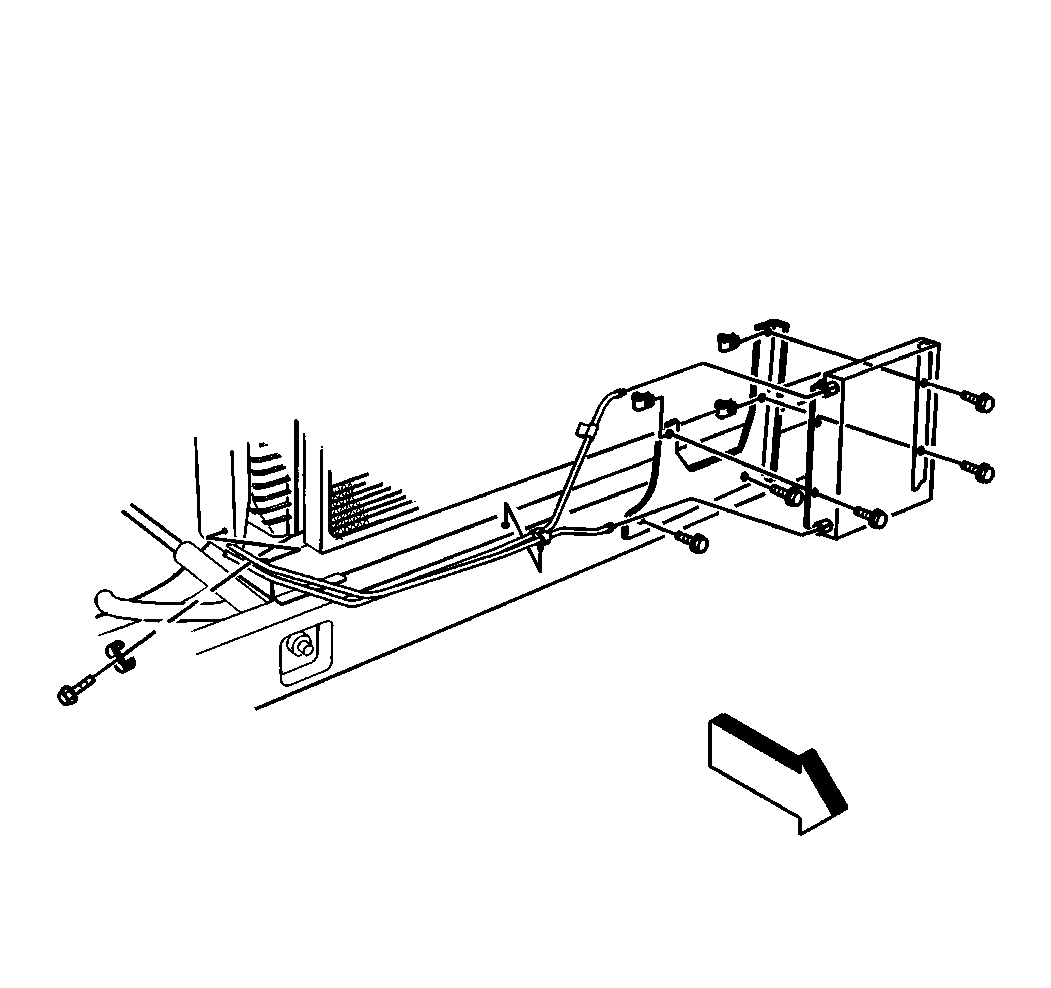
- Remove the bolts and nuts that secure the clips, brackets and cooler lines to the frame rail (P42 with I-Beam Suspension).
- Remove the bolts and nuts that secure the clips, brackets and cooler lines to the frame rail (P42 without I-Beam Suspension).
- Remove the bolts and nuts that secure the clips, brackets and cooler lines to the frame rail (P42 with Auxiliary Cooler).
- Remove the bolts and nuts that secure the clips, brackets and cooler lines to the frame rail (P32 with Auxiliary Cooler).
- Remove the bolts and nuts that secure the clips, brackets and cooler lines to the frame rail.
- Remove the bolts and nuts that secure the clips, brackets and cooler lines to the frame rail (6.5L Turbo Diesel with Auxiliary Cooler).
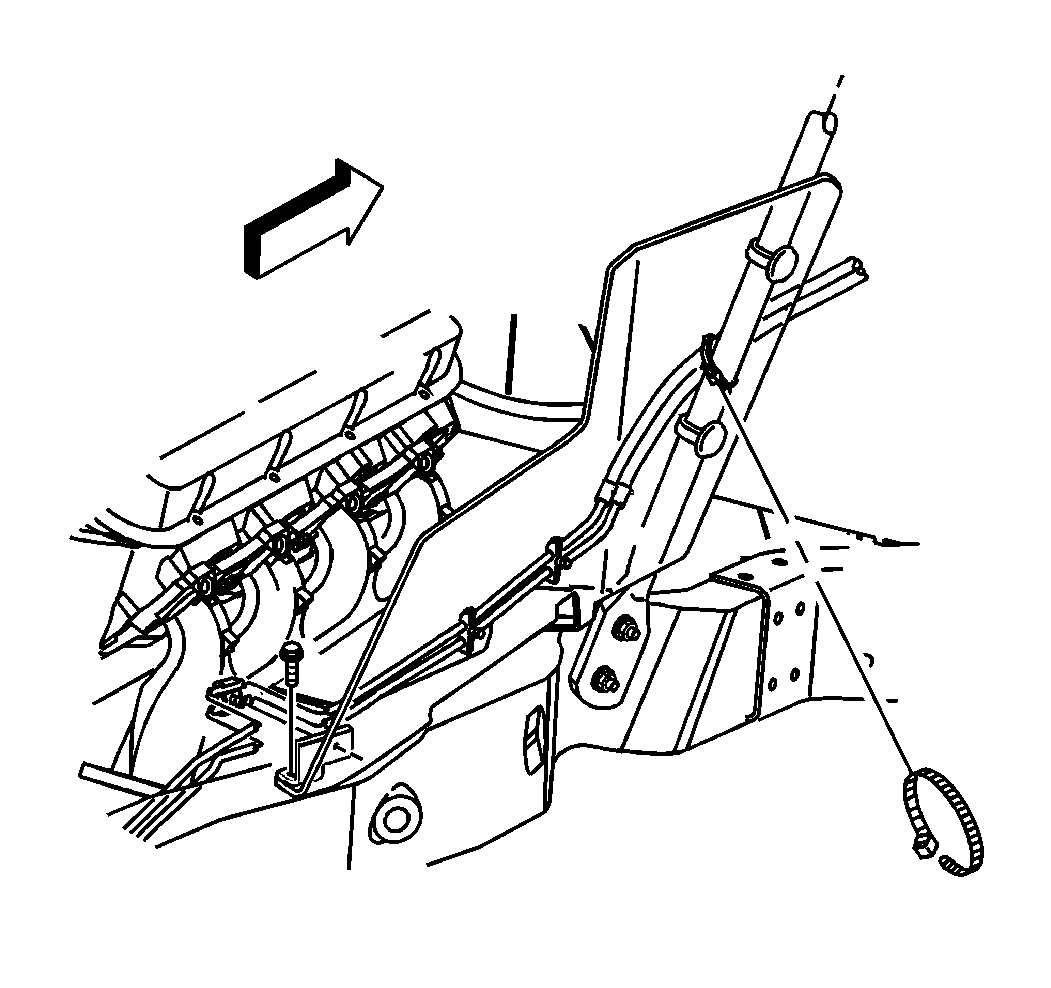
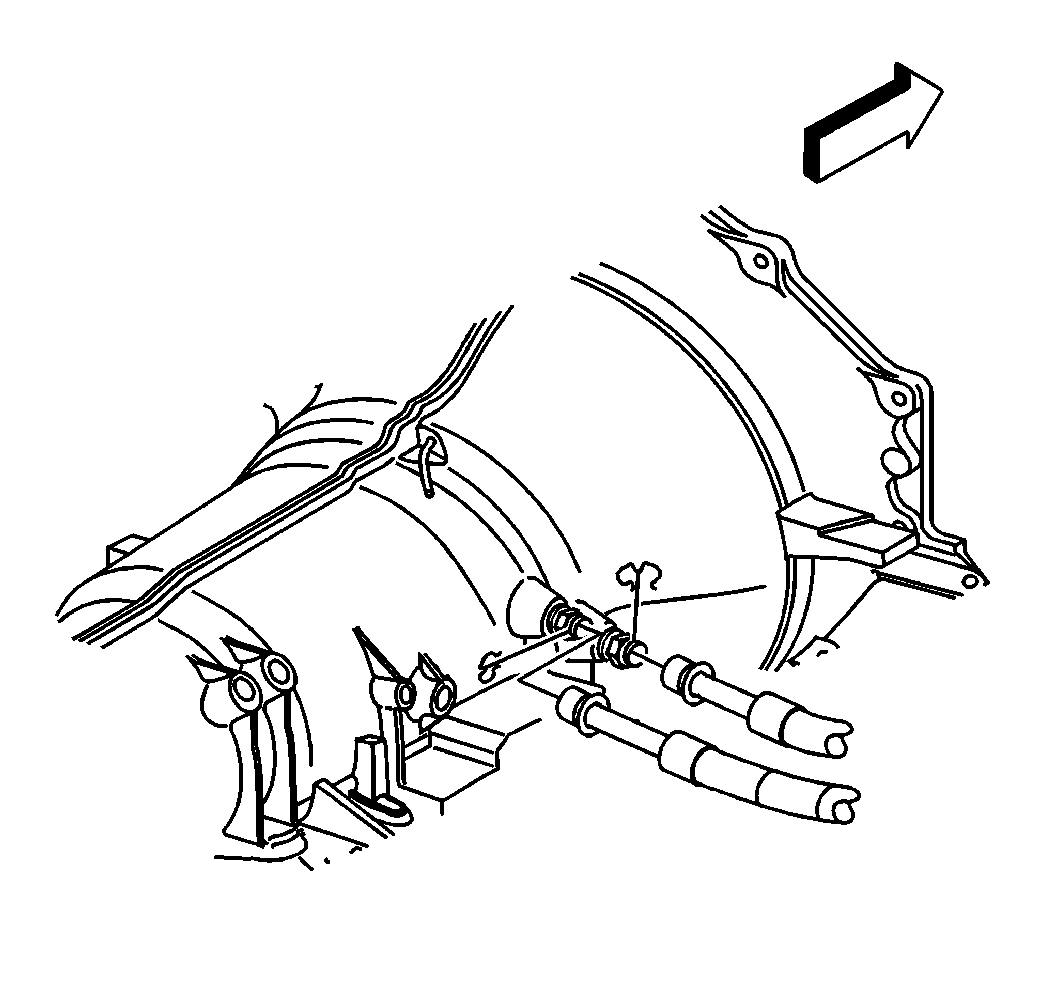
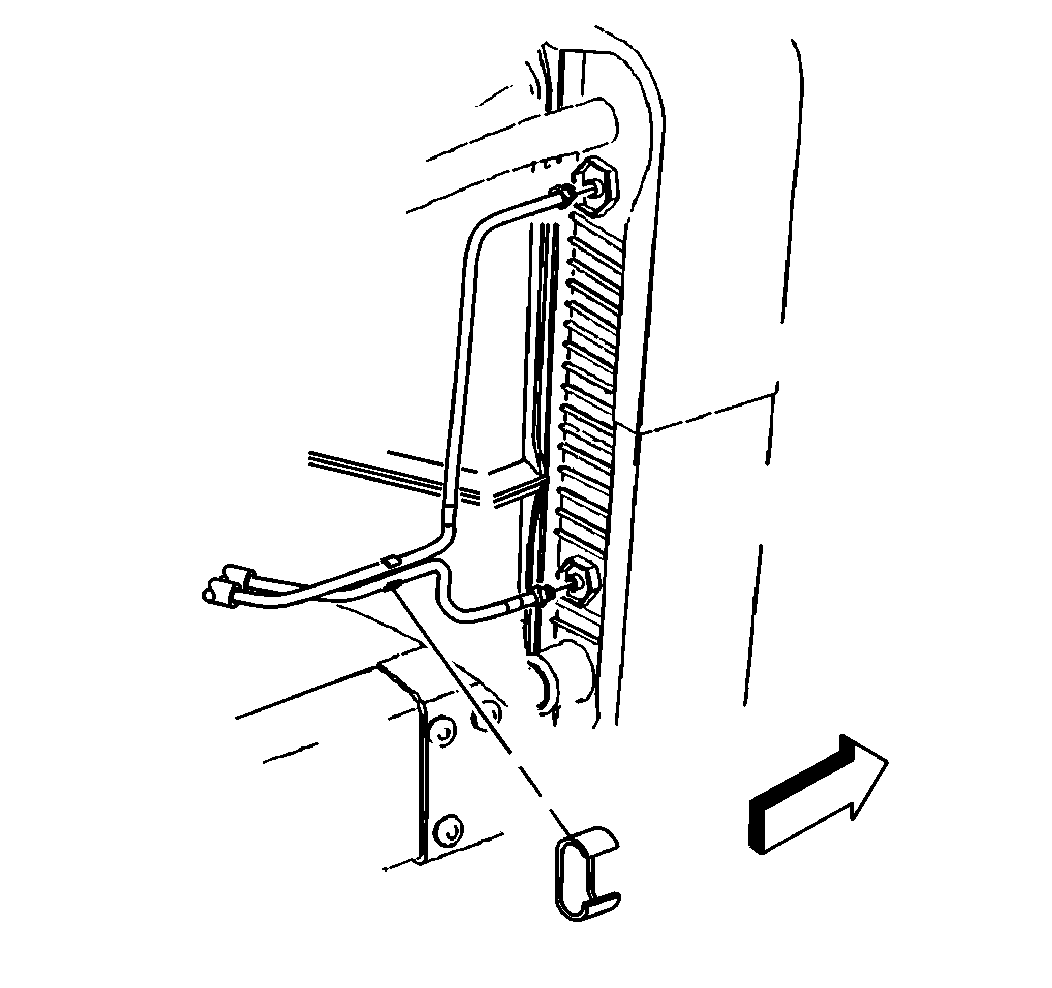
- Remove the two retaining clips that secure the two transmission cooler lines to the transmission.
- Discard the two retaining clips.
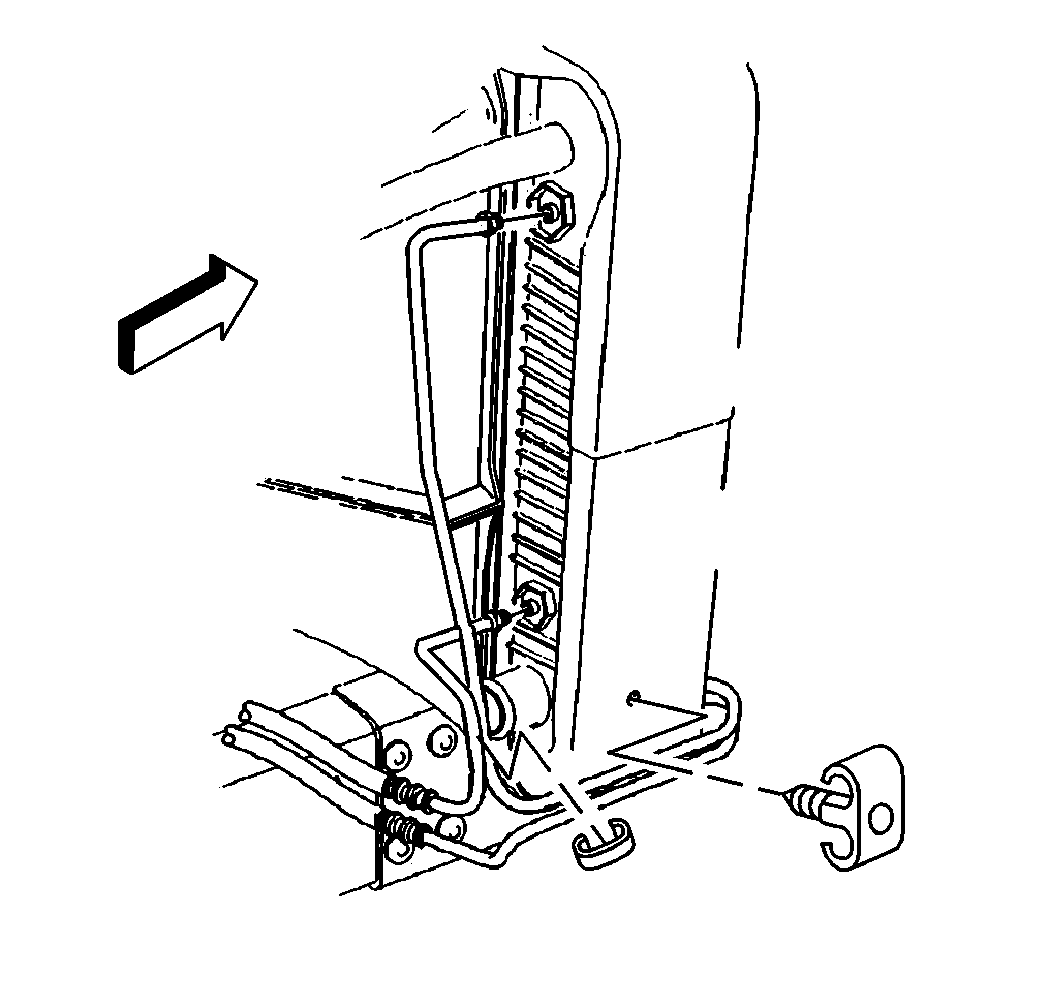
- Remove the two nuts that secure the two cooler lines to the radiator (P32 with Auxiliary Cooler).
- Remove the two nuts that secure the two cooler lines to the radiator (P32 without Auxiliary Cooler).
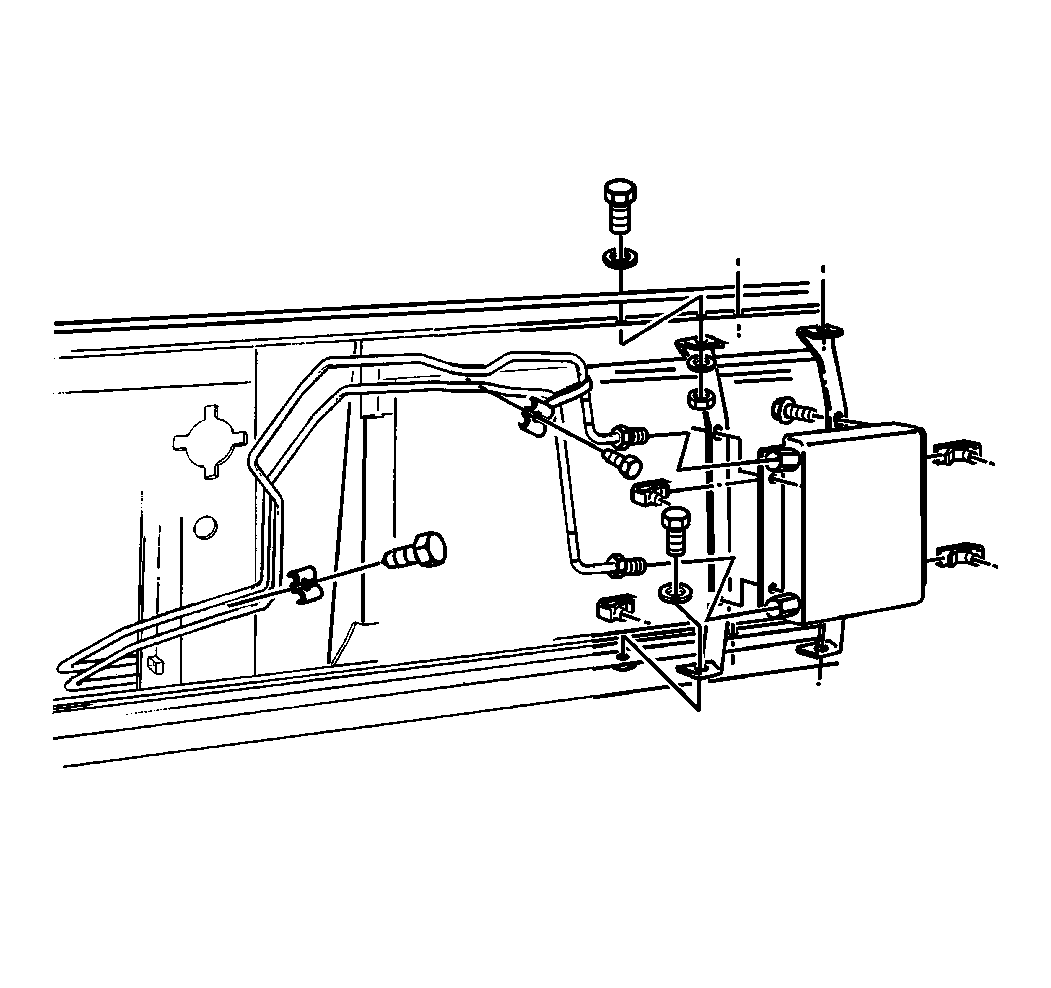
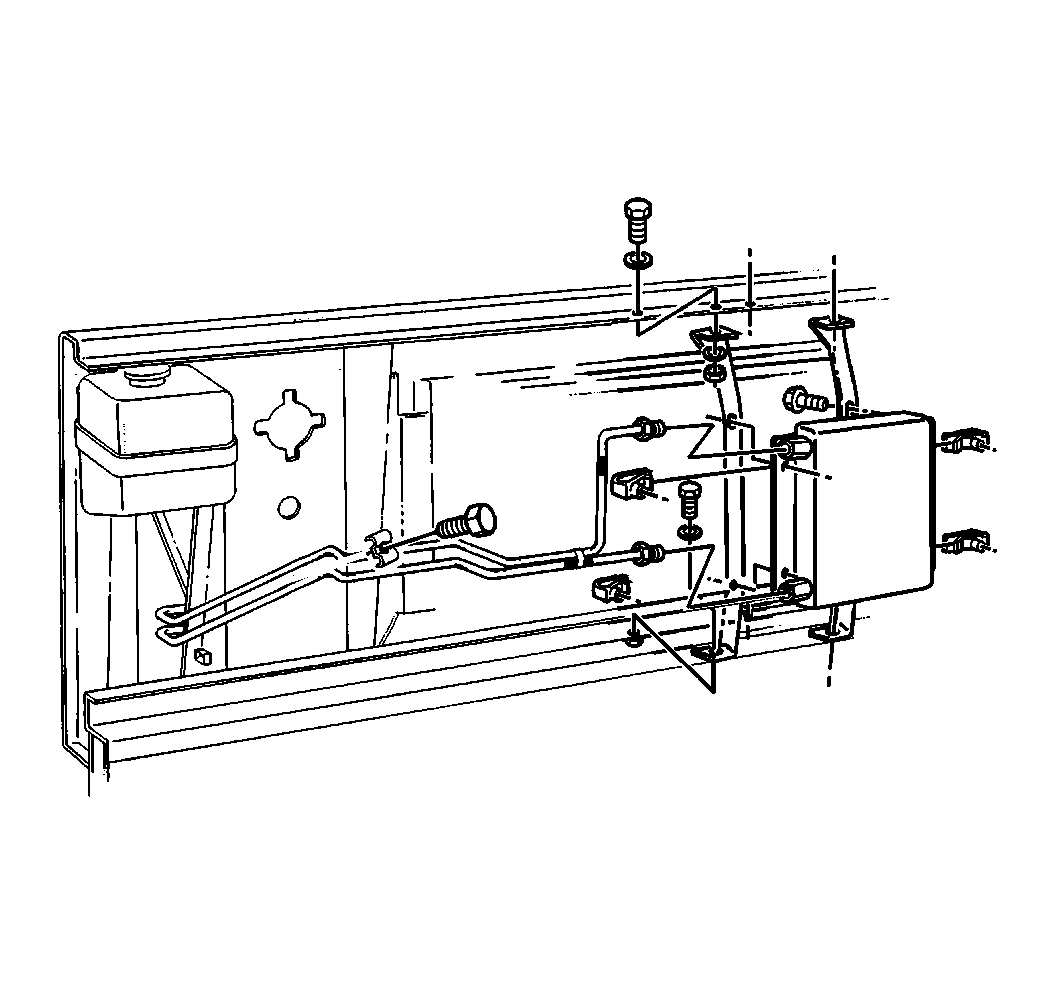
- Remove the two nuts that secure the two cooler lines to the auxiliary oil cooler, if equipped 6.5L Turbo Diesel).
- Remove the two nuts that secure the two cooler lines to the auxiliary oil cooler, if equipped (6.5L Diesel with HVAC System).
- Remove the two nuts that secure the two cooler lines to the auxiliary oil cooler, if equipped (6.5L Diesel without HVAC System).
- Remove the nuts and clips that secure the auxiliary oil cooler to the radiator support, if equipped.
Installation Procedure
- Install the bolts, nuts, and clips that secure the auxiliary oil cooler to the radiator support, if equipped (6.5L Turbo Diesel).
- Install the bolts, nuts, and clips that secure the auxiliary oil cooler to the radiator support, if equipped (6.5L Diesel with HVAC System).
- Install the bolts, nuts, and clips that secure the auxiliary oil cooler to the radiator support, if equipped (6.5L Diesel without HVAC System).
- Install the two nuts that secure the oil cooler lines at the transmission oil cooler, if equipped.
- Install the two nuts that secure the two cooler lines to the radiator (P32 with Auxiliary Cooler).
- Install the two nuts that secure the two oil cooler lines to the radiator (P32 without Auxiliary Cooler).
- Install two NEW retaining clips onto the transmission.
- Push the two cooler lines into the two transmission fittings until the cooler lines lock into place:
- Install the bolts and nuts that secure the clips to the frame rail (P32 with I-Beam Suspension).
- Install the bolts and nuts that secure the clips to the frame rail (P42 without I-Beam Suspension).
- Install the bolts and nuts that secure the clips to the frame rail (P42 with Auxiliary Cooler).
- Install the bolts and nuts that secure the clips to the frame rail (P32 with Auxiliary Cooler).
- Install the bolts and nuts that secure the clips to the frame rail (P32 without Auxiliary Cooler).
- Install the bolts and nuts that secure the clips to the frame rail (6.5L Turbo Diesel with Auxiliary Cooler).
- Install the bolts and nuts that secure the transmission cooler lines to the frame rail.

Notice: Use the correct fastener in the correct location. Replacement fasteners must be the correct part number for that application. Fasteners requiring replacement or fasteners requiring the use of thread locking compound or sealant are identified in the service procedure. Do not use paints, lubricants, or corrosion inhibitors on fasteners or fastener joint surfaces unless specified. These coatings affect fastener torque and joint clamping force and may damage the fastener. Use the correct tightening sequence and specifications when installing fasteners in order to avoid damage to parts and systems.
Tighten
Tighten the bolts and nuts that secure the auxiliary oil cooler to the
radiator support to 10 N·m (89 lb in).
Tighten
Tighten the nuts that secure the oil cooler lines to the transmission
oil cooler to 27 N·m (20 lb ft).

Tighten
Tighten the nuts that secure the oil cooler lines to the radiator to
27 N·m (20 lb ft).

Tighten
Tighten the nuts that secure the oil cooler lines to the radiator to
27 N·m (20 lb ft).

Important: Do not reuse the existing retaining clips that were removed from the transmission cooler line fittings. The two retaining clips that are to be installed into the new transmission fittings must be new.
| 8.1. | Lightly pull on the cooler line, away from the fitting, to ensure that the cooler line is locked into the fitting. |
| 8.2. | Position the plastic cap located on the cooler line onto the fitting hex. |

Tighten
Tighten the bolts and nuts that secure the clips to the frame rail to
8 N·m (71 lb in).

Tighten
Tighten the bolts and nuts that secure the clips to the frame rail to
8 N·m (71 lb in).

Tighten
Tighten the bolts and nuts that secure the clips to the frame rail to
8 N·m (71 lb in).

Tighten
Tighten the bolts and nuts that secure the clips to the frame rail to
8 N·m (71 lb in).

Tighten
Tighten the bolts and nuts that secure the clips to the frame rail to
8 N·m (71 lb in).

Tighten
Tighten the bolts and nuts that secure the clips to the frame rail to
8 N·m (71 lb in).
Tighten
Tighten the bolts and nuts that secure the transmission cooler lines
to the frame rail to 12 N·m (9 lb ft).
