Caution: If penetrating oil gets on the vertical surfaces between the wheel and the rotor or drum it could cause the wheel to work loose as the vehicle is driven, resulting in loss of control and an injury accident.
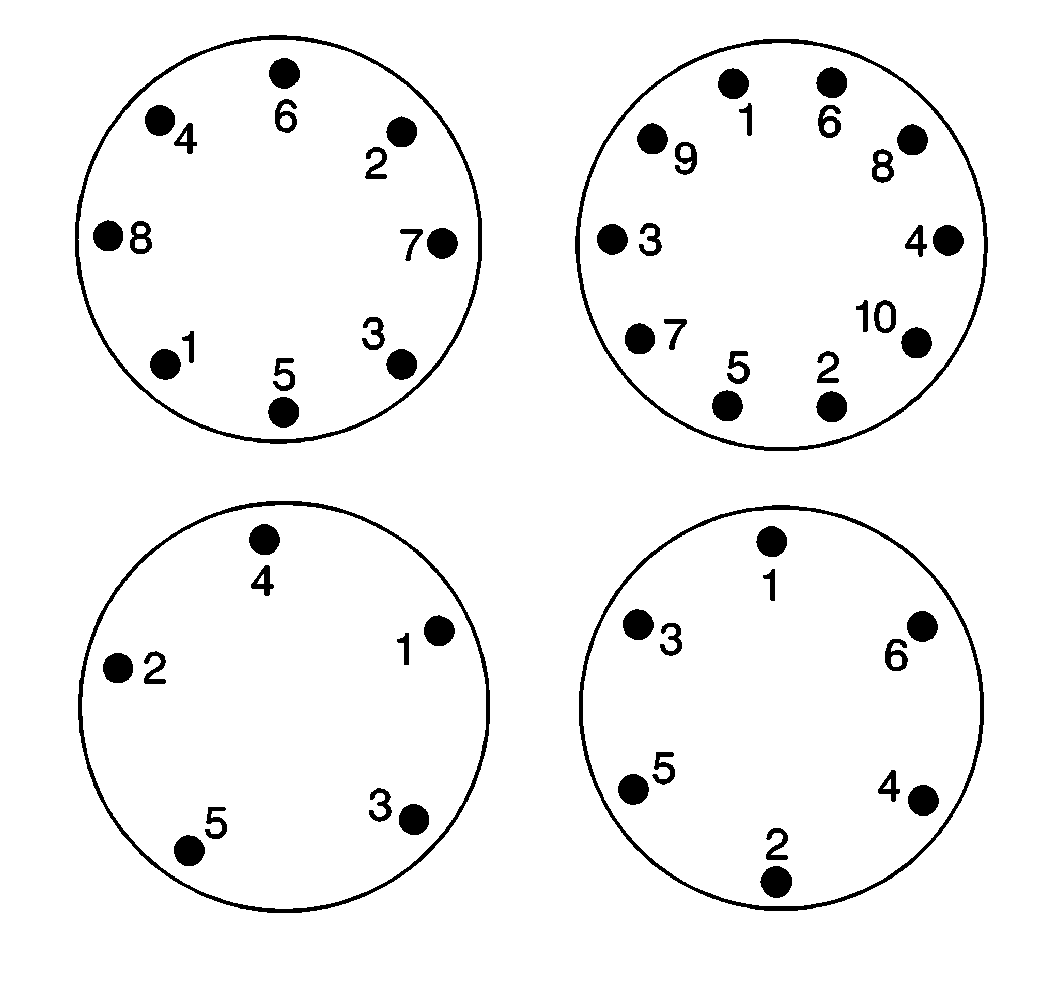
Notice: Never use heat to loosen a tight wheel. It can shorten the life of the wheel, studs, or hub and bearing assemblies. Wheel nuts must be tightened in sequence and to the specified torque to avoid bending the wheel or rotor.
Penetrating oil is not effective in removing tight wheels. However, if used, apply the penetrating oil sparingly to the hub surface only.
Excessive force, such as hammering the wheel or the tire, may cause damage. Lightly tap the tire's sidewall with a rubber mallet.
Sometimes wheels can be difficult to remove from the vehicle due to foreign material or a tight fit between the wheel center hole and the hub or rotor. Use the following procedure to safely remove the wheel:
- Tighten all of the wheel nuts on the affected wheel.
- Loosen each wheel nut 2 turns.
- Lower the vehicle onto the floor.
- Rock the vehicle from side to side as hard as possible using one or more person's body weight in order to loosen the wheel.
- Rock the vehicle from Drive gear to Reverse gear allowing the vehicle to move several feet in each direction. Apply quick, hard jabs on the brake pedal in order to loosen the wheel.
Removal Procedure
Caution: To avoid eye injury, use approved safety lenses, goggles, or face shield to prevent eye injury when deflating tires.
Important: When removing and demounting any tire and wheel assembly, deflate the tire by removing the valve core. Perform this procedure before removing the tire assembly from the vehicle.
- Break the wheel nuts loose.
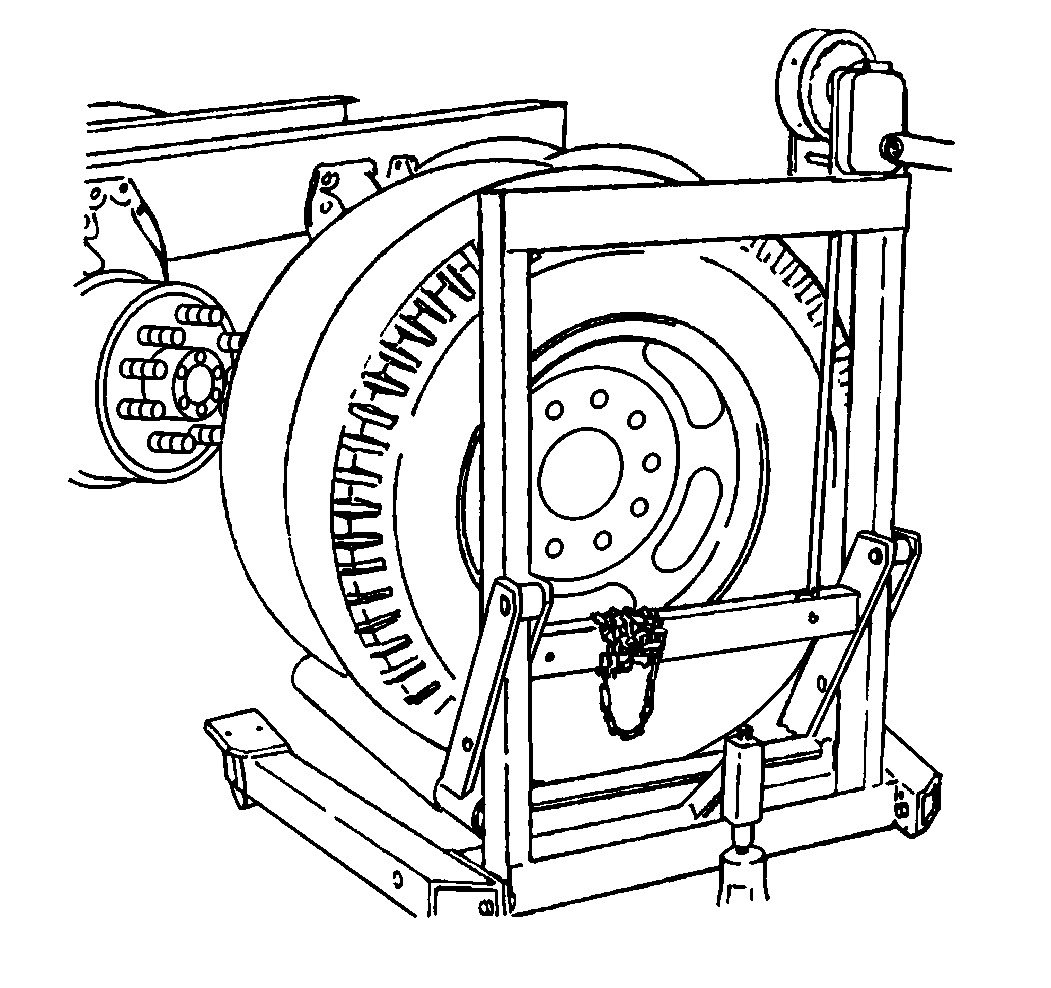
- Raise the vehicle until the tire clears the floor. Support the vehicle. Refer to Lifting and Jacking the Vehicle in General Information.
- Remove the wheel nuts.
- Remove the wheel from the hub.
- Clean the following components:

| • | The wheel nuts. |
| • | The studs. |
| • | The wheel. |
| • | The rotor/drum mounting surfaces. |
Installation Procedure
Caution: Before installing the wheels, remove any buildup of corrosion on the wheel mounting surface and brake drum or disc mounting surface by scraping and wire brushing. Installing wheels with poor metal-to-metal contact at the mounting surfaces can cause wheel nuts to loosen. This can cause a wheel to come off when the vehicle is moving, causing loss of control and possibly personal injury.
Notice: Wheel hub flanges, wheel studs, and stud nuts should be free of rust, lubricants, dirt, and finish color paint on all contact surfaces to ensure proper torque retention.
- Apply a thin coat of grease to the hub pads in order to prevent corrosion.
- Turn the hub so that a hub pad is at a 12 o'clock position.
- Install the wheel on the hub.
- Install the inner wheel on the hub.
- Install the outer wheel on the hub with the valve stems of both wheels positioned as close to 180 degrees as possible.
- Install the wheel nuts.

Important: Perform steps 4 and 5 for dual wheel applications only. For single wheel applications proceed to step 6.

Important: Tighten the wheel nuts progressively using the first specification. Then retighten the nuts using the second specification.
Notice: A torque wrench or J 39544 must be used to ensure that wheel nuts are tightened to specification. Never use lubricants or penetrating fluids on wheel stud, nuts, or mounting surfaces, as this can raise the actual torque on the nut without a corresponding torque reading on the torque wrench. Wheel nuts, studs, and mounting surfaces must be clean and dry. Failure to follow these instructions could result in wheel, nut, and/or stud damage.
Notice: Use the correct fastener in the correct location. Replacement fasteners must be the correct part number for that application. Fasteners requiring replacement or fasteners requiring the use of thread locking compound or sealant are identified in the service procedure. Do not use paints, lubricants, or corrosion inhibitors on fasteners or fastener joint surfaces unless specified. These coatings affect fastener torque and joint clamping force and may damage the fastener. Use the correct tightening sequence and specifications when installing fasteners in order to avoid damage to parts and systems.
Tighten
Tighten the wheel nuts to specifications. Refer to
Fastener Tightening Specifications
.
Tighten the wheel nuts evenly and alternately in order to avoid excessive runout.
