Steering Linkage Tie Rod End Inspection Commerical

Important: Replace damaged or broken steering linkage components. Do not attempt
to repair broken or damaged components by welding.
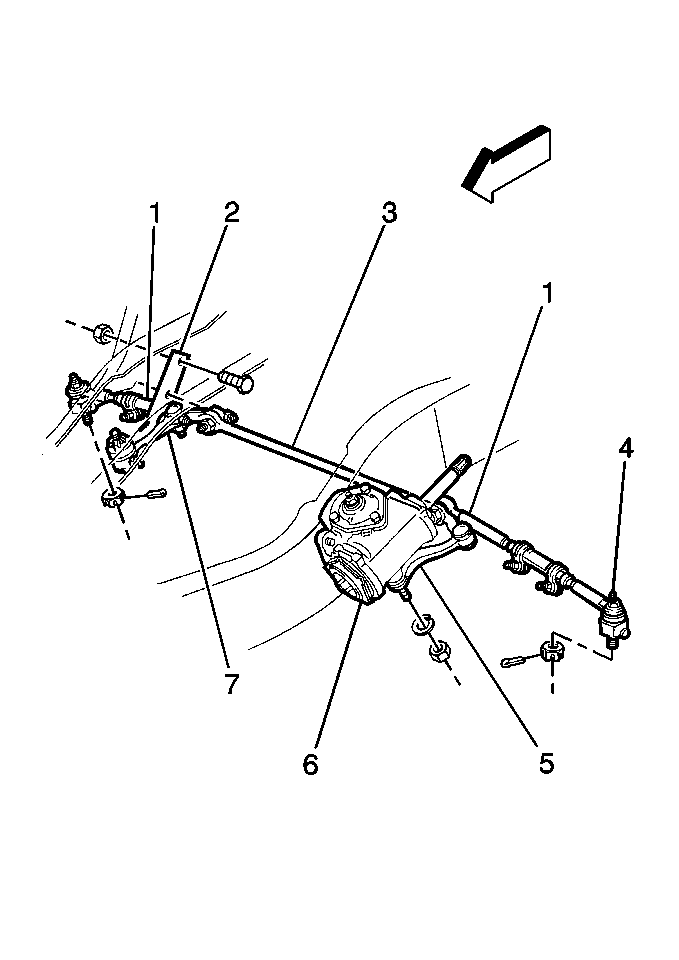
There are 2 tie rod assemblies (1). Each tie rod assembly
consists of the following 5 pieces:
The ends are threaded into the sleeves and are secured with the clamps.
Right-hand and left-hand threads are used for toe-in adjustments and steering
gear centering.
The tie rod ends are self-adjusting. The tie rod ends require periodic
lubrication. Refer to
Fluid and Lubricant Recommendations
in Maintenance
and Lubrication. Replace the tie rod ends when any of the
following conditions are present at the ball stud:
| • | Excessive up-and-down motion |
Before you undertake any service, note the following conditions:
| • | The position of the tie rod adjuster tube |
| • | The direction from which the bolts are installed |
| | The tie rod adjuster tube components may be rusted: |
- If the torque required in order to remove the nut from the bolt
exceeds 9 N·m (80 lb in), discard the nuts and
the bolts.
- Apply penetrating oil between the clamp and the tube.
- Rotate the clamps until the clamps move freely.
- Inspect the following components:
| • | The tie rod ends for damage |
| • | The tie rod end seals for excessive wear |
| • | The threads on the tie rod ends for damage |
| • | The ball stud threads for damage |
| • | The adjuster tube for bends |
| • | The adjuster tube for damaged threads |
- Install all of the parts, with the correct part number, in the
proper position.
Steering Linkage Tie Rod End Inspection Motorhome

Important: Replace damaged or broken steering linkage components. Do not attempt
to repair broken or damaged components by welding.
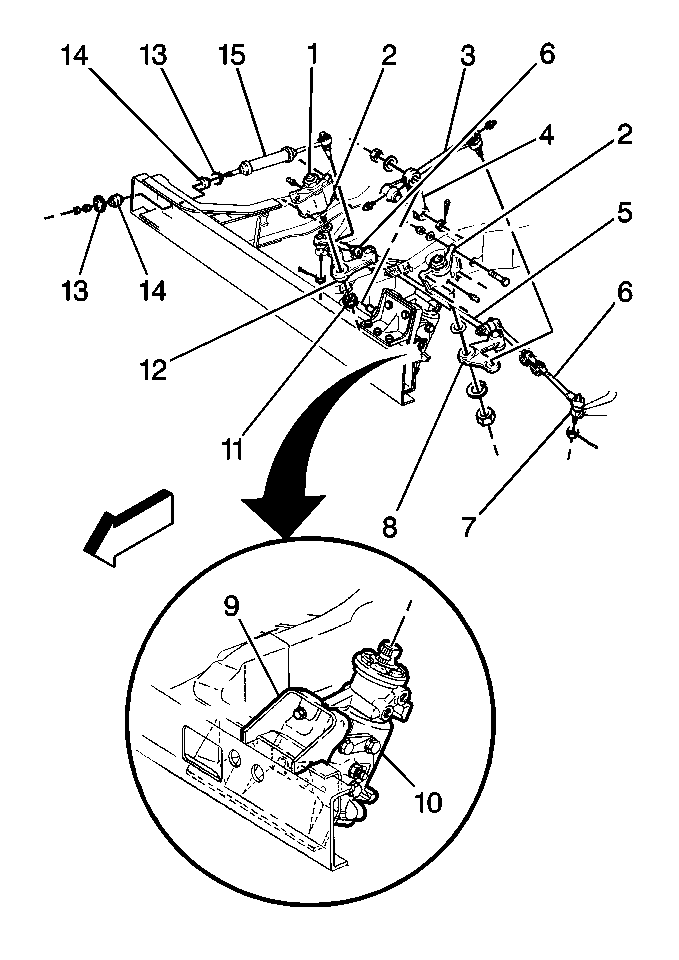
There are 2 tie rod assemblies (6). Each tie rod assembly
consists of the following 5 pieces:
The ends are threaded into the sleeves and are secured with the clamps.
Right-hand and left-hand threads are used for toe-in adjustments and for steering
gear centering.
The tie rod ends are self-adjusting. The tie rod ends require periodic
lubrication. Refer to General Information. Replace the tie rod ends when any
of the following conditions are present at the ball stud:
| • | Excessive up-and-down motion |
Before you undertake any service, note the following conditions:
| • | The position of the tie rod adjuster tube |
| • | The direction from which the bolts are installed |
| | The tie rod adjuster tube components may be rusted: |
- If the torque required in order to remove the nut from the bolt
exceeds 9 N·m (80 lb in), discard the nuts and
the bolts.
- Apply penetrating oil between the clamp and the tube.
- Rotate the clamps until the clamps move freely.
- Inspect the following components:
| • | The tie rod ends for damage |
| • | The tie rod end seals for excessive wear |
| • | The threads on the tie rod ends for damage |
| • | The ball stud threads for damage |
| • | The adjuster tube for bends |
| • | The adjuster tube for damaged threads |
- Install all of the parts, with the correct part number, in the
proper position.
Steering Linkage Tie Rod End Inspection Commerical (I-Beam Front Axle)

Important: Replace damaged or broken steering linkage components. Do not attempt
to repair broken or damaged components by welding.
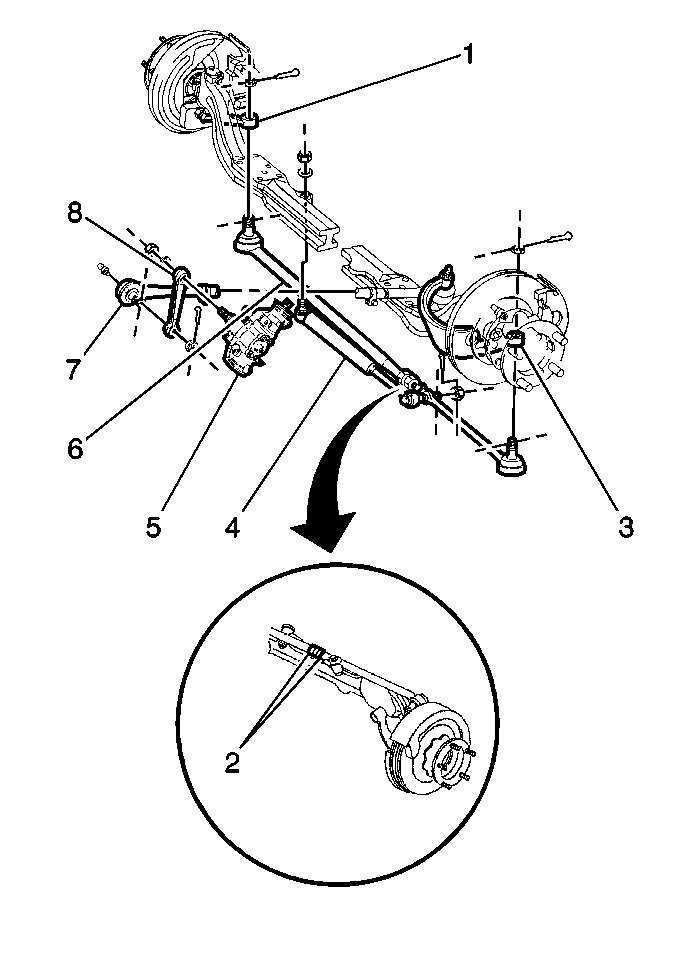
The commercial I-beam front axle tie rod assembly (6) has 2 toe-in
adjustment nuts (2) on the tie rod. Refer to
Fastener Tightening Specifications
for proper tightening specifications after you obtain the proper adjustment
reading shown in
Wheel Alignment Specifications
. Inspect the toe-in adjustment nuts for the following
conditions:
Replace the nuts if necessary.
Replace the tie rod when any of the following conditions are present
at the ball stud:
| • | Excessive up-and-down motion |
Inspect the tie rod end seals for excessive wear.
Inspect the following components for damage:
| • | The threads on the tie rod ends |


