Removal Procedure
Important: Before a new crankshaft rear oil seal is installed, the CDR and crankshaft ventilation system should be thoroughly inspect and crankshaft pressure should also be checked.
- Disconnect the battery negative cable from the battery. Refer to Battery Cable Replacement
- Raise the vehicle and support with safety stands. Refer toLifting and Jacking the Vehicle in General Information.
- Remove the transmission from the vehicle.
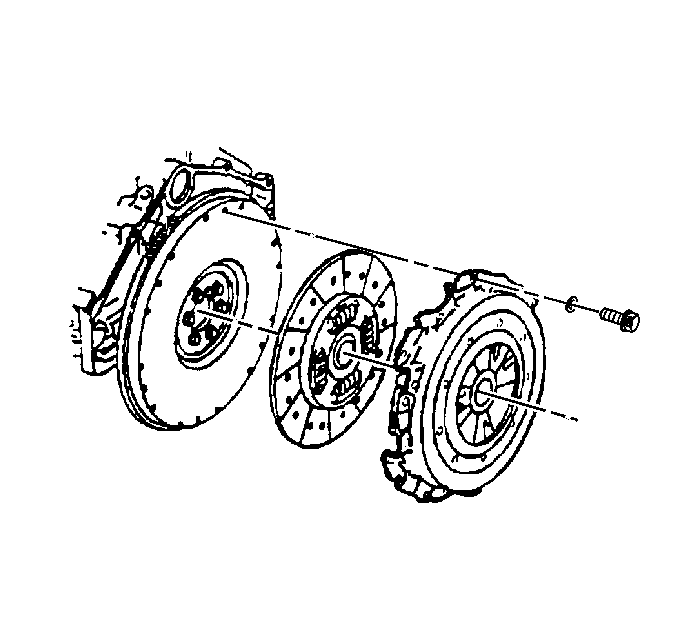
- Remove the clutch assembly, if equipped. Refer to Clutch Assembly Replacement .
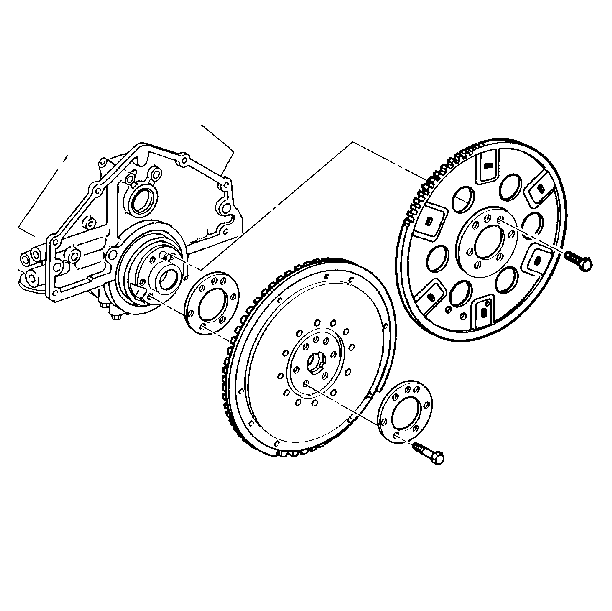
- Remove the flywheel from the crankshaft. Refer to Engine Flywheel Replacement .
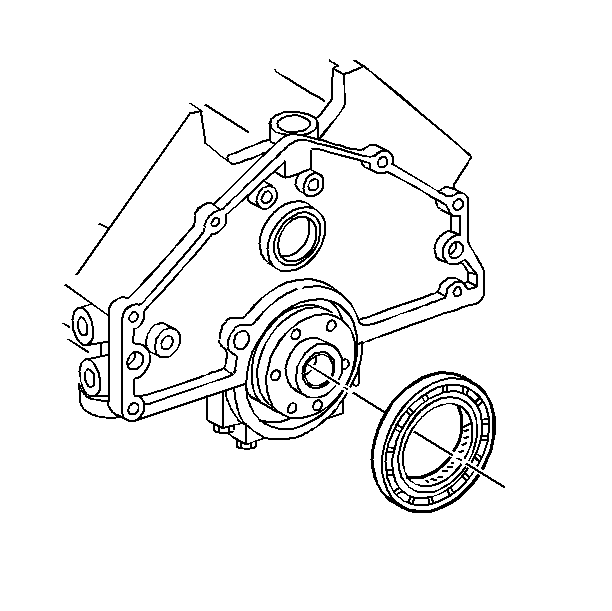
- Remove the crankshaft rear oil seal from the engine block.
Caution: Before servicing any electrical component, the ignition and start switch must be in the OFF or LOCK position and all electrical loads must be OFF, unless instructed otherwise in these procedures. If a tool or equipment could easily come in contact with a live exposed electrical terminal, also disconnect the negative battery cable. Failure to follow these precautions may cause personal injury and/or damage to the vehicle or its components.
| • | For the 4L80E, refer to Transmission Replacement |
| • | For the NV4500, refer to Transmission Replacement |


Important: Use caution as not to damage the sealing area of the crankshaft when removing the crankshaft rear oil seal.

Installation Procedure
Tools Required
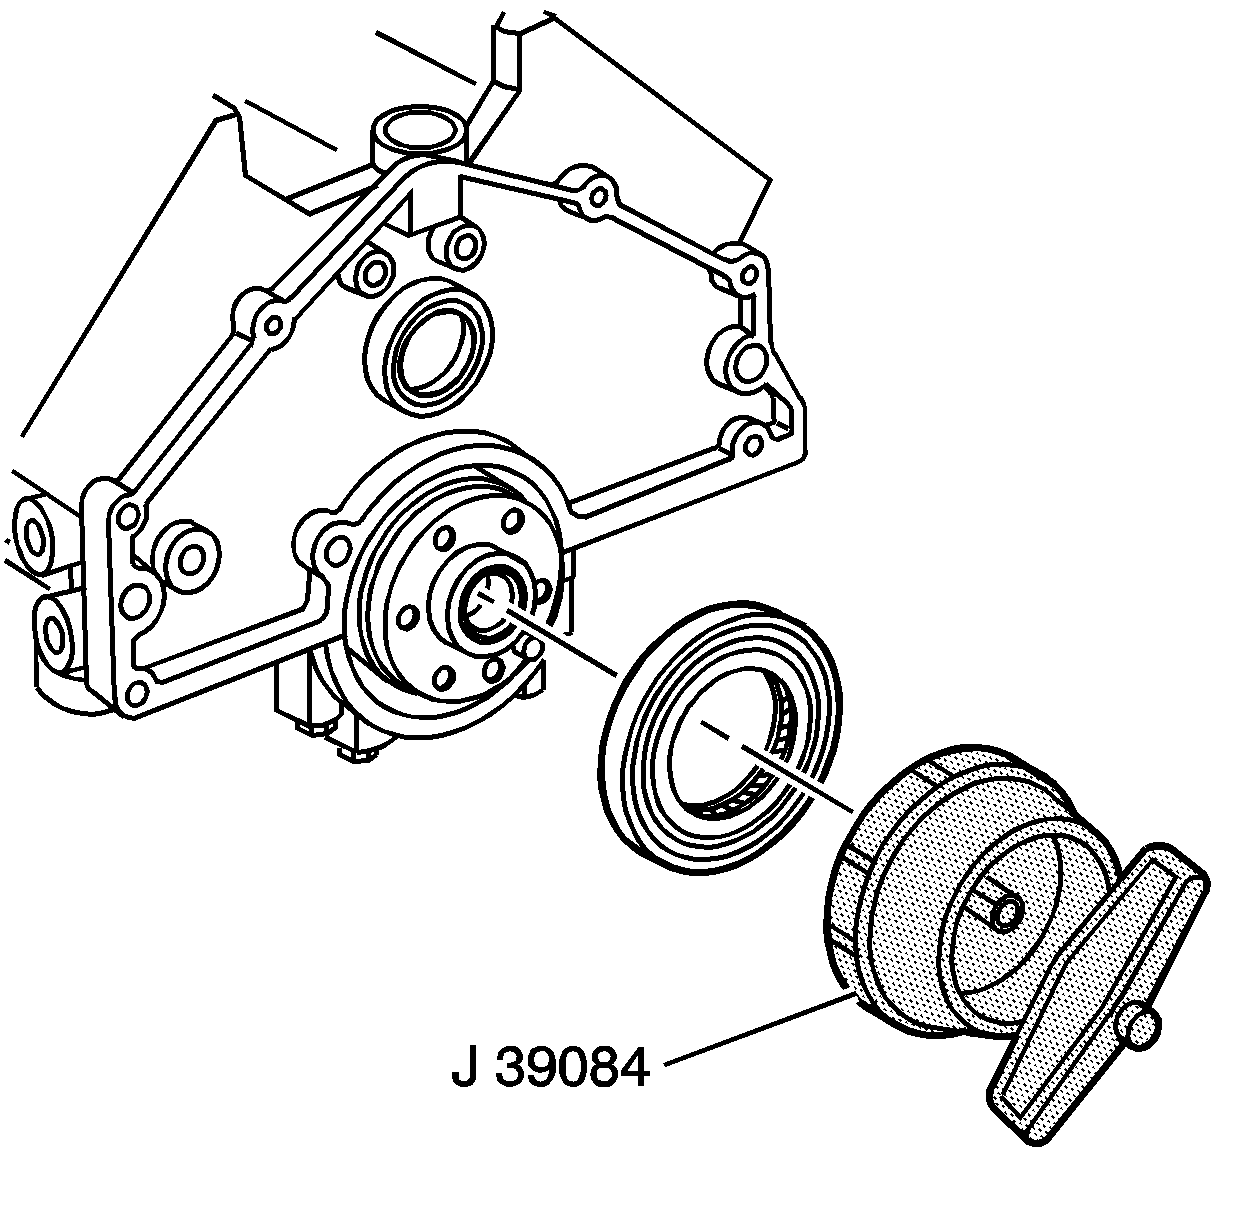
J 39084 Rear Crankshaft Oil Seal Installer
Important: The crankshaft sealing surface must be clean and smooth in order to prevent damaging the crankshaft rear oil seal lip when a new seal is installed.
Because of the crankshaft rear oil seal wear or grooving, the service crankshaft rear oil will be positioned flush with the rear cylinder block surface. The position of the new crankshaft rear oil seal will be controlled by the tool. Positioning the crankshaft rear oil in a new location provides a new surface for the crankshaft rear oil seal to ride on.- Install the oil seal, with the spring cavity facing the engine, onto the crankshaft.
- Using the J 39084 drive the seal into the crankshaft until the tool bottoms against the block and the rear crankshaft bearing cap.
- Install the flywheel to the crankshaft. Refer to Engine Flywheel Replacement .
- Install the clutch assembly, if equipped. Refer to Clutch Assembly Replacement .
- Install the transmission to the vehicle.
- Remove the safety stands and lower the vehicle.
- Connect the battery negative cable to the battery. Refer to Battery Cable Replacement .
Important:
• Coat the crankshaft surface with engine oil. • Lightly coat the lip of the new oil seal with engine oil or grease
before installing the new oil seal. • Do not scratch or nick the edge of the oil seal.


| • | For the 4L80E, refer to Transmission Replacement |
| • | For the NV4500 transmission, refer to Transmission Replacement |
