Trailing Arm Rear
Removal Procedure
- Remove the tire and wheel assembly. Refer to Wheel Removal and Tire Mounting and Dismounting in Tires and Wheels.
- Remove the air spring. Refer to Air Spring .
- Remove the shock absorber. Refer to Shock Absorber Replacement .
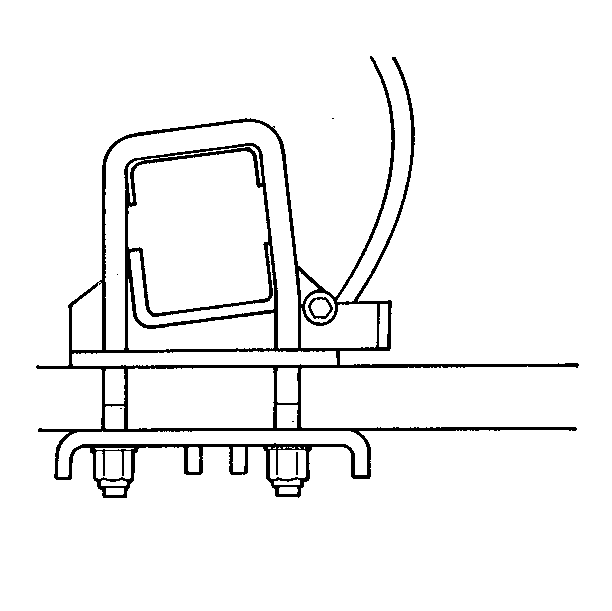
- Remove the bolt (7), the nut, the washer (6) and the rebound strap (5) from the axle saddle (2).
- Remove the four nuts (10), the two U-bolts (3), the axle cap (4), the axle saddle (2), the trailing arm (1), and the bottom mounting plate (8) from the rear axle.
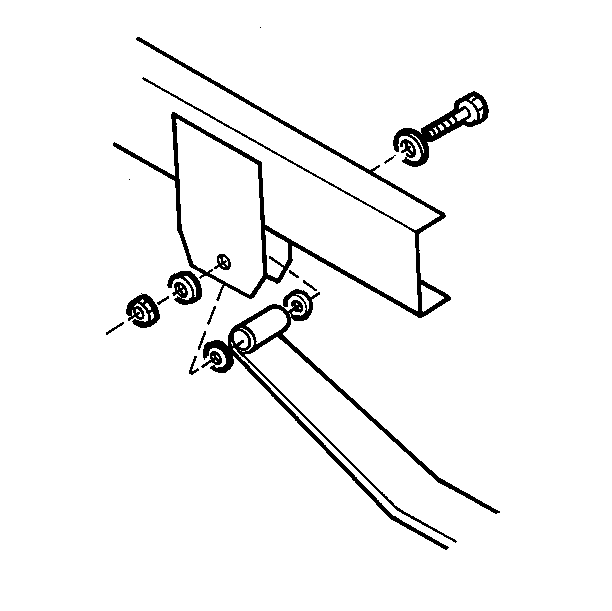
- Remove the pivot bolt, the two washers, the two hardened washers, and the nut from the hanger.
- Remove the trailing arm from the hanger.
- Inspect the pivot bushings. Replace the bushings if necessary.


Installation Procedure
- Install the trailing arm by slipping the front pivot bolt through the two washers, the two hardened washers, the trailing arm bushing, and the front hanger and threading on the nut finger-tight only.
- Install the axle saddle (2), the axle cap (4), the trailing arm (1), and the bottom mounting plate (8) on the axle with the two U-bolts (3) and the four nuts (10).
- Install the rebound strap (5) to the axle saddle (2) with the bolt (7), the washer (6), and the nut.
- Install the shock absorber. Refer to Shock Absorber Replacement .
- Install the air spring. Refer to Air Spring .
- Install the tire and wheel assemblies. Refer to Wheel Removal and Tire Mounting and Dismounting in Tires and Wheels.
- Remove the safety stands. Lower the vehicle.
- Start the vehicle. Allow the air system to fully pressurize.
- Measure the ride height. Refer to Ride Height .
- Adjust the ride height if necessary. Refer to Ride Height Adjustment .
Important: Do not tighten the rear pivot bolts. Tightening the rear pivot bolts is the last step in the procedure.

| • | The nuts must face the outside of the chassis. |
| • | The hardened washers must be on the inside of the hanger. |

Tighten
Tighten the U-bolts to 373-407 N·m (275-300 lb ft).
Notice: Use the correct fastener in the correct location. Replacement fasteners must be the correct part number for that application. Fasteners requiring replacement or fasteners requiring the use of thread locking compound or sealant are identified in the service procedure. Do not use paints, lubricants, or corrosion inhibitors on fasteners or fastener joint surfaces unless specified. These coatings affect fastener torque and joint clamping force and may damage the fastener. Use the correct tightening sequence and specifications when installing fasteners in order to avoid damage to parts and systems.
Tighten
Tighten the nut to 122 N·m (90 lb ft).
Tighten
Tighten the pivot bolt to 340-380 N·m (250-280 lb ft).
