Balancing Tire and Wheel Assembly--Static Imbalance

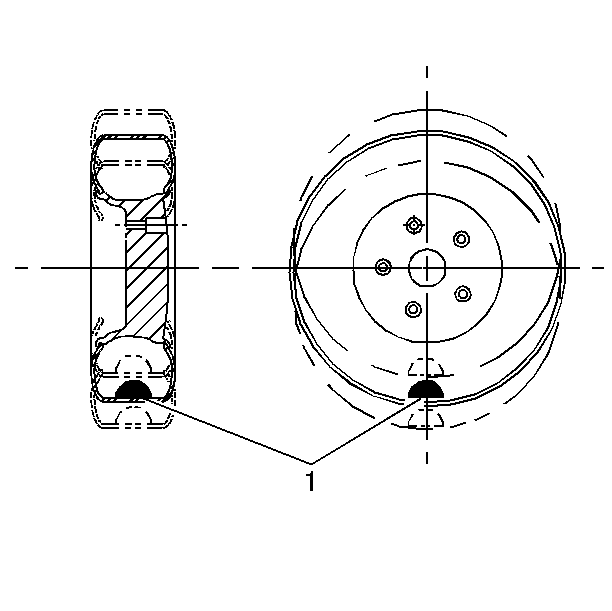
Static imbalance occurs when unequal weight (1) is concentrated in a small area of the tire and the wheel. This condition causes a vibratory pounding that is called "tire tramp" or "wheel hop".

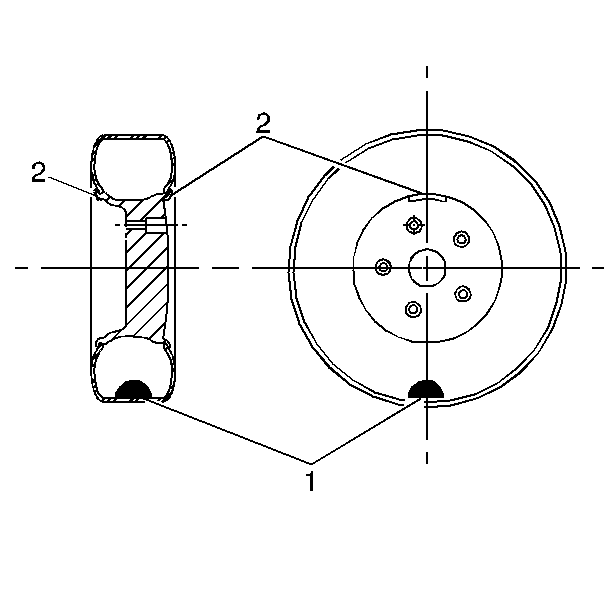
Static balance is an equal distribution of weight around the circumference of the tire and wheel.
If you need more than 28 grams (1 ounce) of weight when static balancing, split the balance weights (2) as equally as possible between the inboard and outboard flanges.
Balancing Tire and Wheel Assembly--Dynamic Imbalance

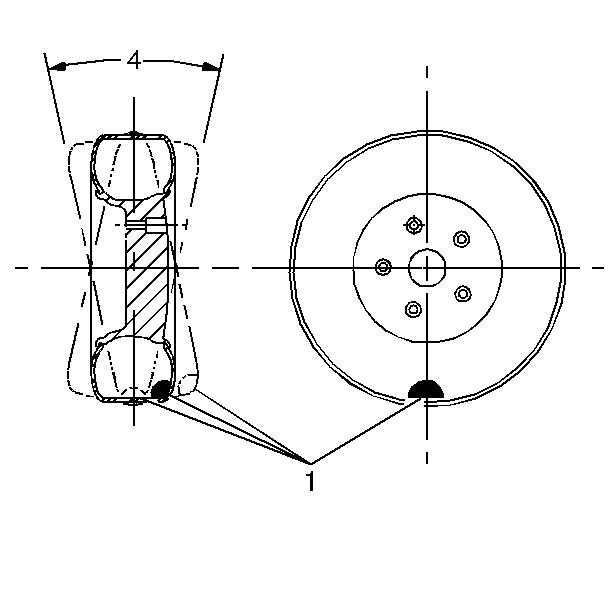
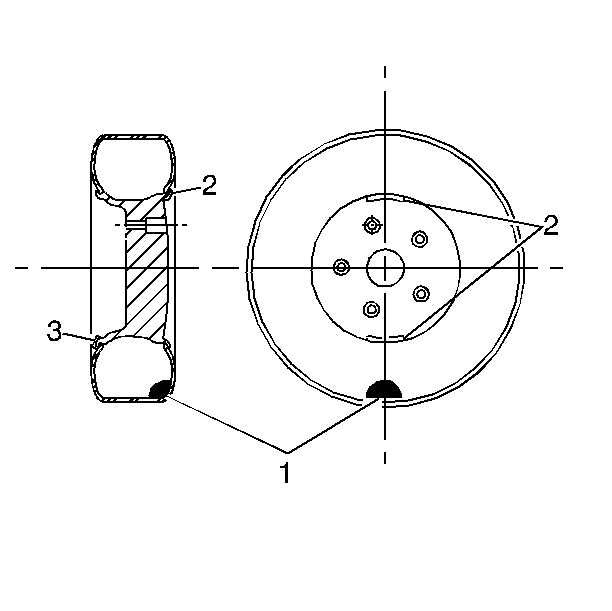
Dynamic imbalance results from unequal forces (1) concentrated at opposing locations on the circumference of the tire and the wheel during wheel rotation. This condition causes wheel shimmy (4) and vibration at medium and high speed rotations.

Dynamic balance offsets the unequal forces. Match the weight needed to correct dynamic imbalance (2) with an opposing weight (3).
General Balance Precautions
Do the following precautionary steps:
| • | Clean deposits of foreign material from the inside of the wheel. |
| • | Remove stones from the tread in order to avoid operator injury during spin balancing, and to obtain a good balance. |
| • | Inspect the tire for damage. |
| • | Balance the tires and wheels according to the equipment manufacturer's recommendations. |
Off-Vehicle Balancing
When you balance the tire and wheel assemblies off of the vehicle, use a balancer that pilots the wheel by the center hole not the wheel bolt, if possible. Always follow the equipment manufacturer's instructions.
Some electronic off-vehicle balancers are more accurate than the on-vehicle spin balancers. But these do not correct for rotor imbalance. If you cannot correct the vibration with the off-vehicle balance, you also may need an on-vehicle balance.
On-Vehicle Balancing
On-vehicle balancing will help correct vibrations due to brake drum, rotor, and wheel cover imbalance.
When balancing on-vehicle, remove the balance weights from the off-vehicle dynamic balance. If you need more than 28 grams (1 ounce) of additional weight, split the weight between the inner and the outer rim flanges.
Caution: On vehicles equipped with limited slip rear axles, do not attempt to balance a tire on a drive wheel with the other drive wheel on the ground. The vehicle may drive through this wheel and cause the vehicle to move unexpectedly, resulting in personal injury and property damage.
Caution: Do not spin the drive wheels faster than 55 km/h (35 mph) as indicated by the speedometer. This limit is necessary because the speedometer indicates only one half of the actual wheel speed when one drive wheel is spinning and the other drive wheel is stopped. Personal injury and damage may result from high speed spinning.
In order to distinguish between a standard rear axle and a limited slip rear axle, check for Positraction (G80). Refer to Service Parts ID Label in General Information.
Wheel Balance Weights
Notice: Do not scratch the clear coating on aluminum wheels with the tire changer attachments, wheel mounting techniques, or tire changing tools. Failure to follow proper procedures could cause the aluminum wheel to corrode and the clear coating to peel from the wheel.
Important: When installing the polyester coated weights, do not crack the polyester coating. Use a teflon-coated hammer.
Balancing factory aluminum wheels requires the use of special polyester coated, clip-on balance weights. These weights fit over the thicker rim flange of the aluminum wheel. These weights also provide a much better appearance and will not discolor, corrode, or damage the wheel.
Adhesive Wheel Balance Weight Installation Procedure
Install the wheel weight using the following procedure:
- Wipe the wheel balance weight attachment area with a mixture of ½ isopropyl alcohol and ½ water. Use a clean cloth or a paper towel.
- Dry the area with hot air. The surface of the wheel must be warm to the touch.
- Warm the adhesive backing on the wheel balance weights to room temperature.
- Remove the tape from the back of the weights. Do not touch the adhesive surface.
- Apply the wheel balance weight. Press on the weight using hand pressure.
- Secure the wheel balance weight with a 70-110 N (16-25 lb) force applied with a roller.
