Radiator Replacement P72
Removal Procedure
- Drain the coolant from the cooling system. Refer to Draining, Filling, Recovery of Cooling System. Close the drain cock when the draining is complete.
- Remove the coolant recovery reservoir and the associated hoses. Refer to Coolant Recovery Reservoir Replacement.
- Remove the surge tank and the associated hoses. Refer to Radiator Surge Tank (P72).
- Remove the upper and the lower radiator hoses. Refer to Radiator Hose Replacement (Upper) and Radiator Hose Replacement (Lower).
- Remove the engine oil dipstick, the oil fill tube and the bracket. Set them aside but do not remove them from the engine.
- Remove the transmission dipstick and the bracket. Set them aside but do not remove them from the transmission.
- Remove the power steering reservoir from the brace and set it aside. Do not disconnect the power steering hoses. Refer to Remote Reservoir (P72) in Power Steering System.
- Remove the bolts, the washers, the nuts, the brackets and the radiator braces.
- Remove the screws and the shroud access panel.
- Remove the oil cooler lines and the reducer fittings (4L80-E transmission only) from the oil cooler.
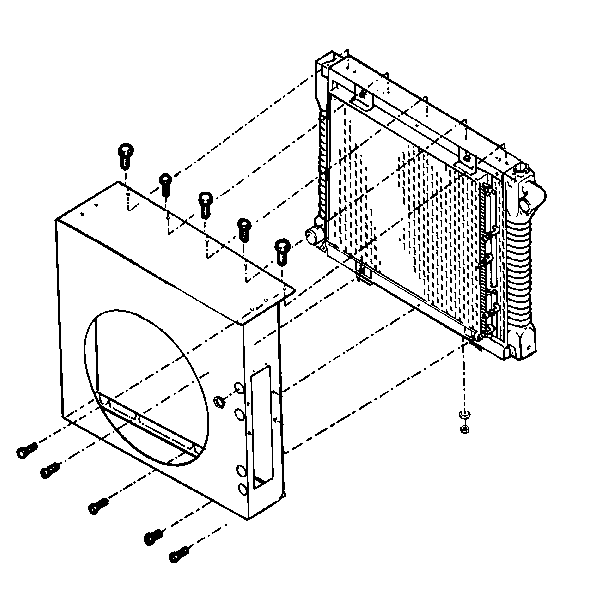
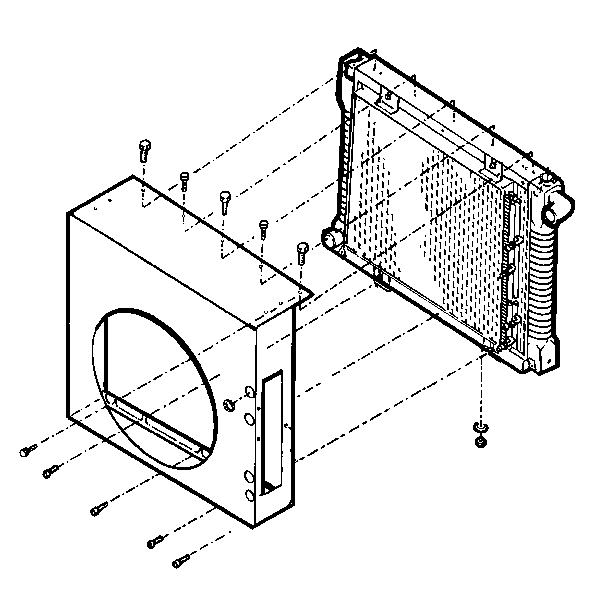
- Remove the shroud mounting bolts.
- Remove the two nuts, the washers and the radiator from the crossmember.
- Remove the bolts and the oil cooler from the radiator.
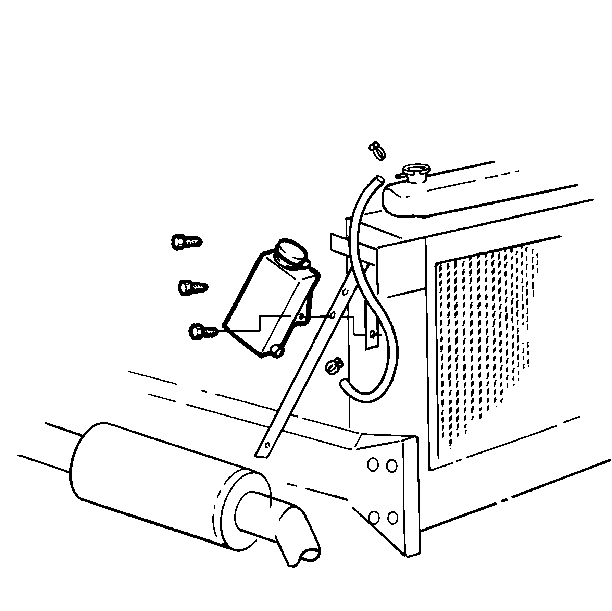
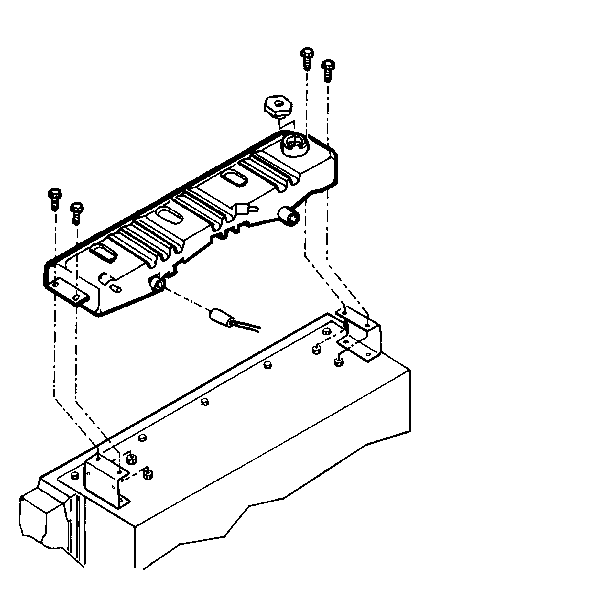

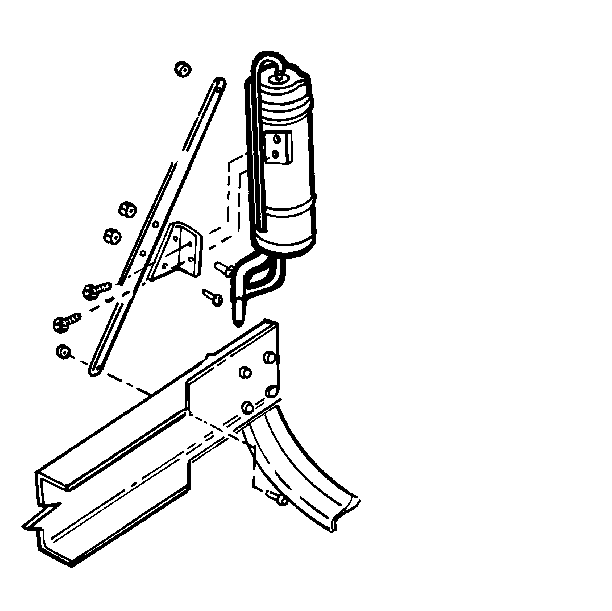
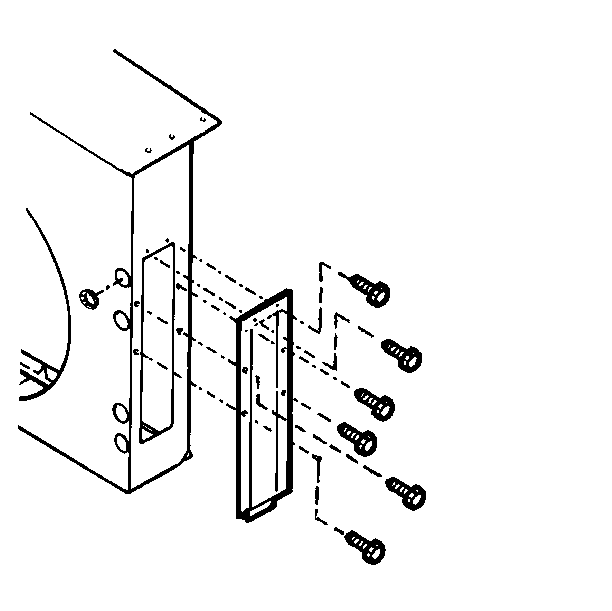
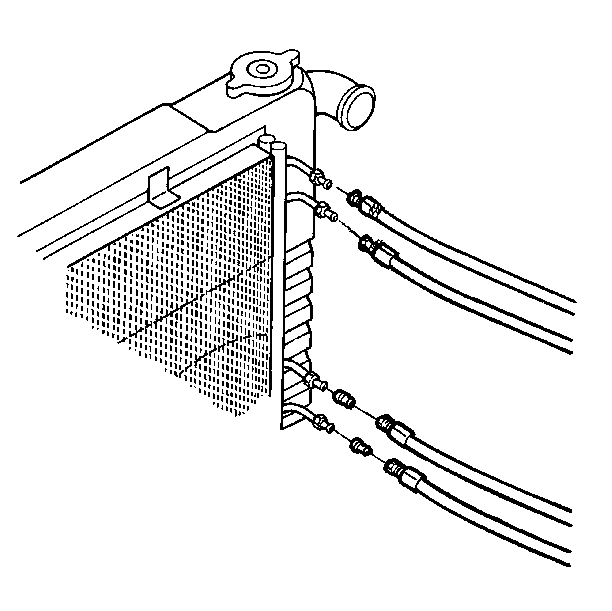
Important: Tie the oil cooler lines up so they drip as little as possible. Place a drain pan beneath the lines in order to catch any drips.

Installation Procedure
- Install the oil cooler with the bolts.
- Install the radiator to the crossmember with the two washers and the nuts.
- Install the shroud to the radiator with the ten mounting bolts.
- Install the oil cooler lines and the reducer fittings (transmission lines with 4L80-E only) to the oil cooler.
- Install the access panel to the shroud with the screws.
- Install the radiator braces and the brackets to the radiator and the frame with the bolts, the washers and the nuts.
- Install the power steering reservoir to the radiator brace. Refer to Remote Reservoir (P72) in Power Steering System.
- Install the surge tank and the associated hoses to the top of the shroud. Refer to Radiator Surge Tank (P72).
- Install the transmission dipstick and the bracket to the surge tank mount .
- Install the engine oil dipstick, the oil fill tube and the bracket to the surge tank mount.
- Connect the upper and lower radiator hoses. Refer to Radiator Hose Replacement (Upper) and Radiator Hose Replacement (Lower).
- Install the coolant recovery reservoir and the associated hoses. Refer to Coolant Recovery Reservoir Replacement.
- Fill the radiator with coolant. Refer to Draining, Filling, Recovery of Cooling System.


Tighten
Tighten the radiator-to-crossmember nut to 61 N·m (45 lb ft).
Notice: Use the correct fastener in the correct location. Replacement fasteners must be the correct part number for that application. Fasteners requiring replacement or fasteners requiring the use of thread locking compound or sealant are identified in the service procedure. Do not use paints, lubricants, or corrosion inhibitors on fasteners or fastener joint surfaces unless specified. These coatings affect fastener torque and joint clamping force and may damage the fastener. Use the correct tightening sequence and specifications when installing fasteners in order to avoid damage to parts and systems.

Tighten
Tighten the shroud-to-radiator bolts to 54 N·m (39 lb ft).

Tighten
Tighten the engine oil cooler line fittings to 73 N·m (54 lb ft).
Tighten
Tighten the transmission oil cooler line fittings to 28 N·m
(21 lb ft).
Tighten
Tighten the transmission reducer fittings to 73 N·m (54 lb ft).


Tighten
Tighten the access panel screws to 5.5 N·m (49 lb in).
Tighten
Tighten the radiator brace-to-frame bolts to 140 N·m (103 lb ft).
Tighten
Tighten the brace and mounting bracket-to-radiator bolts to 61 N·m
(45 lb ft).

Tighten
Tighten the dipstick and the fill tube bracket-to-surge tank mount bolts
to 12 N·m (106 lb in).

Radiator Replacement P92
Removal Procedure
- Drain the coolant from the cooling system. Refer to Draining, Filling, Recovery of Cooling System. Close the drain cock when the draining is complete.
- Remove the coolant recovery reservoir and the associated hoses. Refer to Coolant Recovery Reservoir Replacement.
- Remove the upper and the lower radiator hoses. Refer to Radiator Hose Replacement (Upper) and Radiator Hose Replacement (Lower).
- Remove the surge tank and the associated hoses. Refer to Radiator Surge Tank.
- Remove the engine oil dipstick, the oil fill tube and the bracket. Set them aside but do not remove them from the engine.
- Remove the transmission dipstick and the bracket. Set them aside but do not remove them from the transmission.
- Remove the power steering reservoir from the mounting bracket and set it aside. Do not disconnect the power steering hoses. Refer to Remote Reservoir (P92) in Power Steering System.
- Remove the transmission oil cooler lines and the adapters from the radiator side tank.
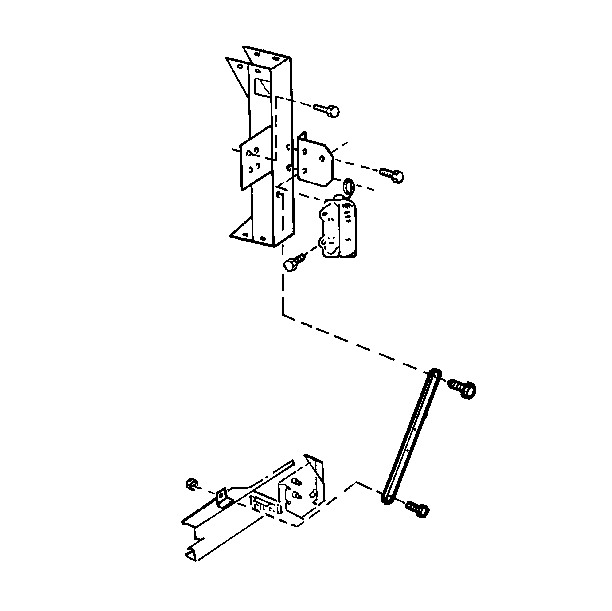
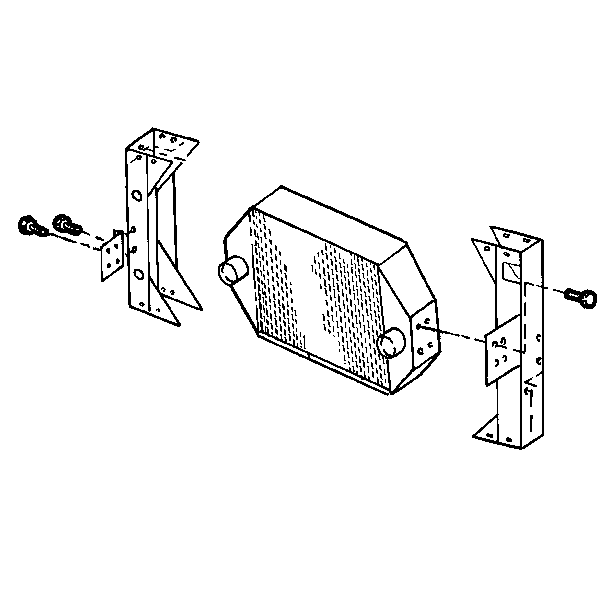
- Remove the bolts, the washers, the nuts, and the radiator braces from the left and the right radiator frames.
- Remove the frame.
- Remove the bolts from the aftercooler supports.
- Remove the bolts, the washers, the power steering reservoir and the coolant recovery tank mounting brackets from the radiator frame.
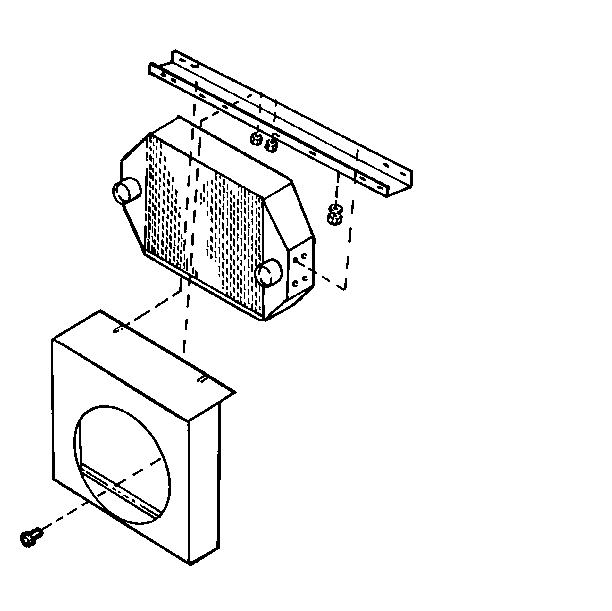
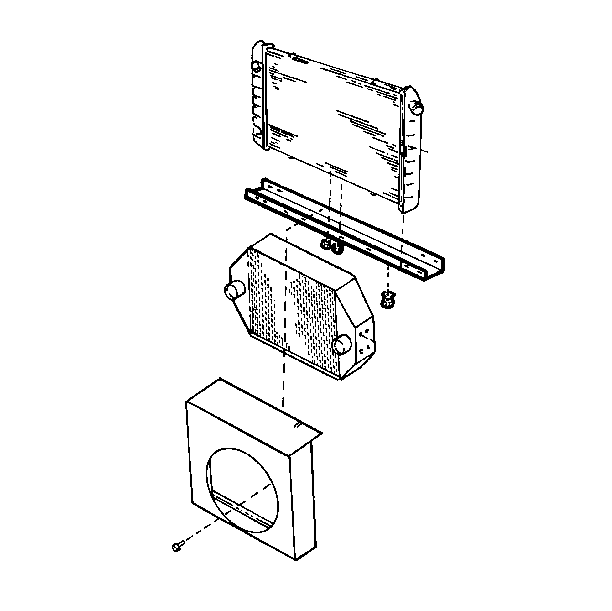
- Remove the mounting bolts from the shroud and the bottom radiator frame.
- Remove the two nuts, the washers, and the radiator frame from the crossmember.
- Remove the eight bolts and the radiator frame from the radiator.


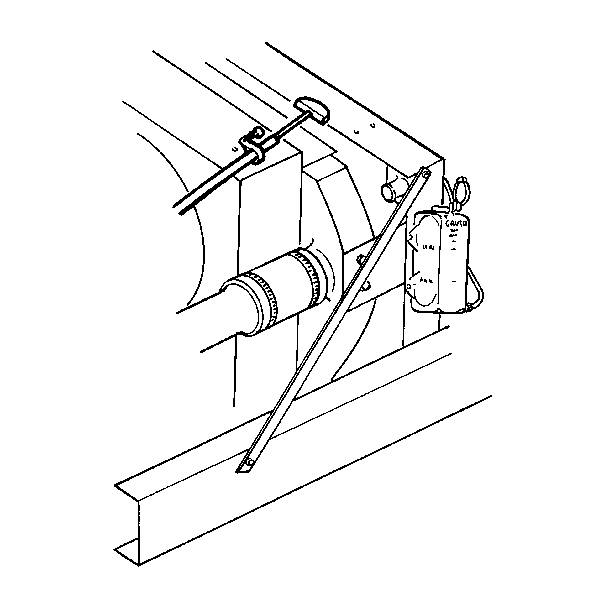


Important: Tie the oil cooler lines up so they drip as little as possible. Place a drain pan beneath the lines in order to catch any drips.
Installation Procedure
- Install the radiator to the crossmember with two washers and the nuts.
- Install the oil cooler to the radiator with the bolts.
- Install the shroud to the radiator with the ten mounting bolts.
- Install the radiator braces and the brackets to the radiator and the frame with the bolts, the washers and the nuts.
- Install the power steering reservoir to the radiator brace. Refer to Remote Reservoir in Power Steering System.
- Install the transmission dipstick and the bracket to the shroud.
- Install the engine oil dipstick, the oil fill tube and the bracket to the surge tank mount.
- Install the upper and the lower radiator hoses. Refer to Radiator Hose Replacement (Upper) and Radiator Hose Replacement (Lower).
- Install the surge tank and the associated hoses to the top of the shroud. Refer to Radiator Surge Tank.
- Install the coolant recovery reservoir and the associated hoses. Refer to Coolant Recovery Reservoir Replacement.
- Fill the radiator with coolant. Refer to Draining, Filling, Recovery of Cooling System.
Important: Take care not to damage the radiator fins while installing the radiator into the vehicle.

Tighten
Tighten the radiator-to-crossmember nuts to 61 N·m (45 lb ft).
Notice: Use the correct fastener in the correct location. Replacement fasteners must be the correct part number for that application. Fasteners requiring replacement or fasteners requiring the use of thread locking compound or sealant are identified in the service procedure. Do not use paints, lubricants, or corrosion inhibitors on fasteners or fastener joint surfaces unless specified. These coatings affect fastener torque and joint clamping force and may damage the fastener. Use the correct tightening sequence and specifications when installing fasteners in order to avoid damage to parts and systems.

Tighten
Tighten the shroud-to-radiator bolts to 54 N·m (39 lb ft).


Tighten
Tighten the radiator brace-to-frame bolts to 140 N·m (103 lb ft).
Tighten
Tighten the brace- and mounting bracket-to-radiator bolts to 61 N·m
(45 lb ft).

Tighten
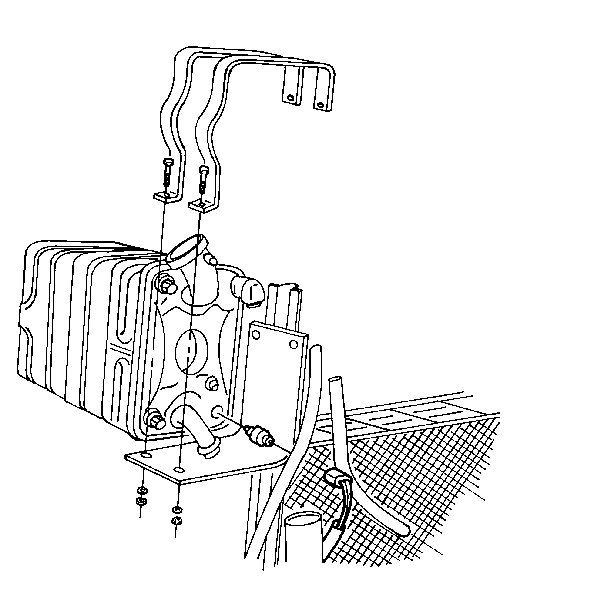
Tighten the dipstick and the fill tube bracket-to-surge tank mount bolts
to 12 N·m (106 lb in).

