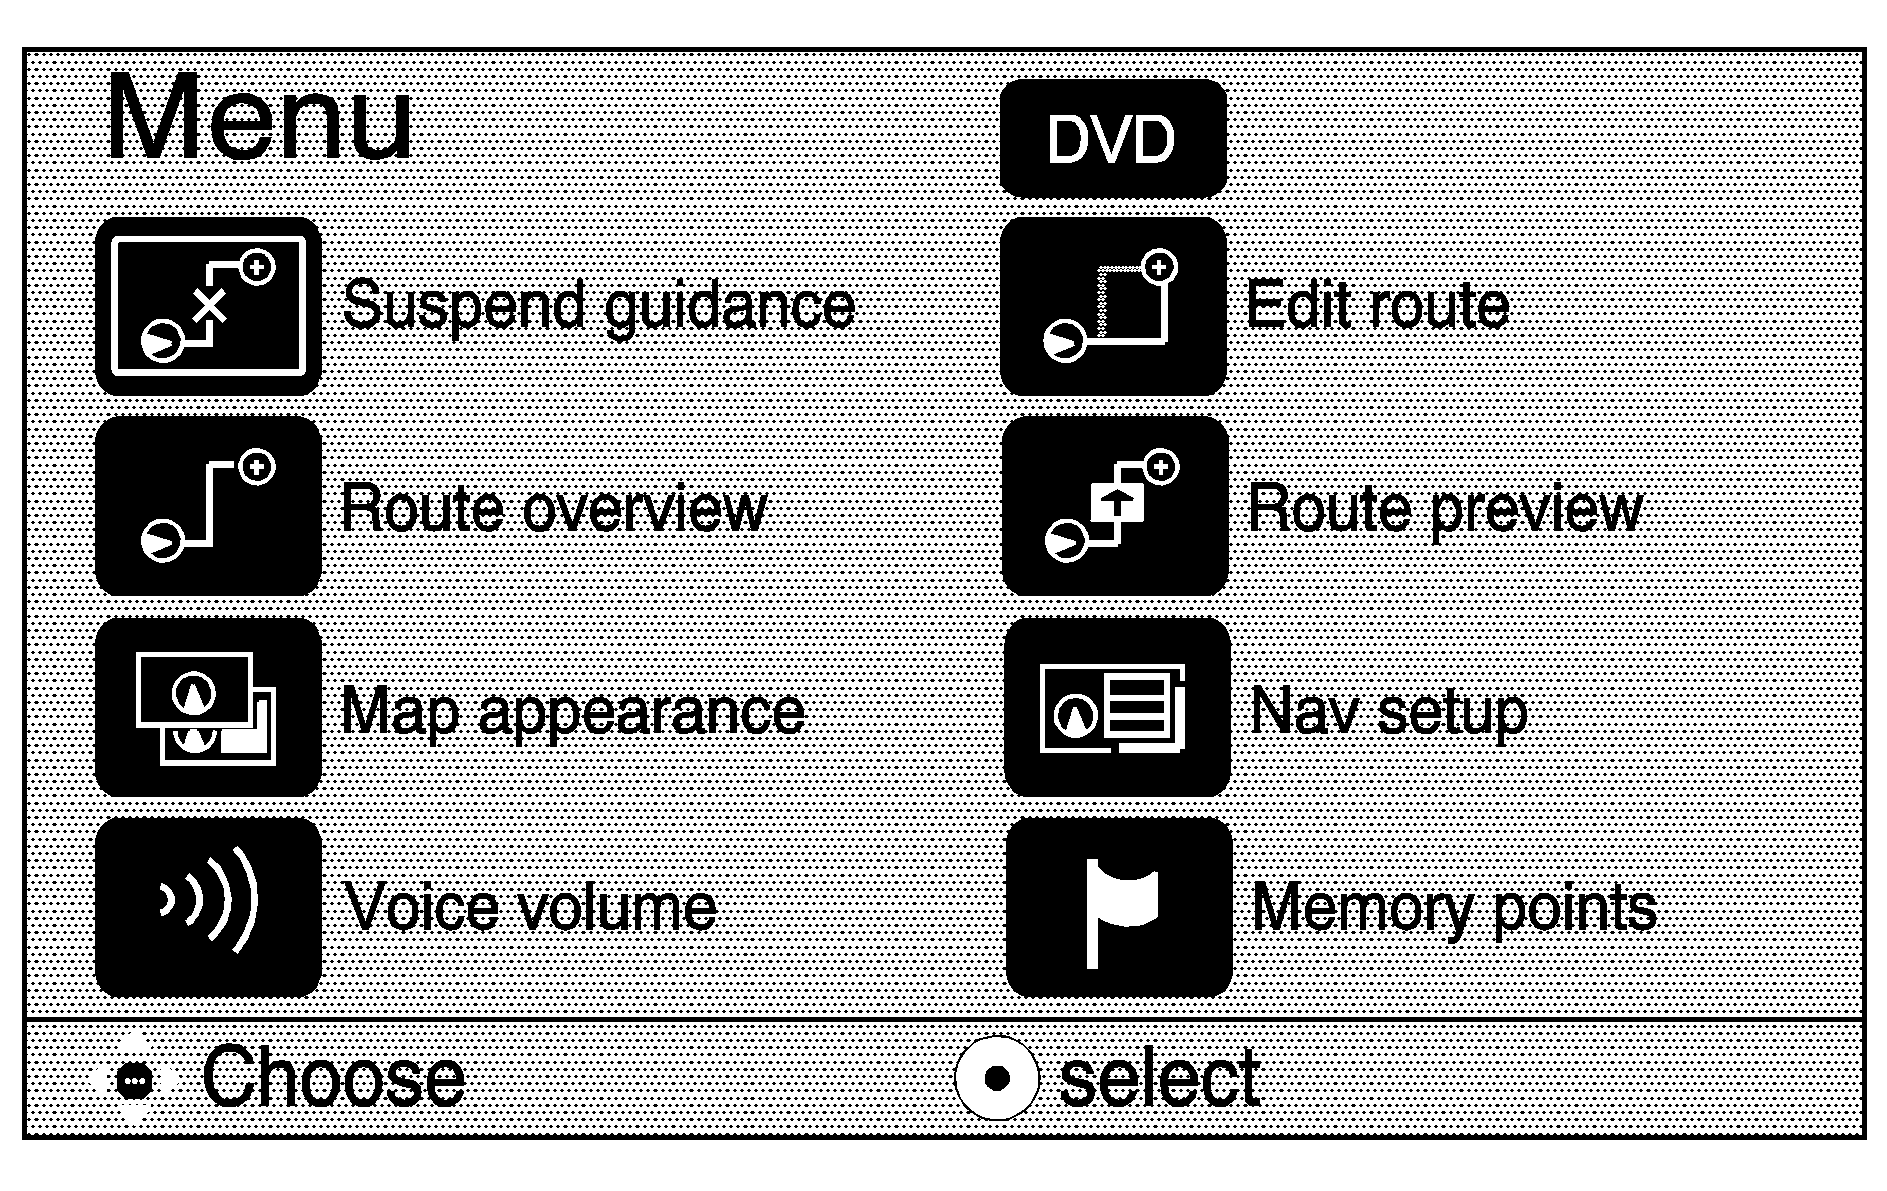
The main navigation menu allows you to choose from a list of options, and to use the available keys to make system adjustments and plan routes. Press the menu key to access the main navigation menu.
You will be able to choose from the following list of items on the main navigation menu:
| • | Suspend Guidance |
| • | Route Overview |
| • | Map Appearance |
| • | Voice Volume |
| • | DVD (DVD Information) |
| • | Edit Route |
| • | Route Preview |
| • | Nav (Navigation) Setup |
| • | Memory Points |
A detailed description of each item follows in this section.
Suspend Guidance
When this function is selected, guidance to all current and programmed destinations is suspended, but the current route will be retained in memory. You will no longer receive voice prompts for navigation. The map can still be viewed by pressing the map key. If you suspend guidance, the Resume Guidance key will allow you to resume the current route.
Route Overview
Selecting Route overview will show the map with the route highlighted. The total distance and estimated travel time are also displayed.
Map Appearance
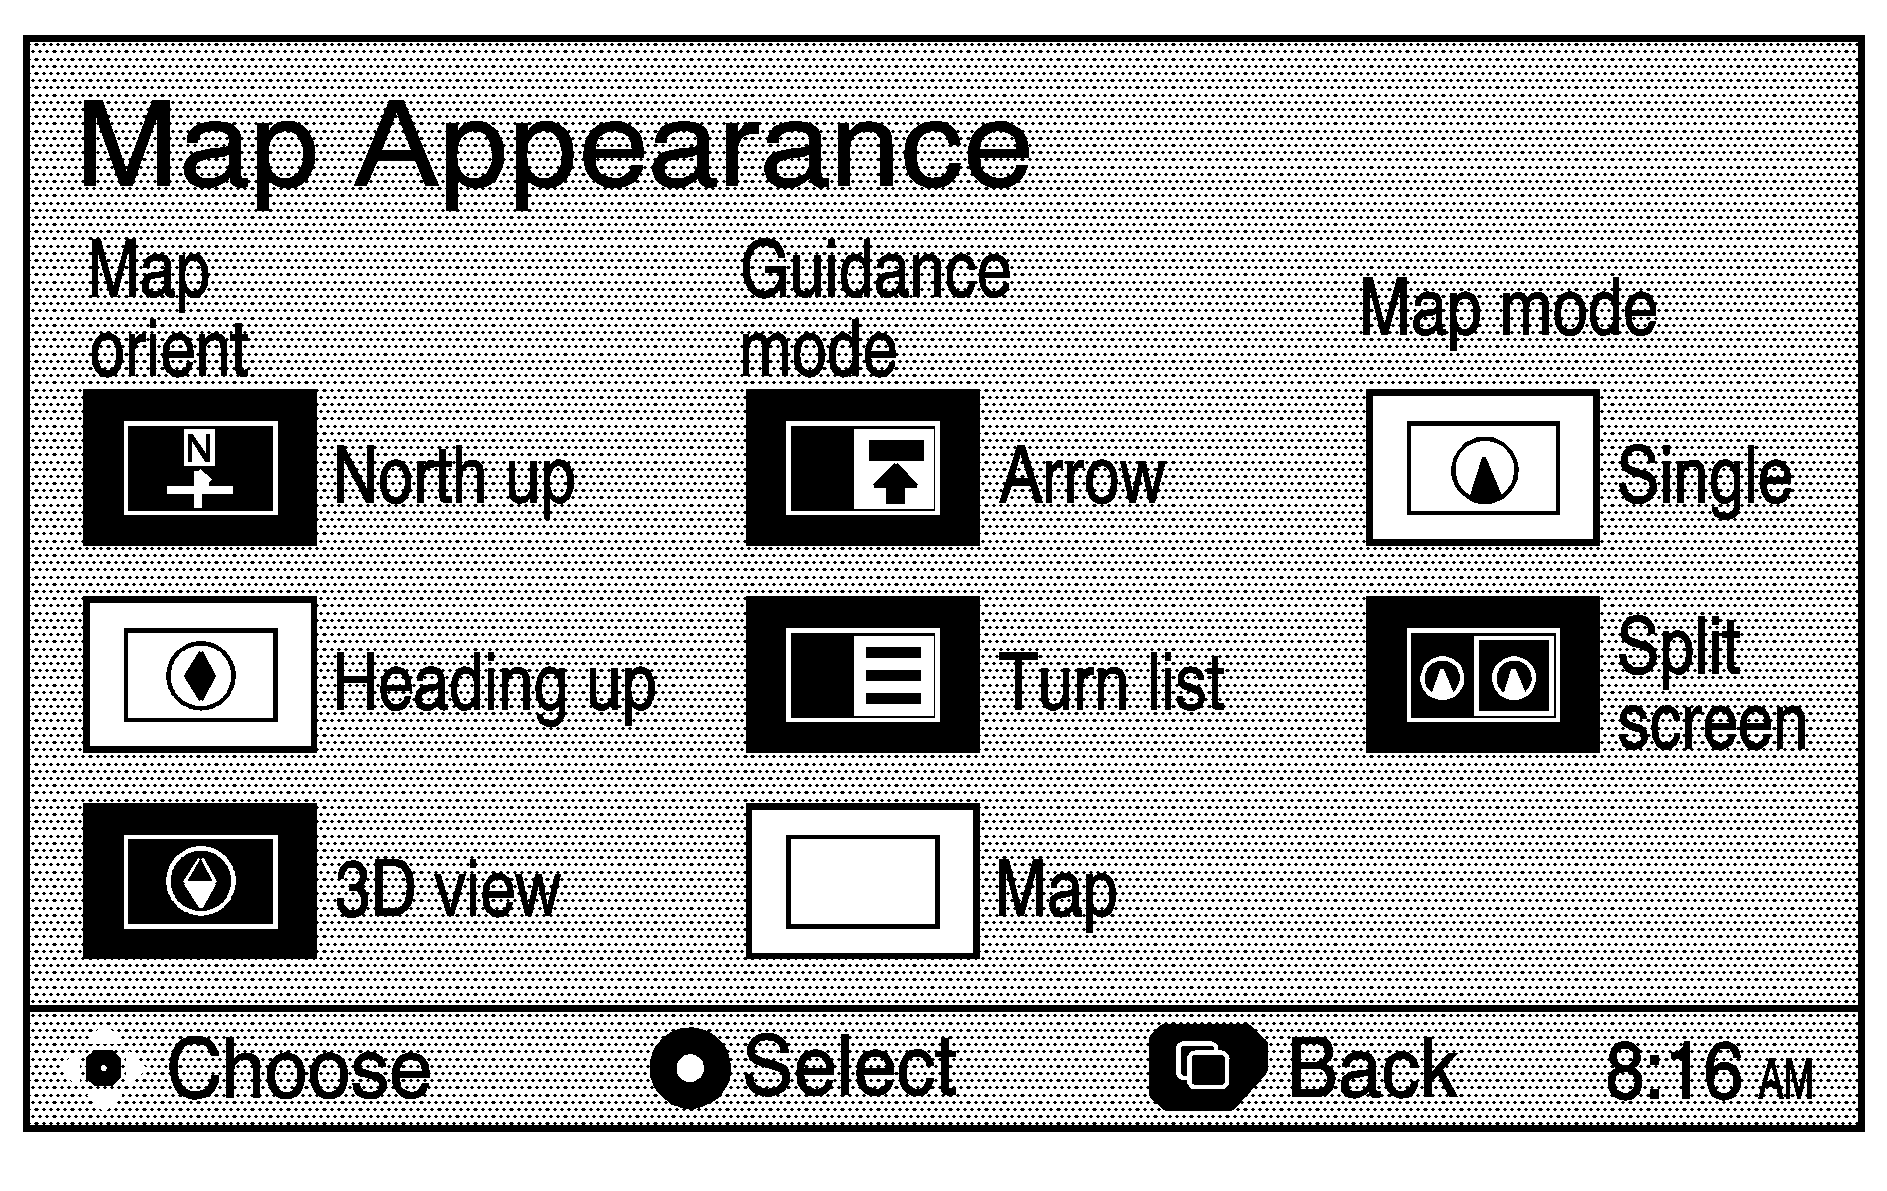
The Map Appearance menu allows you to adjust the appearance of a map based on your preferences. This menu is divided into three sections: Map orient (orientation), Guidance mode, and Map mode. Use the joystick to scroll through and select the options you want. The following are brief explanations of the options available in each section:
North up: This feature orients the map with North at the top of the map screen, regardless of which direction you are driving.Heading up: This feature orients the map with the direction you are driving at the top of the map screen, regardless of which direction is North.
3D view: This feature gives maps a 3-dimensional view, and will remain in the Heading up position.
Arrow: This feature continually displays directional turn guidance for your next maneuver.
Turn list: This feature lists information on your next three maneuvers, including the distance to the turn, and street names.
Map: This feature will display your current position, with the calculated route highlighted.
Single: This feature allows one map to be displayed.
Split screen: This feature allows two maps to be displayed, which can be independently adjusted in both scale, and map orientation. When in Split screen mode, the right screen can be chosen to display Arrow or Turn list guidance modes.
For more information on the symbols that can appear on a map screen, see Symbols .
Voice Volume
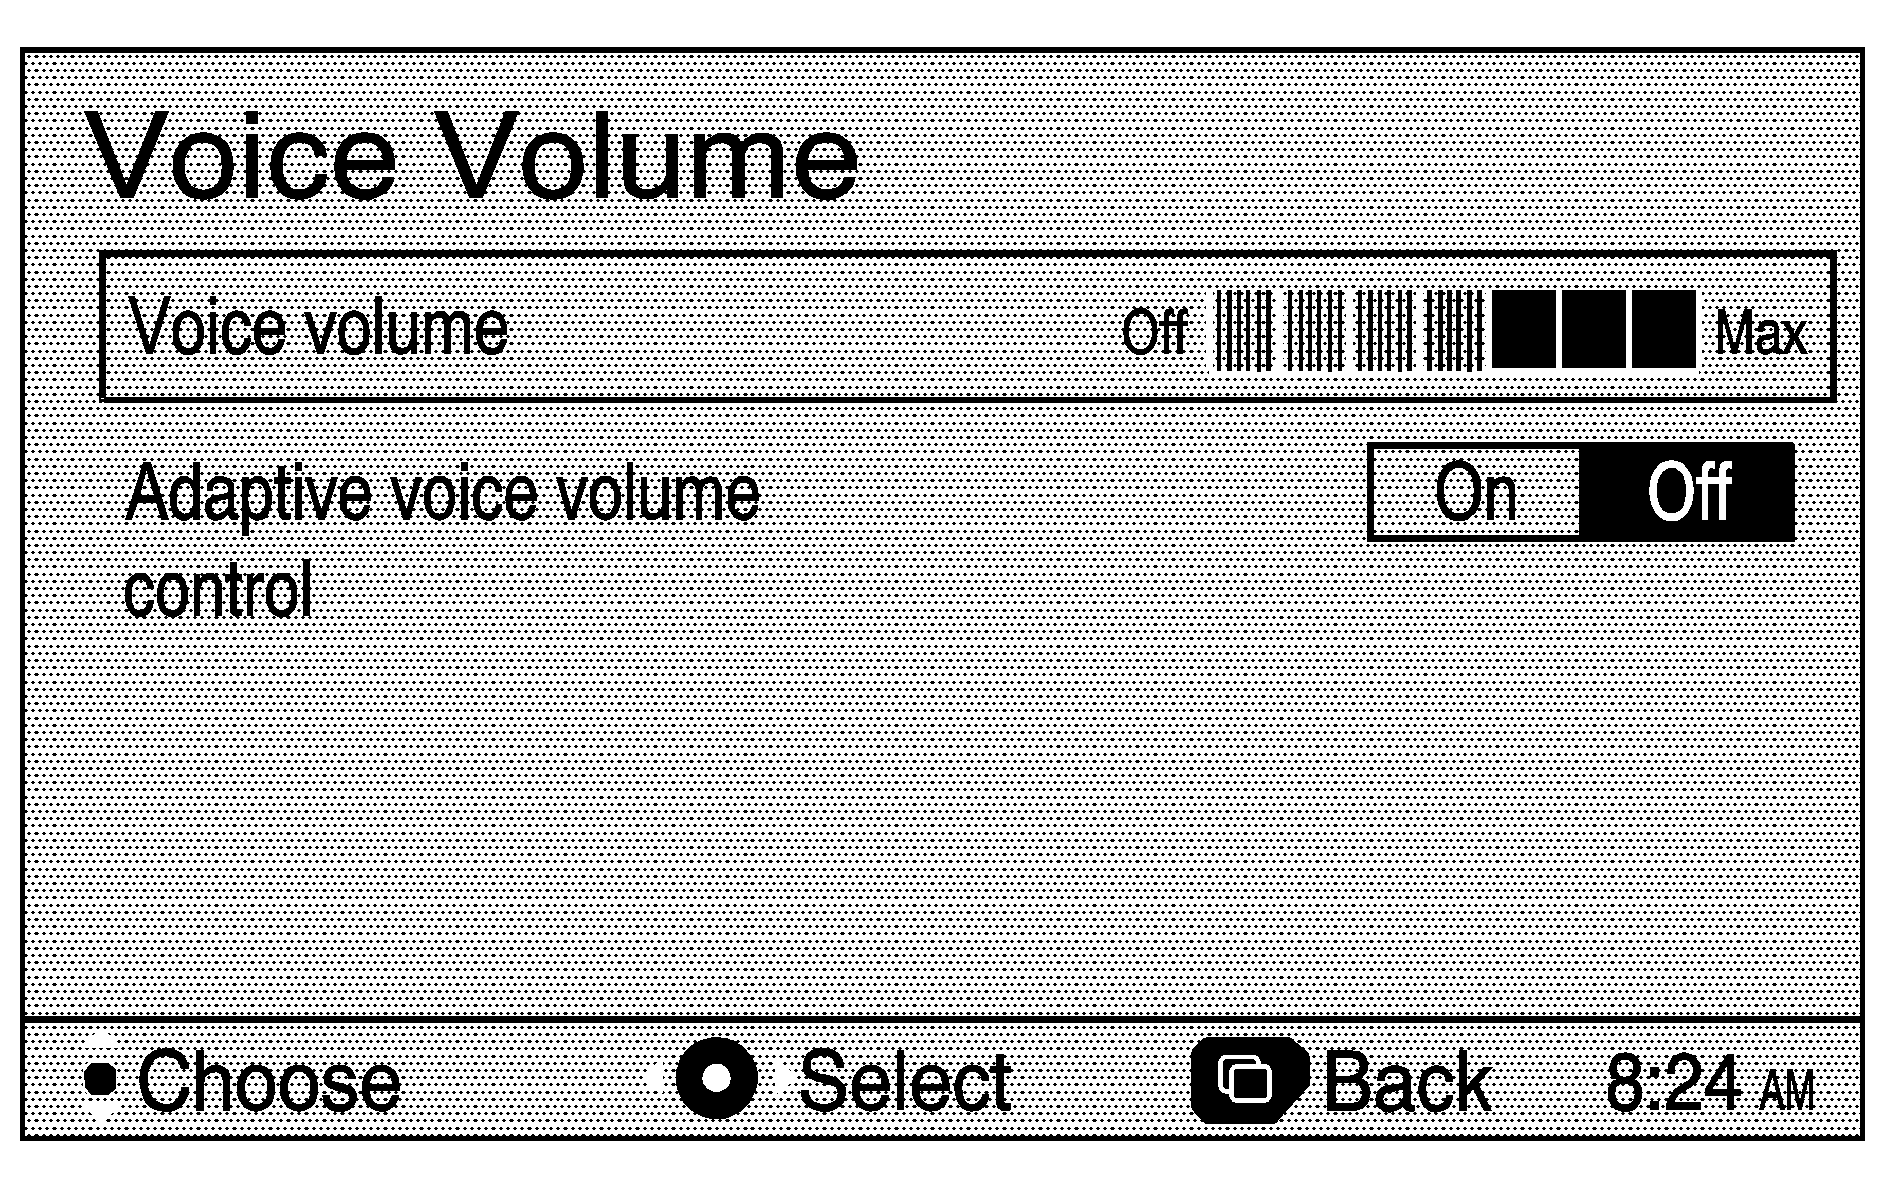
This system has voice guidance prompts that provide various messages as you approach points where you need to maneuver your vehicle, such as an intersection.
To adjust the volume of the voice prompts you receive from the system, do the following:
- Press the menu key.
- Select Voice Volume.
- Use the joystick to raise or lower the volume. The voice prompt will come on with each adjustment to give you an idea of the volume at each level.
- Once you have reached the desired volume level, press the back key to return to the previous screen.
With Adaptive voice volume control, the volume of voice prompts will increase automatically once the vehicle exceeds 50 mph (80 km/hr). Select On to activate this feature.
If you do not need voice guidance, you may also select Off to turn the prompts off.
DVD Information
Selecting DVD will display the information for the current navigation database disc.
Edit Route
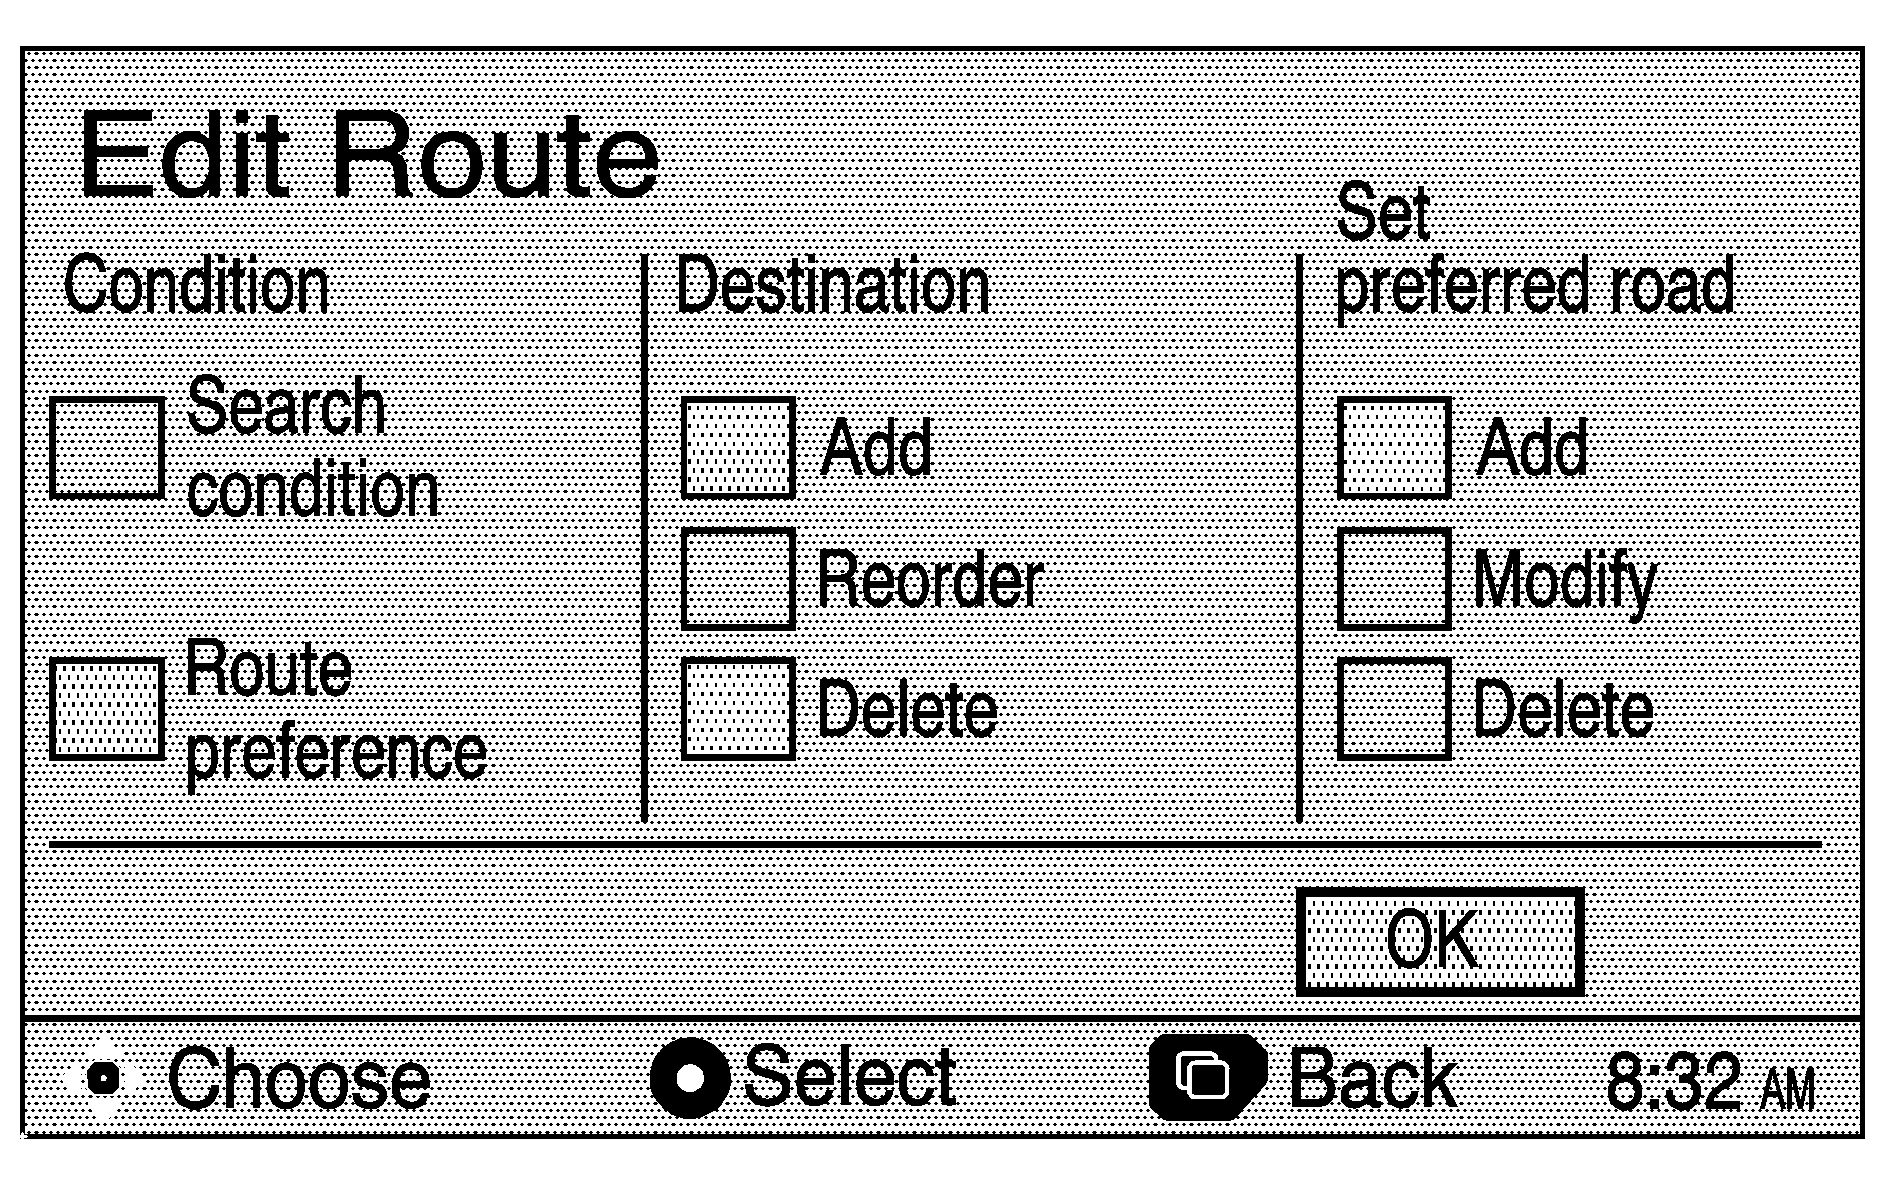
This function allows you to recalculate a route based on your preferences. You can also add, reorder, or delete destinations, and adjust road preference settings.
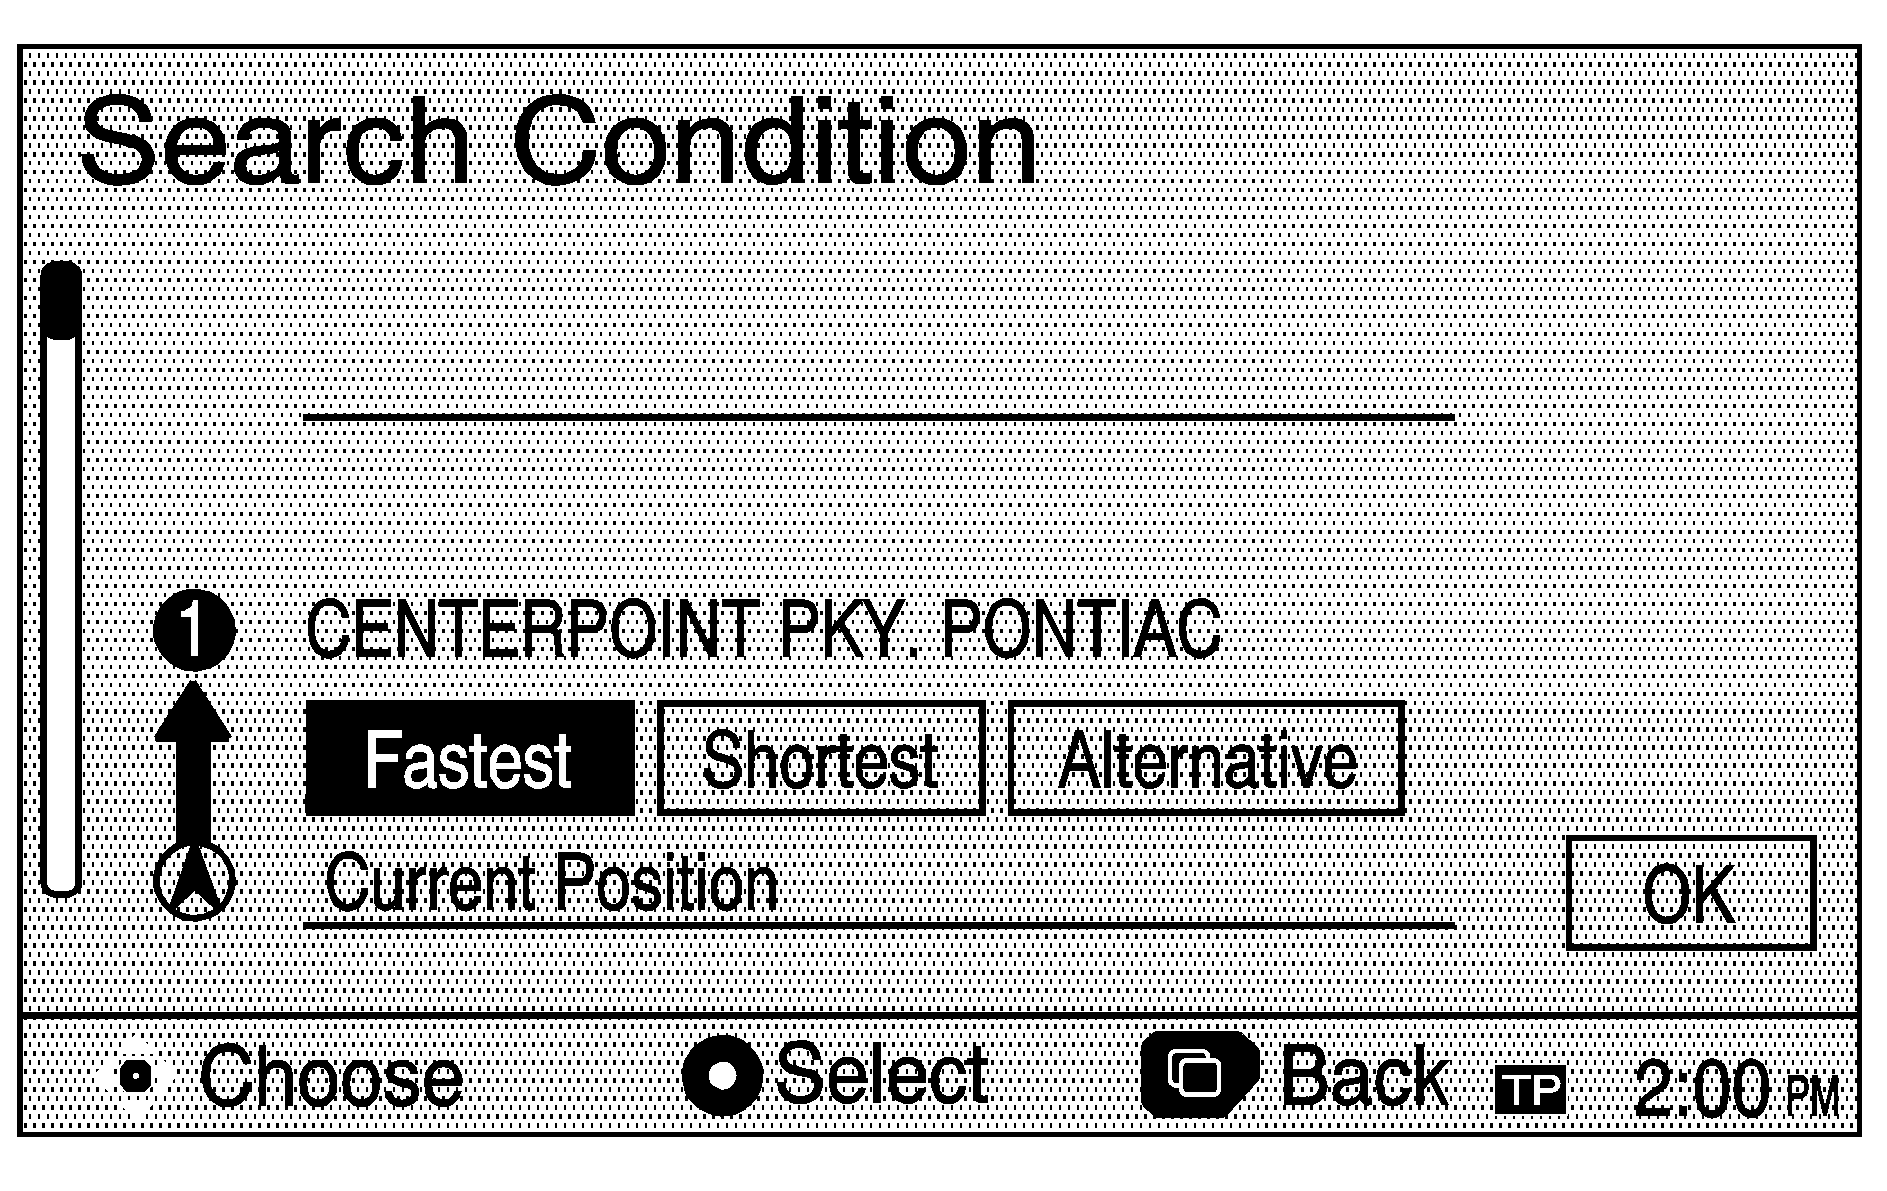
The Search Condition screen allows you to select your route preference by choosing from Fastest, Shortest, or Alternative route. By selecting the Fastest route, you will be routed along main roads and highways, which does not necessarily mean it will be the shortest route.
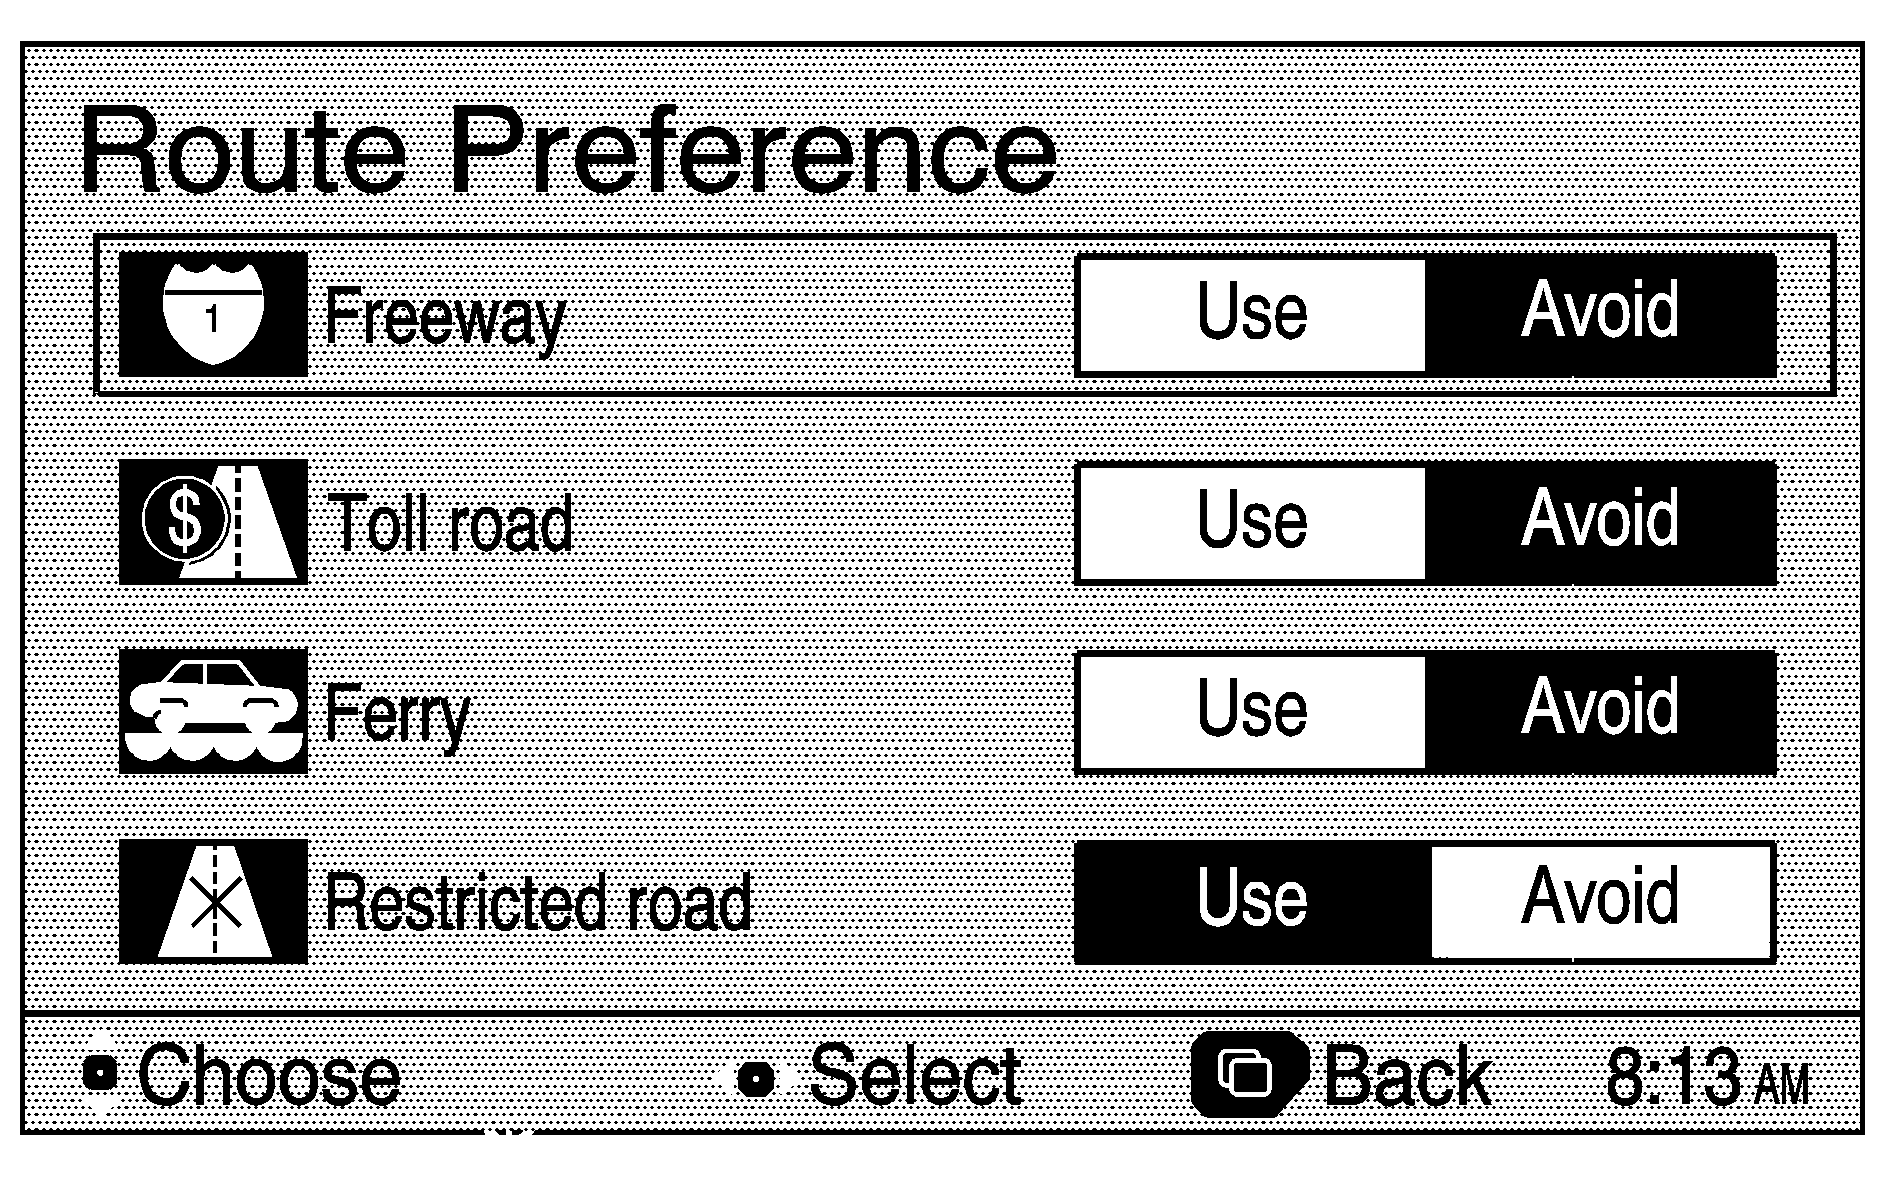
The Route Preference screen allows you to select your road preferences by setting which types of roads you wish to use and avoid.
Route Preview
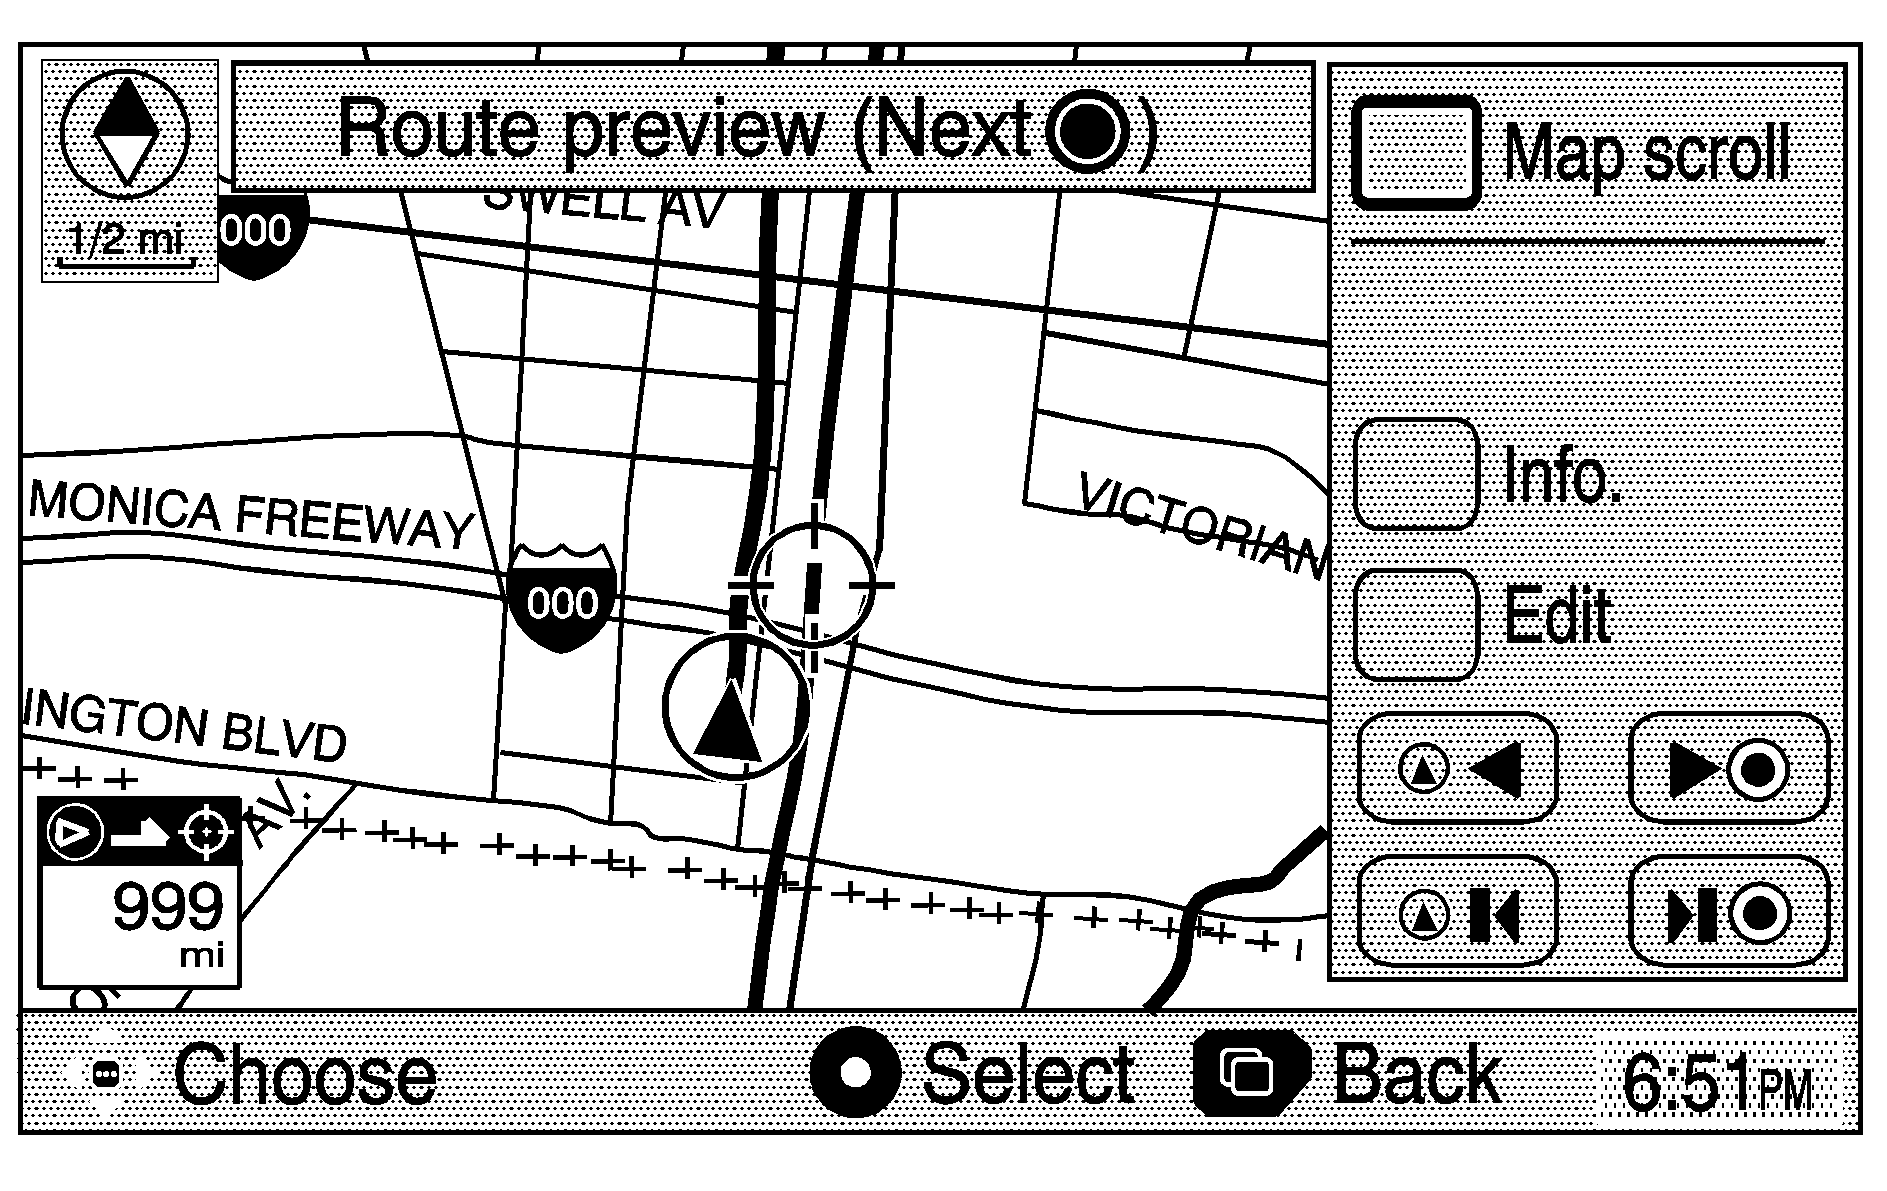
Selecting Route preview from the main navigation menu displays the map screen with the route highlighted. The route is traced by the vehicle symbol as you travel. You can preview the route from the starting position to the destination.
Nav (Navigation) Setup
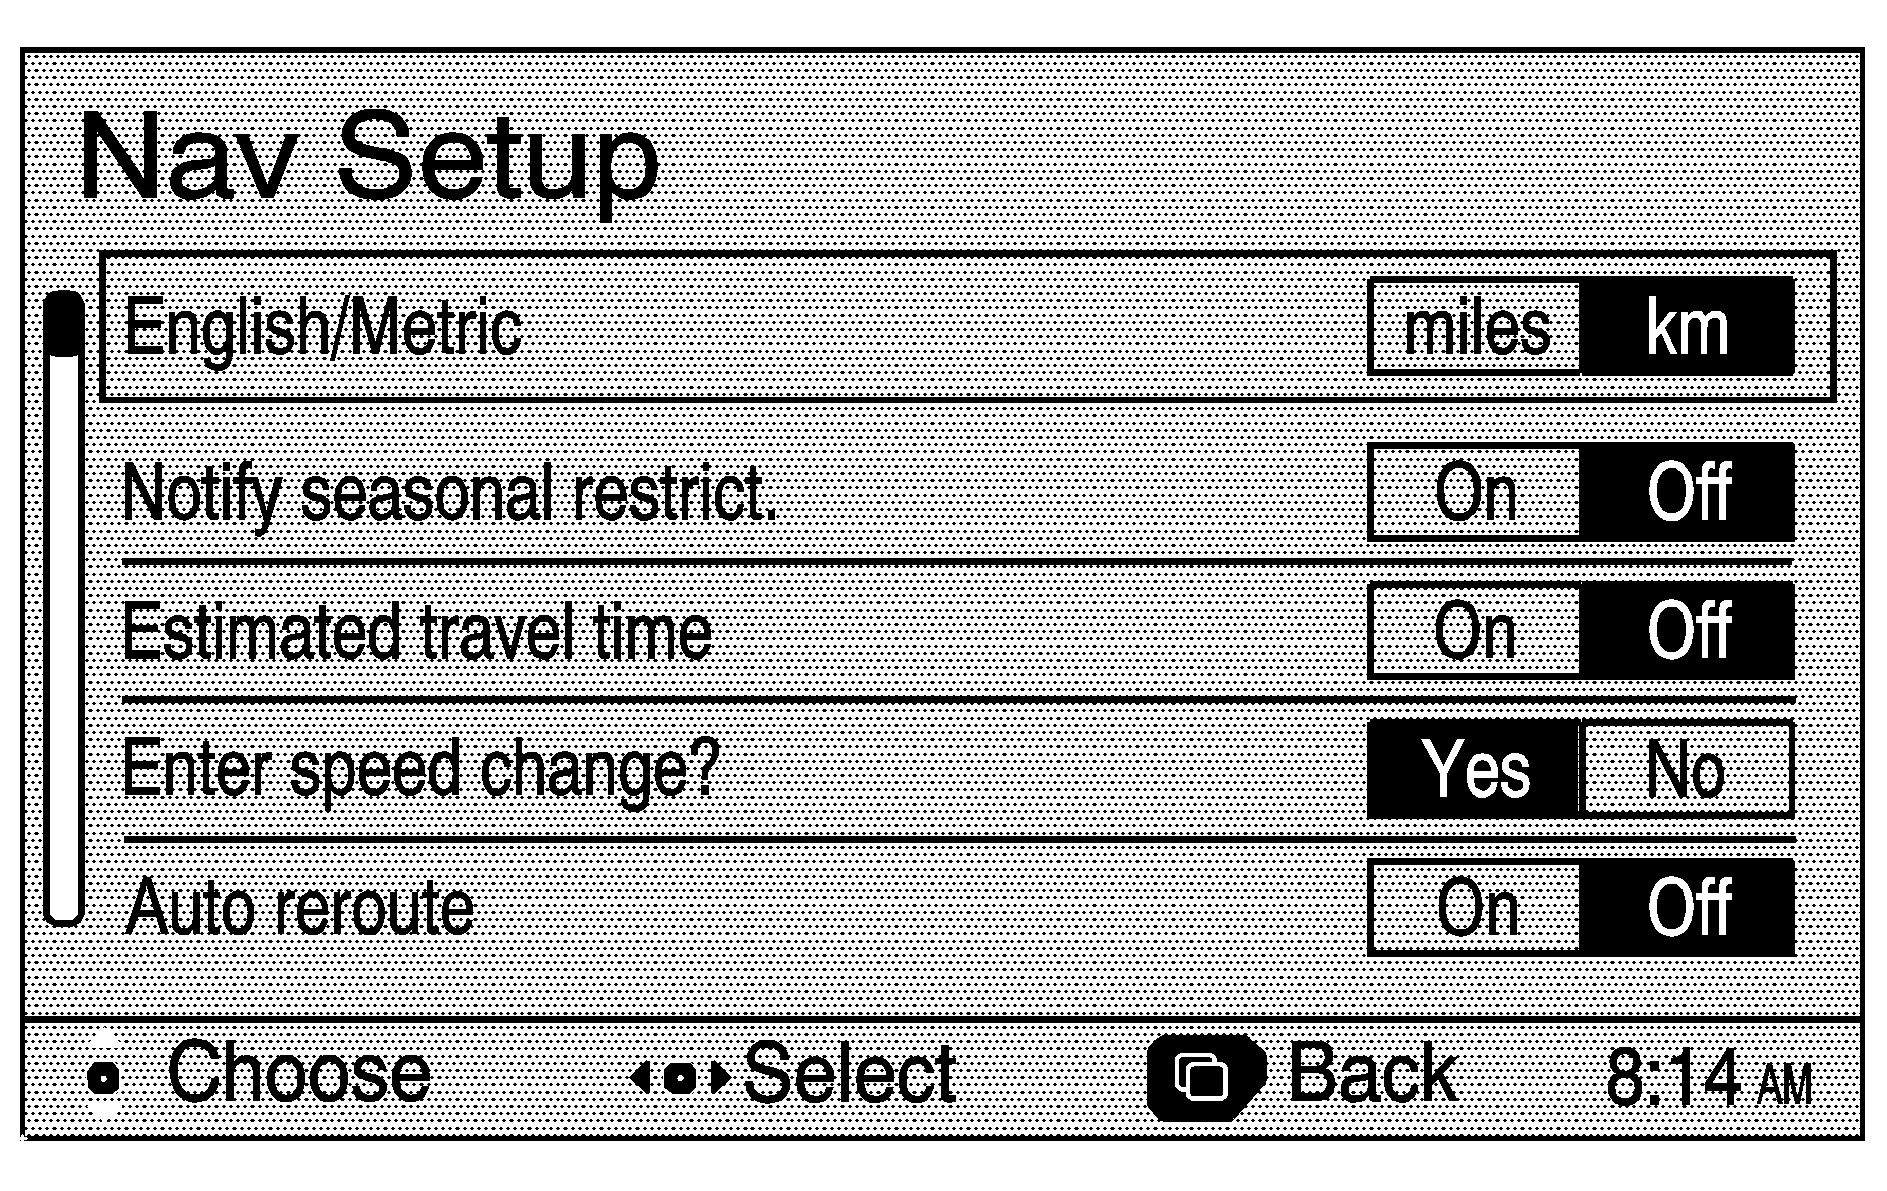
Selecting Nav setup displays the Nav Setup menu. From this menu, several options may be selected, adjusted, or turned on and off. The following are available options from the Nav Setup menu, with a brief explanation of each:
English/Metric: This features switches distance measurements between standard or metric measurements. Choose miles for standard measurements, or km (kilometers) for metric measurements.Notify seasonal restrict (restrictions): This feature can route you around seasonal restrictions, such as a closed road. Choose On to have your routes automatically calculated around seasonal restrictions, or Off to turn this feature off.
Estimated travel time: This feature displays the estimated time to travel from your current position to the destination. Choose On to have the estimated travel time displayed with the distance to destination, or Off to turn this feature off.
Enter speed change?: This feature allows you to adjust estimated speeds for Freeway, Main street or Residential driving. These speed values are used to calculate estimated travel time. To change estimated speeds, choose Yes. The Change Speed menu will appear. Move the joystick up or down to highlight the road type you want to change. Then move the joystick to the right to increase, or to the left to decrease the speed. The maximum allowable speed to set is 100 mph (161 km). When your adjustments are complete, press the back key to return to the Nav Setup menu.
Auto reroute: With this feature On, the navigation system will automatically recalculate a route if you drive off course. Choose Off to turn this feature off.
Voice guide in all mode: With this feature On, you will hear navigation voice prompts while in Audio and CD modes. Choose Off to turn off the voice prompts in those modes.
Current street name: With this feature On, the current street name will be displayed. Choose Off to turn this feature off.
Map color (Day): This feature allows you to adjust the daytime map appearance using the joystick. Choose between Normal, Auto, 1, 2, 3 or 4. The numbered settings vary the color scheme of the map display. The Auto setting will change the map appearance automatically every three months. When the desired color setting has been selected, press the map key to view the adjusted map color.
Map color (Night): This feature allows you to adjust the nighttime map appearance using the joystick. Choose between Normal, Auto, 1, 2, 3 or 4. The numbered settings vary the color scheme of the map display. The Auto setting will change the map appearance automatically every three months. When the desired color setting has been selected, press the map key to view the adjusted map color.
Operation guide on map: This feature allows you to remove the toolbar from the bottom of the display screen in order to see more of the map. Choose Off to remove the toolbar from the display screen. Choose On to restore the toolbar to the display screen.
Calibrate system?: This feature will calibrate wheel speed to assist in the calculation of vehicle position. This feature also allows you to manually reposition the vehicle symbol on the map. You may need to calibrate the system following a tire change, rotation, or if your vehicle has been relocated a great distance. Choose Yes to calibrate the system, or No to leave the calibration as it is.
Select defaults?: This feature allows you to restore all available factory default settings in the Nav Setup menu. Choose Yes to restore defaults, or No to retain the current settings.
Exit information: This feature will display map icons which can be selected to display the next exit's information, including Point of Interest (POI) facilities such as gas stations, restaurants, and lodging. Choose On to display exit information icons, or Off to cancel the display of exit information icons.
Memory Points
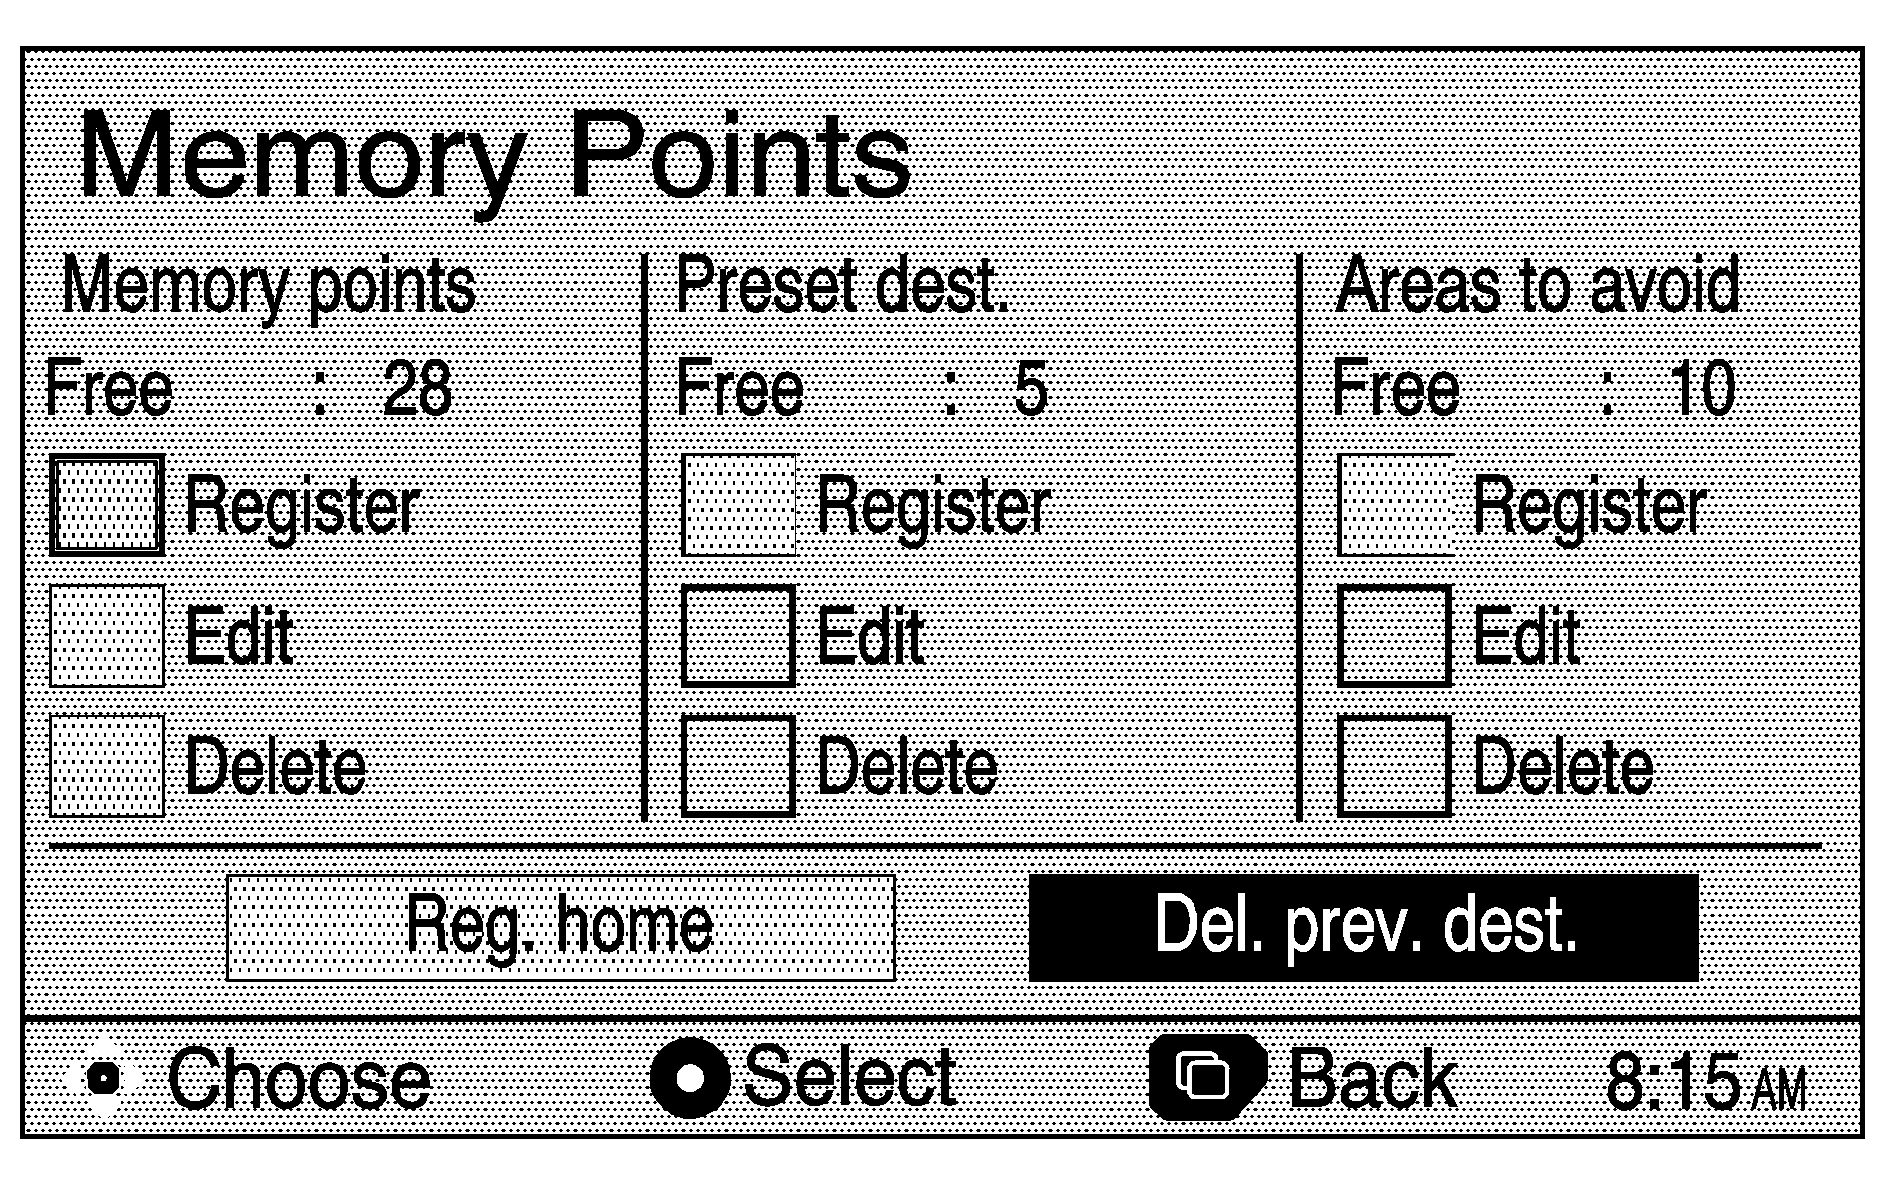
Selecting this function will display the Memory Points menu. This menu contains options for registering, deleting, and editing marked points stored in memory, such as Memory Points, preset destinations and areas to avoid.
Choosing to register a Memory Point will take you to the Destination entry screen. The name, location, information, and icon for a Memory Point may be edited.
Five preset destinations, as well as one for Home, may be registered or edited. The five preset destinations and Home are the only destination selections available from the Destination entry screen while the vehicle is moving. See "Destination" following in this section for more information on how to register Memory Points and preset destinations.
Up to 10 areas to avoid may also be registered from the Memory Points menu. Areas to avoid include areas such as a high traffic area, construction area, or any main road or intersection you wish to avoid. When registering or editing an area to avoid, the size of the area may be increased or decreased by using the joystick.
Destination
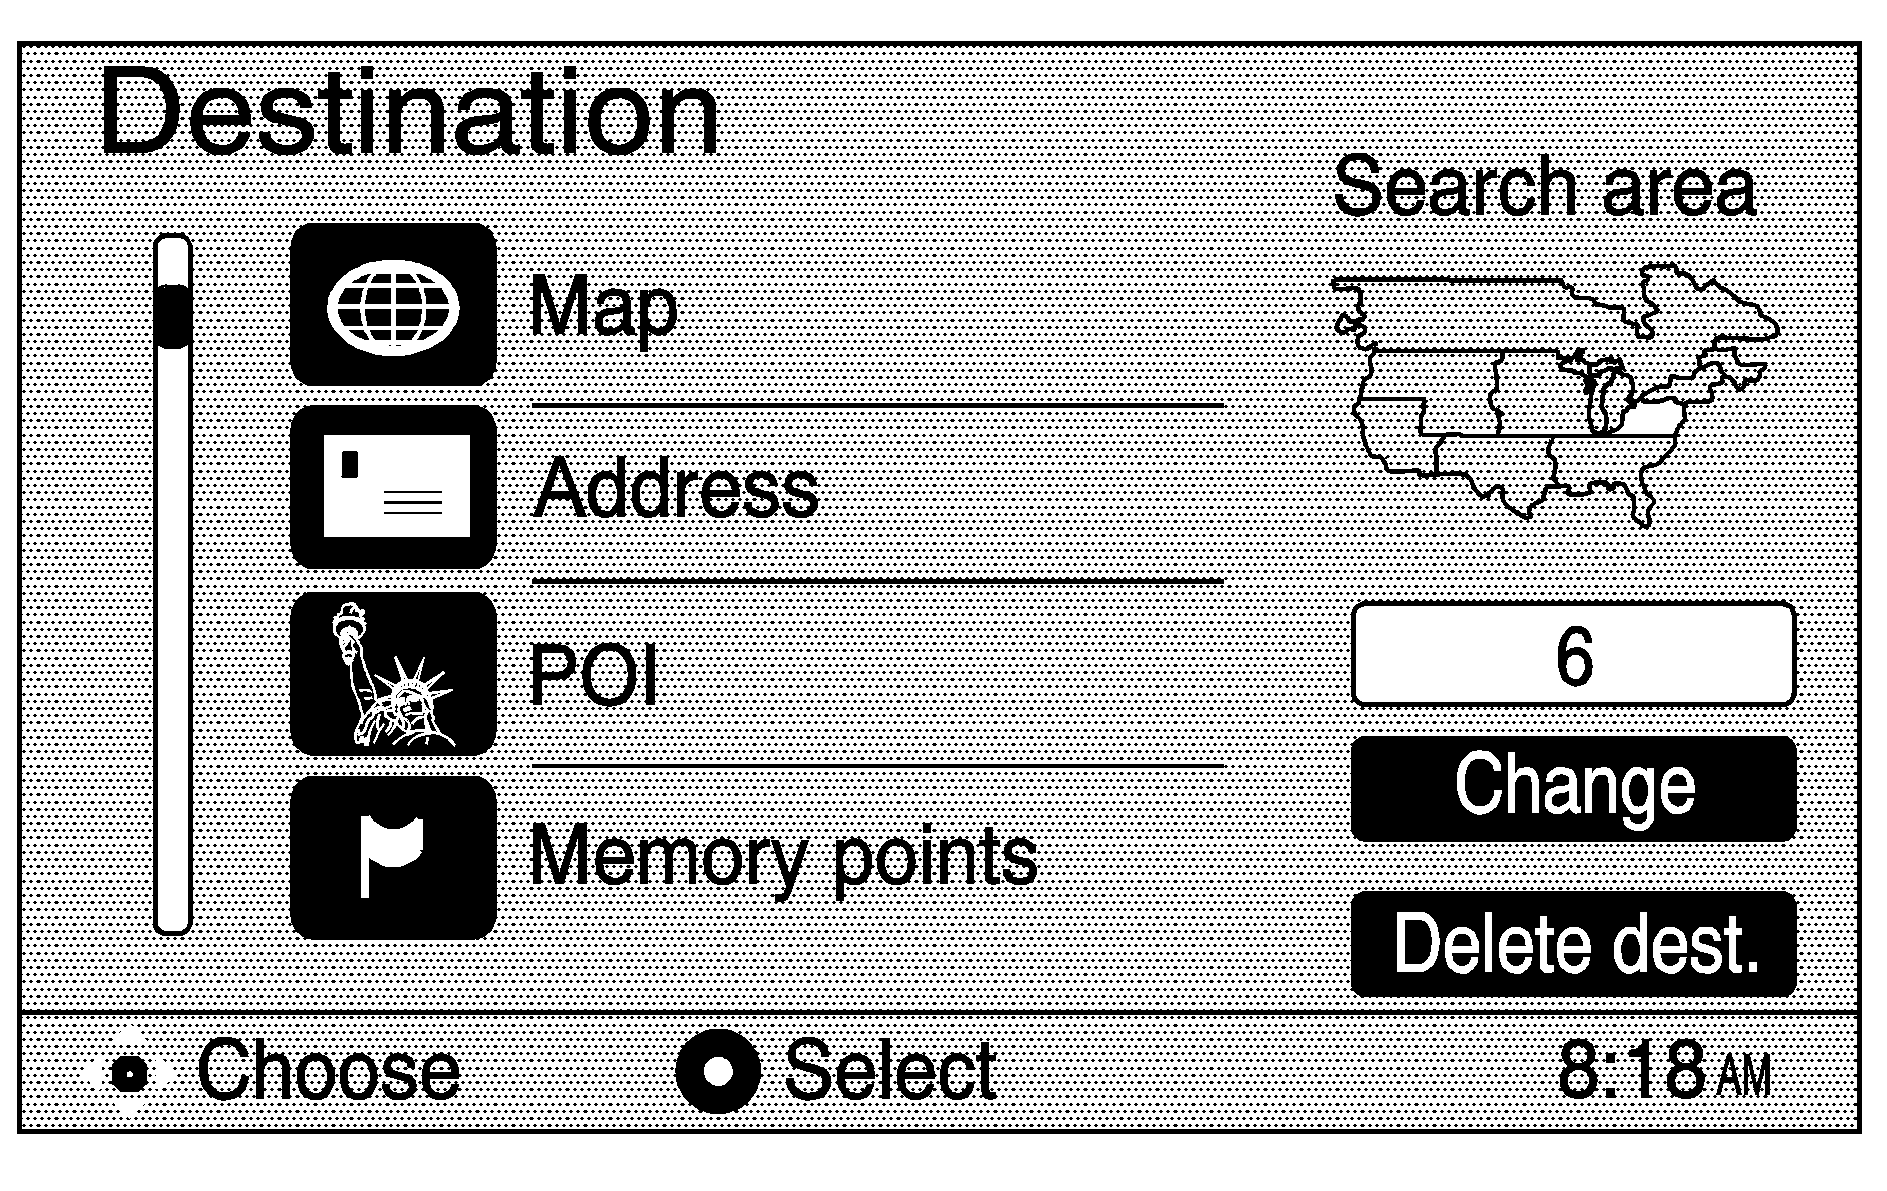
The Destination screen will give you more ways to plan a route by entering destination points. Press the DEST key to display the Destination screen.
The Destination screen allows you to select the area to be searched for your destination. A map of the United States and a part of Canada divided into 8 regions will be shown. Before selecting a method of destination entry, review the search area map on the right side of the Destination screen to make sure your destination is located in the highlighted region.
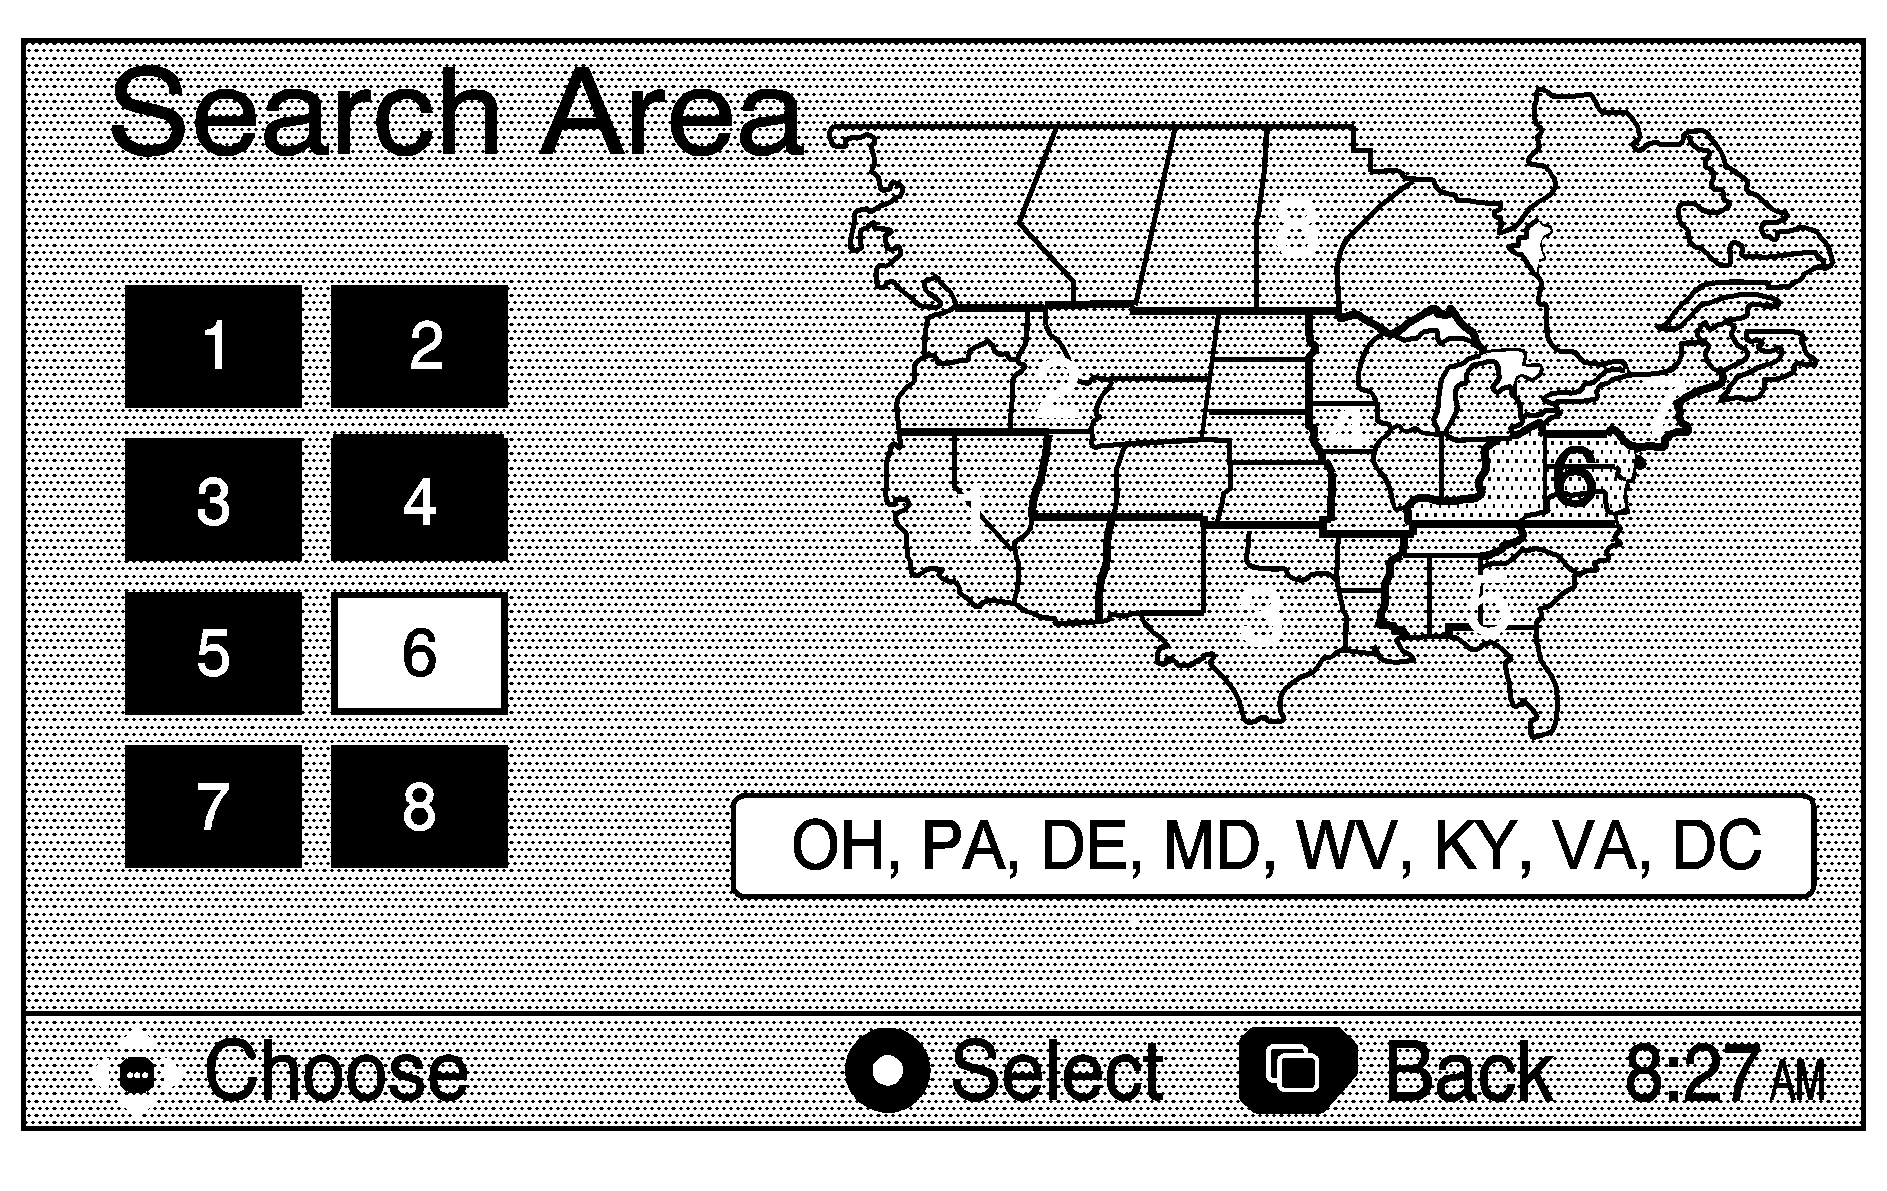
If you need to see a more detailed search area map with a list of states, or to change the search area, select Change. Use the joystick to highlight the number for the desired region, then press the center of the joystick to select it. The Destination screen will return automatically.
To enter a destination, choose from one of the following destination entry methods:
Address
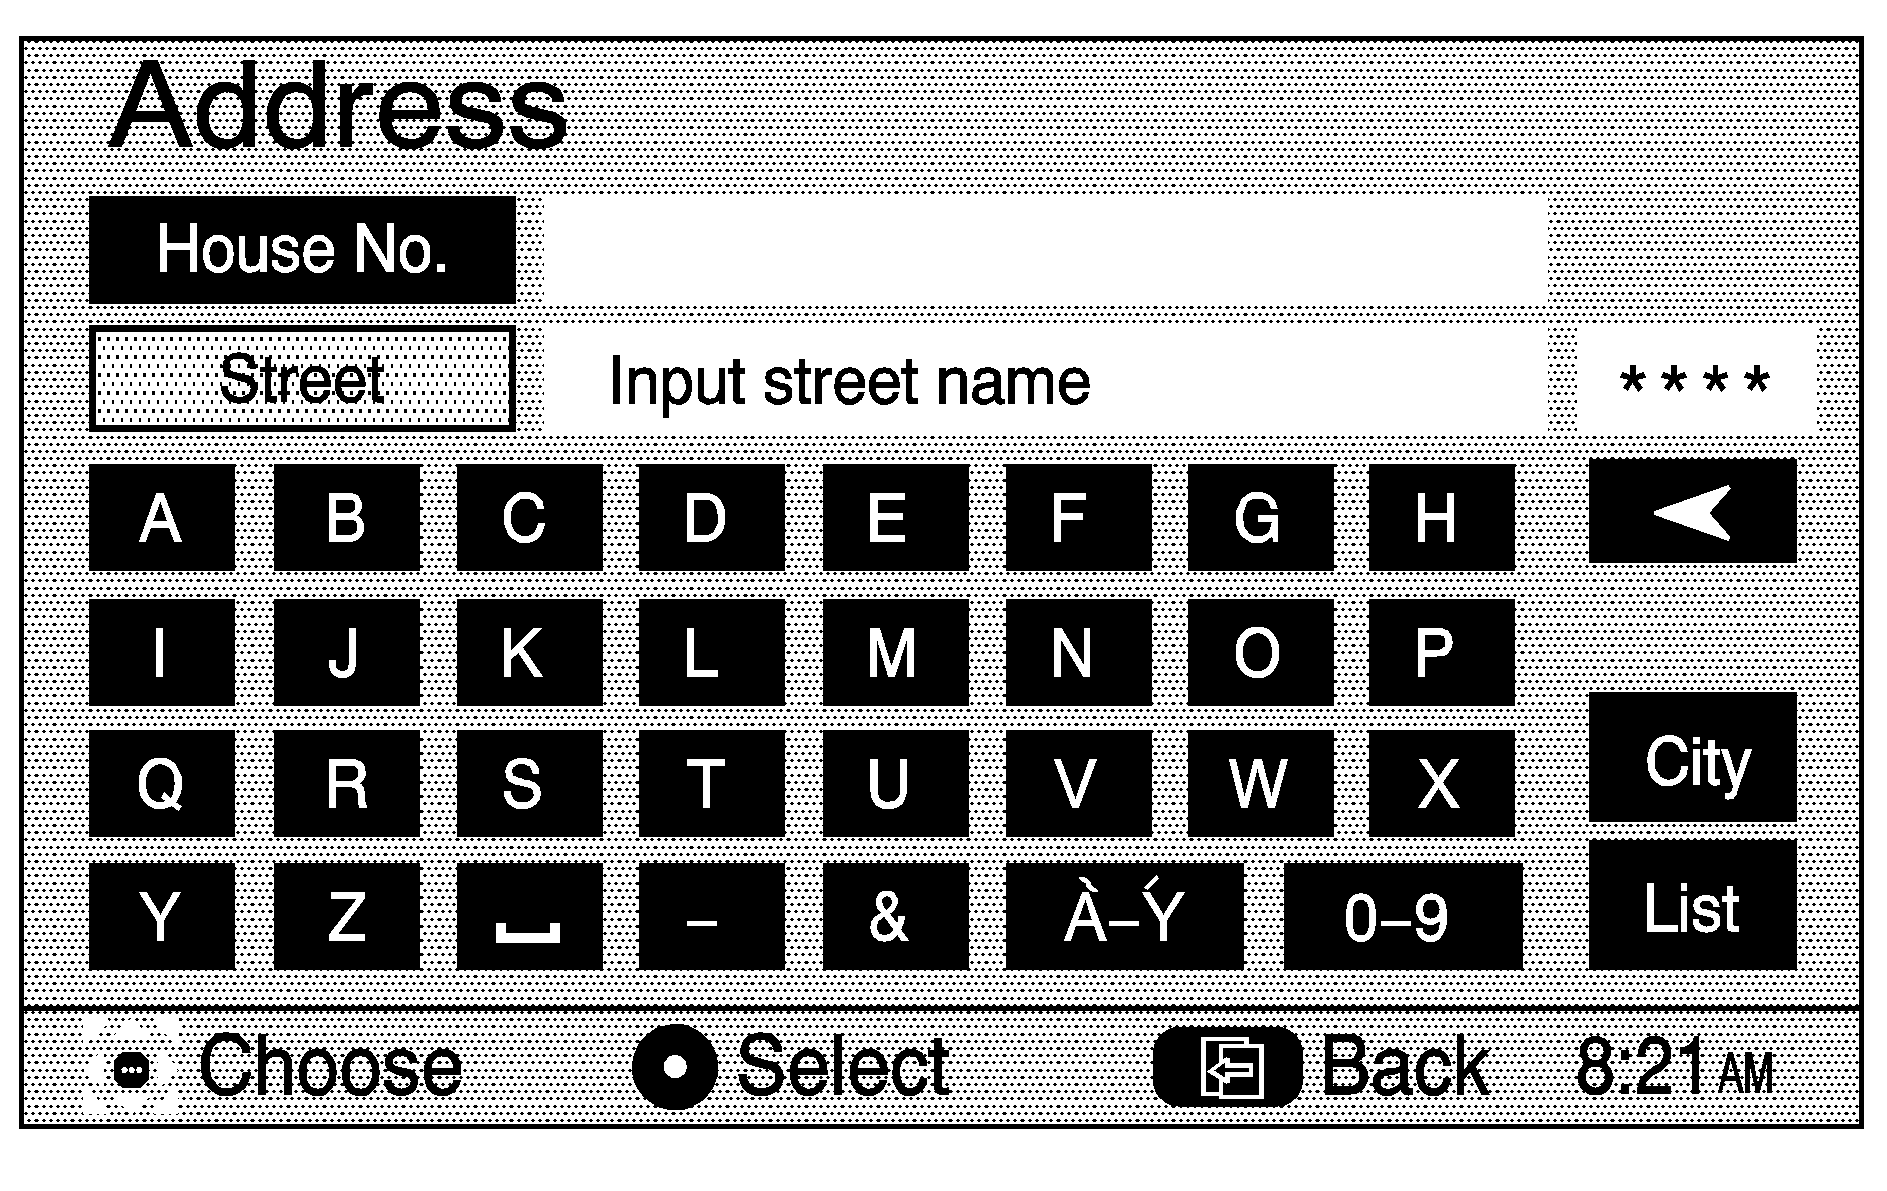
The Address destination entry method allows you to input an address by providing the system with a house number, street name, and city. Select Street name to begin entering the desired address.
Enter the street name using the alpha keypad. See "Alpha-Numeric Keypad" under Using the Navigation System for more information. Do not include name extensions such as N., or Drive. For example, the street name N. Civic Center Drive should be entered as Civic Center. As information is entered, the system will automatically search for available names, and the List key will become available. Press the List key to view available name choices and select the desired street name, or continue to spell the street name to further reduce the number of available items.
Once the street name has been selected, enter the house number using the numeric keypad. The system will list the house number range that is available for the street. When you have finished entering the house number, select OK.
If the house number and street address you entered exists in more than one city on the DVD database, a list of cities will appear. You can select a city name from the list, or enter the city name by selecting City, then Input City Name. As you begin to enter the city name, you can select the desired city from the list which will appear, or continue to spell the city name to further reduce the number of available items.
Once your destination entry is complete, a screen with the destination preview menu will be displayed. See "Destination Preview Menu" later in this section for more information.
Point of Interest (POI)
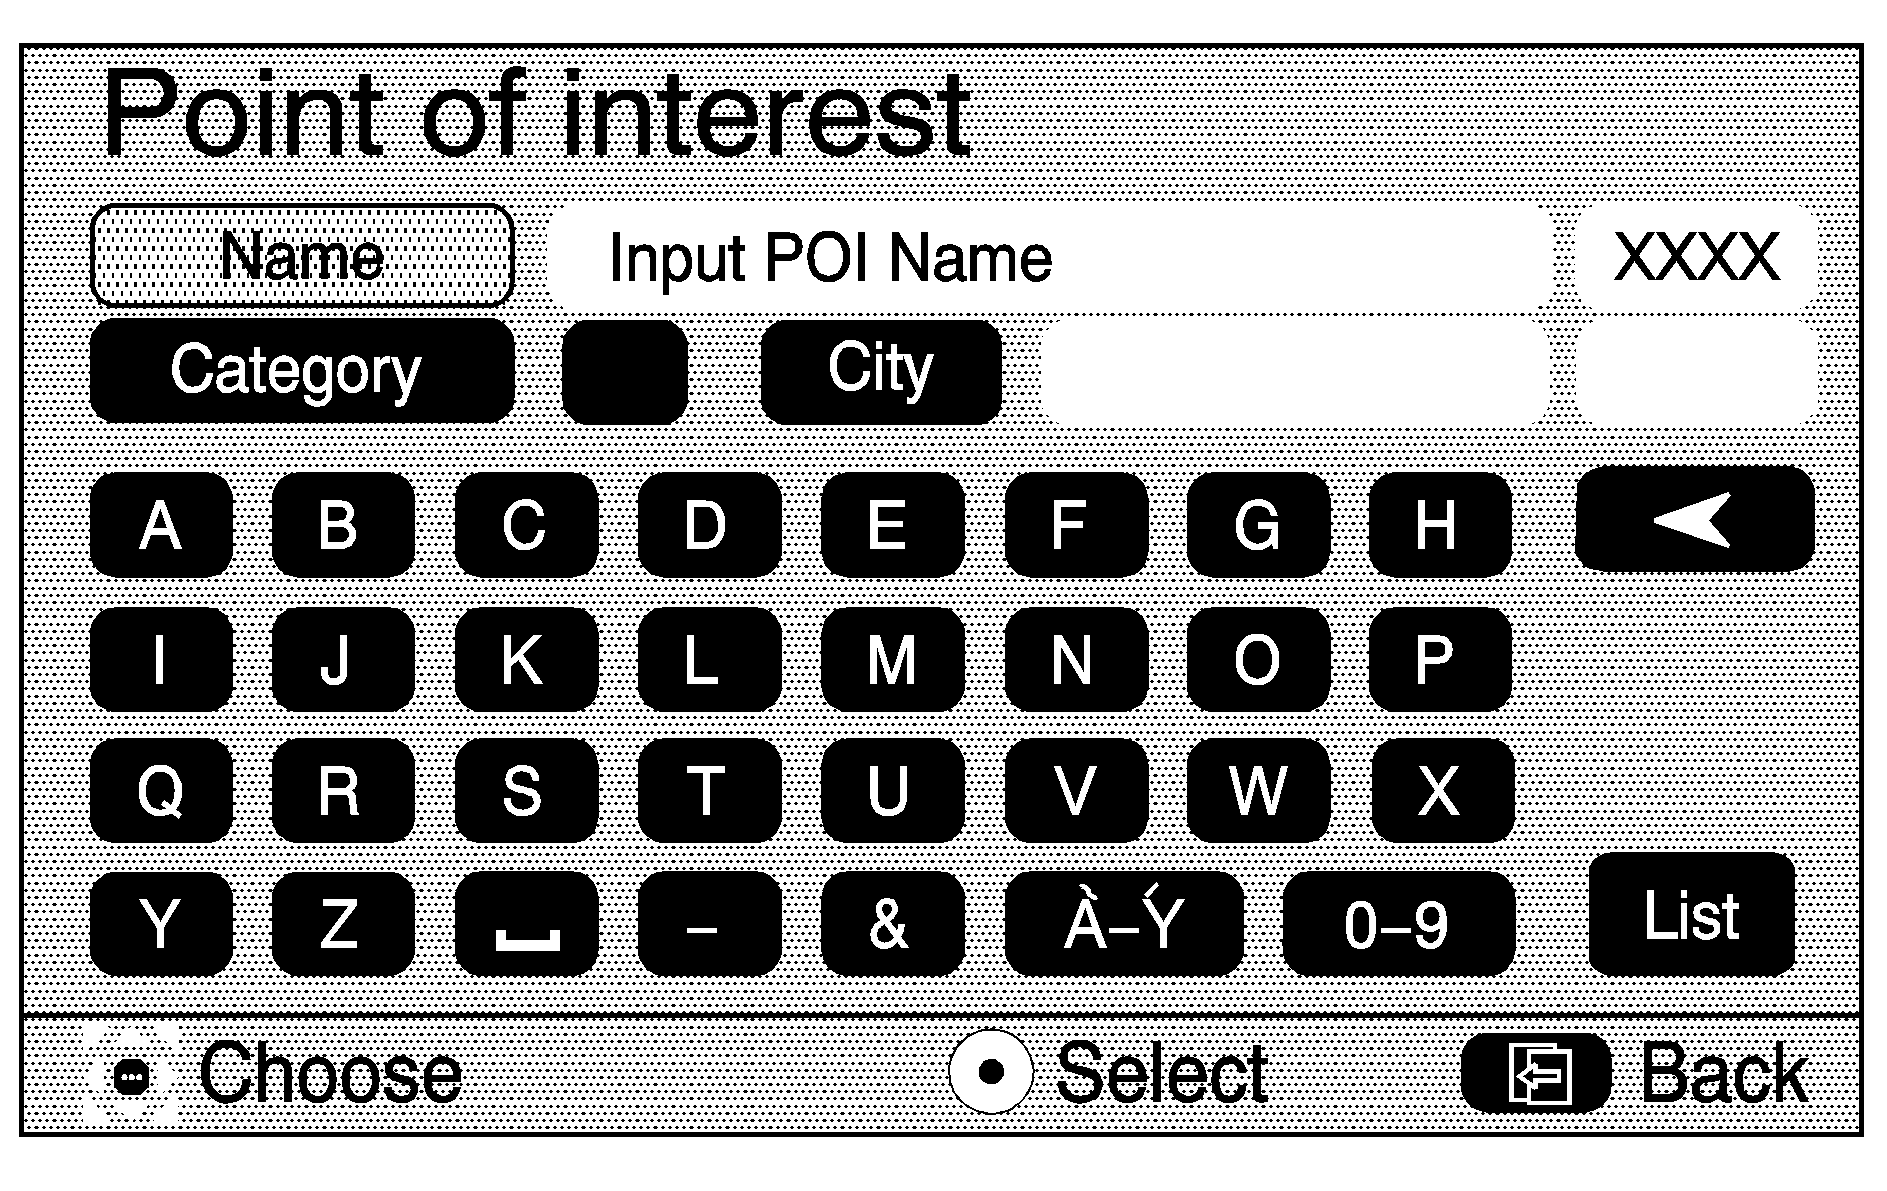
The Point of Interest (POI) destination entry method allows you to choose a destination from the POI list. Selecting POI from the Destination screen brings up the Point of Interest entry menu. The POIs in the database are cross referenced between Name, Category and City Names. You may search for a POI by using a combination of the following three methods:
| • | Type in a POI by name using the alpha-numeric keypad. As you type in a name, the system will search for an available match to your input. Select the correct POI name. |
| • | Select a POI by choosing the Category option. Select a category from the list the system will supply. If the list of available POIs for the category selected is still too long, you may need to input the name or city for the POI. |
| • | Select the City button and then type in the city you wish to select a POI from. |
While inputting a POI or city name, the List key will become available. Press the List key to view the list of available name choices, or continue to spell the name to further reduce the list of available items.
Once your destination entry is complete, a screen with the destination preview menu will be displayed. See "Destination Preview Menu" later in this section for more information.
The following list shows the types of facilities in the DVD database that you can choose from when using POI options. GM brand names can be selected to locate automobile related facilities specific to that brand name.
| • | Airport |
| • | Amusement Park |
| • | ATM |
| • | Auto Service & Maintenance |
| • | Automobile Club |
| • | Automobile Dealership |
| • | Bank |
| • | Border Crossing |
| • | Bowling Center |
| • | Buick® |
| • | Bus Station |
| • | Business Facility |
| • | Cadillac® |
| • | Casino |
| • | Chevrolet® |
| • | City Center |
| • | Community Center |
| • | Commuter Rail Station |
| • | Court House |
| • | Exhibition Center |
| • | Ferry Terminal |
| • | Gas Station |
| • | Golf Course |
| • | Government Office |
| • | GMC® |
| • | Grocery Store |
| • | Historical Monument |
| • | Hospital |
| • | Hotel |
| • | Ice Skating Center |
| • | Library |
| • | M-Way Service (Rest Area/Travel Plaza) |
| • | Marina |
| • | Movie Theater |
| • | Museums |
| • | Night Club |
| • | Oldsmobile® |
| • | Other |
| • | Park & Ride |
| • | Park/Recreation Area |
| • | Parking Garage |
| • | Parking Lot |
| • | Performing Arts |
| • | Police Station |
| • | Pontiac® |
| • | Post Office |
| • | Public Sports Airport |
| • | Rental Car Agency |
| • | Railway Station |
| • | Restaurant |
| • | Saab® |
| • | Saturn® |
| • | School |
| • | Shopping |
| • | Ski Resort |
| • | Sports Complex |
| • | Theatre |
| • | Tourist Attraction |
| • | Tourist Information |
| • | Town Hall |
| • | University |
| • | Winery |
If an arrow appears to the right or left of the item name, the complete name is too long for the display. Use the joystick to choose the right or left arrow, then press the joystick to select it. The item name will scroll to the end or beginning of its name.
The POI for Restaurant is broken down into several distinct categories. Select Restaurant from the POI choices. A list of cuisine types will then appear.
Memory Points
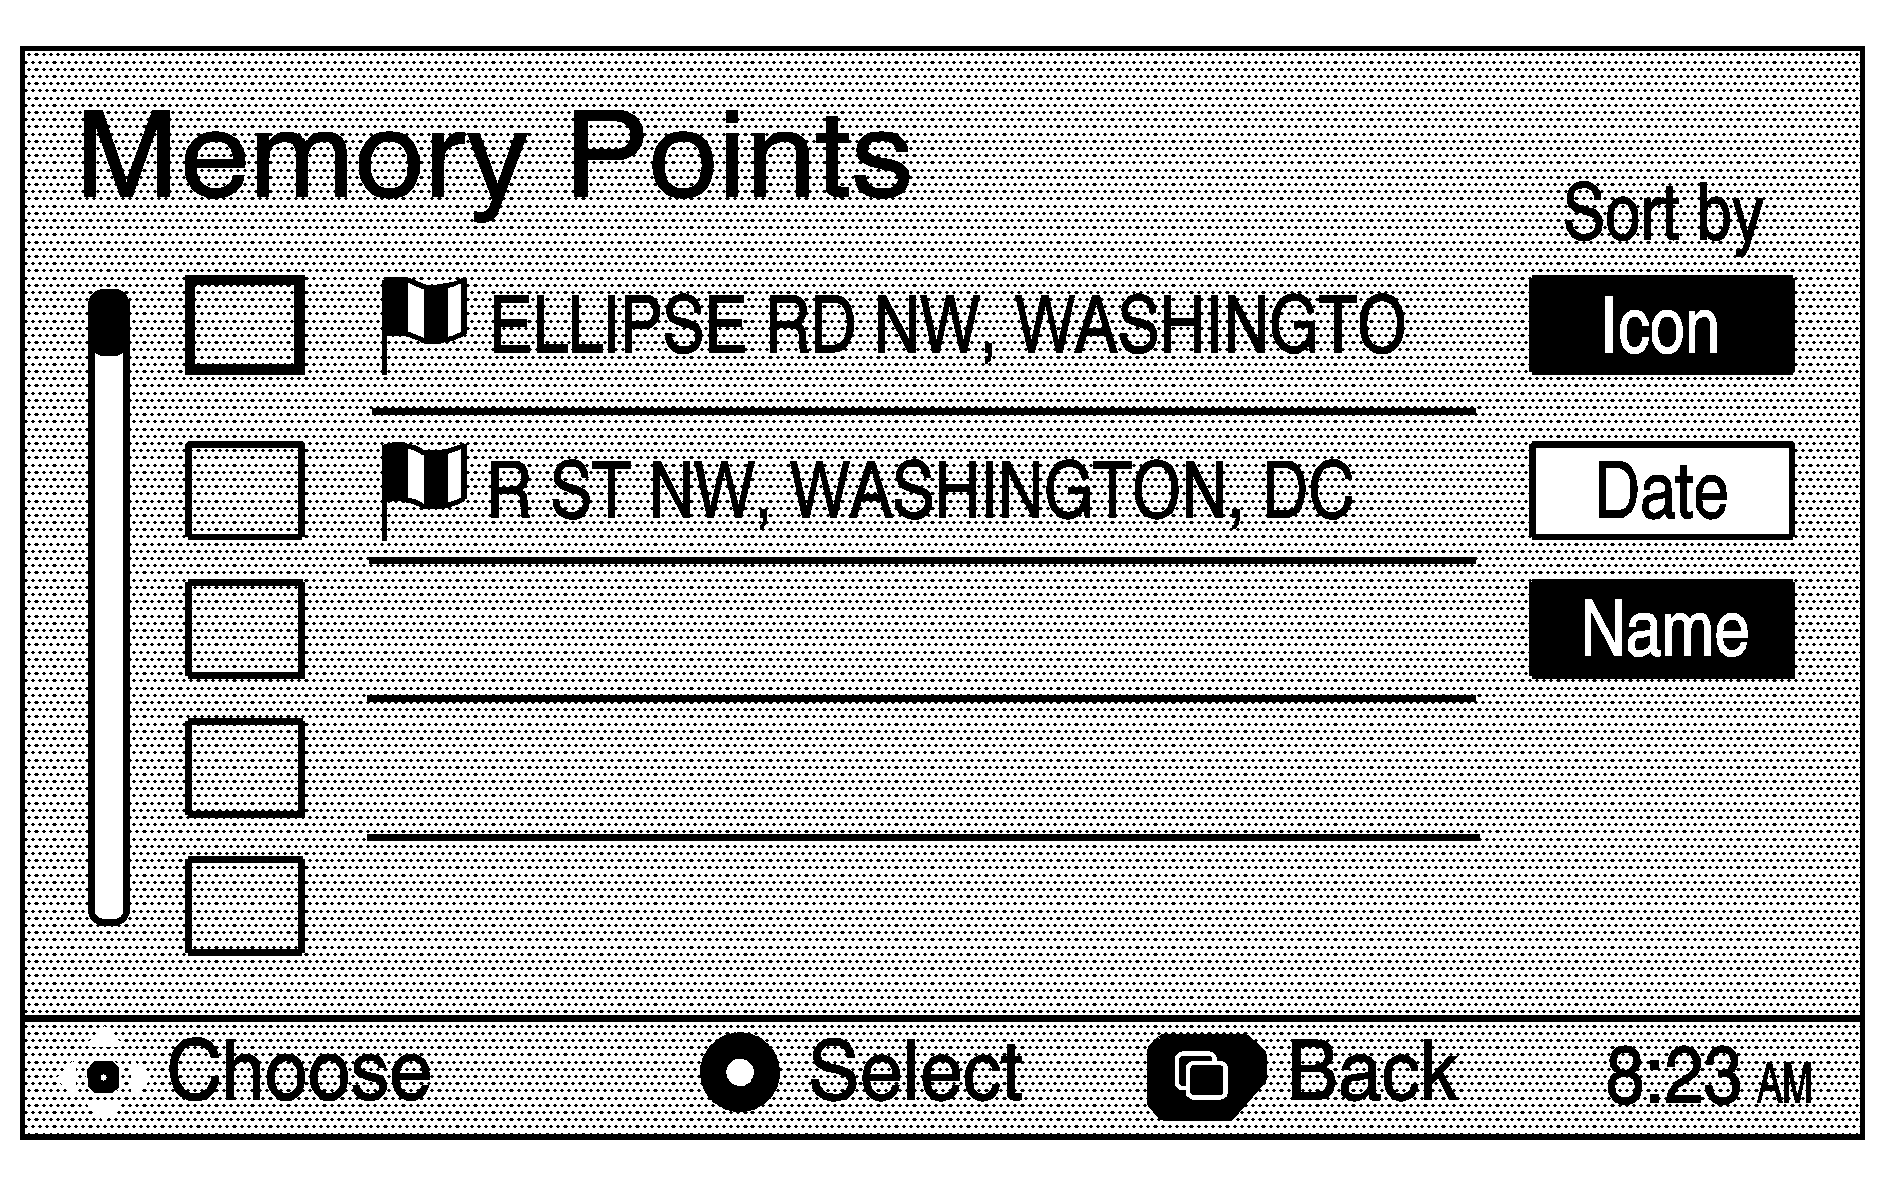
The Memory points destination entry method allows you to select a destination by choosing from a list of marked points on the map that were previously marked. Memory points include up to 30 saved points and five preset destinations. Selecting marked points from the Destination screen allows you to select any one of the marked points as the active destination. Marked points can also be sorted by icon, date saved, or alphabetically.
If you choose to register a memory point, you will be able to select an icon to correspond with that memory point. You will be given a screen with several icons to choose from. You can also choose to register that memory point by using a sound, which you select. To select a sound, choose With Sound, and press the joystick to select it.
Once your destination entry is complete, a screen with the destination preview menu will be displayed. See "Destination Preview Menu" later in this section for more information.
Preset Destination
The Preset destination entry method allows you to select destinations that were registered as presets 1 through 5. Besides the Home preset destination, these are the only presets available for selection while the vehicle is moving.
Once your destination entry is complete, a screen with the destination preview menu will be displayed. See "Destination Preview Menu" later in this section for more information.
Previous Destination
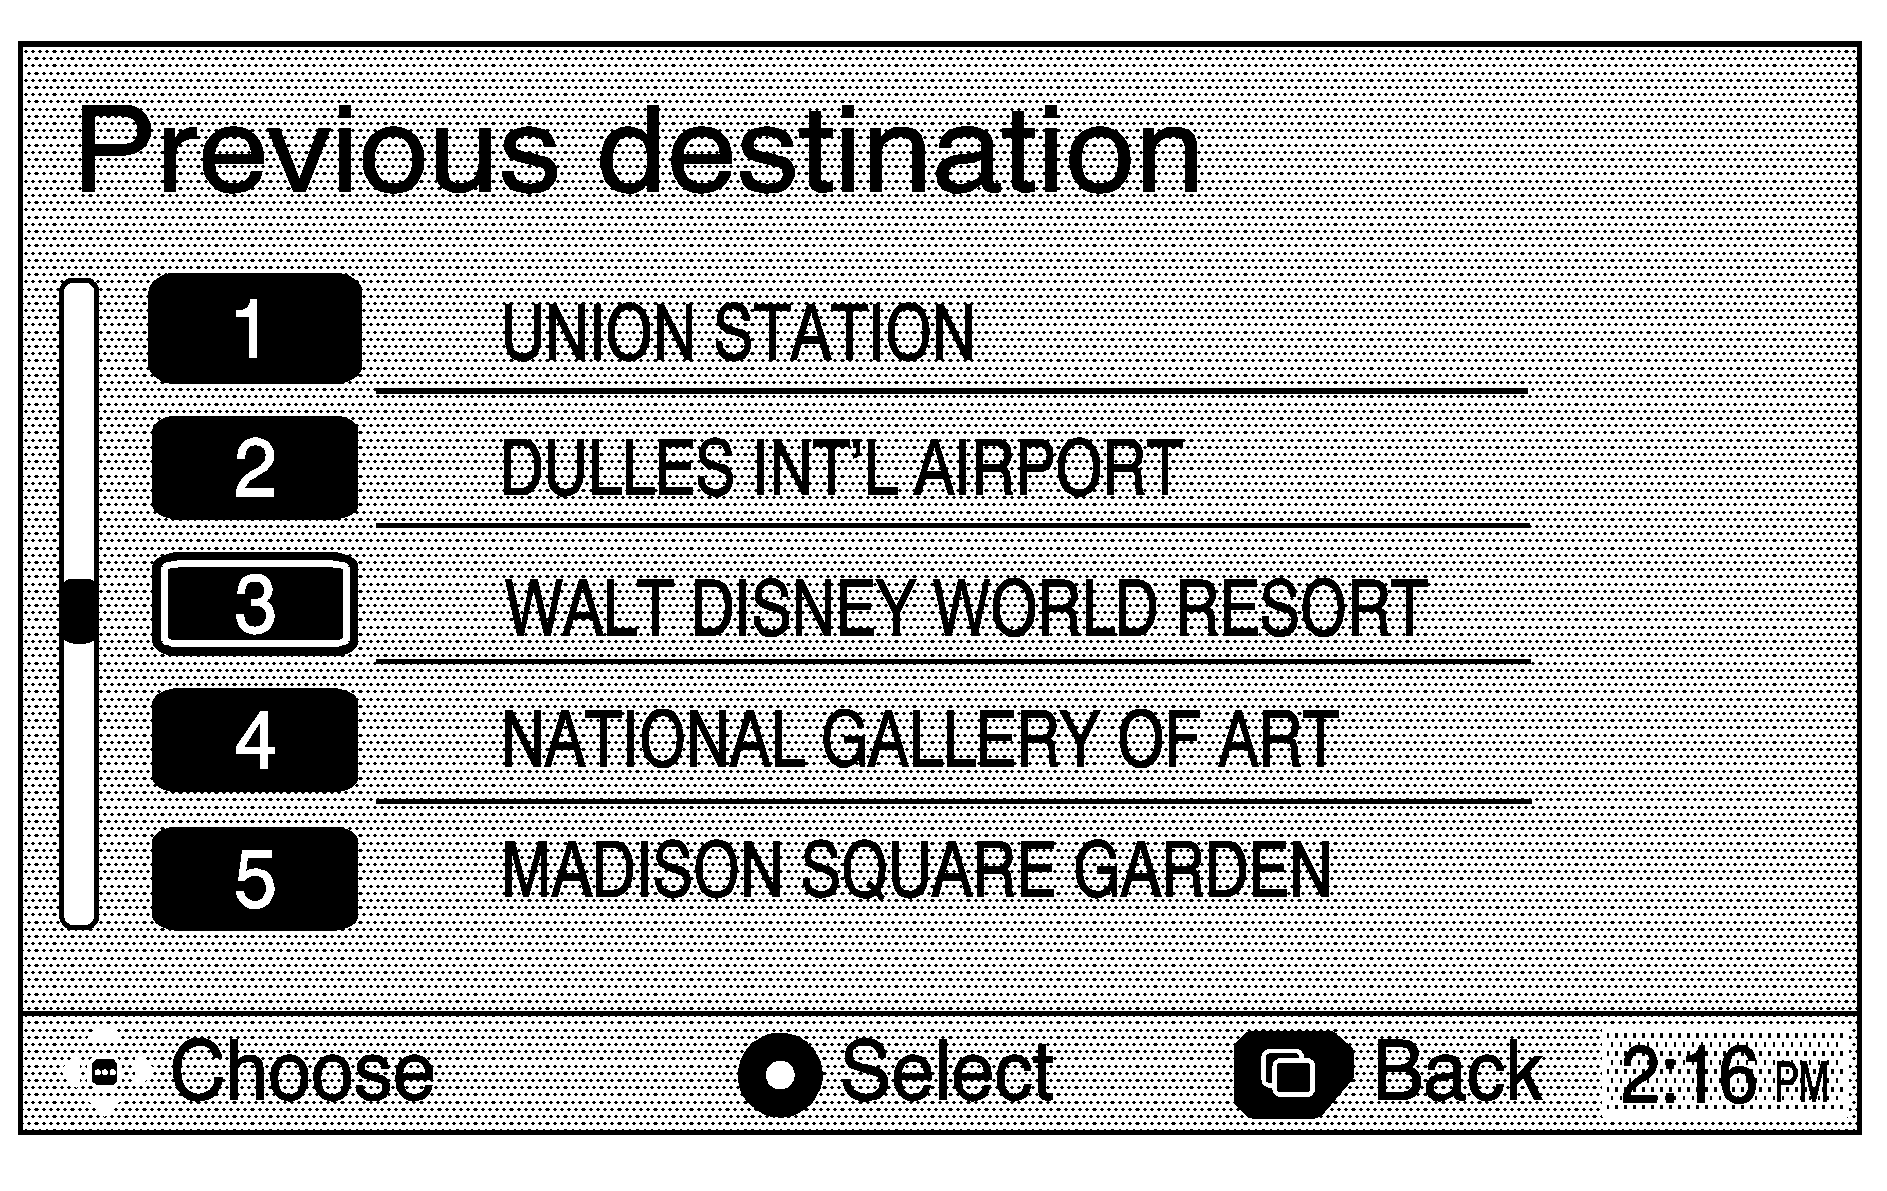
The Previous destination entry method allows you to select a destination by choosing from a list of previous destinations, once they are entered.
Once your destination entry is complete, a screen with the destination preview menu will be displayed. See "Destination Preview Menu" later in this section for more information.
Intersection
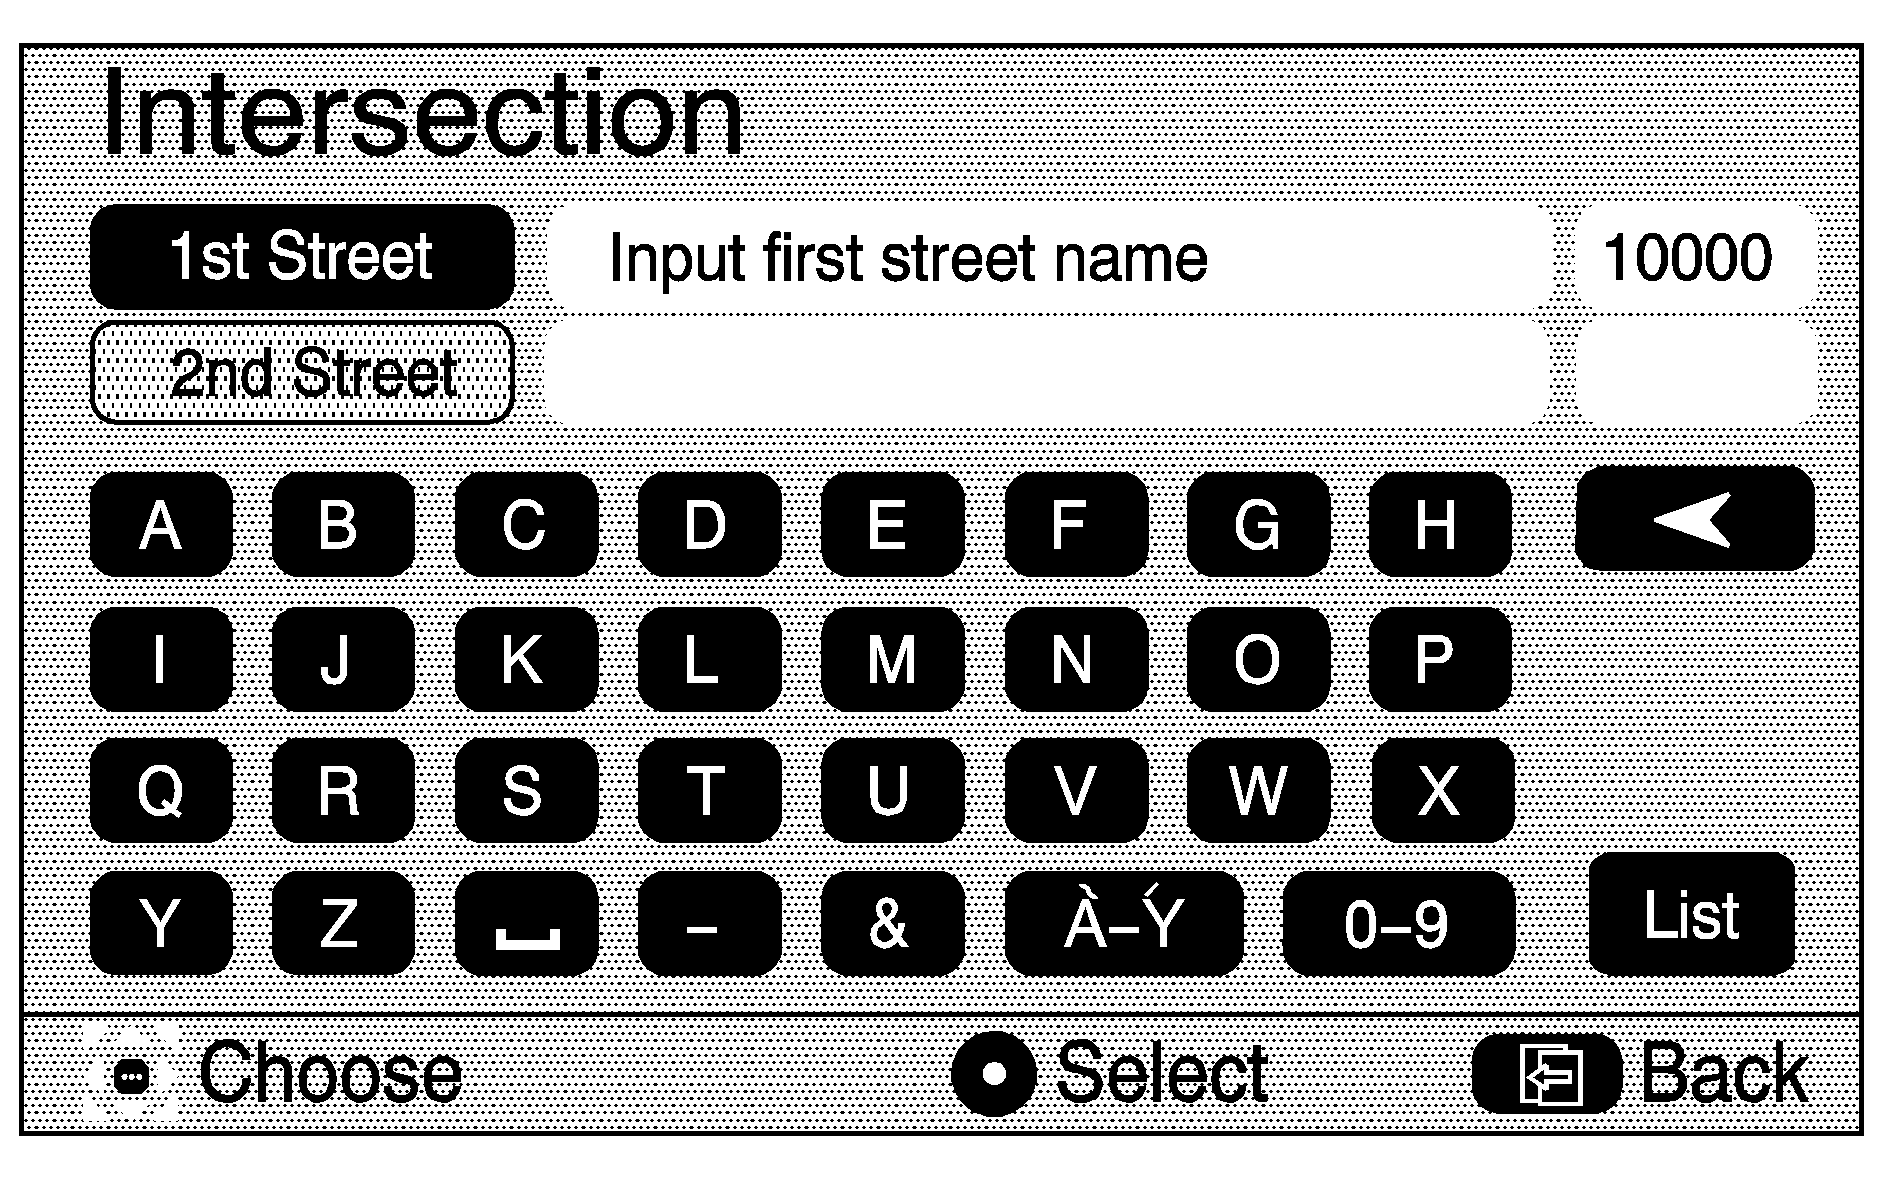
The Intersection destination entry method allows you to select a destination by inputting the intersecting roads you wish to travel to. To enter a destination using this method, select Intersection from the Destination screen. Then enter the name of the street, but do not include name extensions such as N., or Drive. For example, the street name N. Civic Center Drive should be entered as Civic Center. This will bring up a list of streets with that name. Select the desired street name from the list.
Now begin entering the second street name, and choose the desired street name from the list. After both street names in the intersection have been selected, a list of cities containing the selected intersection will appear. If there are several cities that contain that specific intersection, you must specify a city. Select the desired city from the list . The route will then be calculated, and you will hear a voice prompt directing you to "Proceed to the highlighted route." If you do not hear a voice prompt, your voice guidance prompts may have been turned off. See "Voice Volume" earlier in this section for more information.
Once your destination entry is complete, a screen with the destination preview menu will be displayed. See "Destination Preview Menu" later in this section for more information.
Phone Number
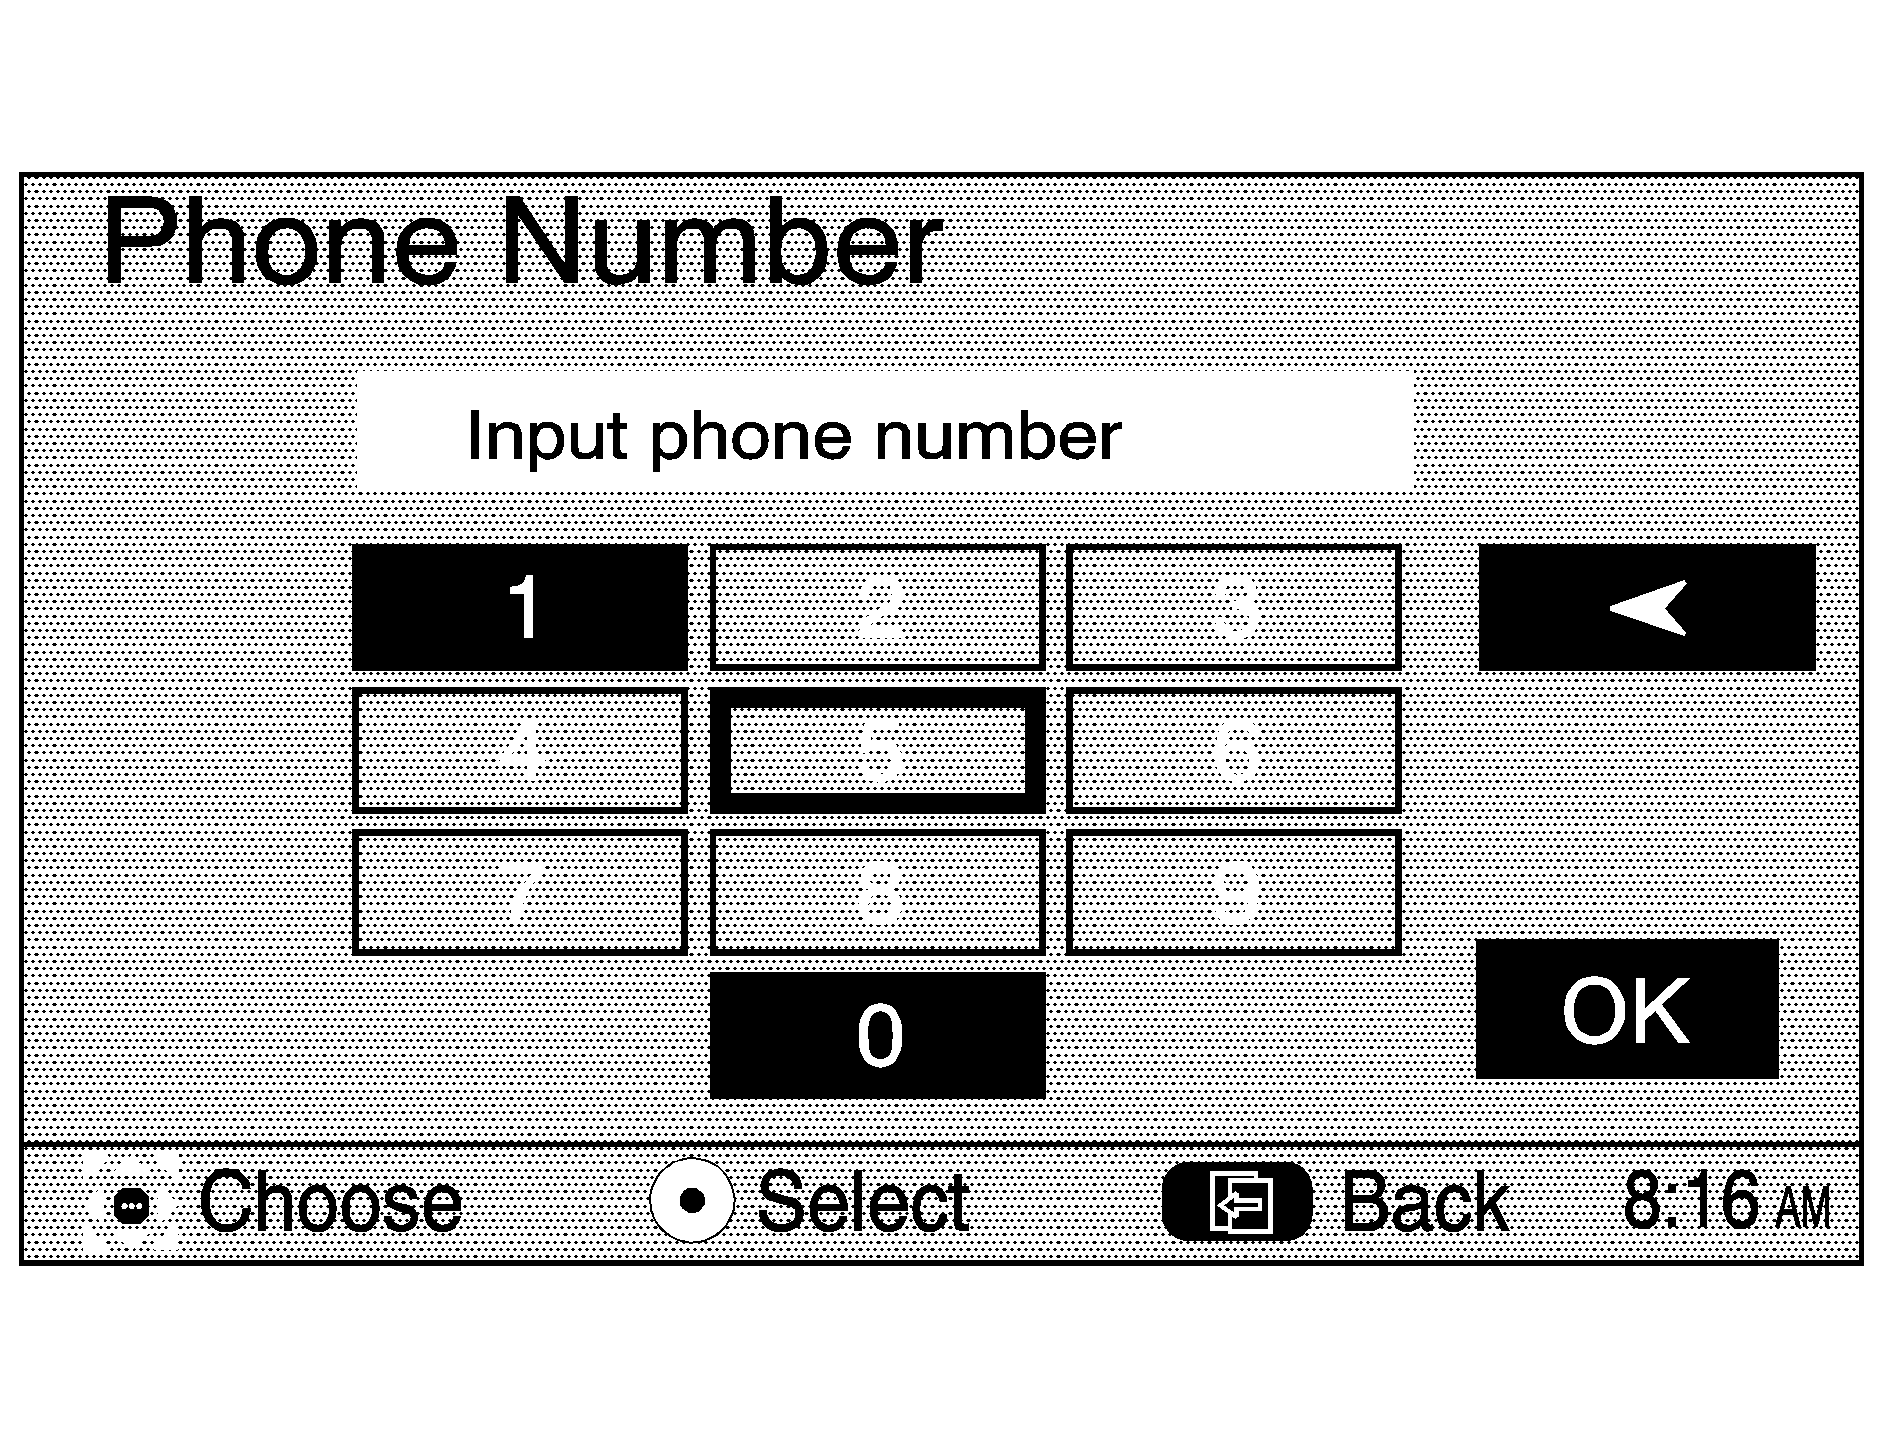
The Phone Number destination entry method allows you to search for a point of interest (POI) destination by entering the POI phone number. Use the joystick to enter the POI phone number on the numeric keypad and select OK. The destination location will then be displayed. Most phone numbers for POIs included in the DVD database can be entered to locate a destination. Cellular phone numbers and internal company phone numbers cannot be entered to locate a destination.
Once your destination entry is complete, a screen with the destination preview menu will be displayed. See "Destination Preview Menu" later in this section for more information.
Emergency
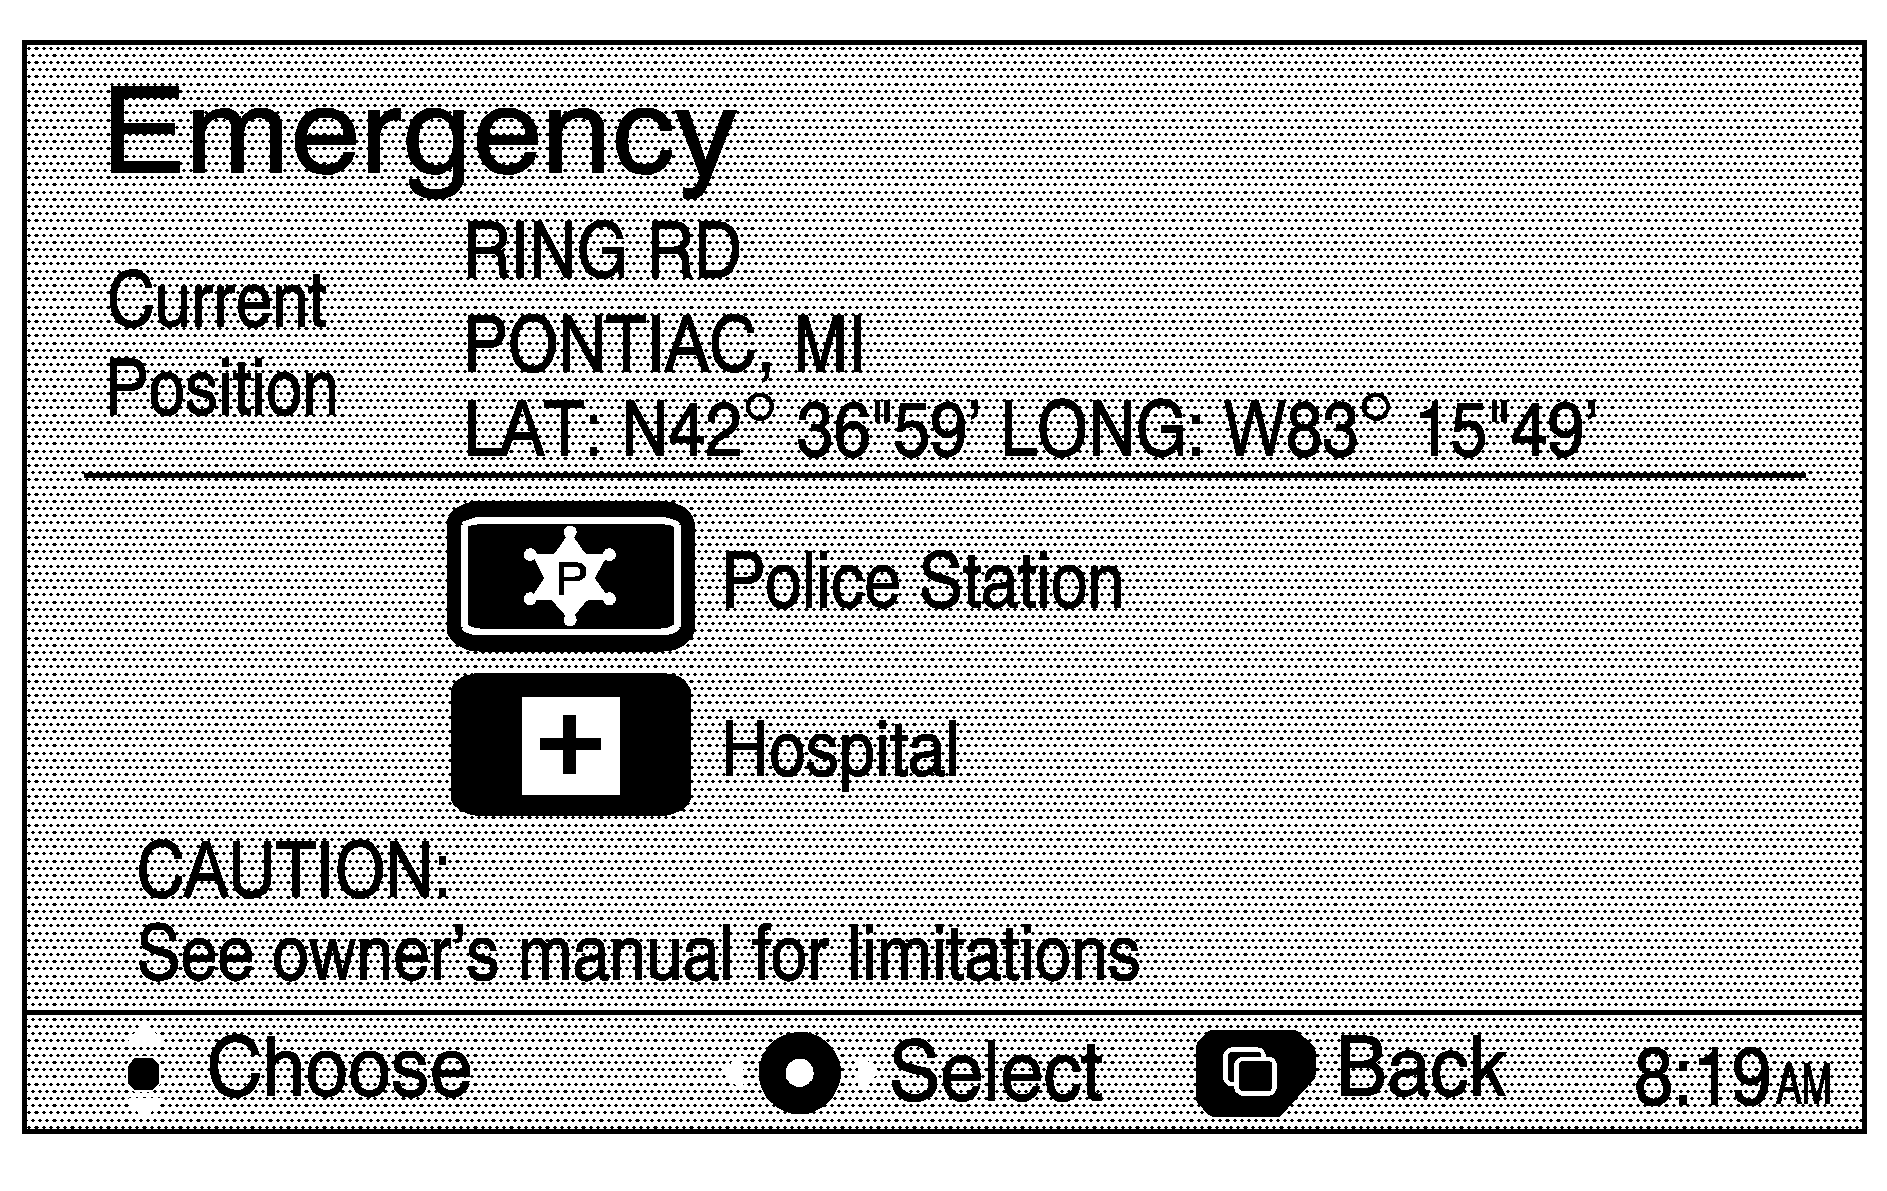
The Emergency destination entry method allows you to select a destination by choosing from a list of emergency facilities. The list will vary by area. Selecting Police Station or Hospital will display a list. The list can be changed to appear in alphabetical order, or in order by distance.
Once your destination entry is complete, a screen with the destination preview menu will be displayed. See "Destination Preview Menu" later in this section for more information.
Freeway Entrance/Exit
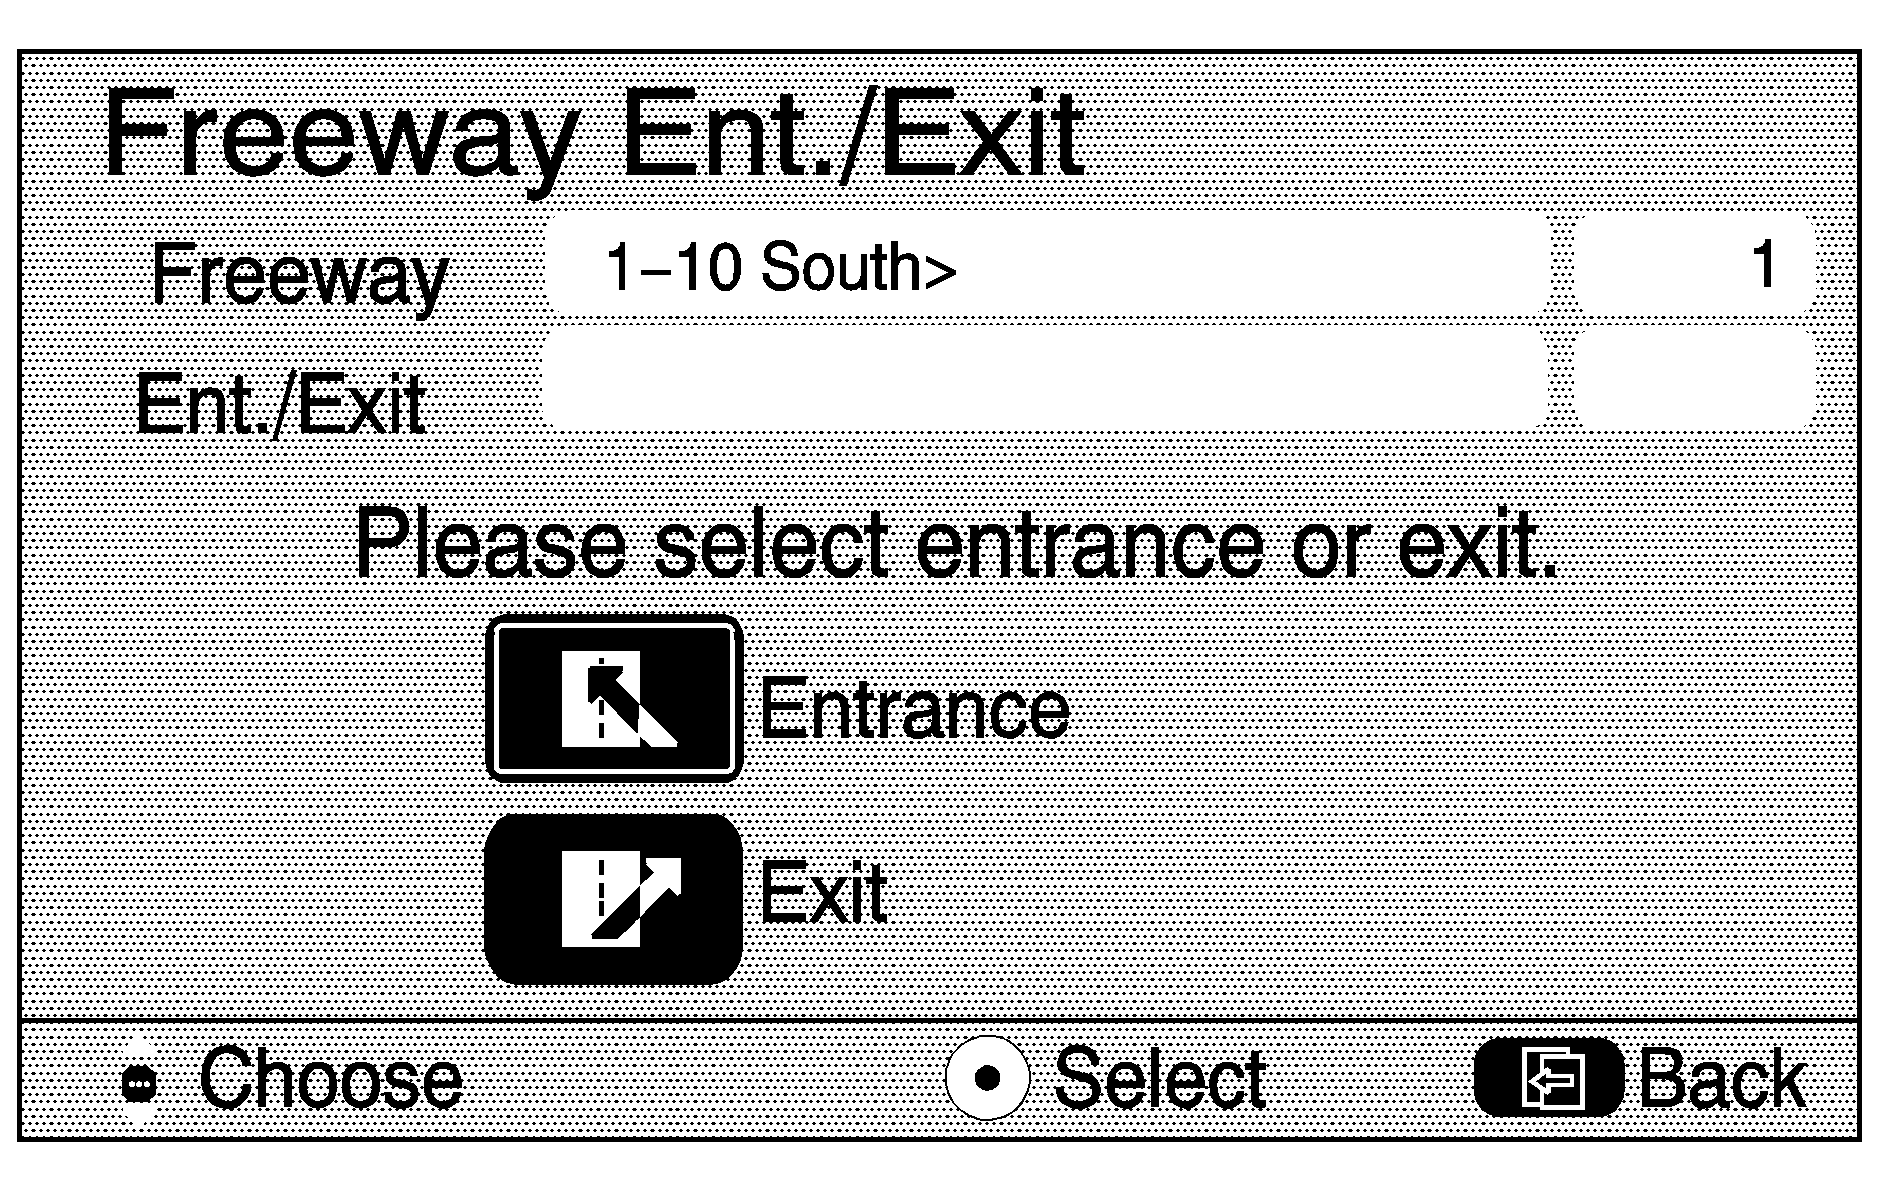
The Freeway Entrance/Exit destination entry method allows you to select a destination by entering a freeway entrance or exit point. Use the joystick to enter Freeway names on the alpha keypad.
Once your destination entry is complete, a screen with the destination preview menu will be displayed. See "Destination Preview Menu" later in this section for more information.
Prev (Previous) Start Point
The Previous start point destination entry method allows you to select the last start point as a destination.
Once your destination entry is complete, a screen with the destination preview menu will be displayed. See "Destination Preview Menu" later in this section for more information.
Home
The Home destination entry method allows you to choose home as a destination. Use the joystick to select Home from the Destination screen. Besides preset destinations 1 through 5, this is the only preset available for selection while the vehicle is moving.
Once your destination entry is complete, a screen with the destination preview menu will be displayed. See "Destination Preview Menu" later in this section for more information.
Map
The Map destination entry method displays the last location on the map, and the road preference.
Use the joystick to select Map from the Destination screen, then scroll across the map to locate your destination. Once you have located the desired destination, press the joystick to select it. The route will then be calculated, and you will hear a voice prompt directing you to "Proceed to the highlighted route." If you do not hear a voice prompt, your voice guidance prompts may have been turned off. See "Voice Volume" earlier in this section for more information.
You may also zoom out to view the entire regional map. See "Hard Keys" under Using the Navigation System for more information. However, if you zoom out as much as possible and scroll around the map, some parts of the map will appear to be missing because they are not readable in larger scales.
Once your destination entry is complete, a screen with the destination preview menu will be displayed. See "Destination Preview Menu" following in this section for more information.
Destination Preview Menu
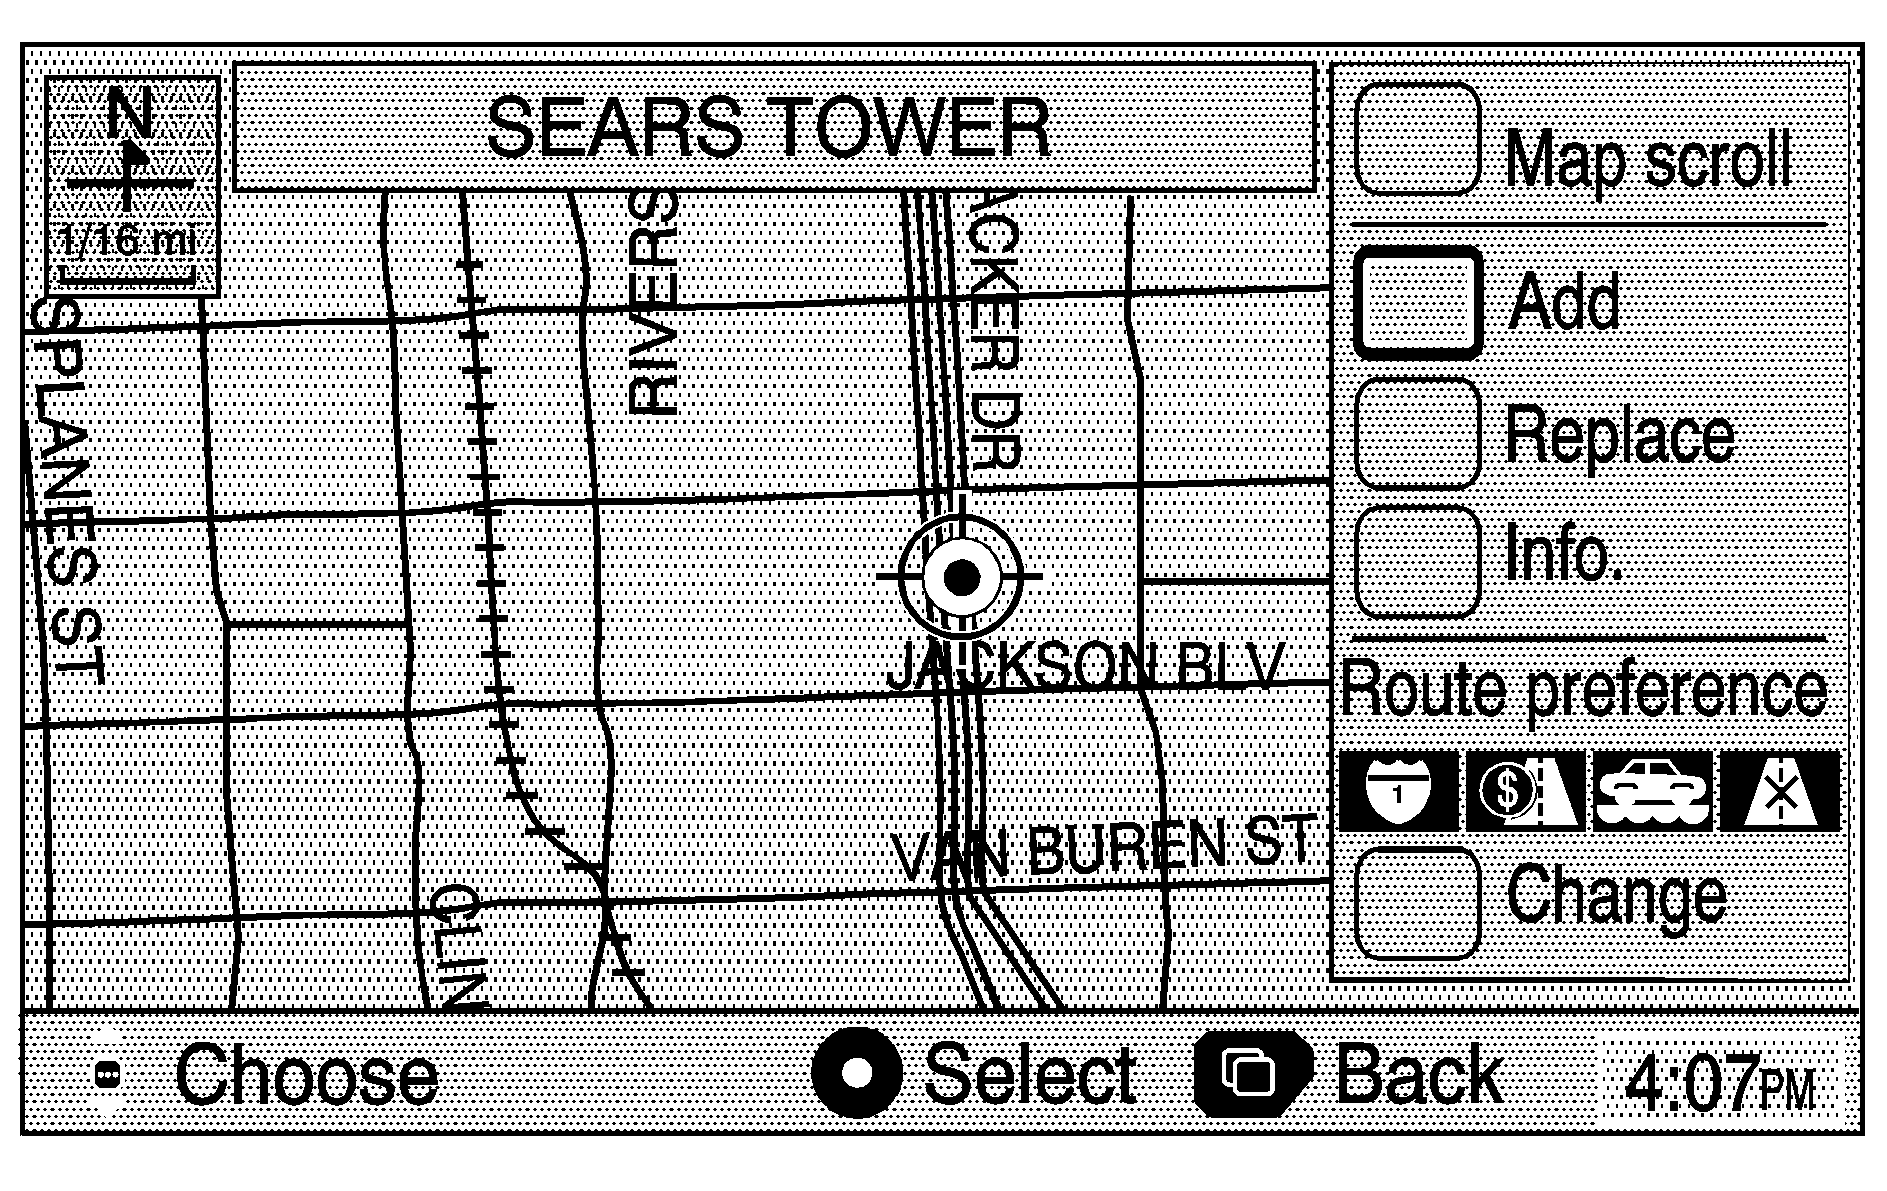
Each time a destination is entered, a screen with the destination preview menu will appear. This screen will display a zoomed in view of the destination, as well as the following options:
Map scroll: This option allows you to scroll the map and make small adjustments to the desired destination, for greater accuracy.Add: This option will add the displayed destination to the current route. If there is more than one destination entered into the system, the Add Destination screen will be displayed.
Replace: This option will replace a destination to the current route of the displayed destination.
Info: This option will display the telephone number for the point of interest (POI) which contains the displayed information in the database.
Route preference: This option will display the Route Preference screen. To adjust your route preferences, select Change, located below the road type icons. See the route preference screen under "Edit Route" earlier in this section for more information.
Once the desired adjustments from the destination preview menu are complete, the route overview menu can be displayed. See "Route Overview Menu" following in this section for more information.
Route Overview Menu
Each time a destination has been selected and the desired adjustments from the destination preview menu are complete, the route overview menu can be displayed. Press the joystick to display the following three options:
Start: This option will choose the default road type, calculate the route, and begin route guidance for the displayed route.3 Routes: This option will display the map with three highlighted routes shown in three different colors for Fastest, Shortest, and Alternative route.
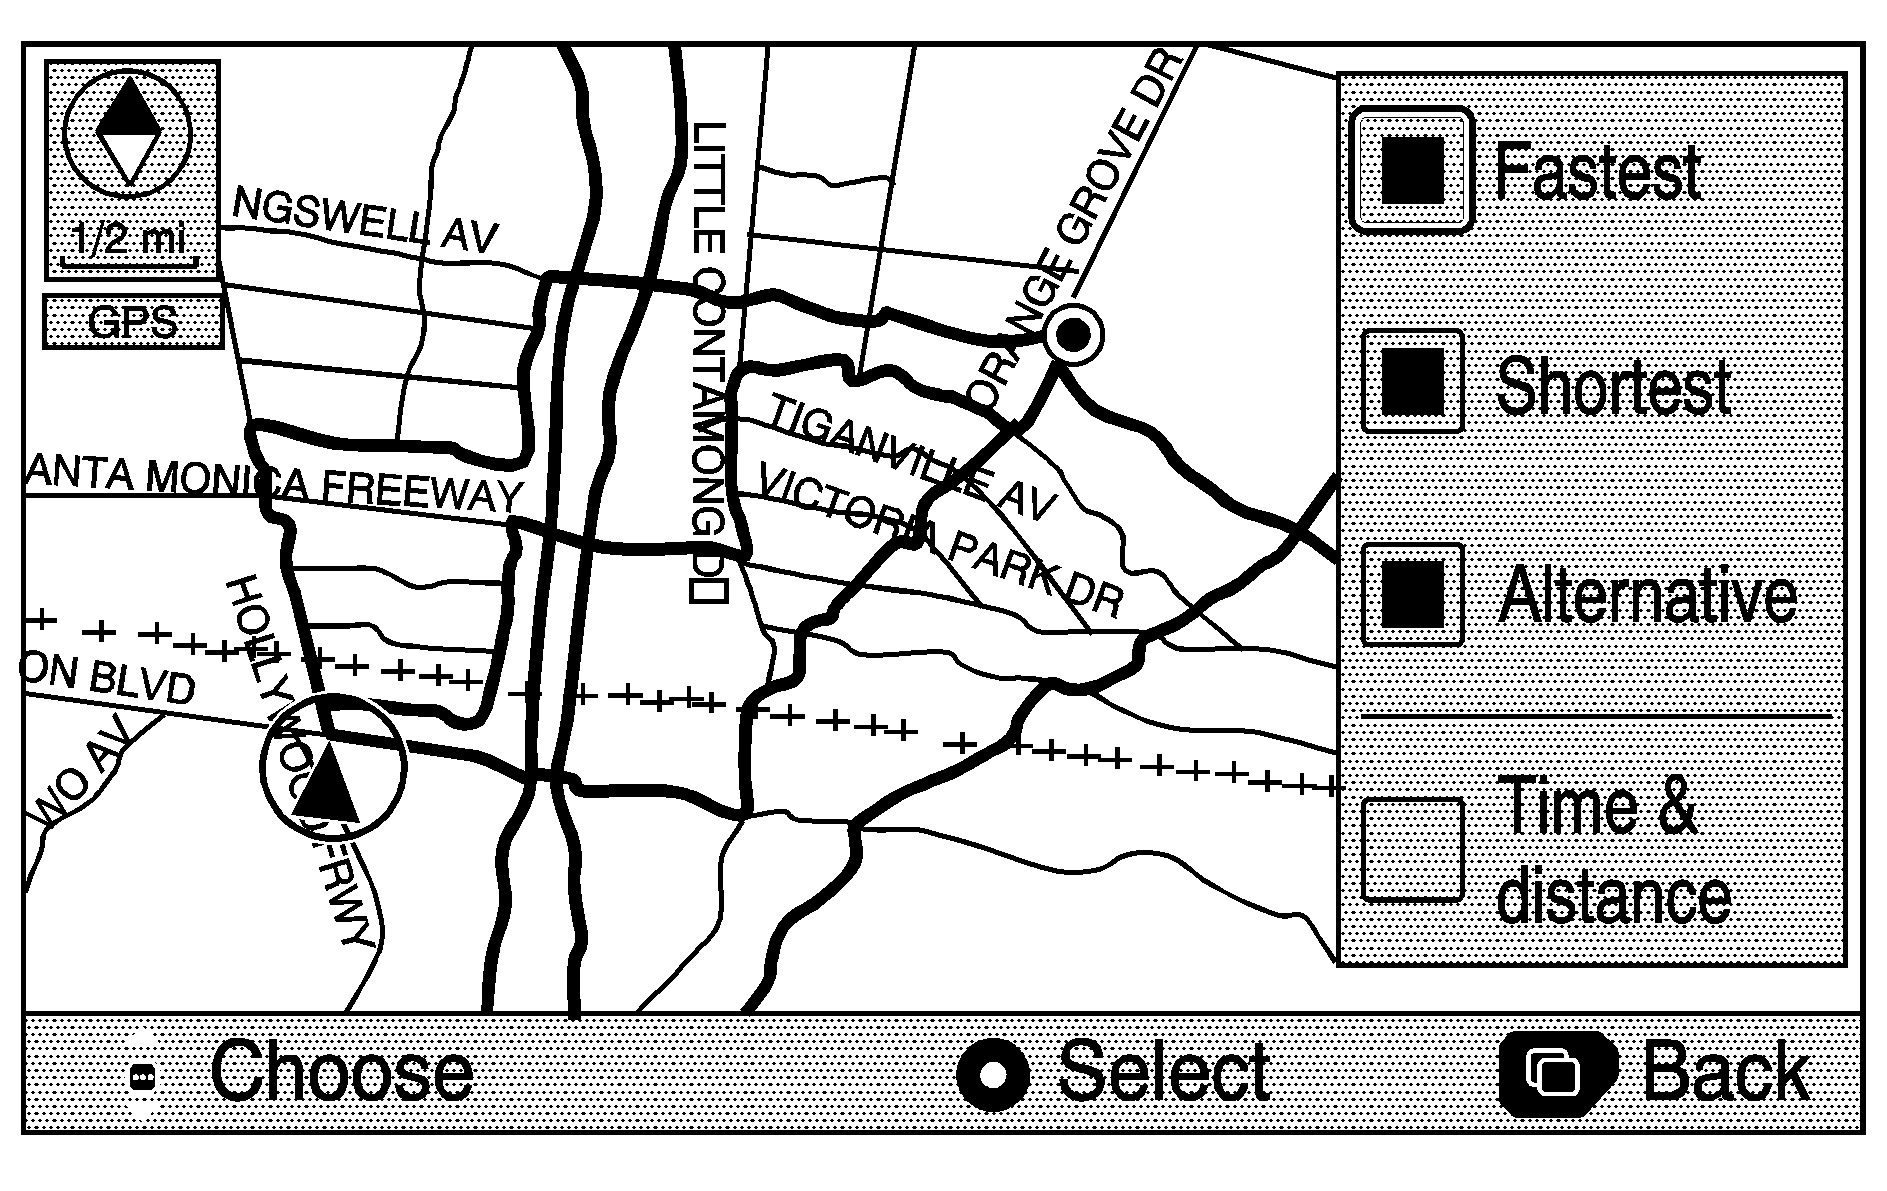
After selecting one of the three routes, the road distance and estimated travel time will be displayed. The Fastest route means you will be routed along main roads and highways, and does not necessarily mean it is the shortest route.
Edit Route: This option allows you to change your route preferences. See "Edit Route" earlier in this section for more information.Press the back key at any time to return to the previous screen.
Map Menu
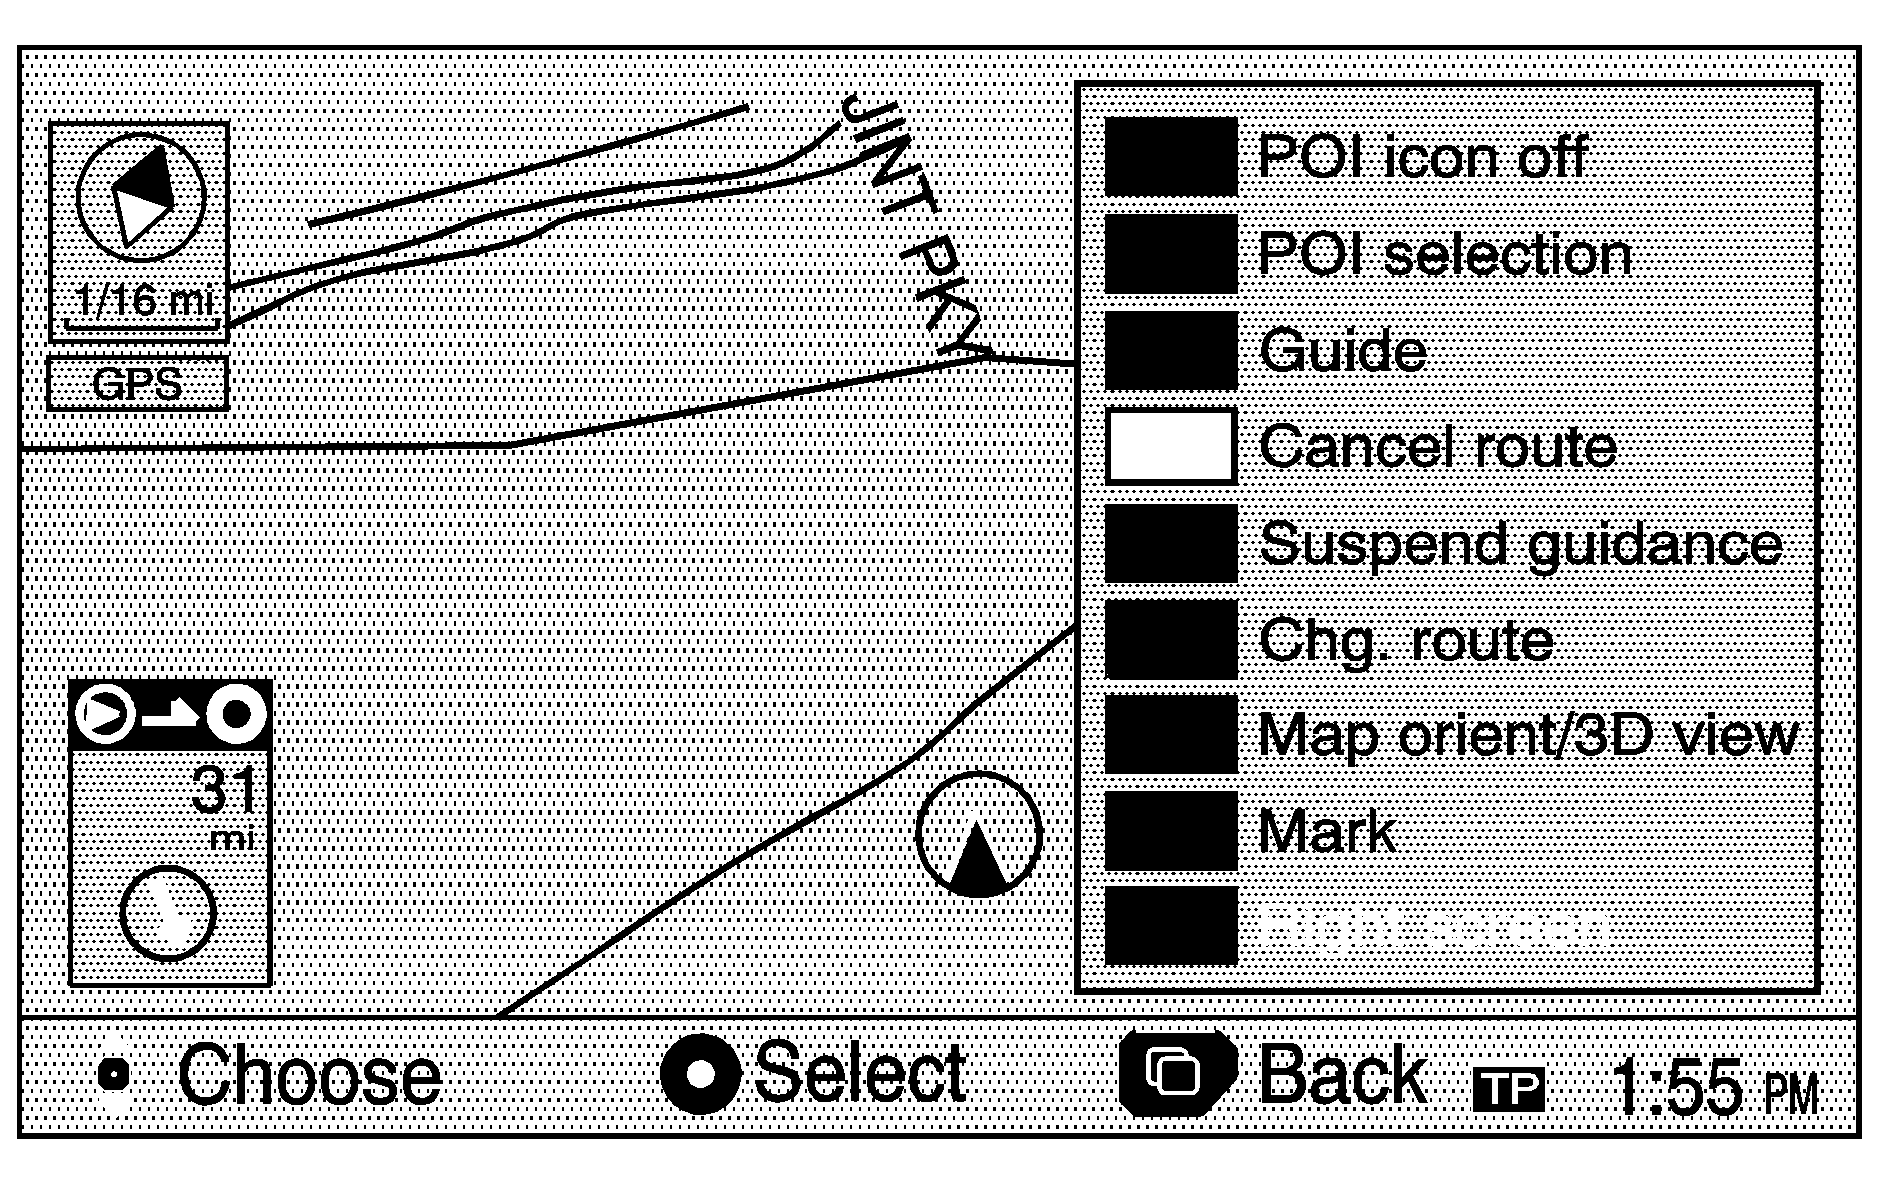
Once you select a destination and begin your route, you can press the center of the joystick to view a menu with additional route options. Use the joystick to select from the following route options:
POI icon Off: This option allows you to turn off Point of Interest (POI) icons shown on the map.POI selection: This option allows you to choose which types of POIs will be displayed on the map.
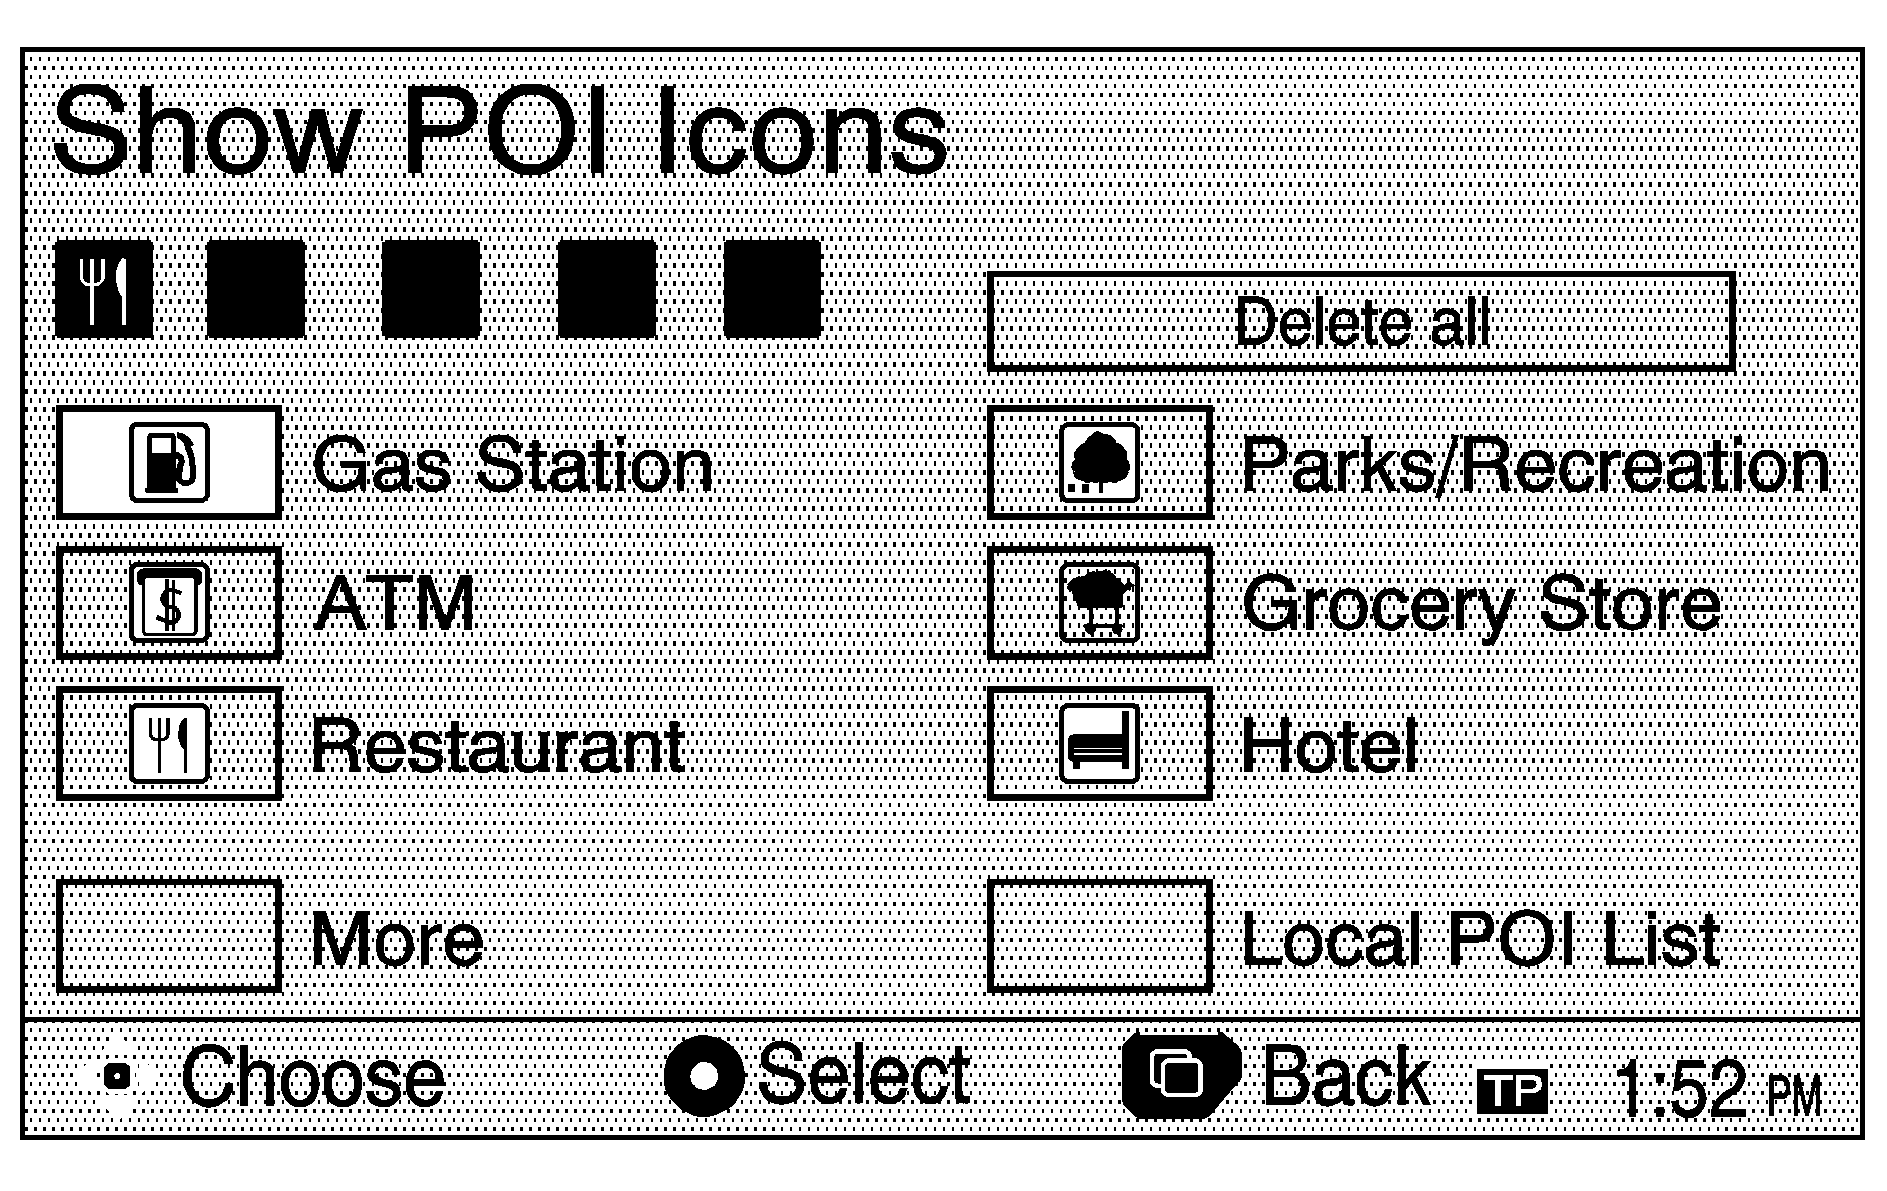
Once you choose POI selection, the Show POI Icons screen will appear and display the different POI categories. Use the joystick to select up to five different POI categories. The icons for the selected categories will then be displayed on the map.
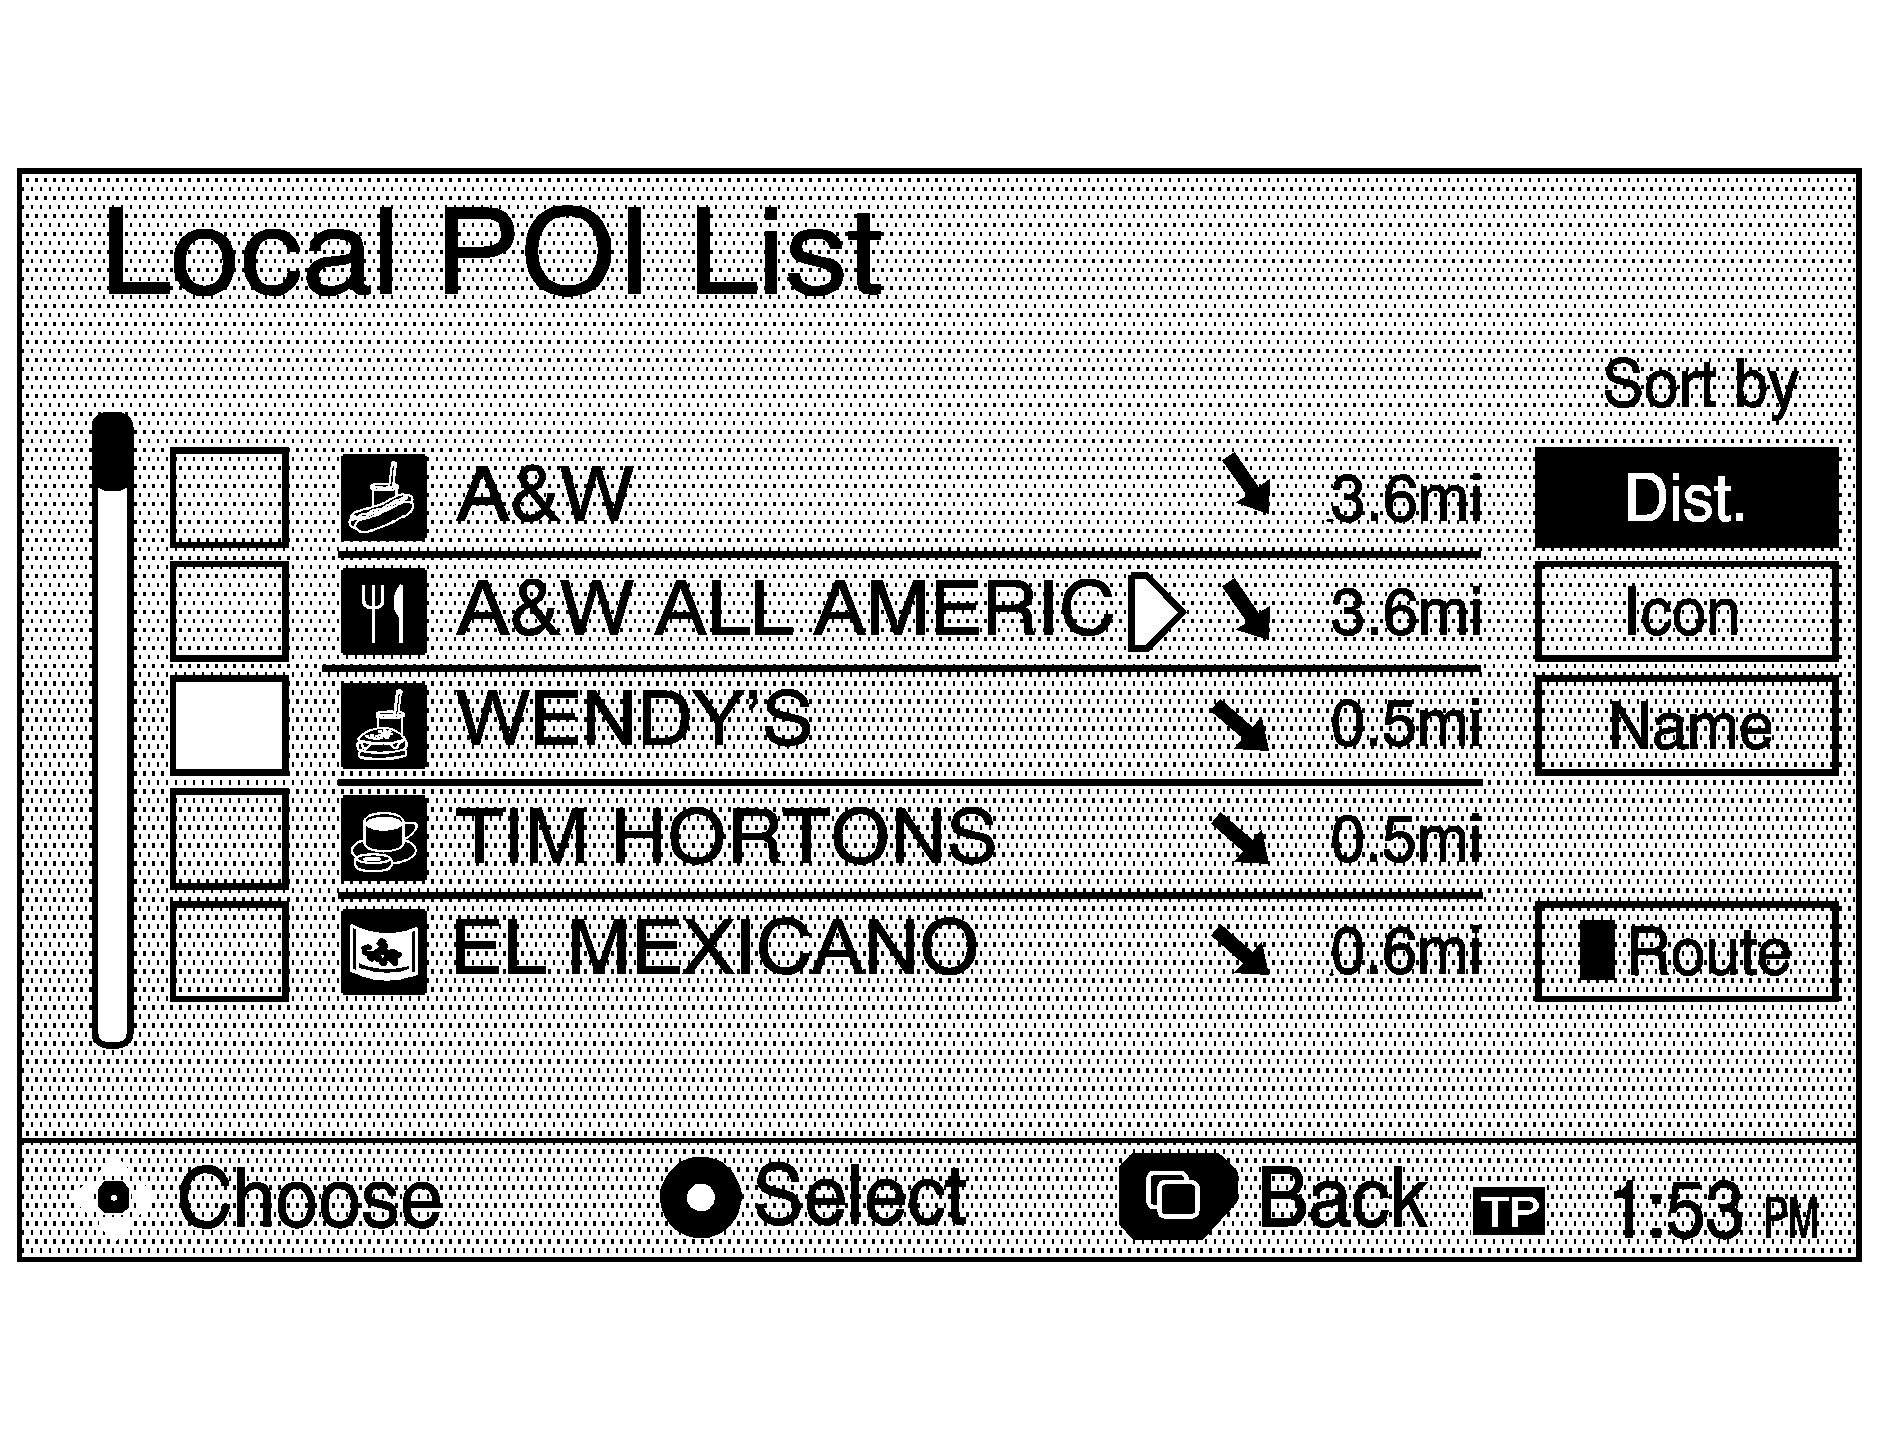
To view a list of local POIs, select Local POI List. The Local POI List screen will list the closest POIs from the categories you have selected. You can sort these POIs by distance, icon/category, or name. You can also select Route to display POIs along your current route. Once you select the desired POI, a map of the area with a symbol marking the destination will be displayed.
Guide: This option allows you to view POI information by selecting the desired POI icon on the map. To use this feature, you must have at least one POI category selected to appear on the map. To view POI information, move the joystick so that the joystick indicator is located on the desired POI icon, and press the joystick to select it. Once a POI is selected, select Guide from the menu that is now being displayed. This will display the POI name and distance from the vehicle's current location. While the POI icon is surrounded by a red box, you can press the joystick again to select it, and the POI name, address, and phone number will also be displayed. POI information will only be displayed while the vehicle is not moving.Cancel route: This option allows you to cancel the current, or first destination. The second programmed destination will then be used if one is available and/or entered.
Suspend guidance: This option allows you to suspend active route guidance for all current and programmed destinations. See "Suspend Guidance" earlier in this section for more information.
Chg. route: This option allows you to change the route search condition while the vehicle is moving. The following options may be available:
| • | Detour for 1 mile?: Select Yes to recalculate your route and detour for one mile around the vehicle's current position. |
| • | Detour for 3 mile?: Select Yes to recalculate your route and detour for three miles around the vehicle's current position. |
| • | Change to fastest?: Select Yes to recalculate your route to the fastest route. |
| • | Change to shortest?: Select Yes to recalculate your route to the shortest route. |
| • | Reroute from adjacent road?: Select Yes to recalculate your route from another road on your route, near the vehicle's current position. |
Mark: This option allows you to save a point to memory.
Right Screen: If you currently have a split-screen, this option allows you to adjust options for the screen to the right.
Colors on the Map
When a route has been planned, it will be highlighted on the screen in blue.
Different colors are also used to distinguish between interstate freeways, state highways, county roads, major streets and secondary streets. Highways will be shown as a thicker line than a general street.
