For 1990-2009 cars only
Removal Procedure
- Remove the transfer case shield, if equipped. Refer to Transfer Case Shield Replacement .
- Remove the front propeller shaft. Refer to Front Propeller Shaft Replacement .
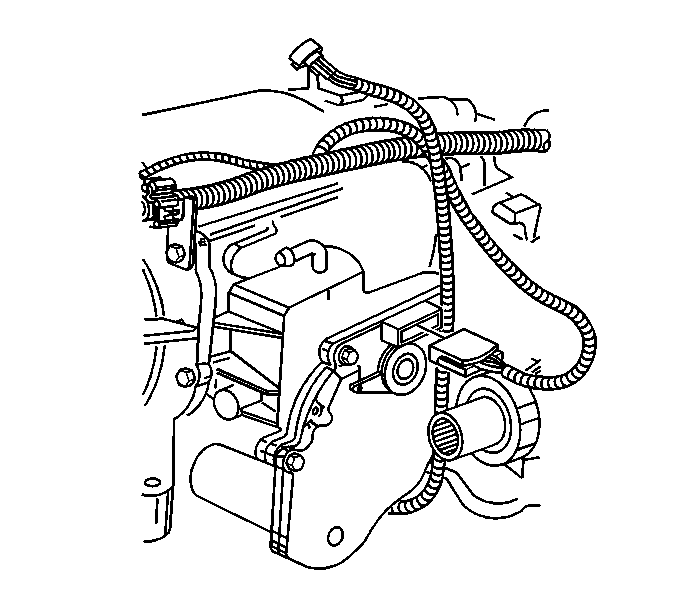
- Disconnect the encoder motor electrical connector.
- Remove the encoder motor bolts.
- Remove the encoder motor.
- Remove the actuator insulator gasket.
- If replacing the encoder motor, remove the locating pins from the old motor.

Installation Procedure
Important:
• If the encoder motor is being replaced because it is defective, ensure that the transfer case is in the neutral position. Manually shift the unit at the shift shaft. Use a crescent wrench, if necessary. • If the encoder motor is being replaced, a new gasket will come with the encoder motor. DO NOT reuse the old gasket. • A NEW encoder motor does NOT come with locating pins.
- Install the locating pins to the NEW encoder motor.
- Position a NEW actuator insulator gasket to the transfer case.
- Install the encoder motor.
- Install encoder motor bolts.
- Connect the encoder motor electrical connector. Ensure that the retention clips activate.
- Install the front propeller shaft. Refer to Front Propeller Shaft Replacement .
- Install the transfer case shield, if equipped. Refer to Transfer Case Shield Replacement .
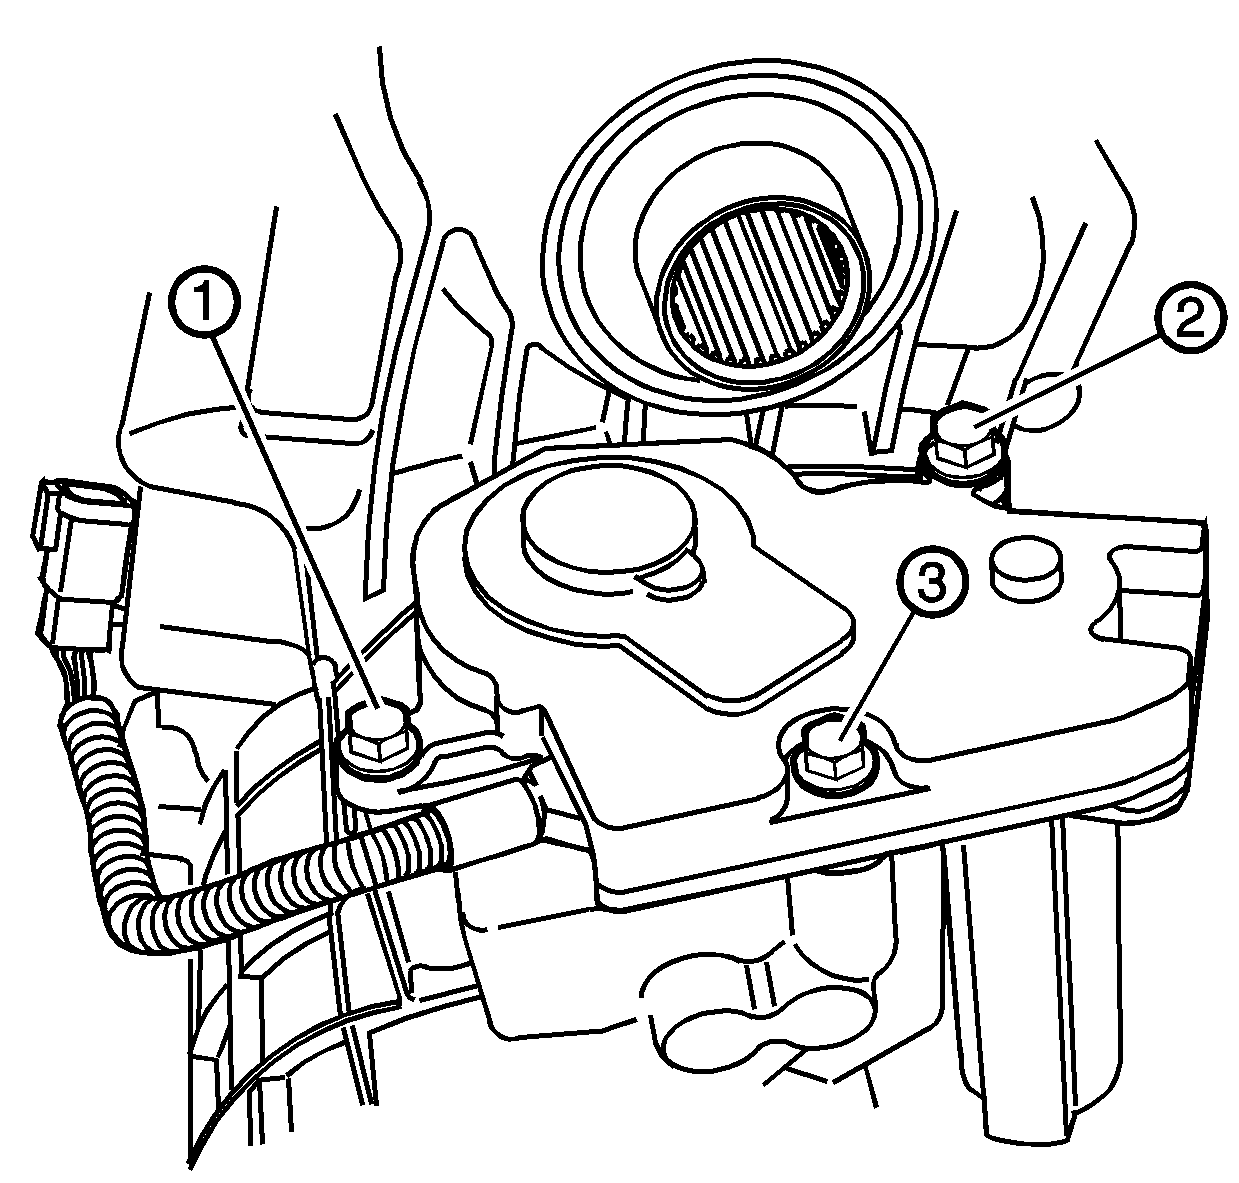
Notice: Refer to Fastener Notice in the Preface section.
Tighten
Tighten the bolts, in the sequence shown, to 20 N·m (15 lb ft).
