For 1990-2009 cars only
Removal Procedure
- Remove both front seats. Refer to Front Seat Replacement - Bucket in Seats.
- Remove the upper console bezel. Refer to Floor Console Bezel Replacement .
- Remove the cupholder. Refer to Cupholder Replacement .
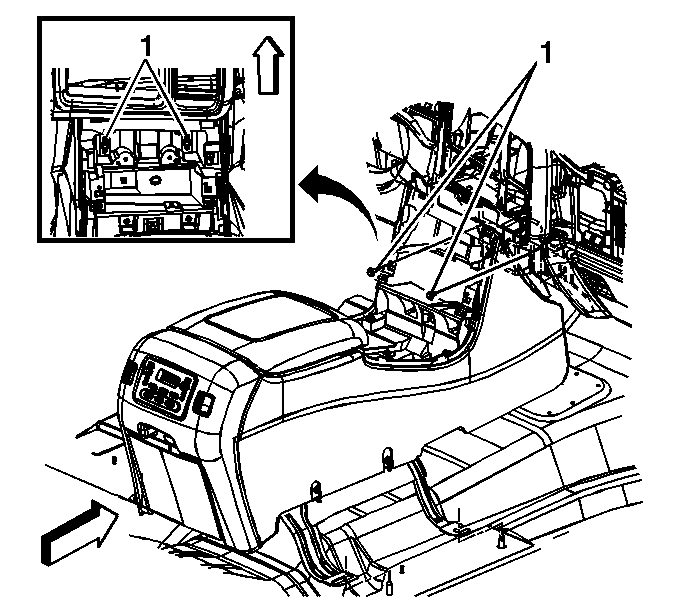
- Remove the screws (1) retaining the console to the I/P.
- Move the console assembly rearwards in order to disconnect the wire connectors.
- Remove the console assembly from the vehicle.
- Remove the console bin. Refer to Front Floor Console Compartment Replacement .
- Remove the amplifier and bracket from the console bracket.
- Remove the fasteners retaining the console to the bracket.

Installation Procedure
- Install the console to the bracket.
- Install the fasteners retaining the console to the bracket.
- Install the amplifier and bracket to the console bracket. Refer to Radio Speaker Amplifier Replacement in Entertainment.
- Install the console bin. Refer to Front Floor Console Compartment Replacement .
- Install the rear seat audio control to the console, if equipped. Refer to Rear Seat Audio Control Replacement in Entertainment.
- Install the console in the vehicle.
- Connect the wire connectors.
- Move the console forward in order to install the retaining screws.
- Install the 2 screws.
- Install the cupholder to the console. Refer to Cupholder Replacement .
- Install the upper console bezel. Refer to Floor Console Bezel Replacement .
- Install both front seats. Refer to Front Seat Replacement - Bucket in Seats.
Notice: Refer to Fastener Notice in the Preface section.
Tighten
Tighten the fasteners to 2 N·m (17 lb in).

Tighten
Tighten the screws to 4 N·m (35 lb in).
