For 1990-2009 cars only
Removal Procedure
- Remove the storage bin. Refer to Front Floor Console Compartment Replacement .
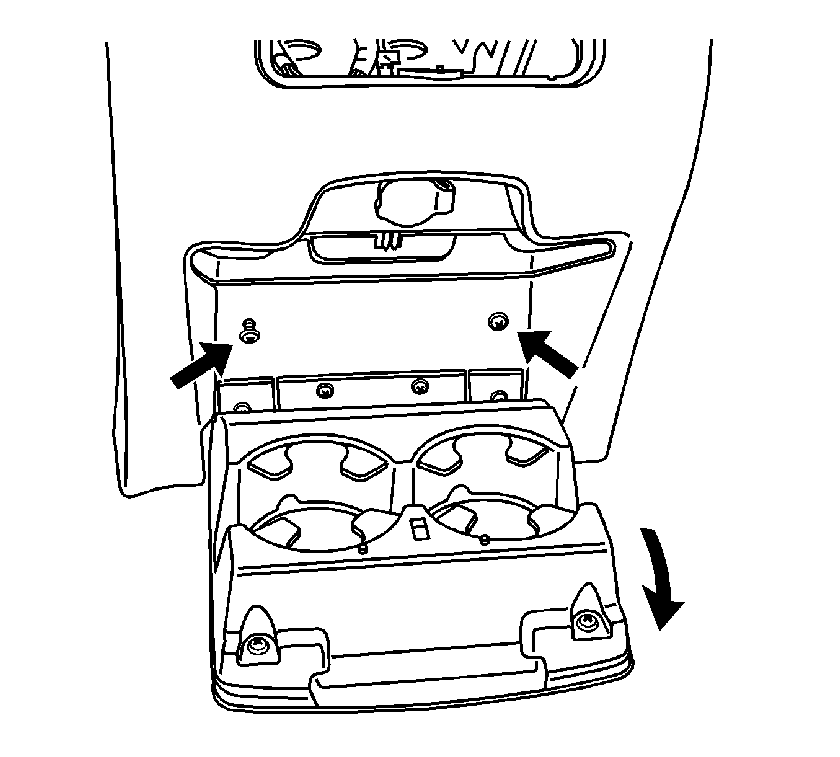
- Remove the rear cupholder from the end panel. Refer to Cupholder Replacement .
- Remove the 2 retaining screws.
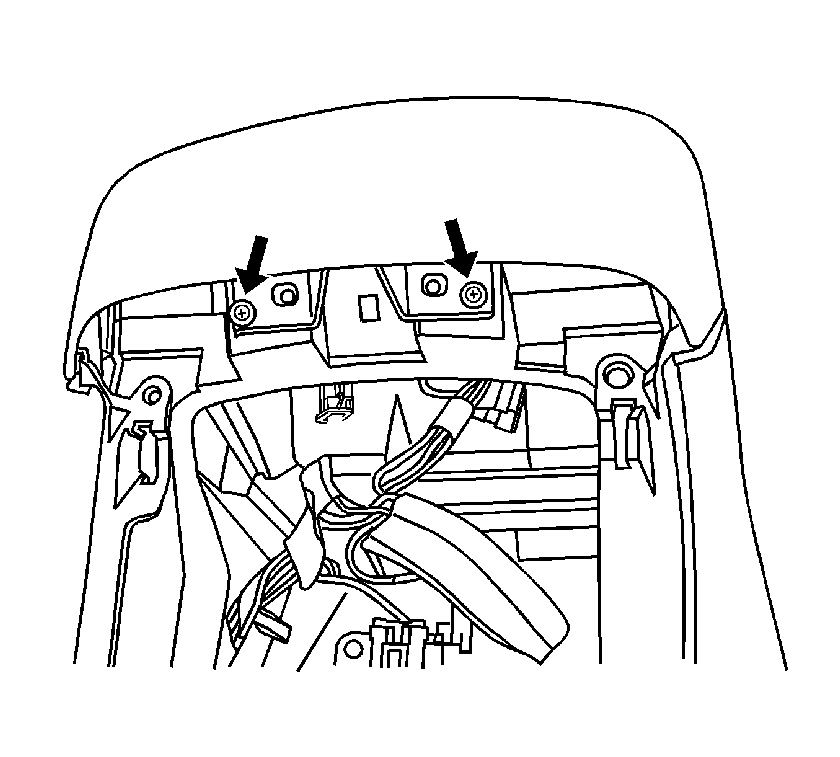
- Remove the top 2 retaining screws.
- Move the end panel rearwards to gain access to the electrical connectors.
- Remove the end panel from the console.
- Remove the rear seat heater switch, if equipped. Refer to Rear Seat Heater Switch Replacement in Seats.
- Remove the rear seat audio controls, if equipped. Refer to Rear Seat Audio Control Replacement in Entertainment.
- Remove the power outlets from the end panel, if equipped. Refer to 12-Volt Accessory Power Receptacle Replacement in Power Outlets.


Installation Procedure
- Install the power outlets to the end panel, if equipped. Refer to 12-Volt Accessory Power Receptacle Replacement in Power Outlets.
- Install the rear seat audio control, if equipped. Refer to Rear Seat Audio Control Replacement in Entertainment.
- Install the rear seat heater switch, if equipped. Refer to Rear Seat Heater Switch Replacement in Seats.
- Connect all electrical connectors.
- Install the end panel to the console.
- Install the 2 top retaining screws.
- Install the 2 retaining screws.
- Install the rear cupholder to the end panel. Refer to Cupholder Replacement .
- Install the storage bin. Refer to Front Floor Console Compartment Replacement .
Notice: Refer to Fastener Notice in the Preface section.

Tighten
Tighten the screws to 1.6 N·m (14 lb in).

Tighten
Tighten the screws to 1.6 N·m (14 lb in).
