Rear Brake Caliper Bracket Replacement 1500 Series
Caution: Refer to Brake Dust Caution in the Preface section.
Removal Procedure
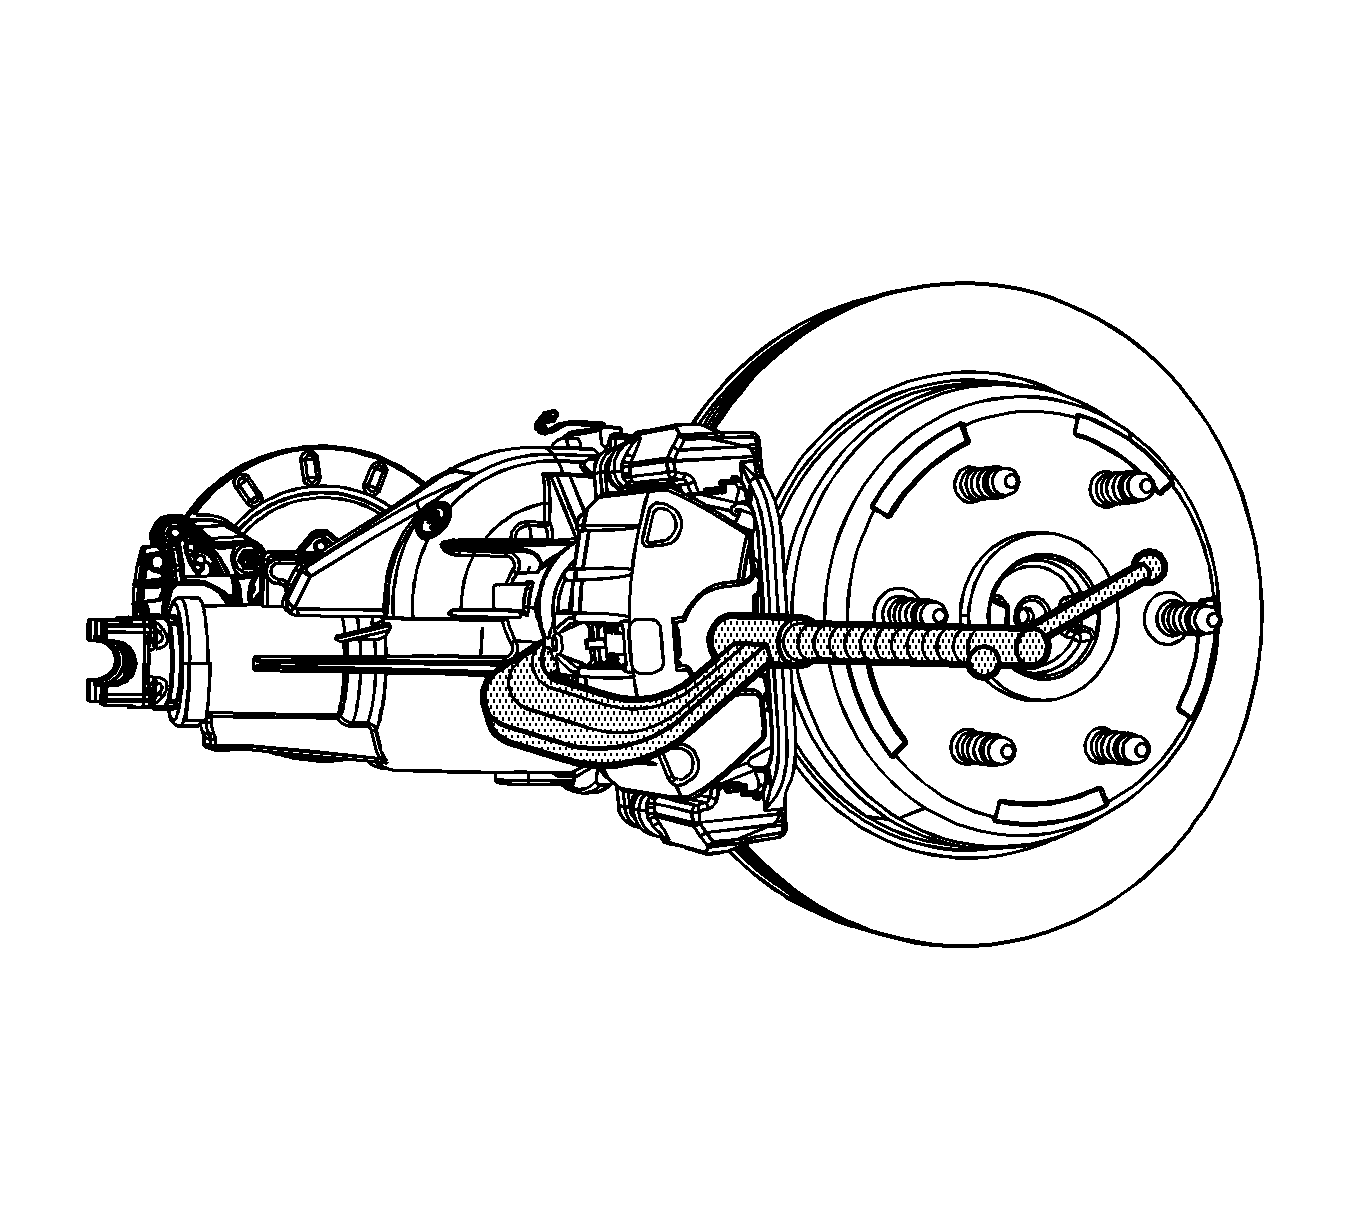
- Inspect the fluid level in the brake master cylinder reservoir.
- If the fluid level is midway between the maximum - full point, and the minimum allowable level, no fluid needs to be removed from the reservoir before proceeding.
- If the fluid level is higher than midway between the maximum - full point, and the minimum allowable level, remove fluid to the midway point before proceeding.
- Remove the tire and wheel assembly. Refer to
Tire and Wheel Removal and Installation
.
- Compress the brake caliper pistons.
| 5.1. | Install a large C-clamp over the top of the caliper housing and against the back of the outboard pad. |
| 5.2. | Slowly tighten the C-clamp until the pistons are pushed completely into the caliper bores. |
| 5.3. | Remove the C-clamp from the caliper. |
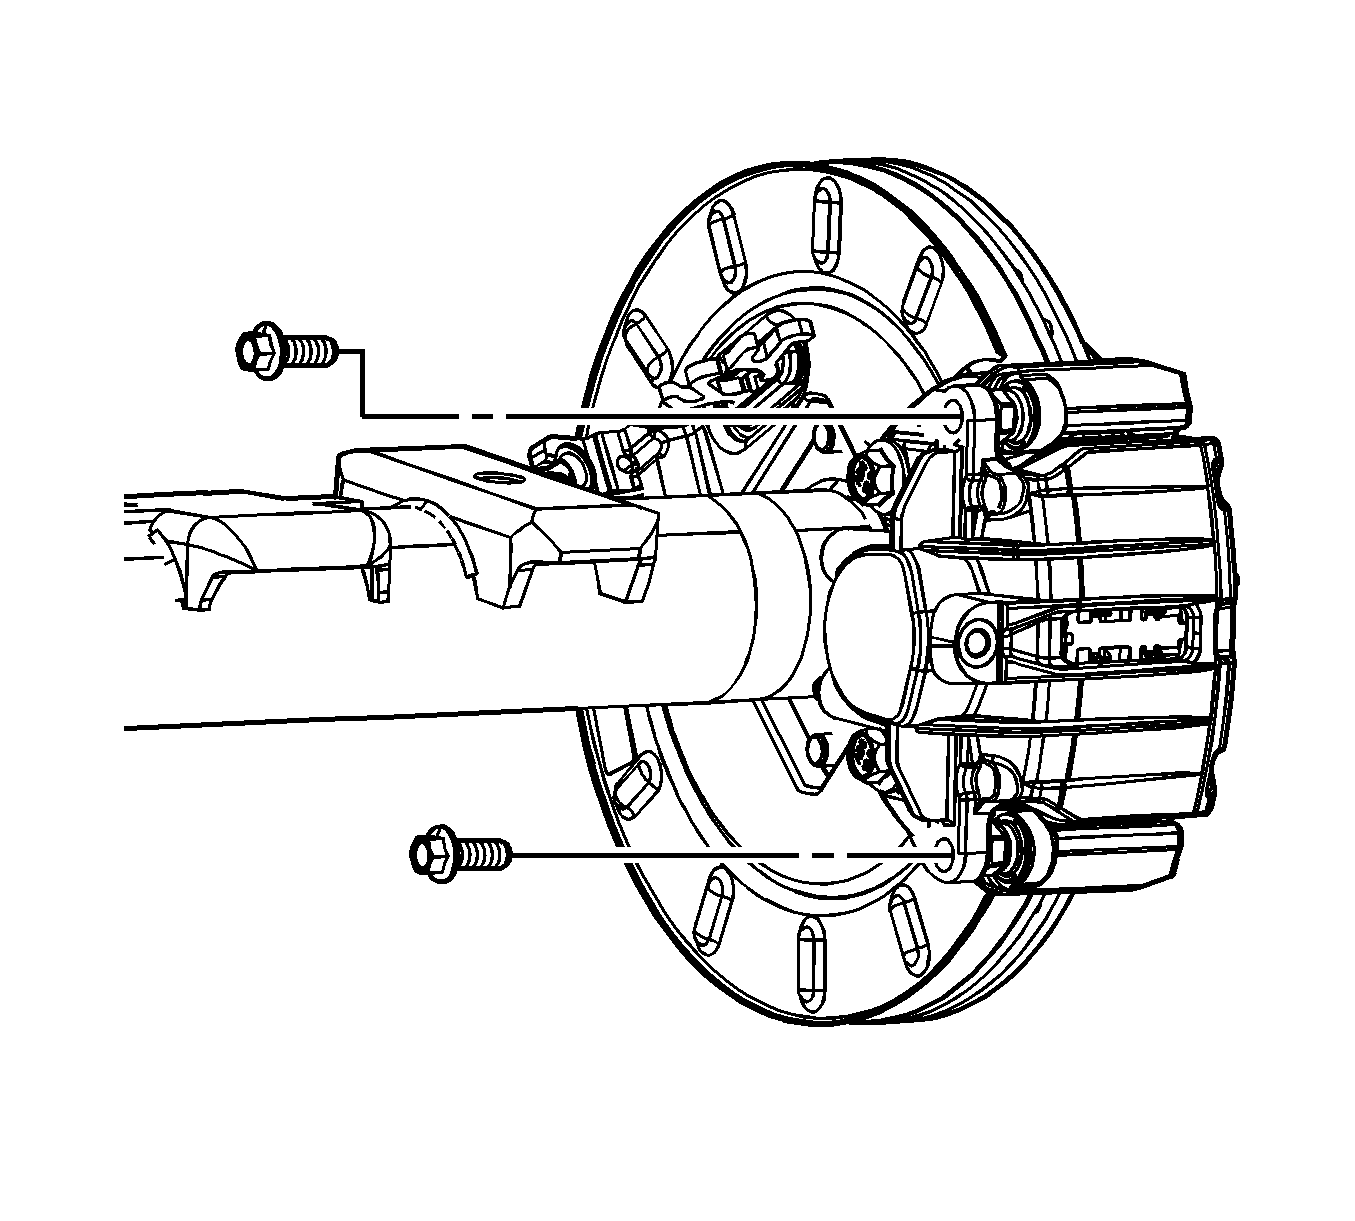
- Remove the brake caliper bolts.
Notice: Refer to Brake Caliper Notice in the Preface section.
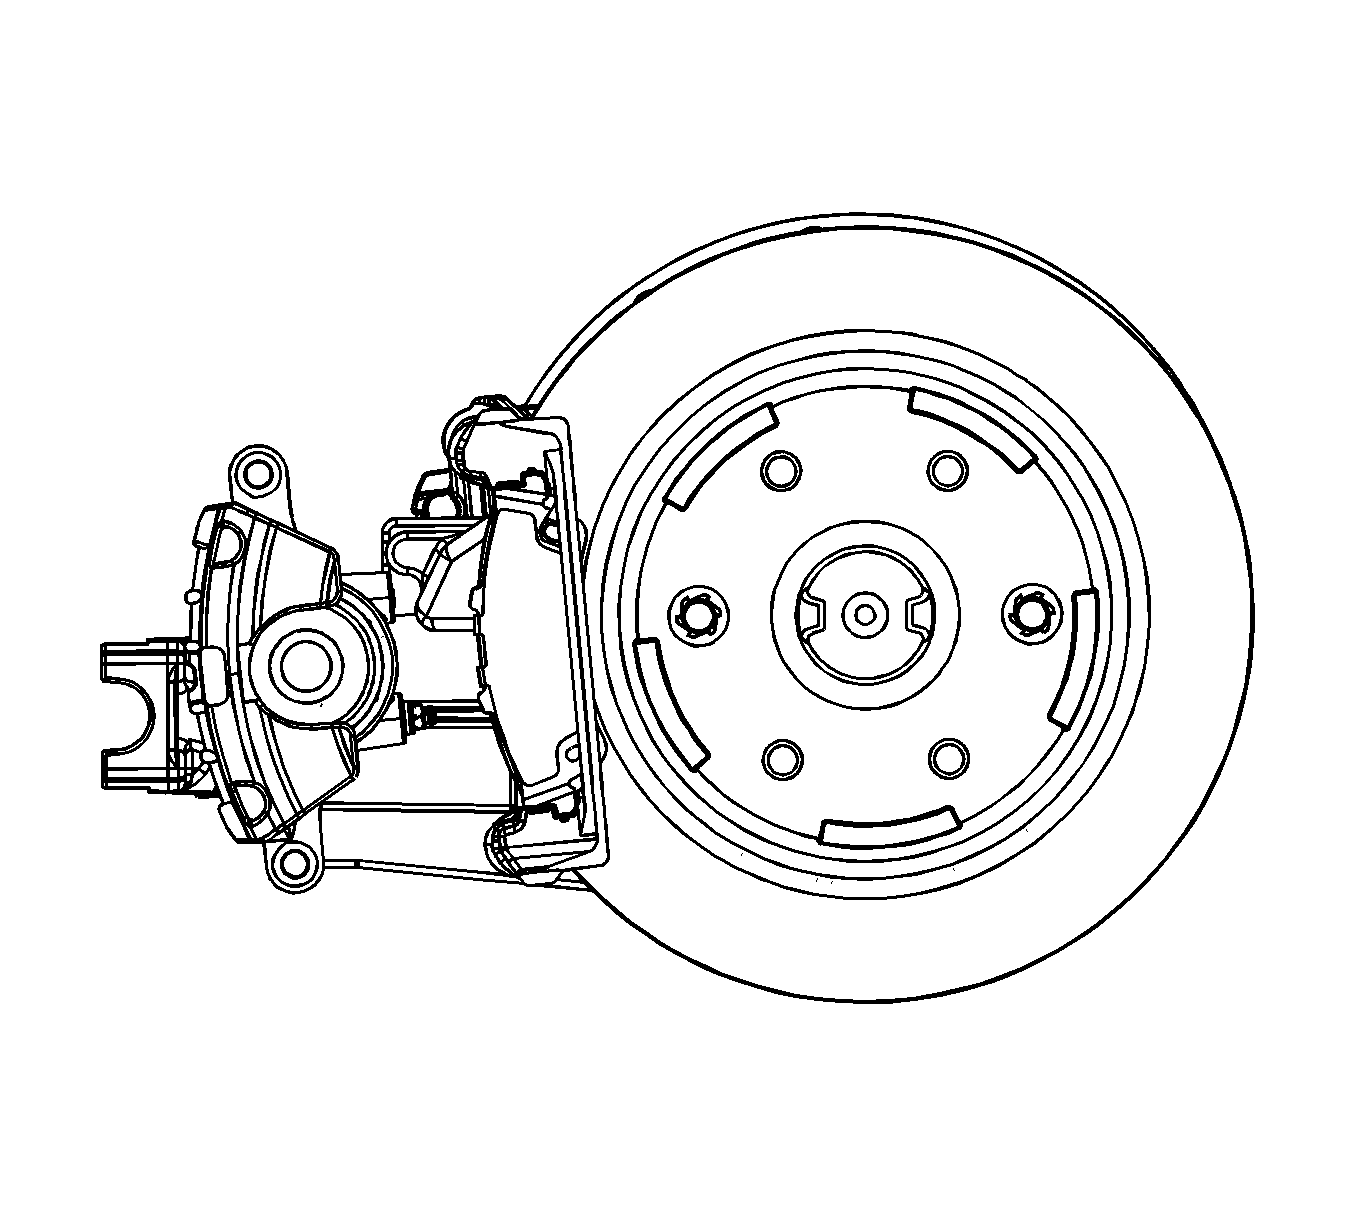
- Remove the caliper from the caliper bracket.
Support the caliper with heavy mechanic's wire or equivalent. DO NOT disconnect the hydraulic brake hose from the caliper.
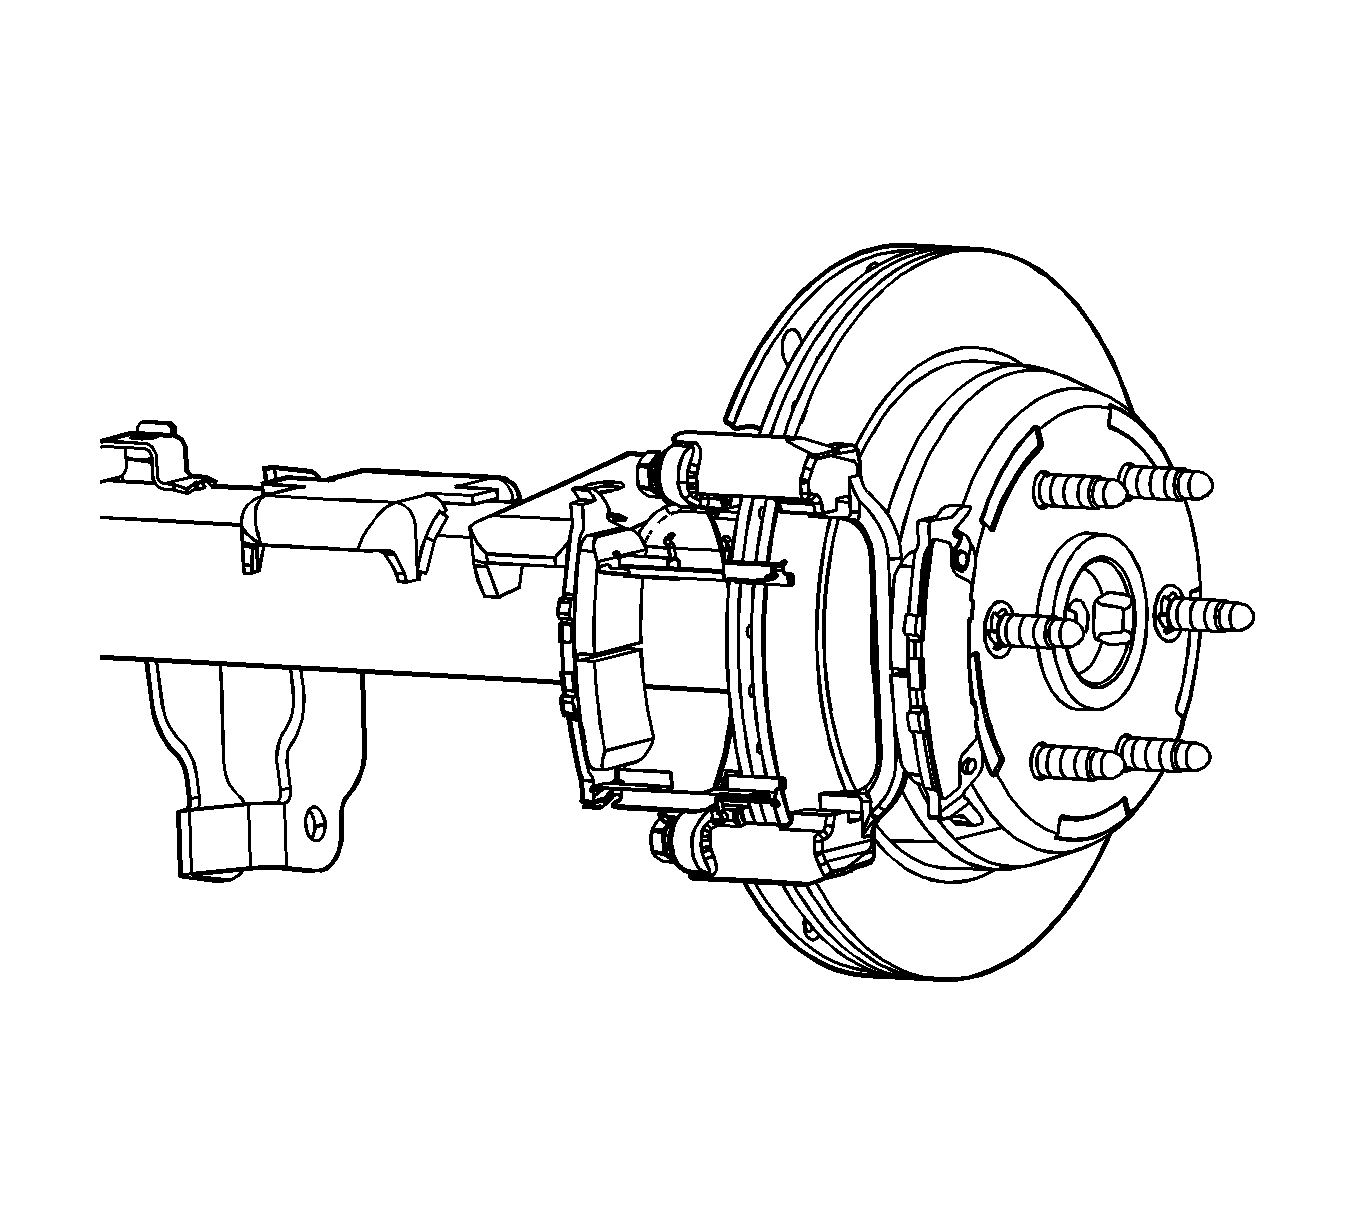
- Remove the brake pads from the caliper bracket.
- Remove the anti-rattle clips.
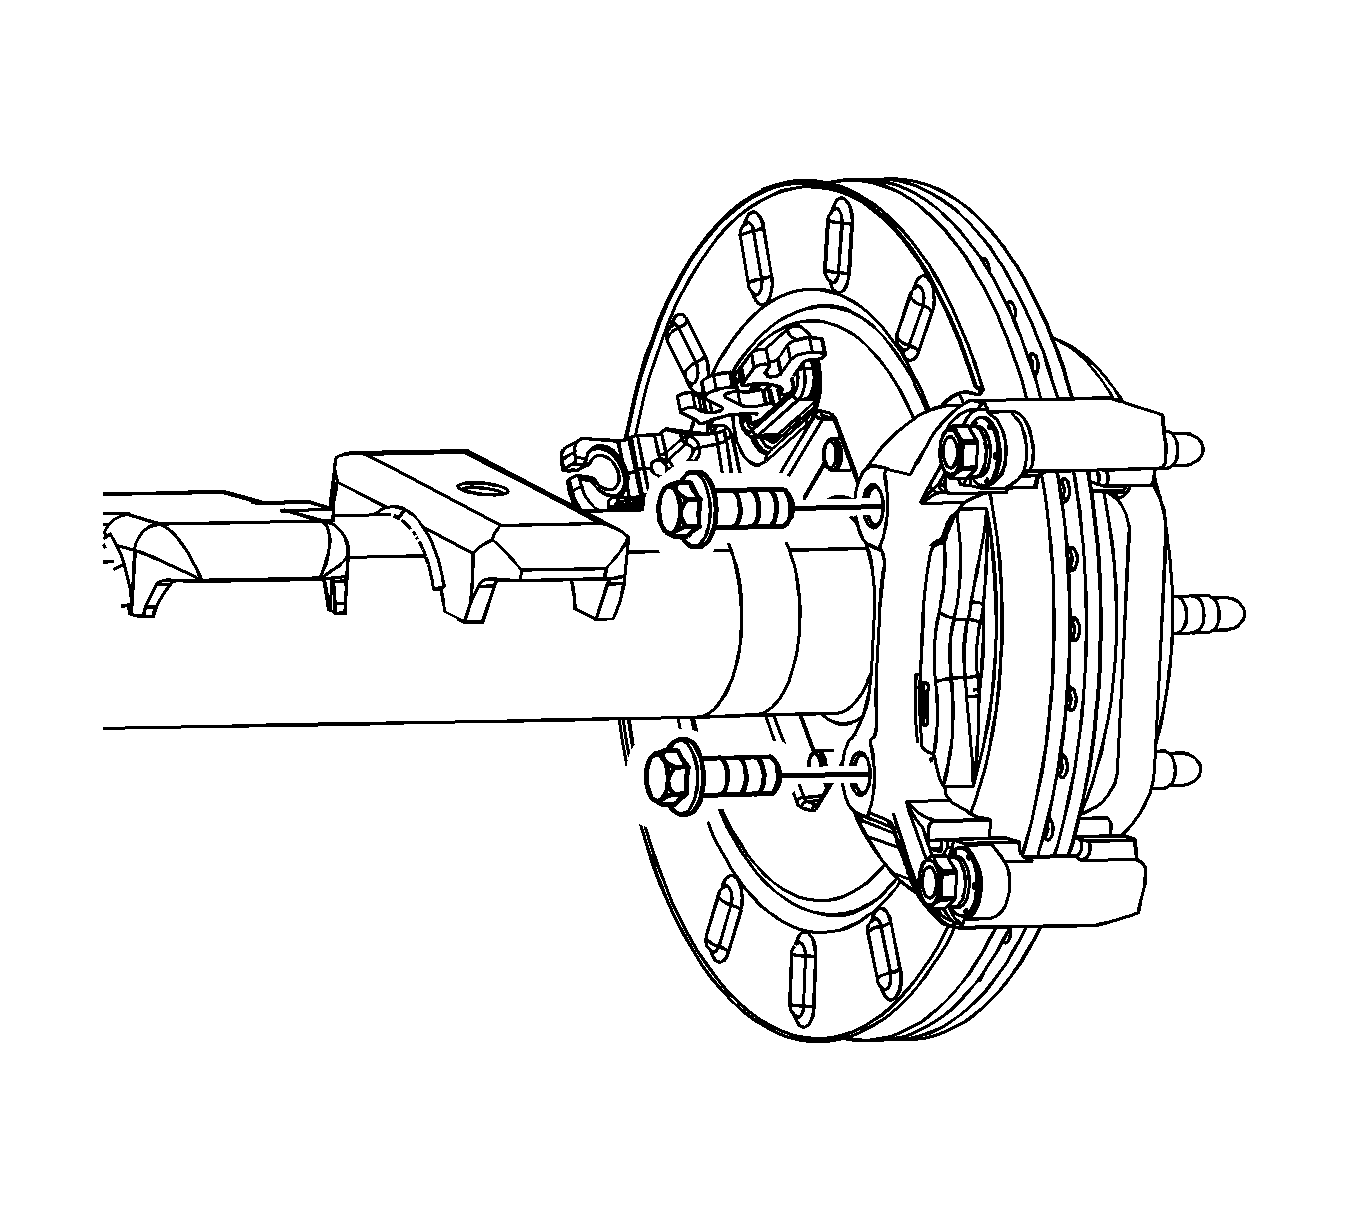
- Remove the brake caliper bracket bolts.
- Remove the brake caliper bracket.
- Remove any contaminants or foreign material from the inside ends of the brake caliper bracket.
- Clean the mounting surface and threads of the brake caliper bracket.
Installation Procedure

- Install the brake caliper bracket.
- Perform the following procedure before installing the brake caliper bracket bolts.
| 2.1. | Remove all traces of the original adhesive patch. |
| 2.2. | Clean the threads of the bolt with denatured alcohol or equivalent and allow to dry. |
| 2.3. | Apply Threadlocker GM P/N 12345493 (Canadian P/N 10953488) to the threads of the bolt. |
Notice: Refer to Fastener Notice in the Preface section.
- Install the brake caliper bracket bolts.
Tighten
Tighten the bolts to 200 N·m (148 lb ft).

- Install the anti-rattle clips to the brake caliper bracket.
- Install the brake pads.

- Install the caliper to the caliper bracket.

- Install the brake caliper bolts.
Tighten
Tighten the bolts to 42 N·m (31 lb ft).
- Install the tire and wheel assembly. Refer to
Tire and Wheel Removal and Installation
.
- With the engine OFF, gradually apply the brake pedal to approximately 2/3 of its travel distance.
- Slowly release the brake pedal.
- Wait 15 seconds, then repeat steps 10-11 until a firm pedal is obtained. This will properly seat the caliper pistons and pads.
- Fill the master cylinder reservoir to the proper level with clean brake fluid, if necessary. Refer to
Master Cylinder Reservoir Filling
.
Rear Brake Caliper Bracket Replacement 2500/3500 Series
Caution: Refer to Brake Dust Caution in the Preface section.
Removal Procedure
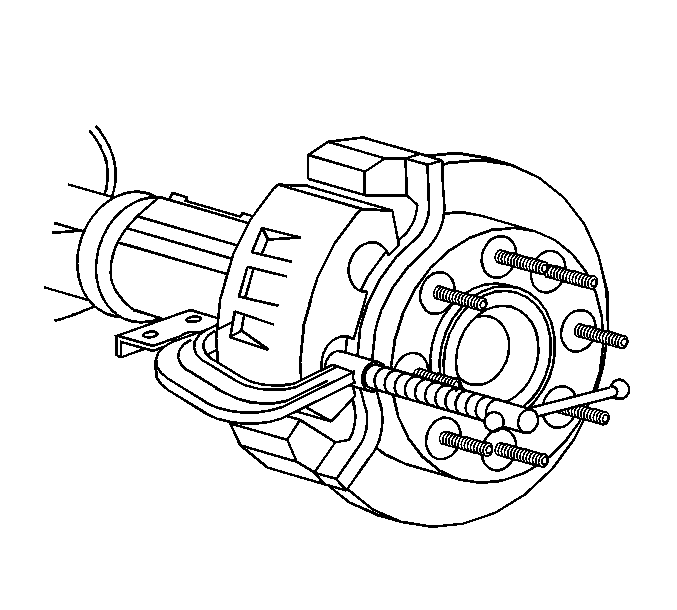
- Inspect the fluid level in the brake master cylinder reservoir.
- If the fluid level is midway between the maximum-full point, and the minimum allowable level, no fluid needs to be removed from the reservoir before proceeding.
- If the fluid level is higher than midway between the maximum-full point, and the minimum allowable level, remove fluid to the midway point before proceeding.
- Remove the tire and wheel assembly. Refer to
Tire and Wheel Removal and Installation
.
- Compress the brake caliper pistons.
| 5.1. | Install a large C-clamp over the top of the caliper housing and against the back of the outboard pad. |
| 5.2. | Slowly tighten the C-clamp until the pistons are pushed completely into the caliper bores. |
| 5.3. | Remove the C-clamp from the caliper. |
- Loosen the rear brake caliper mounting bolts. Do not remove.
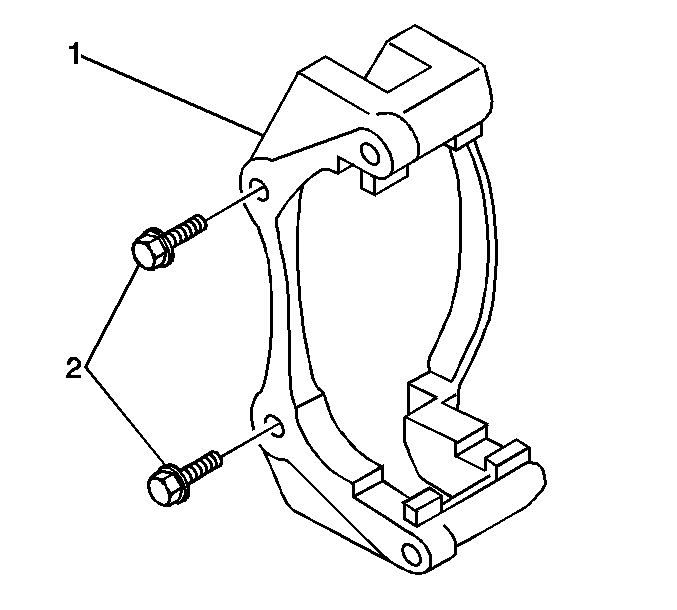
- Remove the brake caliper bracket bolts (2).
- Remove the caliper bracket (1) and brake caliper as an assembly.
Notice: Refer to Brake Caliper Notice in the Preface section.
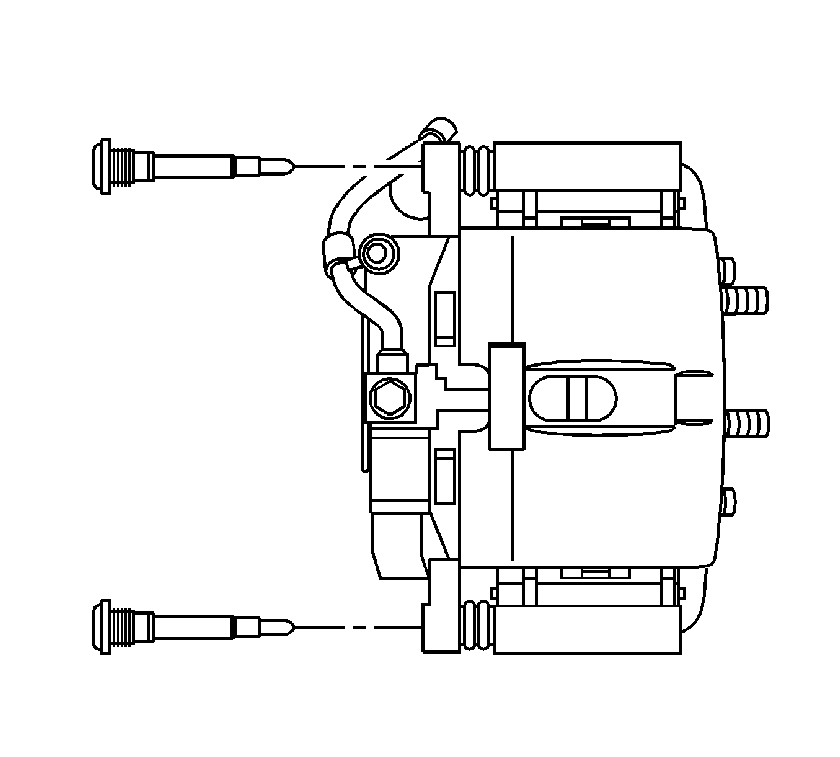
- Remove the caliper bolts from the caliper bracket.
Support the caliper with heavy mechanic's wire or equivalent. DO NOT disconnect the hydraulic brake hose from the caliper.
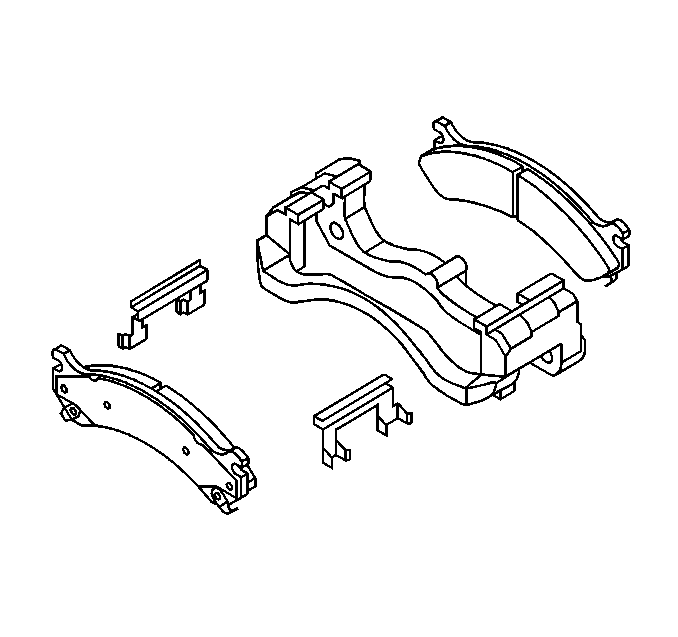
- Remove the brake pads from the caliper bracket.
- Remove the anti-rattle clips.
Installation Procedure

- Install the anti-rattle clips to the caliper bracket.
- Install the brake pads.

- Install the caliper to the caliper bracket.
- Install the brake caliper bolts to the caliper bracket. DO NOT tighten.

- Install the caliper and caliper bracket (1) as an assembly.
- Perform the following procedure before installing the caliper bracket bolts.
| 6.1. | Remove all traces of the original adhesive patch. |
| 6.2. | Clean the threads of the bolt with denatured alcohol or equivalent and allow to dry. |
| 6.3. | Apply Threadlocker GM P/N 12345493 (Canadian P/N 10953488) to the threads of the bolt. |
Notice: Refer to Fastener Notice in the Preface section.
- Install the brake caliper bracket bolts (2).
Tighten
| • | For JH6, tighten the bolts to 200 N·m (148 lb ft). |
| • | For JH7, tighten the bolts to 300 N·m (221 lb ft). |
- Tighten the brake caliper bolts (2).
Tighten
Tighten the bolts to 108 N·m (80 lb ft).
- Install the tire and wheel assembly. Refer to
Tire and Wheel Removal and Installation
.
- With the engine OFF, gradually apply the brake pedal to approximately 2/3 of its travel distance.
- Slowly release the brake pedal.
- Wait 15 seconds, then repeat steps 11-12 until a firm pedal is obtained. This will properly seat the brake caliper pistons and brake pads.
- Fill the master cylinder reservoir to the proper level with clean brake fluid, if necessary. Refer to
Master Cylinder Reservoir Filling
.


