Removal Procedure
Important: Before a new crankshaft rear oil seal is installed, the CDR and crankshaft
ventilation system should be thoroughly inspect and crankshaft pressure should
also be checked. Refer to Engine Controls for proper inspection procedures.
- Disconnect the battery
negative cables from the batteries. Refer to
Battery Cable
in Engine Electrical.
- Remove the transfer case from the vehicle if equipped.
| • | For the vehicle equipped with Manual Four Wheel Drive or Selectable
Four Wheel Drive, refer to
Transfer Case Replacement
in Driveline Axle. |
- Remove the transmission from the vehicle.
- Remove the clutch assembly if equipped. Refer to
Clutch Assembly Replacement
in Transmission/Transaxle.
- Remove the flywheel from the crankshaft. Refer to
Engine Flywheel Replacement
.
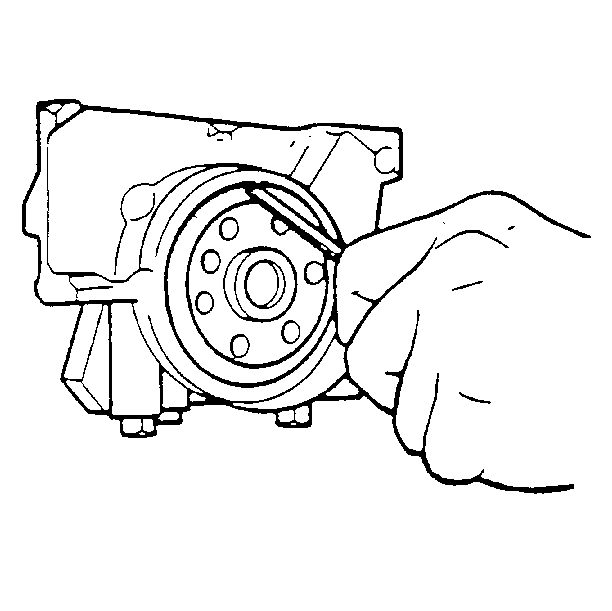
Important: Use caution as not to damage the sealing area of the crankshaft when
removing the crankshaft rear oil seal.
- Remove the crankshaft rear oil seal from the engine block.
Installation Procedure
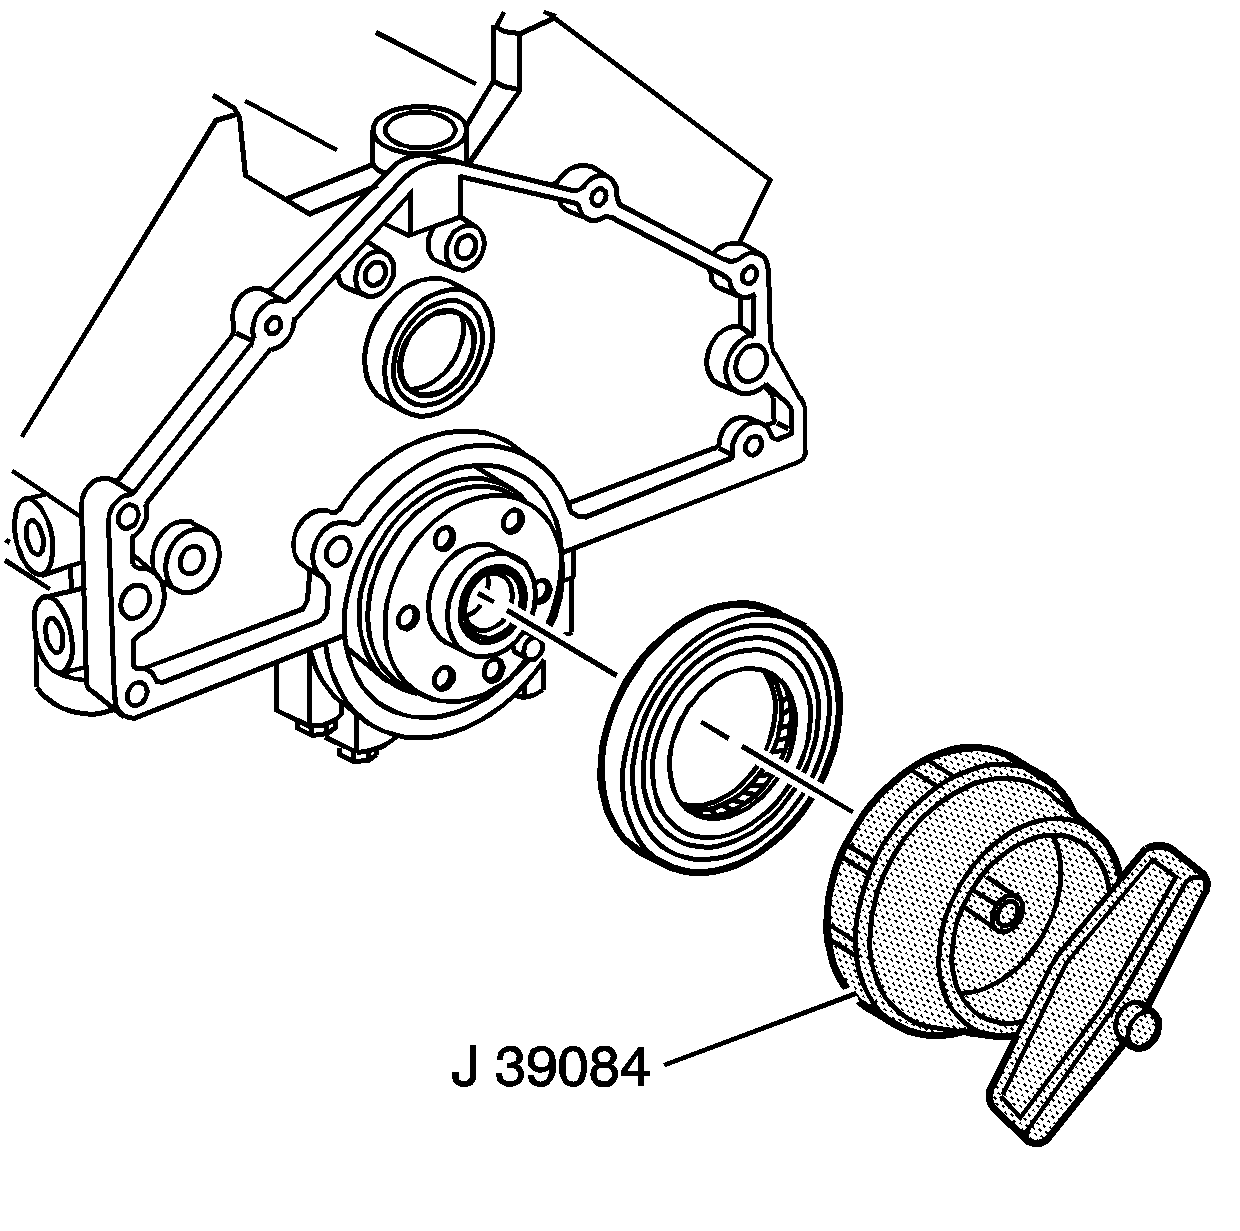
Tools Required
J 39084 Crankshaft
Oil Seal Installer
Important: The crankshaft sealing surface must be clean and smooth in order to
prevent damaging the crankshaft rear oil seal lip when a new seal is installed.
Because of the crankshaft rear oil seal wear or grooving, the service
crankshaft rear oil will be positioned flush with the rear cylinder block
surface. The position of the new crankshaft rear oil seal will be controlled
by the tool. Positioning the crankshaft rear oil in a new location provides
a new surface for the crankshaft rear oil seal to ride on.
Important: Use care as not to cause the spring in the crankshaft rear oil seal
to unseat itself .
- Apply a small amount of clean engine oil to the lips of the crankshaft
rear oil seal before installing.
- Use the J 39084
to install the crankshaft rear oil seal.
- Install the flywheel to the crankshaft. Refer to
Engine Flywheel Replacement
.
- Install the clutch assembly to the flywheel. Refer to
Clutch Assembly Replacement
in Transmission/Transaxle.
- Install the transmission to the vehicle.
- Install the transfer case to the transmission.
| • | For the vehicle equipped with Manual Four Wheel Drive or Selectable
Four Wheel Drive, refer to
Transfer Case Replacement
in Driveline Axle. |
- Lower the vehicle.
- Connect the battery negative cables to the batteries. Refer to
Battery Cable
in Engine Electrical.
