Removal Procedure
Tools Required
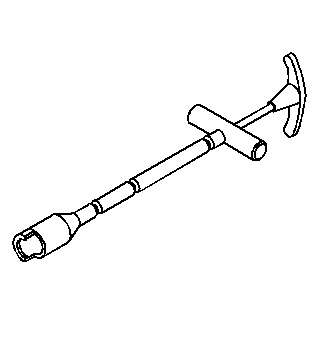
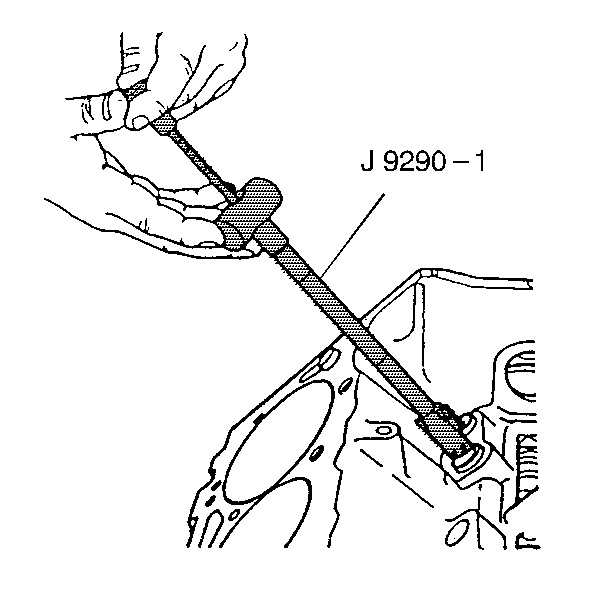
J 9290-01 Valve Lifter Remover (Slide Hammer Type)
- Open the hood.
- Disconnect the negative battery cable from the battery.
- Remove the upper intake manifold from the lower intake manifold. Refer to Intake Manifold Replacement .
- Remove the lower intake manifold from the cylinder head. Refer to Intake Manifold Replacement .
- Remove the valve rocker arm from the cylinder head. Refer to Valve Rocker Arm and Push Rod Replacement .
- Remove the pushrod from the engine block. Refer to Valve Rocker Arm and Push Rod Replacement .
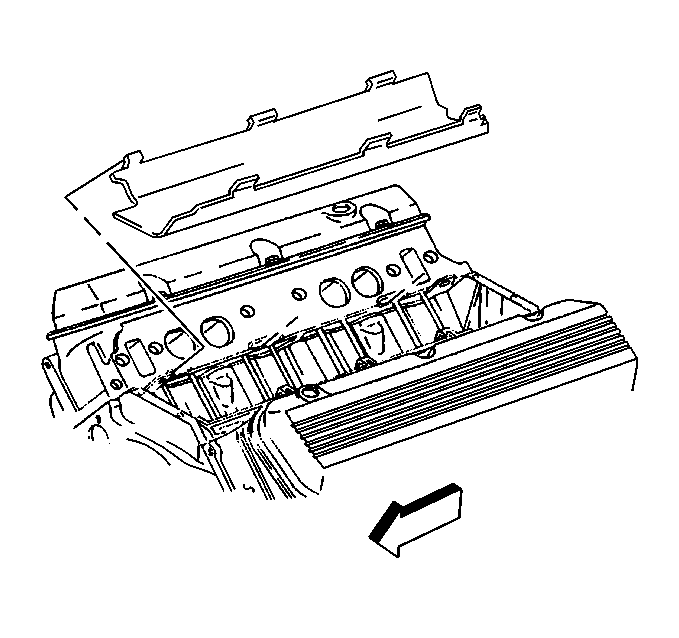
- Remove the intake manifold oil splash shield from the engine block.
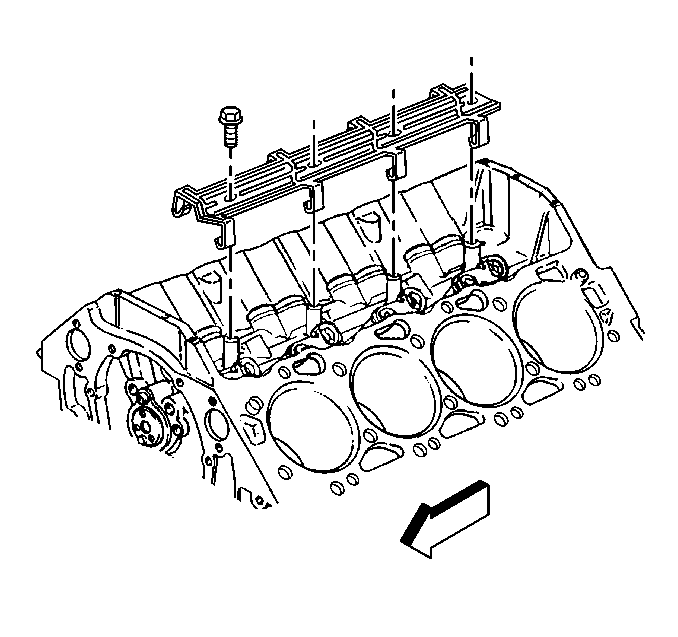
- Remove the valve lifter guide and retainer from the engine block.
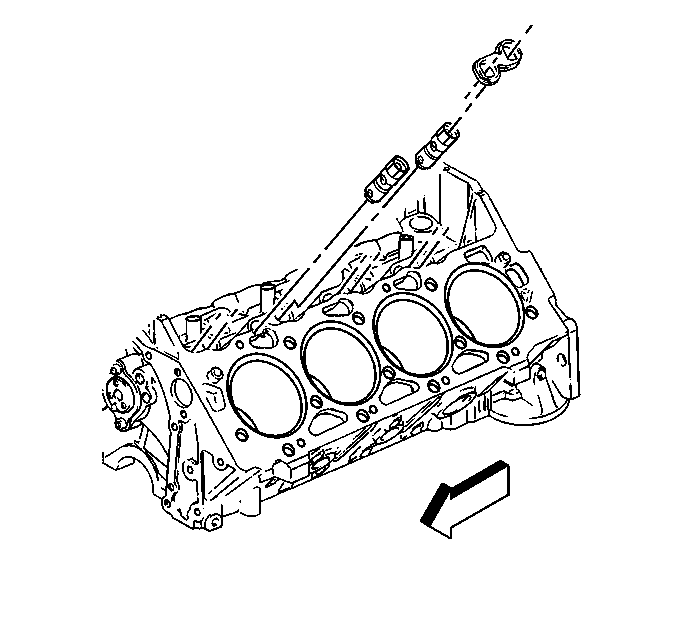
- Remove the valve lifter and guide from the engine block.
- Use the J 9290-01 if a valve lifter is stuck in the engine block.
- Inspect the valve lifter bore in the engine block for excessive wear. Refer to Engine Block Cleaning and Inspection .
Caution: Before servicing any electrical component, the ignition and start switch must be in the OFF or LOCK position and all electrical loads must be OFF, unless instructed otherwise in these procedures. If a tool or equipment could easily come in contact with a live exposed electrical terminal, also disconnect the negative battery cable. Failure to follow these precautions may cause personal injury and/or damage to the vehicle or its components.
Installation Procedure
Important: Replace the engine oil and the oil filter if new valve lifters or a camshaft is installed. Add engine oil supplement GM P/N 1052367 to the crankcase oil.
Replace all of the valve lifters if a new camshaft is installed.- Install the valve lifter and guide into the engine block. Refer to Valve Lifter Installation .
- Install the valve lifter guide retainer into the engine block.
- Install the retaining bolt for the valve lifter guide retainer to the engine block.
- Install the pushrod into the engine block. Refer to Valve Rocker Arm and Push Rod Replacement .
- Install the valve rocker arm on the cylinder head. Refer to Valve Rocker Arm and Push Rod Replacement .
- Install the valve rocker arm cover to the cylinder head. Refer to Valve Rocker Arm Cover Replacement .
- Install the intake manifold splash shield to the engine block.
- Install the lower intake manifold to the engine block. Refer to Intake Manifold Replacement .
- Install the upper intake manifold to the lower intake manifold. Refer to Intake Manifold Replacement .
- Connect the battery negative cable to the battery. Refer to Battery Cable Battery Cable Replacement in Engine Electrical.
- Close the hood.
Notice: Use the correct fastener in the correct location. Replacement fasteners must be the correct part number for that application. Fasteners requiring replacement or fasteners requiring the use of thread locking compound or sealant are identified in the service procedure. Do not use paints, lubricants, or corrosion inhibitors on fasteners or fastener joint surfaces unless specified. These coatings affect fastener torque and joint clamping force and may damage the fastener. Use the correct tightening sequence and specifications when installing fasteners in order to avoid damage to parts and systems.
Tighten
Tighten the bolt to 25 N·m (18 lb ft).
