Cooling System Leak Testing Radiator Leak Test
Testing Procedure (On Vehicle)
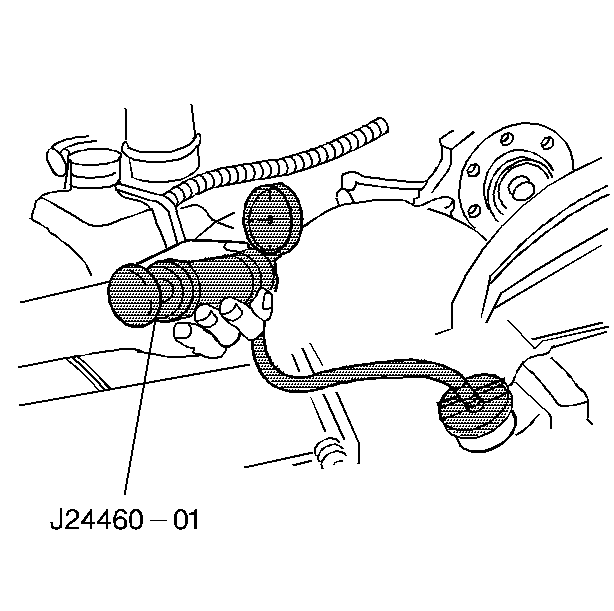
Tools Required
J 24460-01 Cooling System Tester
- After the system has cooled, remove the radiator/surge tank pressure cap.
- Connect the cooling system tester J 24460-01 to the radiator/surge tank.
- Apply normal system operating pressure. Do not exceed 138 kPa (20 psi).
- Watch the gauge needle for an indication of a leak. Examine all cooling system connections and components, including the radiator and the heater core, for leaking coolant.
- Tighten the hose connections or repair as required.
- Inspect the radiator/surge tank cap with J 24460-01 in order to ensure the cap maintains the correct pressure.
- If the radiator leaks during the pressure test, mark the leak area so the leak can be located once the radiator has been removed from the vehicle.
Caution: Under pressure, the temperature of the solution in the radiator can be considerably higher, without boiling. Removing the radiator cap while the engine is hot (pressure is high), will cause the solution to boil instantaneously, with explosive force. The solution will spew out over the engine, fenders, and the person removing the cap. Serious bodily injury may result. Flammable antifreeze, such as alcohol, is not recommended for use at any time. Flammable antifreeze could cause a serious fire.
Caution: In order to help avoid being burned, do not remove the radiator cap while the engine and the radiator are hot. Scalding fluid and steam can be blown out under pressure if the cap is removed too soon.
Testing Procedure (Off Vehicle)
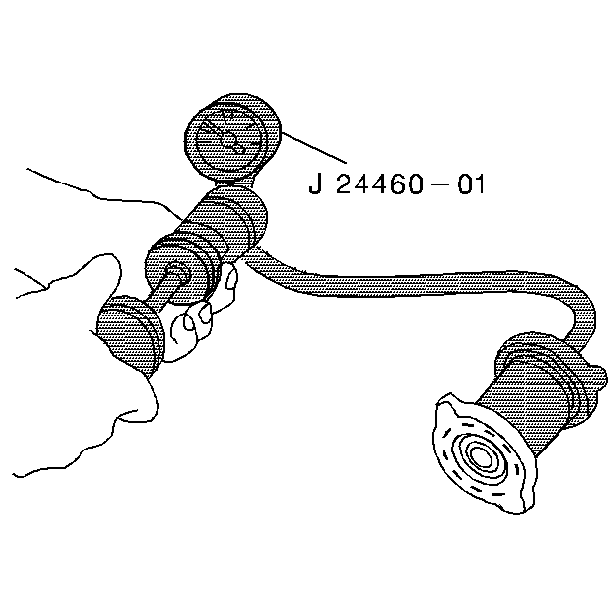
Tools Required
J 24460-01 Cooling System Tester
- Plug the inlet and outlet tubes. Ensure the drain cock is closed.
- Attach the J 24460-01 to the radiator.
- Apply pressure to the radiator. Do not exceed 138 kPa (20 psi) of pressure.
- Observe the gauge for any pressure loss.
- Run water over the repair area and look for any bubbles. If a large tank is available, the radiator can be submerged in order to check for air bubbles.
Notice: Do not use boil-out tanks or any other tank that has been used for copper or brass radiators. The remaining solutions or chemicals in these tanks could cause radiator failure.
Cooling System Leak Testing Radiator Cap Leak Test
Radiator Cap Pressure Test
Tools Required
J 24460-01 Cooling System and Cap Pressure Tester
- After the system has cooled, remove the radiator cap.
- Wet the radiator cap gasket with water. Wash off any sediment from the sealing surface.
- Install the cap to J 24460-01 .
- Use the plunger handle of the J 24460-01 in order to obtain the pressure specified on the cap.
- Note the rate of decrease in pressure.
- The pressure reading should remain within the corresponding pressure segment of the scale for at least 10 seconds.
- If the cap does not hold the corresponding pressure, replace the cap.
Caution: To avoid being burned, do not remove the radiator cap or surge tank cap while the engine is hot. The cooling system will release scalding fluid and steam under pressure if radiator cap or surge tank cap is removed while the engine and radiator are still hot.
Cooling System Leak Testing Exhaust Gas Leak Test
System Check
Notice: Exhaust gasses may enter the cooling system through a leaking cylinder head gasket. Exhaust gasses combine with water to form acids. These acids are harmful to the cooling system and the engine.
In order to check for exhaust gases leaking into the cooling system, do the following steps:
- Drain the coolant system until the coolant level stands just above the top of the cylinder heads. Refer to Cooling System Draining and Filling .
- Disconnect the upper radiator hose. Refer to Radiator Hose Replacement .
- Remove the thermostat. Refer to Engine Coolant Thermostat Replacement .
- Remove the drive belt. Refer to the appropriate procedure:
- Start the engine and accelerate several times.
- Inspect the coolant level for the appearance of bubbles or a significant rise in the coolant level. If the coolant level rises or bubbles appear, coolant may be leaking into engine. Inspect the spark plugs. Refer to Spark Plug Visual Diagnosis in Engine Electrical.
| • | Drive Belt Replacement in Engine Mechanical - 4.3L |
| • | Drive Belt Replacement in Engine Mechanical - 5.0L, 5.7L |
| • | Drive Belt Replacement in Engine Mechanical - 6.5L |
| • | Drive Belt Replacement in Engine Mechanical - 7.4L |
