Removal Procedure
- Open the hood.
- Disconnect the negative battery cable.
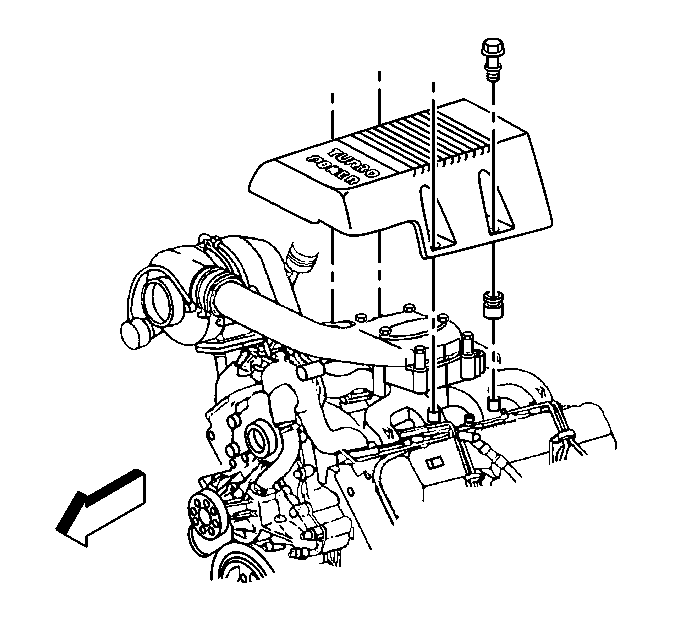
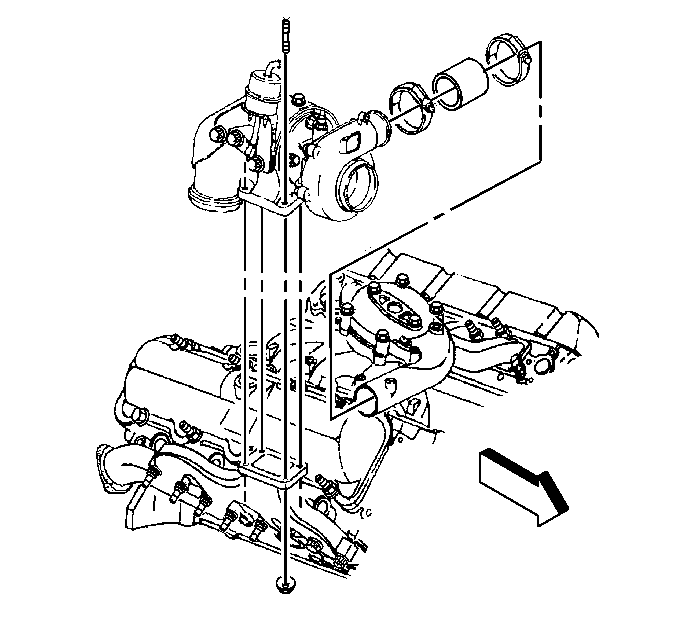
- Remove the upper intake manifold cover.
- Remove the crankcase depression regulator (CDR) valve and tube from the air cleaner. Refer to CDR Valve and Hoses Replacement in Engine Controls.
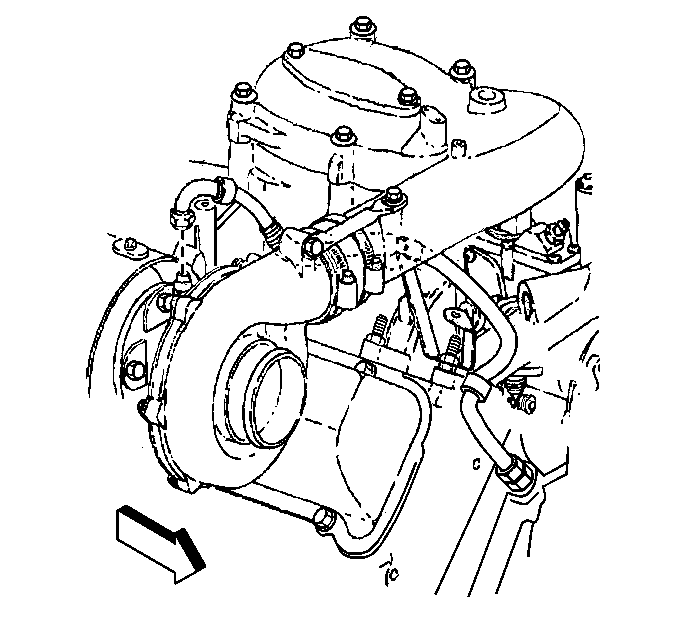
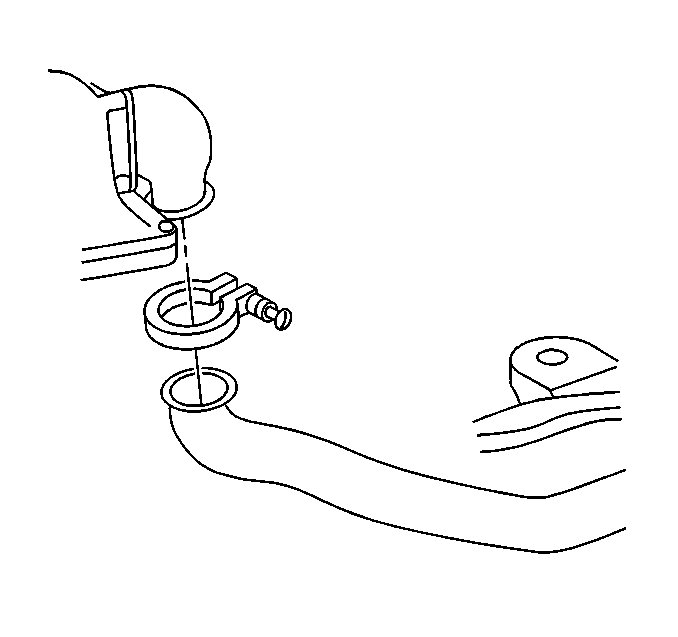
- Loosen the clamps on the connector between the upper intake manifold and the turbocharger.
- Remove the air cleaner extension and air cleaner assembly from the turbocharger:
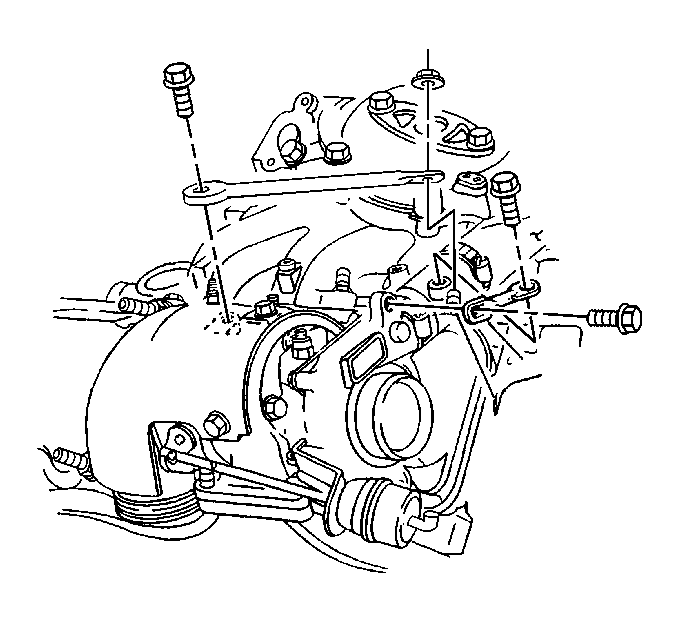
- Remove the braces from the turbocharger.
- Remove the vacuum line from the wastegate actuator.
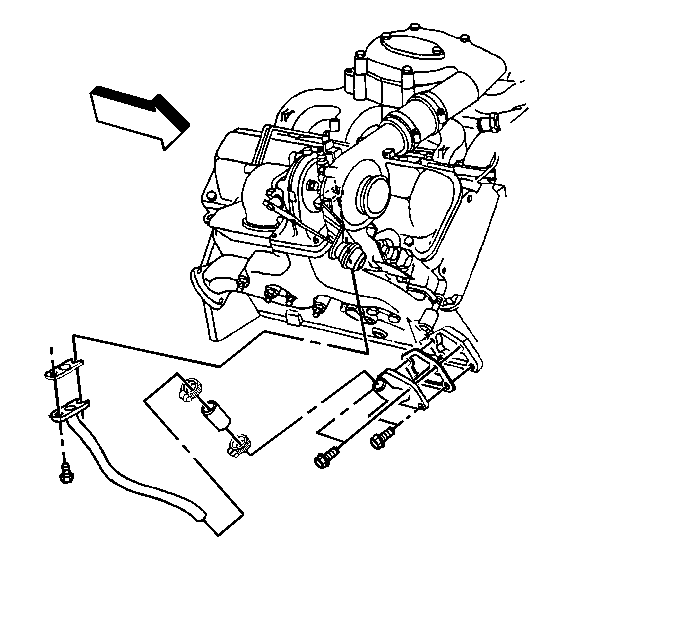
- Remove the oil feed line from the turbocharger.
- Remove the right front wheel and inner splash shield. Refer to Wheel Removal in Tires and Wheels.
- Remove the oil drain tube and nuts.
- Remove the exhaust pipe clamp from the turbocharger outlet.
- Remove the turbocharger assembly.
Caution: Unless directed otherwise, the ignition and start switch must be in the OFF or LOCK position, and all electrical loads must be OFF before servicing any electrical component. Disconnect the negative battery cable to prevent an electrical spark should a tool or equipment come in contact with an exposed electrical terminal. Failure to follow these precautions may result in personal injury and/or damage to the vehicle or its components.
Important: Some quantity of oil will exist inside the vent system. The crankcase vapor consists of vaporized oil that condenses within the vent and intake system. The inside of the air duct and compressor wheel housing will have some oil due to the venting of the crankcase vapors.
Important: Silicone sealant is used between the connector hose, the upper intake manifold, and the turbocharger.
| 6.1. | Break the seal between the connector hose, turbocharger compressor inlet, and the upper intake manifold by using a thin flat screwdriver. |
| 6.2. | Slide the connector hose over the upper intake manifold. |
Important: Removing the right front wheel and the inner splash shield will aid in removing and installing the attaching bolts for the turbocharger and for the oil drain tube.
Installation Procedure
Important: Perform the following steps before the turbocharger is installed:
- Install the studs to the turbocharger.
- Install the turbocharger to the exhaust manifold.
- Install the studs and nuts.
- Install the oil drain tube and gasket.
- Install the mounting bolts.
- Install the right front inner splash shield.
- Install the right front wheel. Refer to Wheel Installation in Tires and Wheels.
- Install the oil feed line to the turbocharger.
- Tighten the oil feed line fitting.
- Install the exhaust pipe to the turbocharger.
- Tighten the exhaust clamp.
- Install the connector hose (with clamps) to the upper intake manifold:
- Install the long and short braces to the turbocharger.
- Install the mounting bolt for the long brace.
- Install the mounting nut for the long brace.
- Install the mounting bolts for the short brace.
- Install the vacuum line to the wastegate actuator.
- Install the air cleaner extension and air cleaner assembly.
- Install the CDR valve and hose. Refer to CDR Valve and Hoses Replacement in Engine Controls.
- Install the upper intake manifold cover.
- Install the upper intake manifold cover bolts.
- Install the negative battery cable.
- Run the engine at idle for at least 2 minutes after completing the installation of the turbocharger. While running the engine, check for any oil leaks at the oil supply and return hoses.
Notice: Use the correct fastener in the correct location. Replacement fasteners must be the correct part number for that application. Fasteners requiring replacement or fasteners requiring the use of thread locking compound or sealant are identified in the service procedure. Do not use paints, lubricants, or corrosion inhibitors on fasteners or fastener joint surfaces unless specified. These coatings affect fastener torque and joint clamping force and may damage the fastener. Use the correct tightening sequence and specifications when installing fasteners in order to avoid damage to parts and systems.
Tighten
Tighten the studs and nuts to 58 N·m (43 lb ft).
Tighten
Tighten the bolts to 26 N·m (19 lb ft).
Important: Fill the oil feed hole at the top of the turbocharger with a small amount of clean engine oil (1 to 2 cc) while turning the compressor wheel by hand to lubricate the bearings in the turbocharger.
Tighten
Tighten the fitting to 17 N·m (13 lb ft).
Tighten
Tighten the clamp to 8 N·m (71 lb in).
Important: Apply a small amount of silicone sealant, GM P/N 9985943 or the equivalent, to a clean turbocharger compressor inlet (not the upper intake manifold) before installing the connector hose to prevent oil leakage from the closed breather system.
| 12.1. | Slide the connector hose over the upper intake manifold. |
| 12.2. | Slide the connector hose forward onto the turbocharger compressor inlet. |
| 12.3. | Center the connector hose and tighten the clamps. |
Tighten
Tighten the clamps to 6 N·m (50 lb in).
Tighten
Tighten the bolt (long brace) to 50 N·m (37 lb ft).
Tighten
Tighten the nut (Long brace) to 40 N·m (30 lb ft).
Tighten
Tighten the bolts (short brace) to 25 N·m (19 lb ft).
Tighten
Tighten the bolts to 11 N·m (90 lb in).
