Removal Procedure
Tools Required
J 6627-A Wheel Stud and Tie Rod Remover
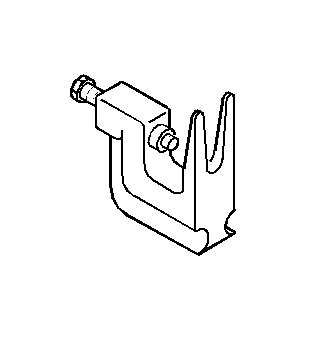
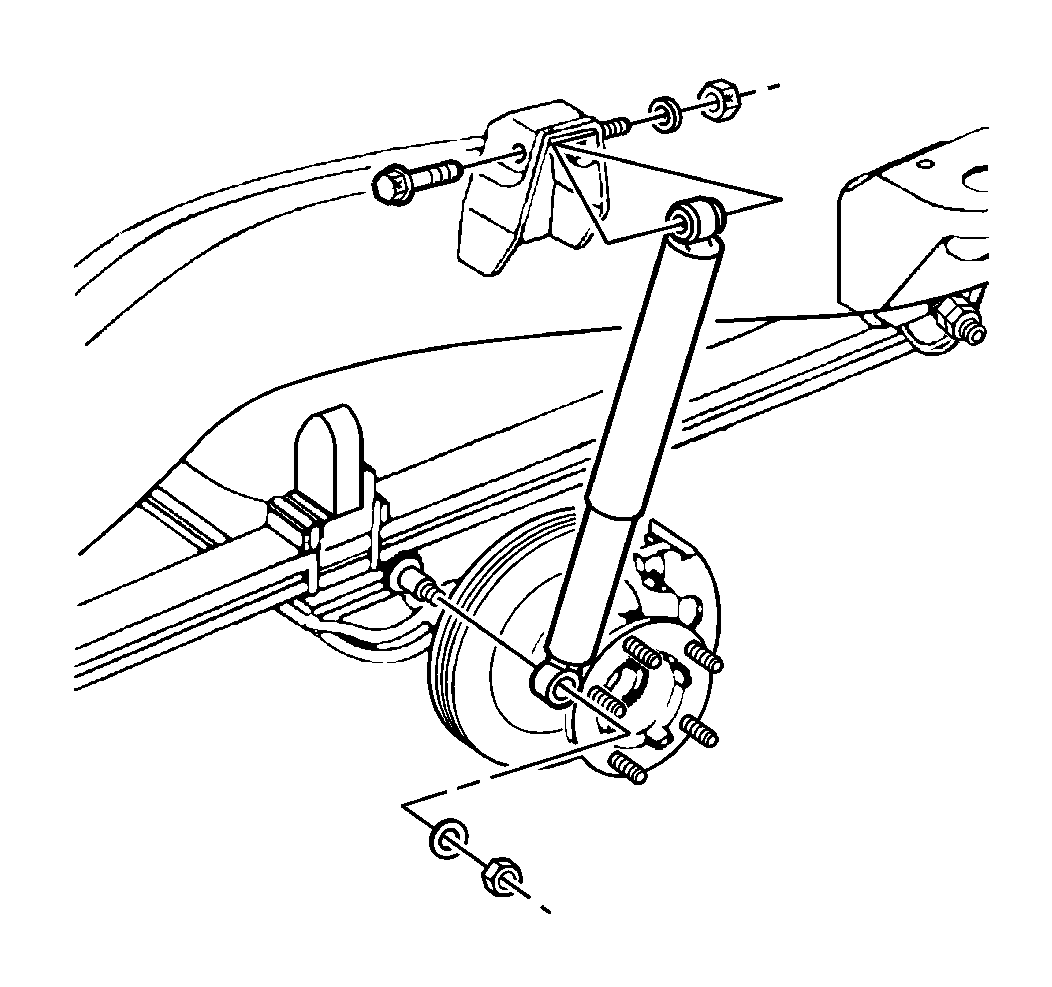
- Raise the vehicle. Support the axle separately in order to eliminate any load on the springs.
- Remove the tire and wheel assembly. Refer to Wheel Removal in Tires and Wheels.
- Remove the nut and the washer.
- Remove the shock absorber from the axle.
- Remove the nut and the washer.
- Remove the stabilizer link from the stabilizer shaft. Using the J 6627-A , separate the stabilizer shaft from the stabilizer link.
- Remove the nut, the retainer, and the insulator.
- Remove the stabilizer link from the axle. Pull the link free from the axle. Do not lose the other insulator and retainer.
- Remove the nuts, the washers, and the U-bolts.
- Remove the spacer and the spring spacer.
- Remove the leaf spring from the axle.
- Remove the nut, the washer, the bolt, and the washer in order to separate the spring from the rear shackle.
- Remove the nut, the washer, the bolt, and the washer in order to separate the spring from the front hanger.
- Pull the leaf spring back and out.
- Remove the leaf spring from the frame.

Installation Procedure
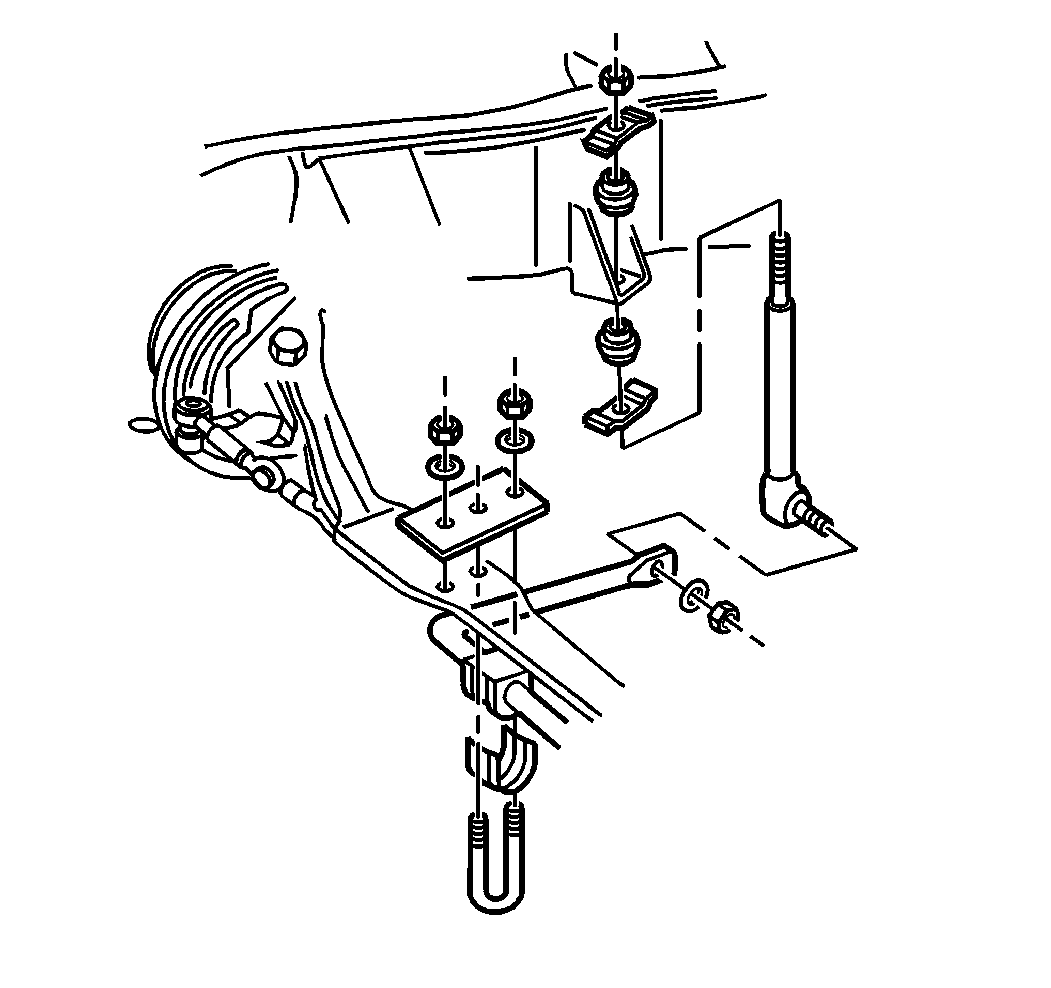
- Install the leaf spring to the frame.
- Attach the spring to the front spring hanger with the washers, the bolt, and the nut.
- Attach the spring to the spring hanger with the washers, the bolt, and the nut.
- Install the leaf spring to the axle.
- Install the spacer, the U-bolts, the washers, and the nuts.
- Install the stabilizer link (with lower retainer and insulator) to the frame.
- Install the stabilizer link upper insulator, retainer, and the nut.
- Install the stabilizer link to the stabilizer shaft.
- Install the washer and the nut.
- Install the shock absorber to the axle.
- Install the washer and the nut.
- Install the tire and wheel assembly. Refer to Wheel Installation in Tires and Wheels.
- Lower the vehicle.
- Check the front wheel alignment. Adjust as necessary. Refer to Wheel Alignment Measurement in Wheel Alignment.
| • | Line up each end of the spring with the spring hangers. |
| • | The double wrap end of the spring should be toward the front of the vehicle. |
Notice: Use the correct fastener in the correct location. Replacement fasteners must be the correct part number for that application. Fasteners requiring replacement or fasteners requiring the use of thread locking compound or sealant are identified in the service procedure. Do not use paints, lubricants, or corrosion inhibitors on fasteners or fastener joint surfaces unless specified. These coatings affect fastener torque and joint clamping force and may damage the fastener. Use the correct tightening sequence and specifications when installing fasteners in order to avoid damage to parts and systems.
Tighten
Tighten the nut to 95 N·m (70 lb ft).
| • | Position the spring spacer onto the axle. |
| • | Either of the aligning pins may contact the edge of the leaf spring after the assembly is complete. |
Tighten
Tighten the nuts, in a diagonal sequence, to 125 N·m (92 lb ft).
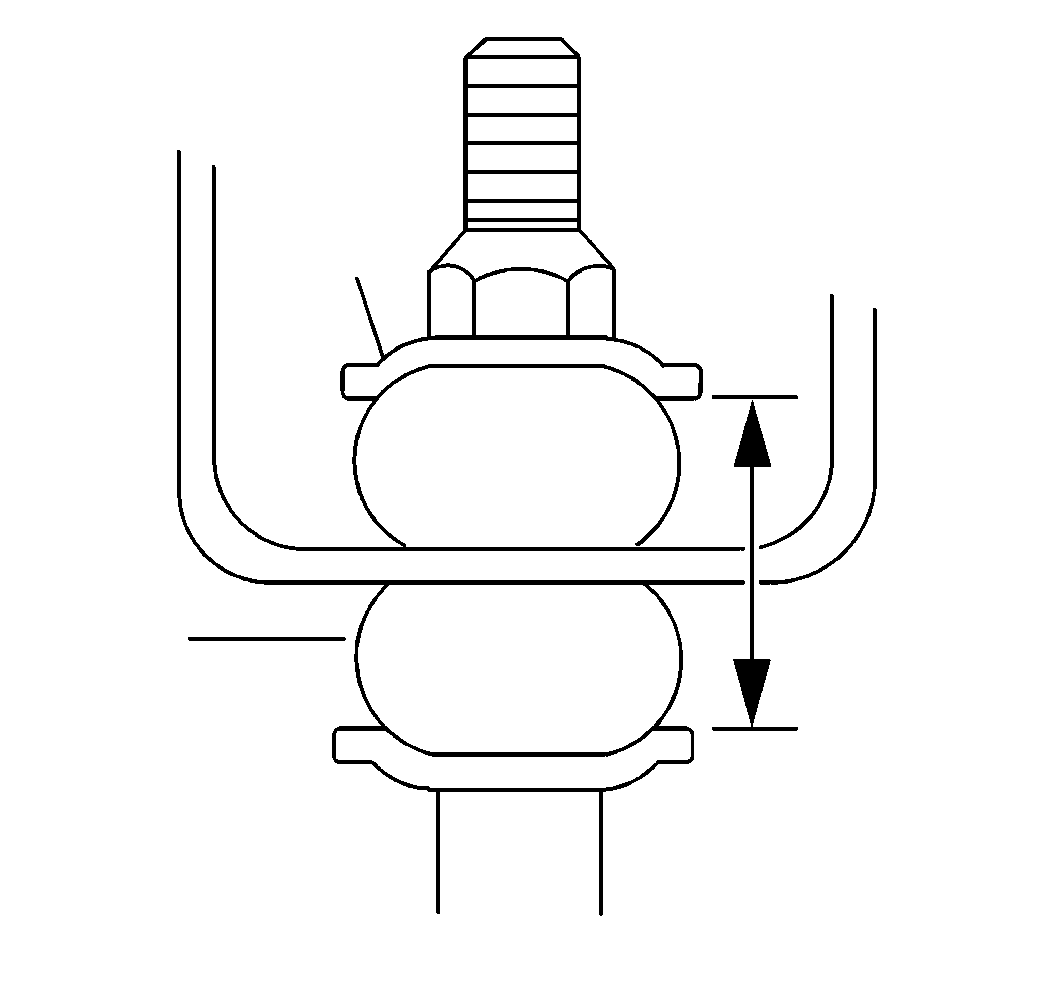
Tighten
Tighten the nut until the distance between each retainer is 38.0 mm
(1.5 in).
Tighten
Tighten the nut to 68 N·m (50 lb ft).
Tighten
Tighten the nut to 50 N·m (37 lb ft).
