Spare Wheel Hoist Replacement All Pickup Models
Removal Procedure
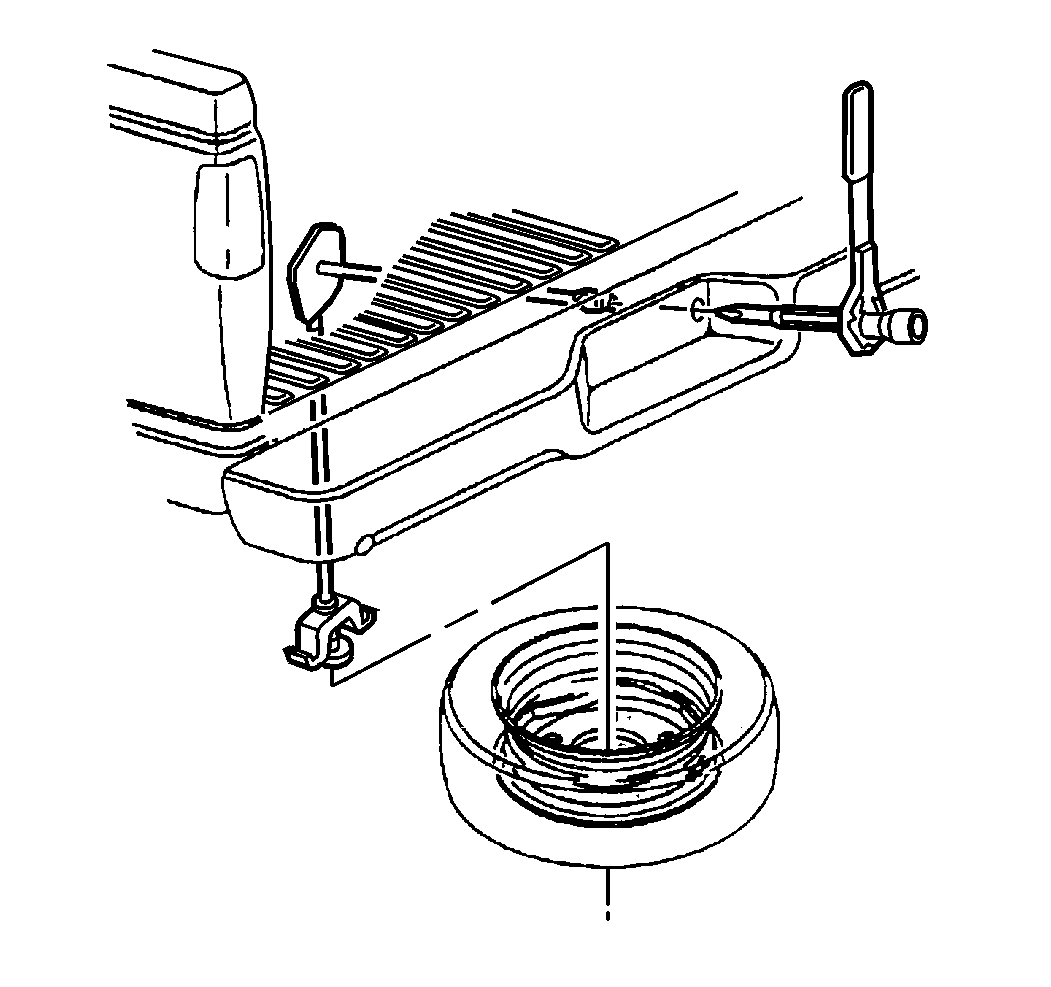
The pickup models use a winch/cable hoist system for tire stowage. The
hoist is behind the rear axle and forward of the rear bumper.

- Remove the spare tire.
| 1.1. | Attach a ratchet to the wheel with the DOWN mark facing you. |
| 1.2. | Put the end of the wheel wrench through the rear bumper access
hole until the wrench connects into the hoist shaft. |
| 1.3. | Turn the ratchet counterclockwise in order to lower the tire. |
| 1.4. | Turn the ratchet until the spare tire can be pulled out from under
the vehicle. |
| 1.5. | Once the tire has been lowered, tilt the retainer at the end of
the cable and pull the retainer through the wheel opening. |

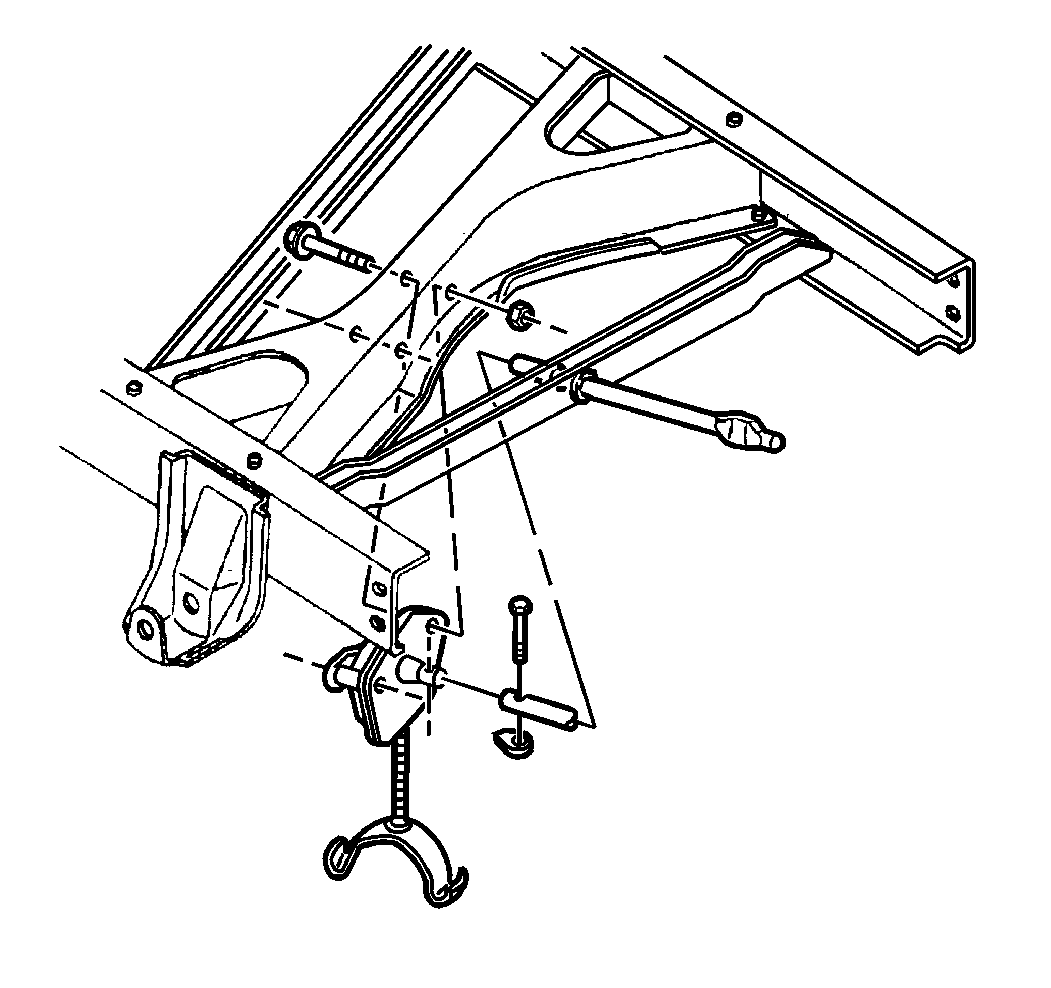
- Remove the pin and the
retainer from the shaft.
- Remove the bolts and the nuts.
- Remove the hoist from the crossmember.
Installation Procedure

- Install the hoist to the
crossmember.
Notice: Use the correct fastener in the correct location. Replacement fasteners
must be the correct part number for that application. Fasteners requiring
replacement or fasteners requiring the use of thread locking compound or sealant
are identified in the service procedure. Do not use paints, lubricants, or
corrosion inhibitors on fasteners or fastener joint surfaces unless specified.
These coatings affect fastener torque and joint clamping force and may damage
the fastener. Use the correct tightening sequence and specifications when
installing fasteners in order to avoid damage to parts and systems.
- Install the bolts
and the nuts.
Tighten
Tighten the nut to 25 N·m (18 lb ft).
- Install the pin and the retainer to the shaft.

- Install the spare tire.
| 4.1. | Place the tire on the ground, with the valve stem pointed down,
at the rear of the vehicle. |
| 4.2. | Pull the wheel retainer through the wheel opening. |
| 4.3. | Attach the ratchet to the wheel with the UP mark facing you. |
| 4.4. | Place the end of the wheel wrench through the rear bumper access
hole until the wrench connects into the hoist shaft. |
| 4.5. | Turn the ratchet clockwise in order to raise the tire. |
| 4.6. | When two clicks are heard, stop turning the wrench. |
Spare Wheel Hoist Replacement 4 Door Utility
Removal Procedure
The 4 Door Utility models use a winch/cable hoist system for tire stowage.
The hoist is behind the rear axle and forward of the rear bumper.

- Remove the spare tire.
| 1.1. | Attach a ratchet to the wheel with the DOWN mark facing you. |
| 1.2. | Place the end of the wheel wrench through the rear bumper access
hole until the wrench connects into the hoist shaft. |
| 1.3. | Turn the ratchet counterclockwise in order to lower the tire. |
| 1.4. | Turn the ratchet until the spare tire can be pulled out from under
the vehicle. |
| 1.5. | Once the tire has been lowered, tilt the retainer at the end of
the cable and pull the retainer through the wheel opening. |
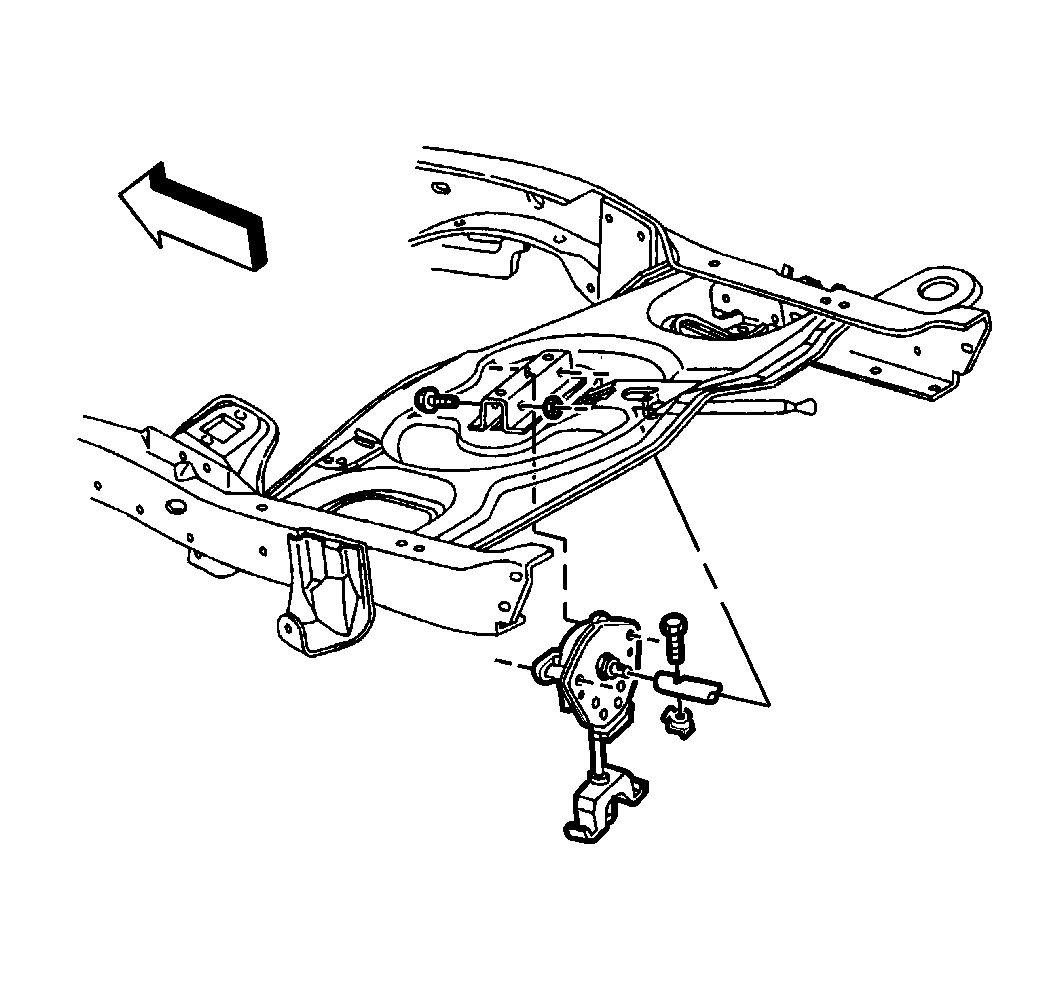
- Remove the pin and the retainer that attaches the shaft to the
hoist assembly.
- Remove the shaft from the hoist assembly.
- Remove the two bolts that attach the hoist assembly to the wheel
carrier.
- Remove the hoist assembly from the wheel carrier.
Installation Procedure

- Install the hoist assembly
to the wheel carrier.
Notice: Use the correct fastener in the correct location. Replacement fasteners
must be the correct part number for that application. Fasteners requiring
replacement or fasteners requiring the use of thread locking compound or sealant
are identified in the service procedure. Do not use paints, lubricants, or
corrosion inhibitors on fasteners or fastener joint surfaces unless specified.
These coatings affect fastener torque and joint clamping force and may damage
the fastener. Use the correct tightening sequence and specifications when
installing fasteners in order to avoid damage to parts and systems.
- Install the bolts
and the nuts that attach the hoist assembly to the wheel carrier.
Tighten
Tighten the nuts to 47 N·m (35 lb ft).
- Install the shaft to the hoist assembly.
- Install the pin and the retainer that attaches the shaft to the
hoist assembly.
- Install the spare tire.
| 5.1. | Place the tire on the ground, with the valve stem pointed down,
at the rear of the vehicle. |
| 5.2. | Pull the wheel retainer through the wheel opening. |
| 5.3. | Attach the ratchet to the wheel with the UP mark facing you. |
| 5.4. | Place the end of the wheel wrench through the rear bumper access
hole until the wrench connects into the hoist shaft. |
| 5.5. | Turn the ratchet clockwise in order to raise the tire. |
| 5.6. | When two clicks are heard, stop turning the wrench. |


