Luggage Carrier Replacement Luxury
Removal Procedure
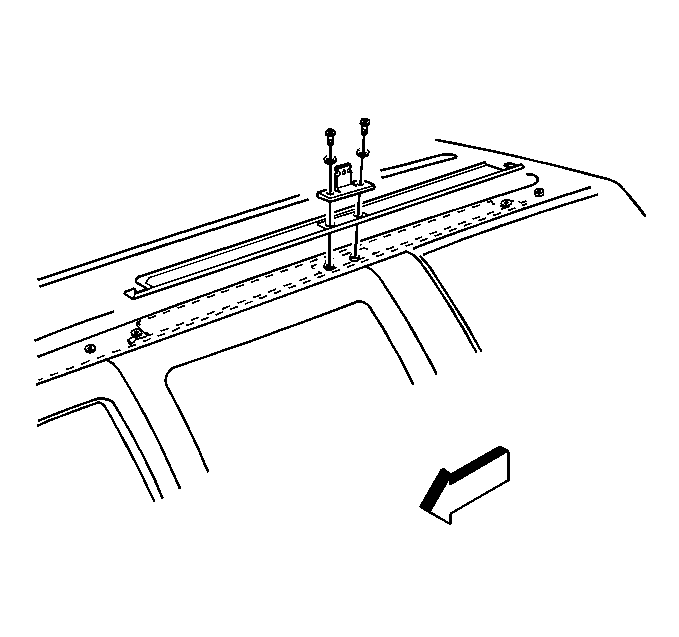
- Remove the center tie loop bolt just enough to loosen tie loop and slide rearward.
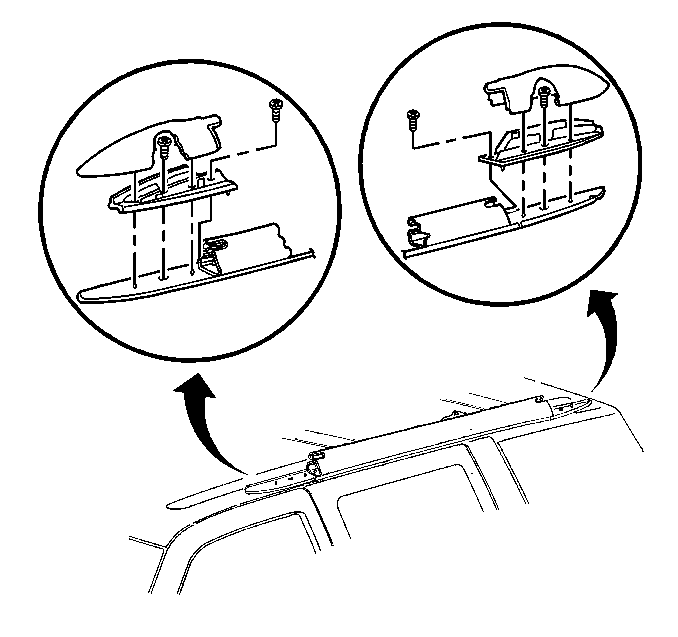
- Remove the front and rear side rail covers.
- Remove the screws from the front and rear of the side rails.
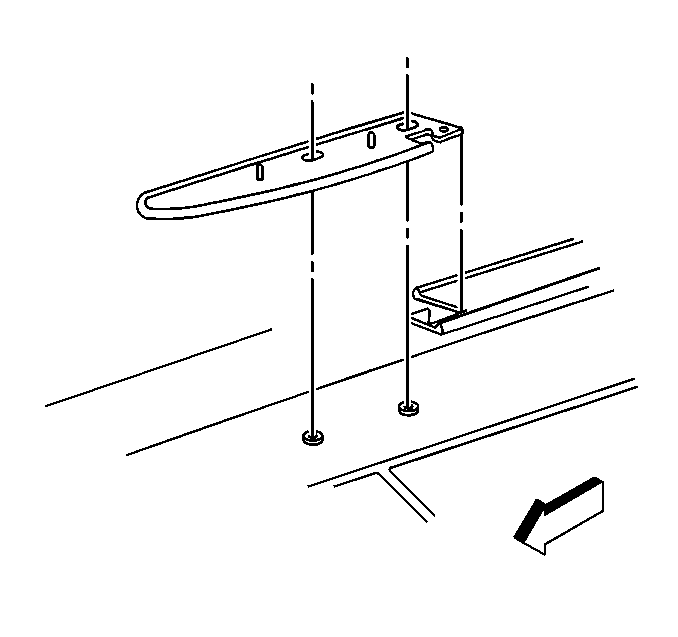
- Remove the side rails.
- Remove the center brackets.
- Remove the gaskets from the roof.

Installation Procedure
- Install the gaskets to the roof.
- Install the center brackets.
- Install the rails and crossbow assemblies over the center brackets and onto the gaskets.
- Install the screws into the rivnut on the roof to attach the side rails to the roof.
- Install the front and rear side rail covers.
- Install the center tie loop by sliding forward and into center bracket.


Notice: Use the correct fastener in the correct location. Replacement fasteners must be the correct part number for that application. Fasteners requiring replacement or fasteners requiring the use of thread locking compound or sealant are identified in the service procedure. Do not use paints, lubricants, or corrosion inhibitors on fasteners or fastener joint surfaces unless specified. These coatings affect fastener torque and joint clamping force and may damage the fastener. Use the correct tightening sequence and specifications when installing fasteners in order to avoid damage to parts and systems.
Tighten
Tighten the screws to 3 N·m (27 lb in).

Tighten
Tighten the screws to 3 N·m (27 lb in).
Luggage Carrier Replacement Base 2 Door Utility
Removal Procedure
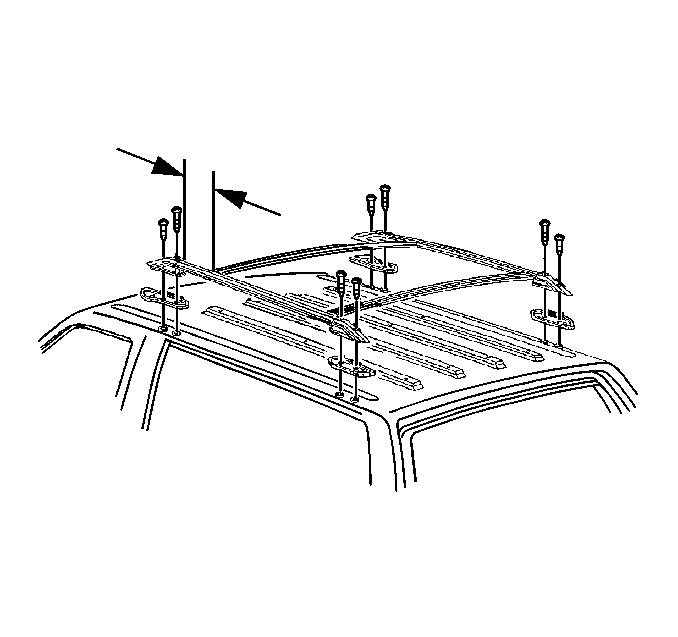
- Remove the screws from the end supports.
- Remove the luggage carrier from the roof.
- Remove the side and center rail support gaskets.
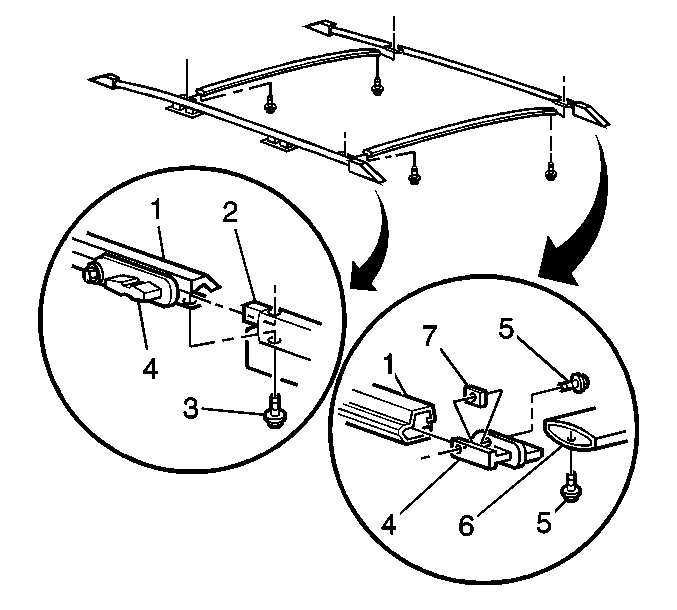
- Remove the screws (3) from the side rail supports (2).
- Remove the side rail supports (2) from the side rails (1).
- Remove the screws (5) from the cross rails (6).
- Remove the cross rails (6) from the sliders (4).
- Remove the screws (5) from the sliders (4) and the lock plates (7).
- Remove the sliders (4) from the slots in the side rails (1).
Installation Procedure
- Place the sliders (4) into the slots in the side rails (1).
- Install the screws (5) into the sliders (4) and the lock plates (7).
- Place the cross rails (1) onto the sliders (4).
- Install the screws (5) into the cross rails (6).
- Connect the side rail supports (2) to the side rails (1).
- Install the screws (3) into the side rail supports (2).
- Install the side and center rail support gaskets.
- Install the center rail supports.
- Place the luggage carrier onto the roof.
- Install the end support to vehicle screws.

Notice: Use the correct fastener in the correct location. Replacement fasteners must be the correct part number for that application. Fasteners requiring replacement or fasteners requiring the use of thread locking compound or sealant are identified in the service procedure. Do not use paints, lubricants, or corrosion inhibitors on fasteners or fastener joint surfaces unless specified. These coatings affect fastener torque and joint clamping force and may damage the fastener. Use the correct tightening sequence and specifications when installing fasteners in order to avoid damage to parts and systems.
Tighten
Tighten the slider to side rail screws to 3 N·m (27 lb in).
Tighten
Tighten the cross rail screws to 2 N·m (18 lb in).
Tighten
Tighten the side rail support screws to 2 N·m (18 lb in).

Tighten
Tighten the screws to 3 N·m (27 lb in).
Luggage Carrier Replacement Base 4Door Utility/Suburban
Removal Procedure
- Remove the rubber side rail cap from the center rail support.
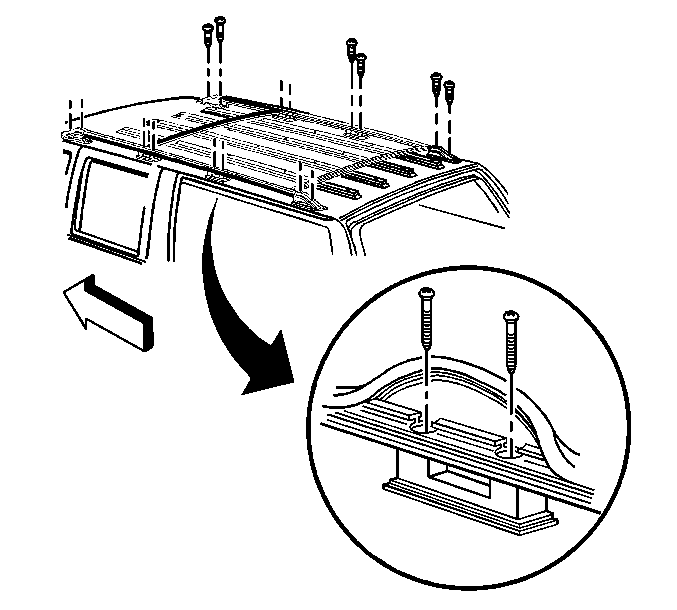
- Remove the screws from the center supports.
- Remove the screws from the end supports.
- Remove the luggage carrier from the roof.
- Remove the center rail supports.
- Remove the screws (3) from the side rail supports (2).
- Remove the side rail supports (2) from the side rails (1).
- Remove the screws (5) from the cross rails (6).
- Remove the cross rails (6) from the sliders (4).
- Remove the screws (5) from the sliders (4) and the lock plates (7).
- Remove the sliders (4) from the slots in the side rails (1).

Installation Procedure
- Place the sliders (4) into the slots in the side rails (1).
- Install the screws (5) into the sliders (4) and the lock plates (7).
- Place the cross rails (1) onto the sliders (4).
- Install the screws (5) into the cross rails (6).
- Connect the side rail supports (2) to the side rails (1).
- Install the screws (3) into the side rail supports (2).
- Install the center rail supports.
- Place the luggage carrier onto the roof.
- Install the end support to vehicle screws.
- Install the screws into the center supports.
- Place the rubber side rail cap over the center rail support.

Notice: Use the correct fastener in the correct location. Replacement fasteners must be the correct part number for that application. Fasteners requiring replacement or fasteners requiring the use of thread locking compound or sealant are identified in the service procedure. Do not use paints, lubricants, or corrosion inhibitors on fasteners or fastener joint surfaces unless specified. These coatings affect fastener torque and joint clamping force and may damage the fastener. Use the correct tightening sequence and specifications when installing fasteners in order to avoid damage to parts and systems.
Tighten
Tighten the slider to side rail screws to 3 N·m (27 lb in).
Tighten
Tighten the cross rail screws to 2 N·m (18 lb in).
Tighten
Tighten the side rail support screws to 2 N·m (18 lb in).

Tighten
Tighten the screws to 3 N·m (27 lb in).
Tighten
Tighten the screws to 3 N·m (27 lb in).
