REAR CARGO DOORS LEAK OR LIFT DOORS-INSTALL WEATHERSTRIP

SUBJECT: REAR CARGO DOORS OR LIFT GLASS WATER LEAK (INSTALL REDESIGNED PRIMARY WEATHERSTRIP)
VEHICLES AFFECTED: 1992 C/K SUBURBAN AND UTILITY CHEVROLET SUBURBAN/BLAZER GMC SUBURBAN/YUKON
Owners of some 1992 C/K Suburbans and Utilities may comment that water leaks into the vehicle through either the rear cargo doors or liftglass. The water leakage may be caused by improper alignment of the rear cargo doors or the liftglass. This may lead to the following two conditions:
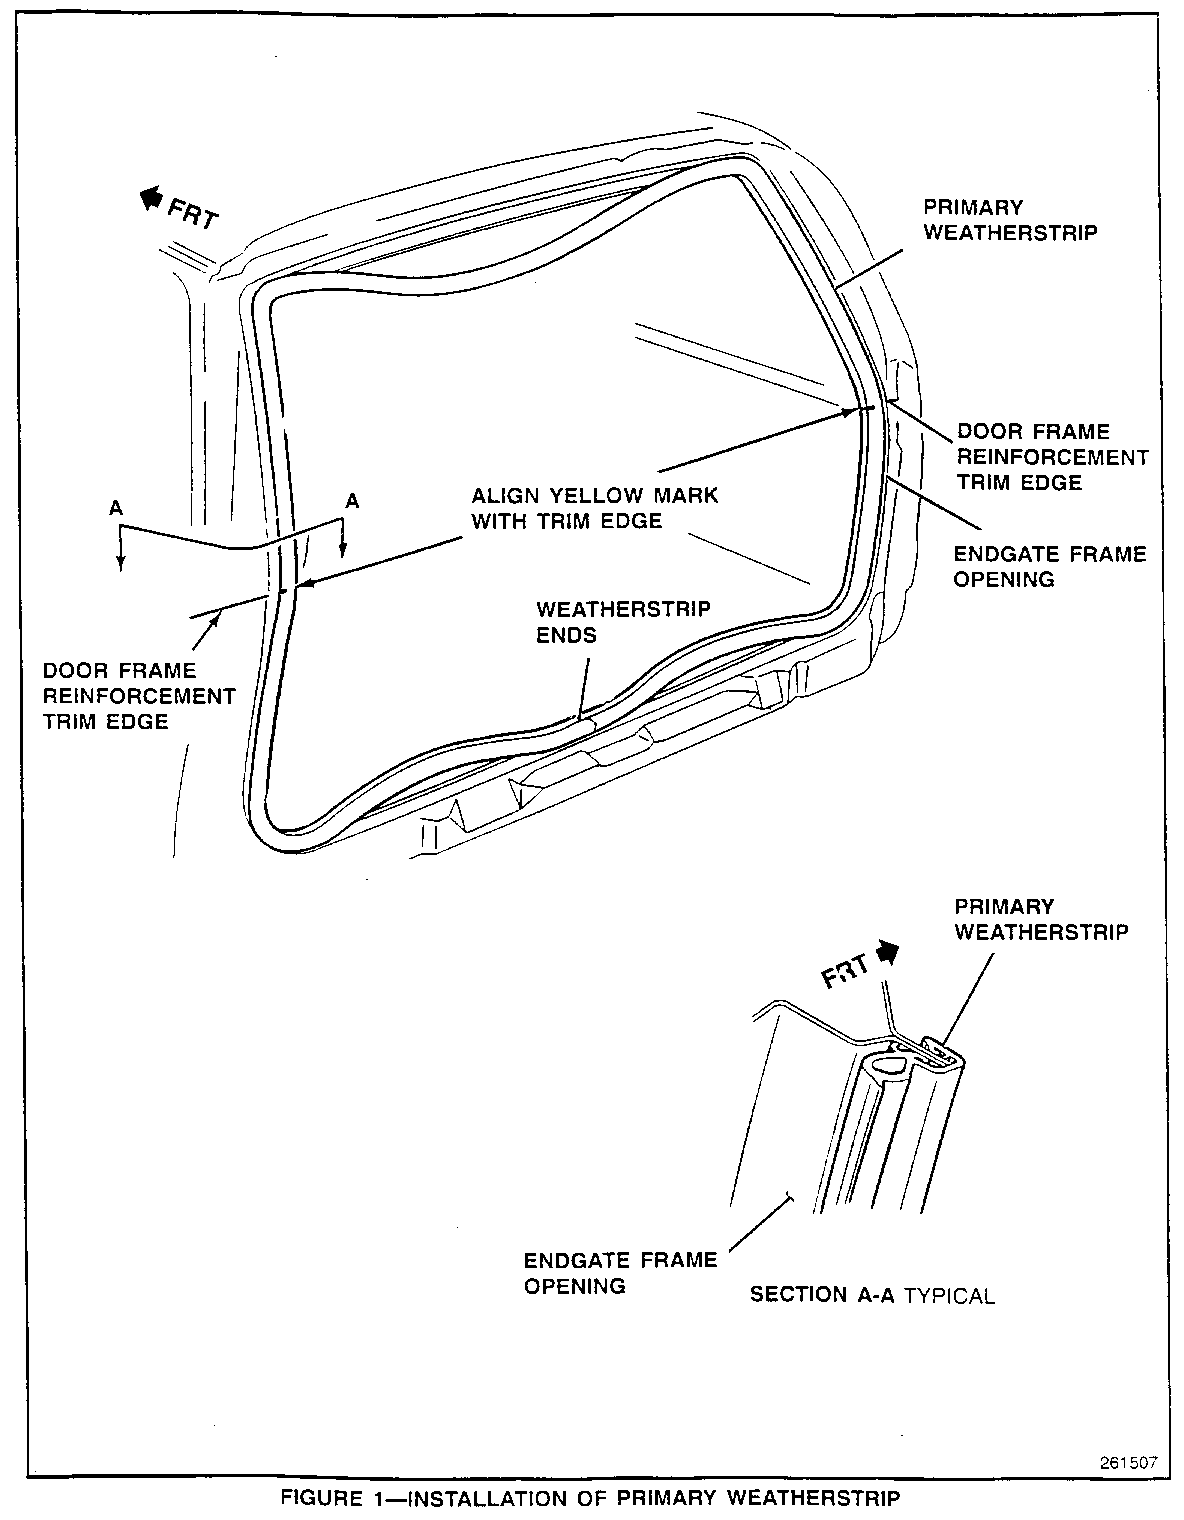
1. The primary weatherstrip not gaining an adequate seal to the seal surface (Figure 1).
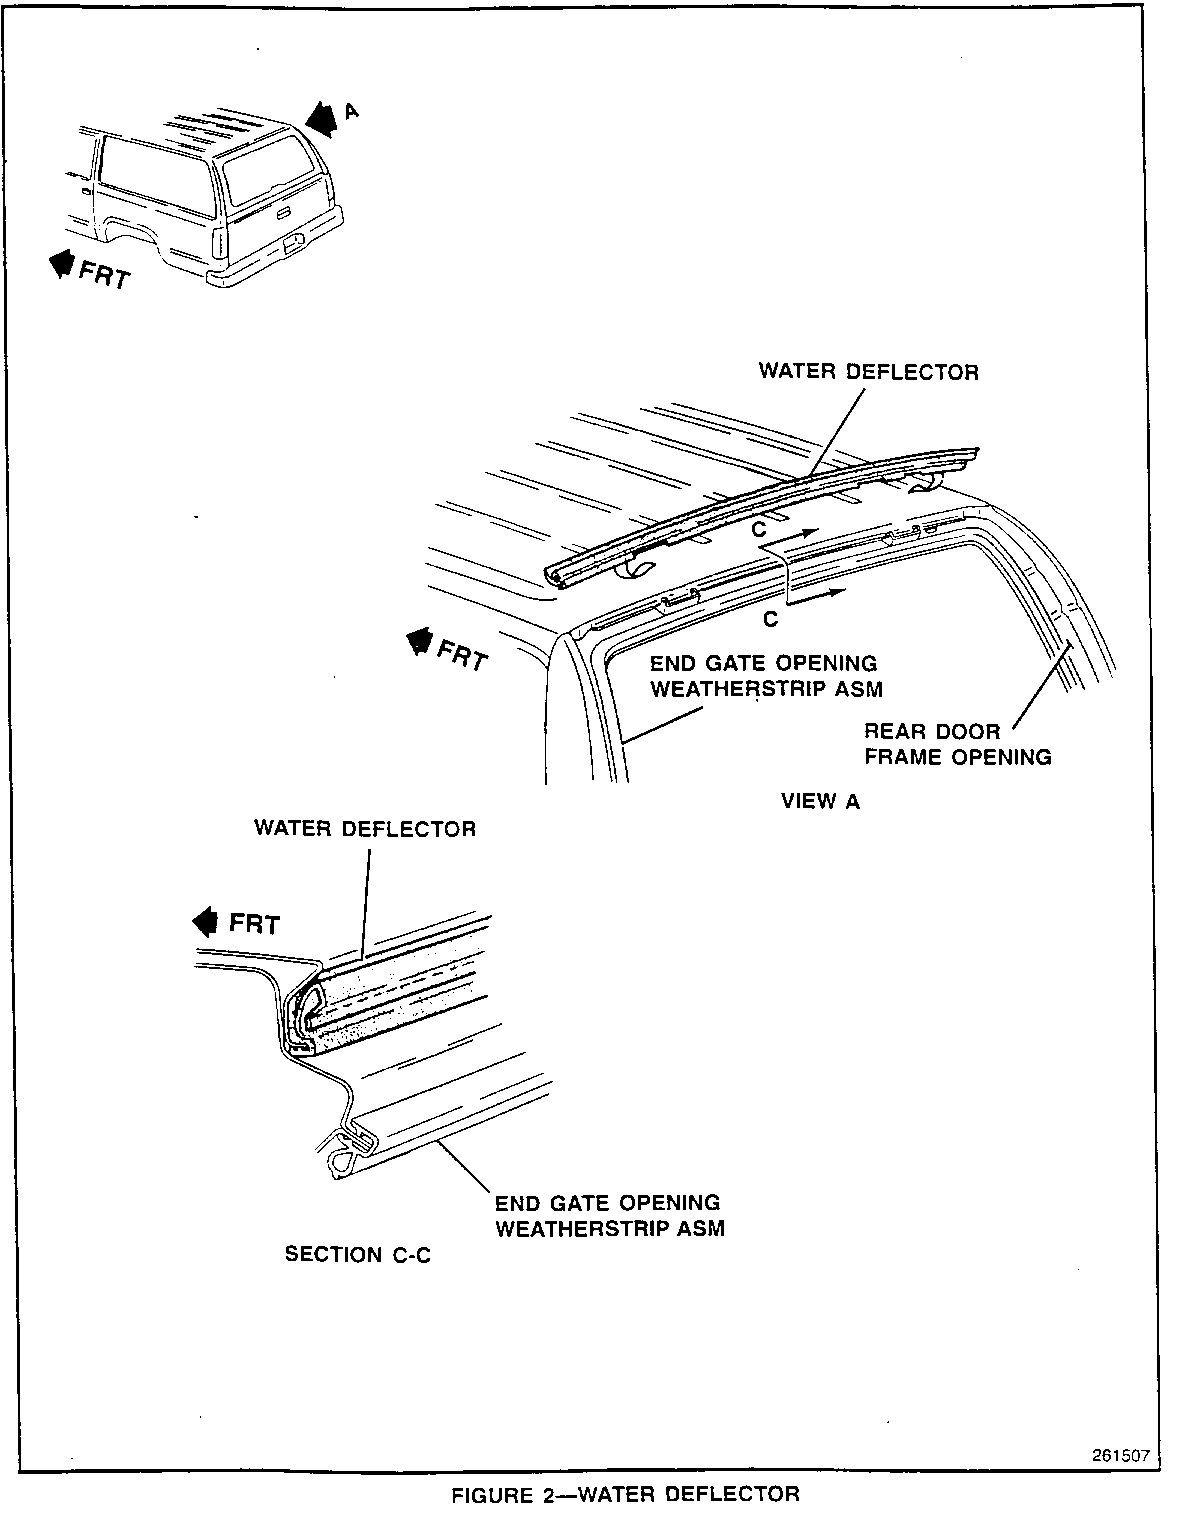
2. The water deflector (Figure 2) could become wedged underneath the liftglass. This may result in the water deflector no longer providing a seal along the roof line of the liftglass allowing water to enter into the vehicle.
The inadequate seal of the primary weatherstrip to the seal surface may be corrected by installing a redesigned primary weatherstrip (P/N 15953341, liftglass or 15698115, rear cargo doors). The lip on the weatherstrip has been removed and the bulb of the weatherstrip has been increased to prevent water from entering the vehicle.
If the water deflector has become wedged underneath the liftglass, align the liftglass so that the water deflector is able to provide a seal between the liftglass and roof.
SERVICE PROCEDURE:
INSTALLATION OF THE PRIMARY WEATHERSTRIP
1. Remove the spare tire from the vehicle.
2. Remove the screws and the complete "D" ring trim mouldings which includes the upper centre, upper right, upper left, lower right, lower left, and sill plate.
3. Remove the primary weatherstrip from its pinch weld flange.
4. Install the new primary weatherstrip (P/N 15953341, liftglass or 15698115, rear cargo doors) to its pinch weld flange (Figure 1). Align the yellow marks on the weatherstrip with the top trim edge of the door frame reinforcement. Next, secure the weatherstrip onto its flange working upward to the upper corners and upper flange. Then, secure the weatherstrip downward to the lower corners and lower flange.
Note: It is important that the two ends of the weatherstrip mate flush together to prevent water leaks.
5. Install the upper "D" ring moulding.
6. Install the complete "D" ring mouldings and the screws.
7. Install spare tire to the vehicle.
CORRECTION OF THE WATER DEFLECTOR CONDITION BY ALIGNING THE LIFTGLASS
1. Align the liftglass by first loosening the liftglass-to-hinge bolts.
2. Position the liftglass as necessary so that the water deflector can provide an adequate seal between the liftglass and the roof.
3. Torque the liftglass bolts 20-25 N.m (15-18 lbs. ft.) to hold the liftglass in place.
SERVICE PARTS INFORMATION:
Description Part Number Qty/Veh ----------- ----------- -------- Primary Weatherstrip, Liftglass 15953341 1 Primary Weatherstrip, Cargo Doors 15698115 1
For vehicles repaired under warranty use:
Labour Operation Description Labour Time ---------------- ----------- ------------ C0300 Glass, Rear Door Align 0.4 hours. C1350 Weatherstrip Replace, Back Door 0.5 hours.


General Motors bulletins are intended for use by professional technicians, not a "do-it-yourselfer". They are written to inform those technicians of conditions that may occur on some vehicles, or to provide information that could assist in the proper service of a vehicle. Properly trained technicians have the equipment, tools, safety instructions and know-how to do a job properly and safely. If a condition is described, do not assume that the bulletin applies to your vehicle, or that your vehicle will have that condition. See a General Motors dealer servicing your brand of General Motors vehicle for information on whether your vehicle may benefit from the information.
