Removal Procedure
Tools Required
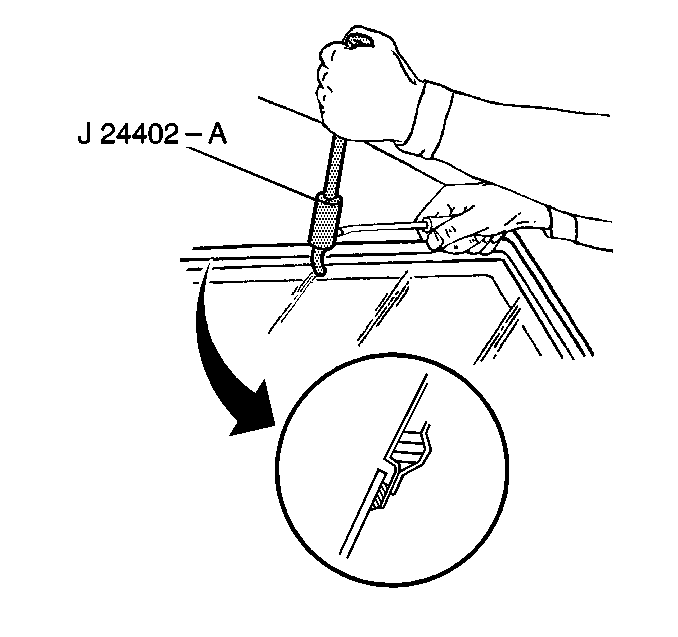
| • | J 24402-A Glass
Sealant Remover (Cold Knife) |
| • | J 39032 Stationary
Glass Removal Tool |
Window assemblies are installed from the outside of the body using a
self-curing adhesive. Replacing a window assembly installed with urethane
adhesive requires either partial or complete replacement of the adhesive.
Partial replacement of the adhesive is known as the short method. Complete
replacement of the adhesive is known as the extended method.
Window assembly removal is the same for both the short and the installation
methods with one exception. Use more care with the short method while cutting
out in order to ensure that an even bead of adhesive remains on the
window opening in order to serve as a base for the new window assembly.
- Place protective coverings around the window removal area.

- Remove the rear window garnish moldings. Refer
to
Rear Window Garnish Molding Replacement
.
- Remove the body side trim panel (for extended cab pickup only).
Refer to
Body Side Trim Panel Replacement
in Interior Trim.
- Use the J 24402-A
or the J 39032
(or the
equivalent) in order to cut out the window. Use the following procedure:
| 4.1. | Use tape in order to hold the window in place while cutting. |
| 4.2. | Insert the blade between the window and the urethane. |
| 4.3. | Keep the blade against the glass edge and cut the sealant from
the window. |
Installation Procedure

- Apply the glass adhesive. Refer to
Windshield Replacement
.
- Perform the following steps in order to install the window to
the vehicle:
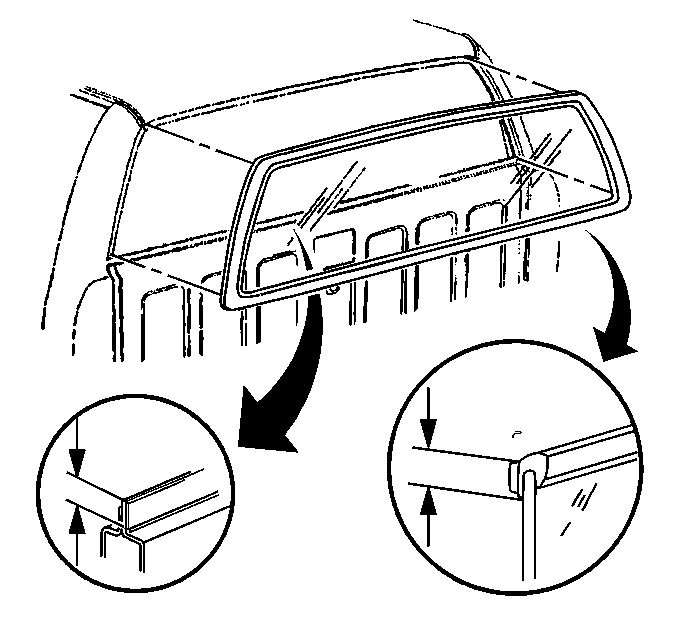
| 2.1. | With the aid of an assistant, align the glass with the body sheet
metal. |
| 2.2. | Place the glass in the window frame. |
| 2.3. | Apply a light hand pressure to the glass in order to key-out the
adhesive and bond the glass to the window frame. |
| 2.4. | Test the window for leaks with a light steady stream of warm or
hot water. Do not run a heavy stream of water directly onto the freshly applied
adhesive. If you find leaks, work additional adhesive material into the
area. |
- Install the body side trim panel (for extended cab pickup only).
Refer to
Body Side Trim Panel Replacement
in Interior Trim.
- Install the rear window garnish moldings. Refer to
Rear Window Garnish Molding Replacement
.
- Ensure that the vehicle remains at normal room temperature for
6 hours in order to complete the proper cure of the adhesive. Partially
lower a door window in order to prevent pressure buildup when
closing the doors prior to urethane adhesive cure.


