UPPER/LOWER DOOR SIDE HINGE REPLACEMENT PROCEDURE

Models: 1982/84 S/T Truck
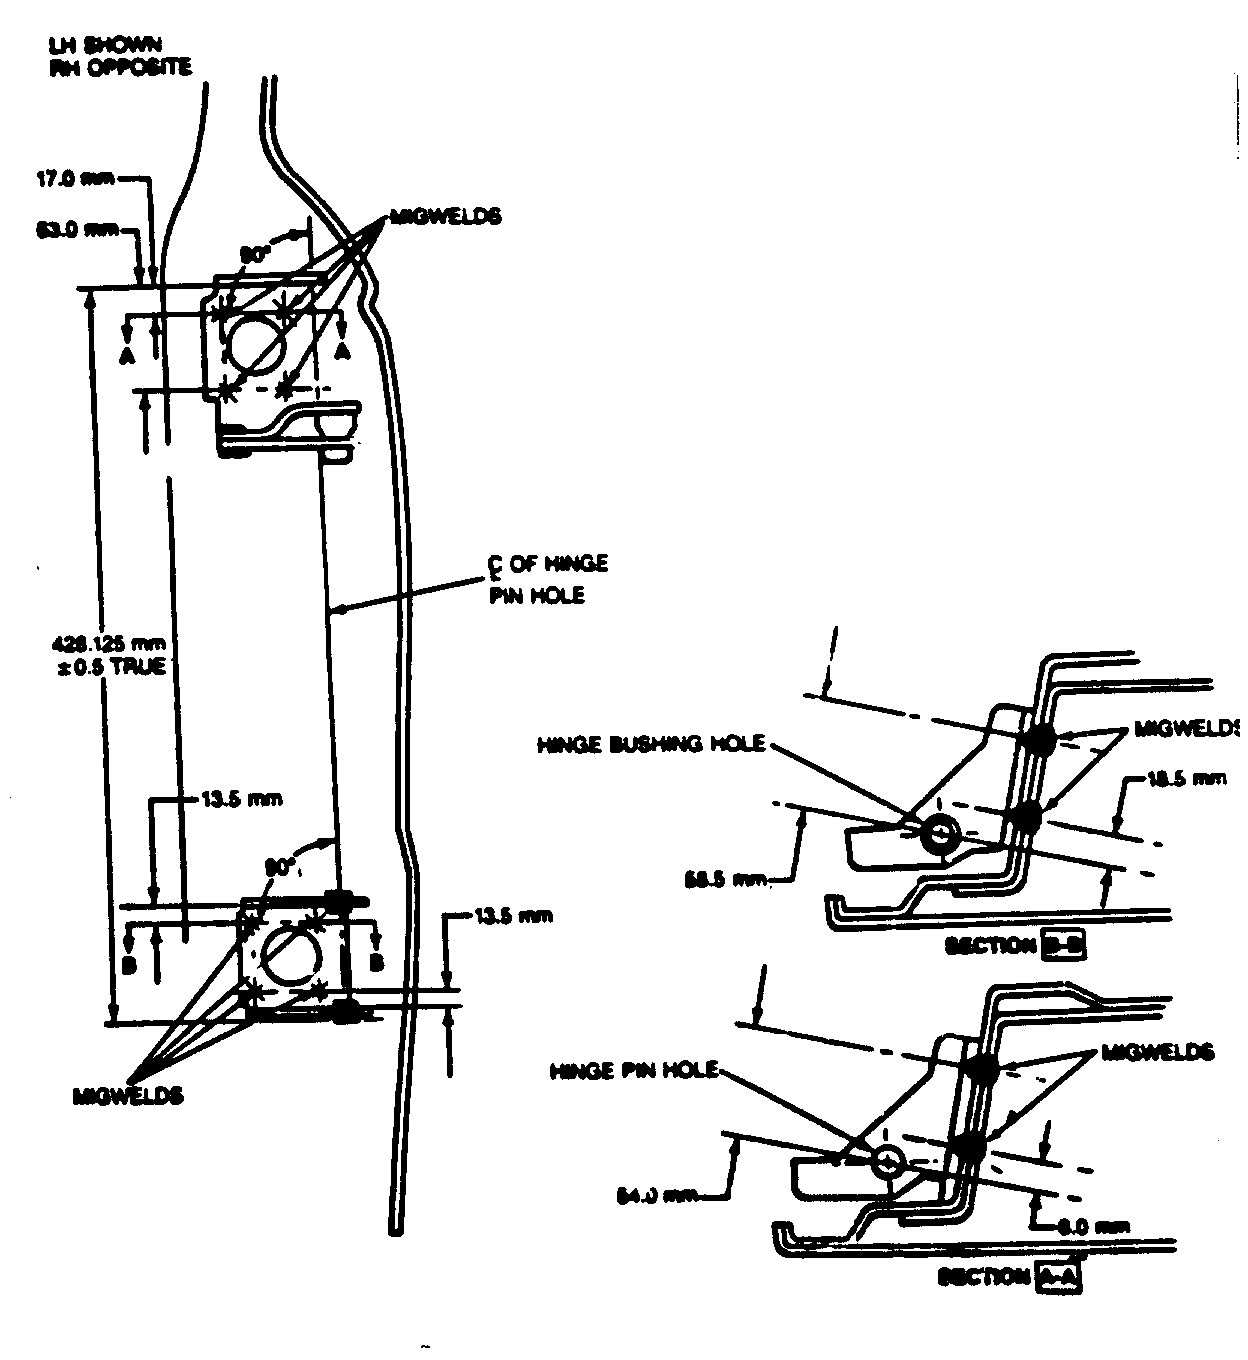
The following service procedure is to be used when replacing the door mounted hinges on S/T trucks. Some service hinge parts will not have attachment holes included and a rework method is called out in the following door hinge service procedure.
Hinge (Door Half) Part Numbers:
14030525 Side Front Door Upper L.H. 14030526 Side Front Door Upper R.H. 14030529 Side Front Door Lower
Removal
1. Disconnect battery ground cable.
2. Remove door trim panel for access to inner door. (Refer to Section 10 of "S" Truck Service Manual).
3. Place masking tape on outside of door and fender for an alignment guide when door is reinstalled.
4. Remove door from body. (Refer to Section 10 of "S" Truck Sercvice Manual). Care should be taken so that the door and exterior mirror are not damaged when placed on work table.
5. Remove all sealer from around usage using a knife edge.
6. Scribe location of existing door hinge on door.
7. Center punch each of the four weld locations on the original hinge.
8. Drill a 3 mm (1/8") pilot hole completely through welds at the center of the original hinge.
9. Using the 3mm (1/8") hole as a guide, drill out welds with a 10 mm (3/8") drill bit.
10. A slight amount of weld may still retain hinge base to the door. Drive a chisel between door and hinge base to separate hinge from door. File burrs and remove excess sealer to get a smooth surface. Clean any burrs or weld flash from inside door surface to assure proper clamp load and torque retention.
INSTALLATION - Do NOT weld on replacement hinges.
1. If holes are not located in hinge, position service hinge on scribed location of door.
2. Mark hole locat,on front inside of door onto hinge.
3. Center punch hole locations and drill 3 mm (1/8") pilot holes.
4. Using 3 mm (1/8") hole as a guide, drill 10 mm (3/8") holes.
5. Coat surface of hinge which mates to the door with a medium bodied sealer.
6. Install hinge with attaching hardware and snug for adjustment.
ATTACHING HARDWARE - EACH DOOR HINGE
Part Part Number Quantity ---- ----------- -------- Bolt 14060613 4 Hexlock Nut 11500760 4 Flat Washer 2436163 4
7. Paint as required to assure achieving desired corrosion protection.
8. Install door to cab. Align as required and torque bolts to 20-35 Nm (14-26 ft.lbs.)
9. Install trim panel.

General Motors bulletins are intended for use by professional technicians, not a "do-it-yourselfer". They are written to inform those technicians of conditions that may occur on some vehicles, or to provide information that could assist in the proper service of a vehicle. Properly trained technicians have the equipment, tools, safety instructions and know-how to do a job properly and safely. If a condition is described, do not assume that the bulletin applies to your vehicle, or that your vehicle will have that condition. See a General Motors dealer servicing your brand of General Motors vehicle for information on whether your vehicle may benefit from the information.
