For 1990-2009 cars only
Removal Procedure
- Remove the front mat and carpet. Refer to Front Floor Mat/Carpet Replacement in Instrument Panel, Gauges, and Console.
- Remove the console. Refer to Front Floor Console Replacement in Instrument Panel, Gauges, and Console.
- Ensure that the transmission is in the mechanical neutral position.
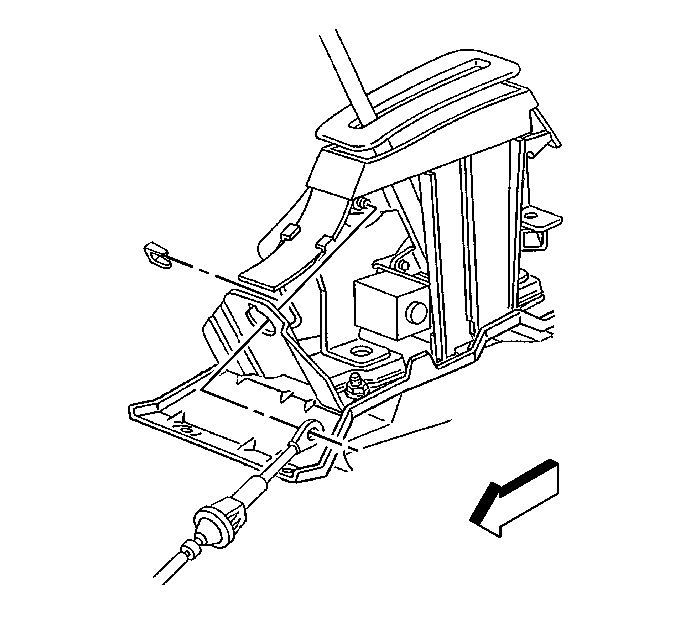
- Remove the retainer securing the shift cable to the shift controller.
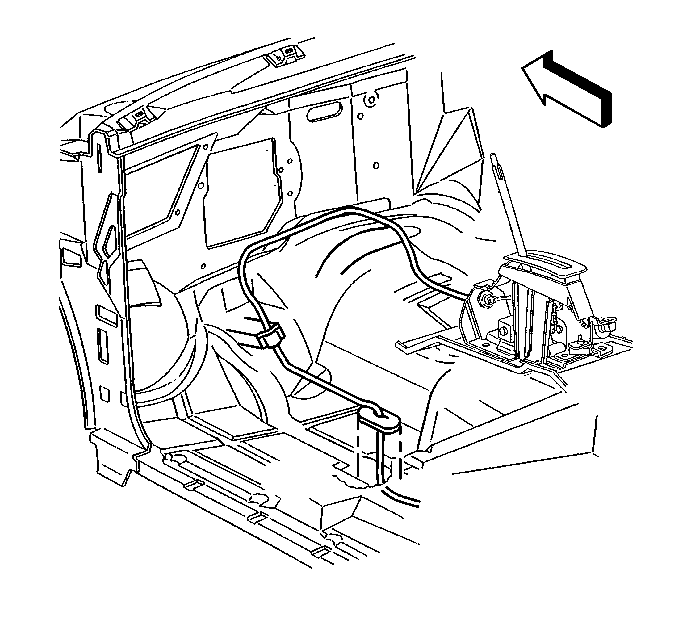
- Remove the tape and grommet on the shift cable from the floor panel.
- Rase the vehicle. Refer to Lifting and Jacking the Vehicle in General Information.
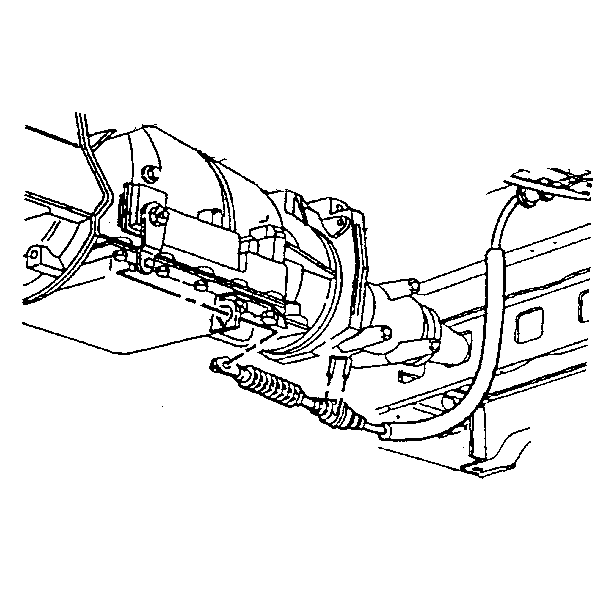
- Remove the retainer from the shift cable and transmission bracket.
- Remove the shift cable end from the transmission shift lever stud ball.
- Remove the cable from the vehicle.
Installation Procedure
- Ensure that the transmission is in the mechanical neutral position.
- Install the shift cable end of the shift cable to the transmission shift lever stud ball.
- Install the retainer to the shift cable and transmission bracket.
- Feed the shift cable through the floor panel.
- Lower the vehicle.
- Install the tape and grommet on the shift cable to the floor panel.
- Install the retainer securing the shift cable to the shift controller.
- Install the console. Refer to Front Floor Console Replacement in Instrument Panel, Gauges, and Console.
- Install the front mat and carpet. Refer to Front Floor Mat/Carpet Replacement in Instrument Panel, Gauges, and Console.
Adjustment Procedure
- Ensure that the shift cable is not restricted.
- Place the shift lever into the NEUTRAL position.
- Position the shift cable to assume a natural routing.
- Pull the cable end completely forward and release it. (When the cable is pulled completely forward and released, the adjustment spring will position the cable to its most rearward position.)
- Connect the end of the shift cable to the transmission shift lever stud ball.
- Press the locking tab IN in order to secure the shift cable to the transmission bracket.
The shift cable must be free to move 20.0 mm (0.80 in) axially during the adjustment under adjustment spring loads.
Notice: Do not pull the shift lever ball stud forward of the transmission shift lever ball stud during installation. Pulling the shift cable end forward of the transmission shift lever ball stud before installing the shift cable end to the transmission shift lever ball stud will result in a poor adjustment.
