Power Steering Fluid Cooler Replacement 2.2L
Removal Procedure
Notice: Do not start the vehicle with any power steering gear inlet or outlet hoses disconnected. When disconnected, plug or cap all openings of components. Failure to do so could result in contamination or loss of power steering fluid and damage to the system.
- Remove the air cleaner assembly.
- Install a drain pan under the vehicle.
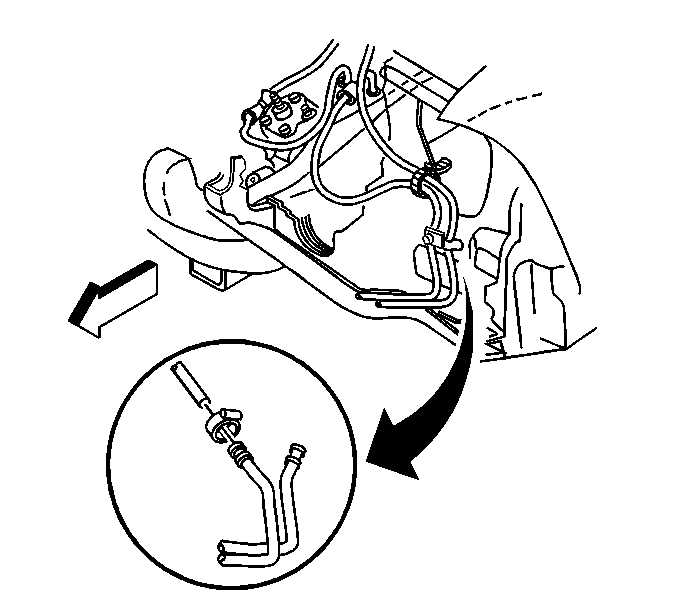
- Disconnect the power steering cooler hoses from the power steering cooler.
- Remove the radiator air intake baffle. Refer to Air Intake Baffle Replacement - Radiator in Body Front End.
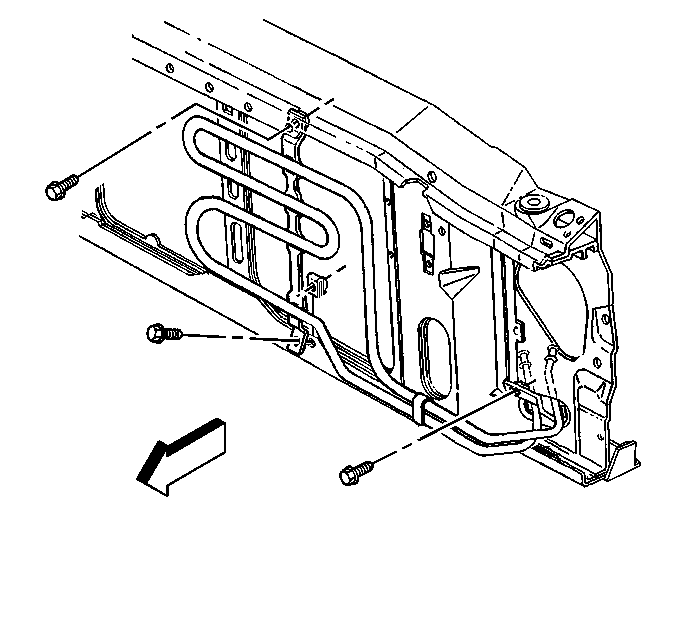
- Remove the power steering cooler retaining bolts.
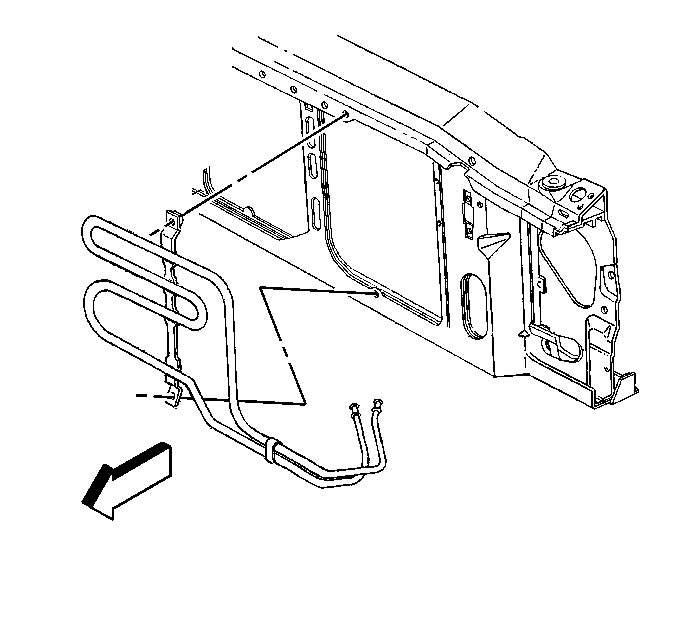
- Remove the power steering cooler from the radiator support.
Installation Procedure
Notice: The inlet and outlet hoses must not be twisted during installation. Do not bend or distort the inlet or outlet hoses to make installation easier. Failure to follow these procedures could result in component damage.
- Install the power steering cooler to the radiator core support.
- Install the power steering cooler retaining bolts.
- Install the radiator air intake baffle. Refer to Air Intake Baffle Replacement - Radiator in Body Front End.
- Connect the power steering cooler hoses to the power steering cooler.
- Remove the drain pan from under the vehicle.
- Install the air cleaner assembly.
- Bleed the power steering system. Refer to Power Steering System Bleeding .


Notice: Use the correct fastener in the correct location. Replacement fasteners must be the correct part number for that application. Fasteners requiring replacement or fasteners requiring the use of thread locking compound or sealant are identified in the service procedure. Do not use paints, lubricants, or corrosion inhibitors on fasteners or fastener joint surfaces unless specified. These coatings affect fastener torque and joint clamping force and may damage the fastener. Use the correct tightening sequence and specifications when installing fasteners in order to avoid damage to parts and systems.
Tighten
Tighten the power steering cooler retaining bolts to 10 N·m
(7 lb ft).

Tighten
Tighten the power steering cooler hose clamps to 2 N·m
(18 lb in).
Power Steering Fluid Cooler Replacement 4.3L
Removal Procedure
Notice: Do not start the vehicle with any power steering gear inlet or outlet hoses disconnected. When disconnected, plug or cap all openings of components. Failure to do so could result in contamination or loss of power steering fluid and damage to the system.
- Remove the air cleaner assembly. Refer to Air Cleaner Assembly Replacement in Engine Controls 4.3L.
- Install a drain pan under the vehicle.
- Disconnect the power steering cooler hoses from the power steering cooler.
- Remove the Grille. Refer to Grille Replacement in Exterior Trim.
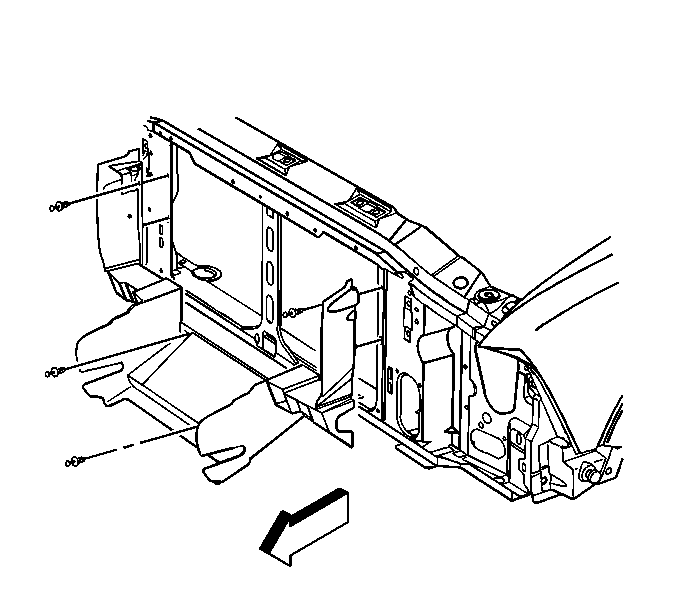
- Remove the radiator air intake baffle retaining clips from LH side.
- Position the radiator air intake baffle out of the way.
- Remove the hood latch support mounting bolts.
- Move the hood latch support forward.
- Remove the power steering cooler retaining bolts.
- Remove the power steering cooler from the radiator support.

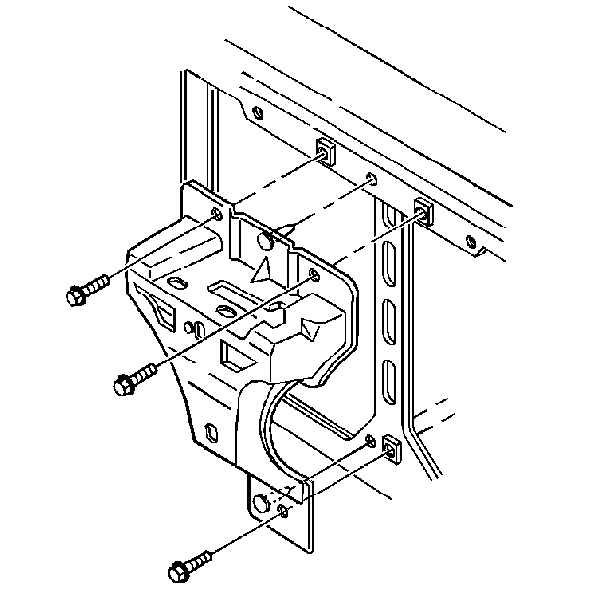


Installation Procedure
Notice: The inlet and outlet hoses must not be twisted during installation. Do not bend or distort the inlet or outlet hoses to make installation easier. Failure to follow these procedures could result in component damage.
- Install the power steering cooler to the radiator core support.
- Install the power steering cooler retaining bolts.
- Reposition the hood latch support to the radiator core support.
- Install the hood latch support mounting bolts.
- Reposition the radiator air intake baffle to the radiator core support.
- Install the radiator air intake baffle retaining clips to the LH side.
- Install the grille. Refer to Grille Replacement in Exterior Trim.
- Connect the power steering cooler hoses to the power steering cooler.
- Remove the drain pan from under the vehicle.
- Install the air cleaner assembly. Refer to Air Cleaner Assembly Replacement in Engine Controls 4.3L.
- Bleed the power steering system. Refer to Power Steering System Bleeding .


Notice: Use the correct fastener in the correct location. Replacement fasteners must be the correct part number for that application. Fasteners requiring replacement or fasteners requiring the use of thread locking compound or sealant are identified in the service procedure. Do not use paints, lubricants, or corrosion inhibitors on fasteners or fastener joint surfaces unless specified. These coatings affect fastener torque and joint clamping force and may damage the fastener. Use the correct tightening sequence and specifications when installing fasteners in order to avoid damage to parts and systems.
Tighten
Tighten the power steering cooler retaining bolts to 10 N·m
(7 lb ft).

Tighten
Tighten the hood latch support mounting bolts to 25 N·m
(18 lb ft).


Tighten
Tighten the power steering cooler hoses to the power steering cooler
clamps to 2 N·m (18 lb in).
