For 1990-2009 cars only
Removal Procedure
Important: After installation, calibrate the new EBCM to the tire size that is appropriate to the vehicle.
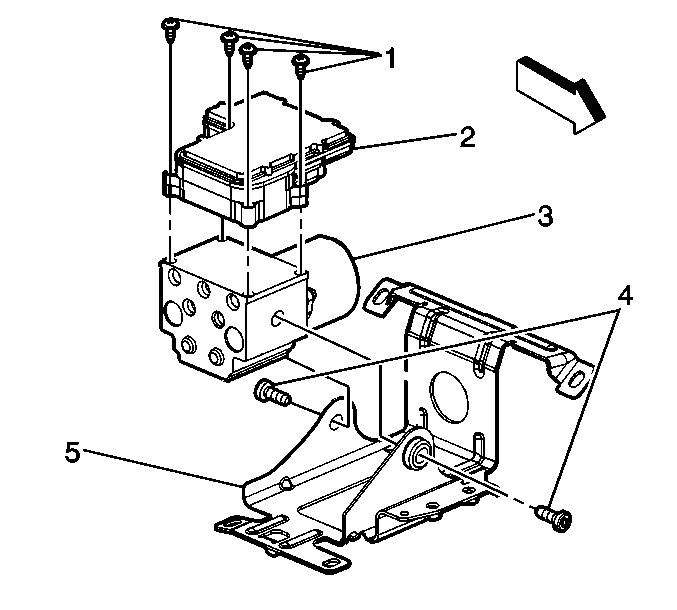
- Disconnect the electrical connectors from the EBCM (2).
- Remove the four T 25-TORX® mounting screws (1) that fasten the EBCM (2) to the BPMV (3).
- Remove the EBCM (2) from the BPMV (3). Removal may require a light amount of force.
- Clean the BPMV (3) to EBCM (2) mounting surfaces with a clean cloth.
Important: Thoroughly wash all contaminants from around the EHCU. The area around the EHCU must be free from loose dirt to prevent contamination of disassembled ABS components.
Important: Do not use a tool to pry the EBCM or the BPMV.
Installation Procedure
Important: Do not reuse the old mounting screws. Always install new mounting screws with the new EBCM.
- Install EBCM (2) on to the BPMV (3).
- Install the four new T-25 TORX® screws (1) in the EBCM (2).
- Connect the electrical connectors to the EBCM (2).
- Revise the tire calibration using the Scan Tool Tire Size Calibration function.
Important: Do not use RTV or any other type of sealant on the EBCM gasket or mating surfaces.
Notice: Refer to Component Fastener Tightening Notice in the Preface section.
Tighten
Tighten the four T-25 TORX® screws to 5 N·m (39 lb in)
in an X-pattern.
