FRT. DOOR SIDE GLASS BINDING/ TRACK DISENGAGEMENT

SUBJECT: FRONT DOOR SIDE GLASS BINDING/TRACK DISENGAGEMENT
MODELS: 1982-93 S/T VEHICLES
Owners of some 1982-1993 S/T vehicles may comment about the side front door glass binding during operation or the glass disengaging from the window track.
These conditions may occur if the glass binds against the run assembly weatherstrip, and/or the plastic window guide separates from the glass due to improper seating during installation and/or breaks.
To correct, it is necessary to replace the following items:
* The side door glass with glass that has the lower rear corner rounded off. The new glass reduces binding between the glass and run assembly weatherstrip during window operation.
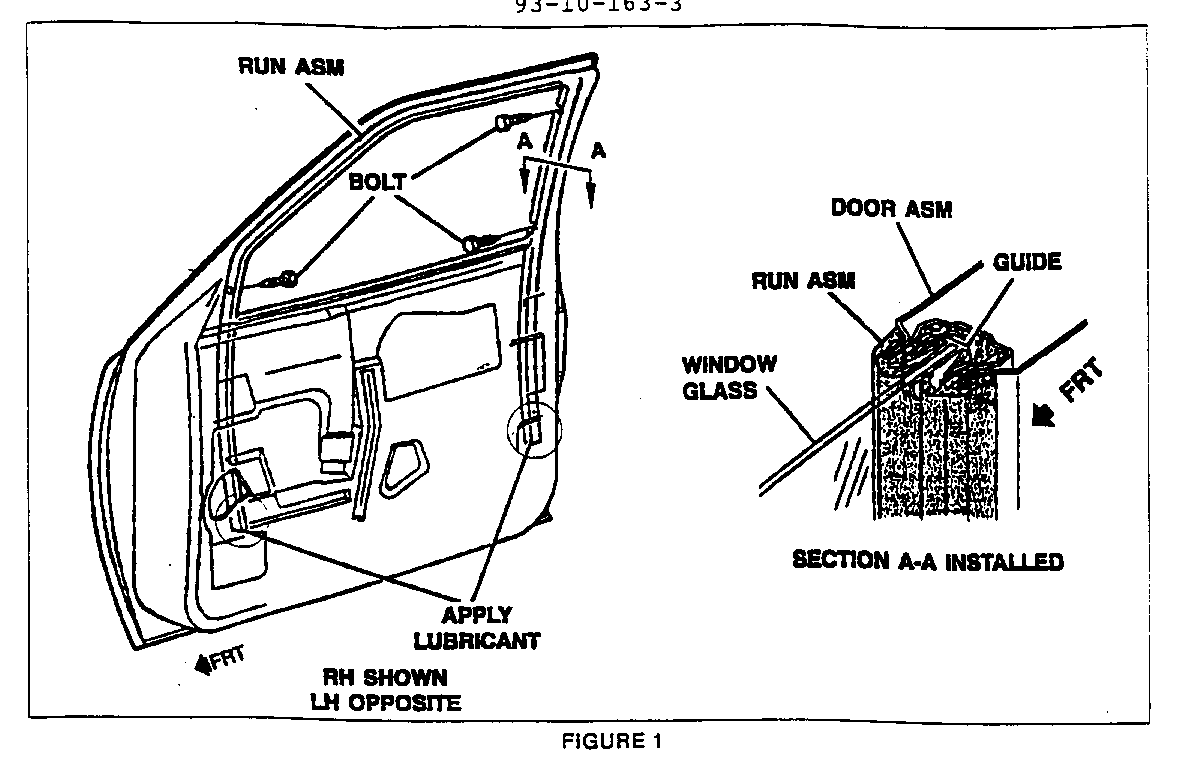
* The run assembly weatherstrip with a weatherstrip that has additional flocking (Figure 1, Section A-A). The additional flocking helps eliminate friction between the glass and channel providing smoother window operation.
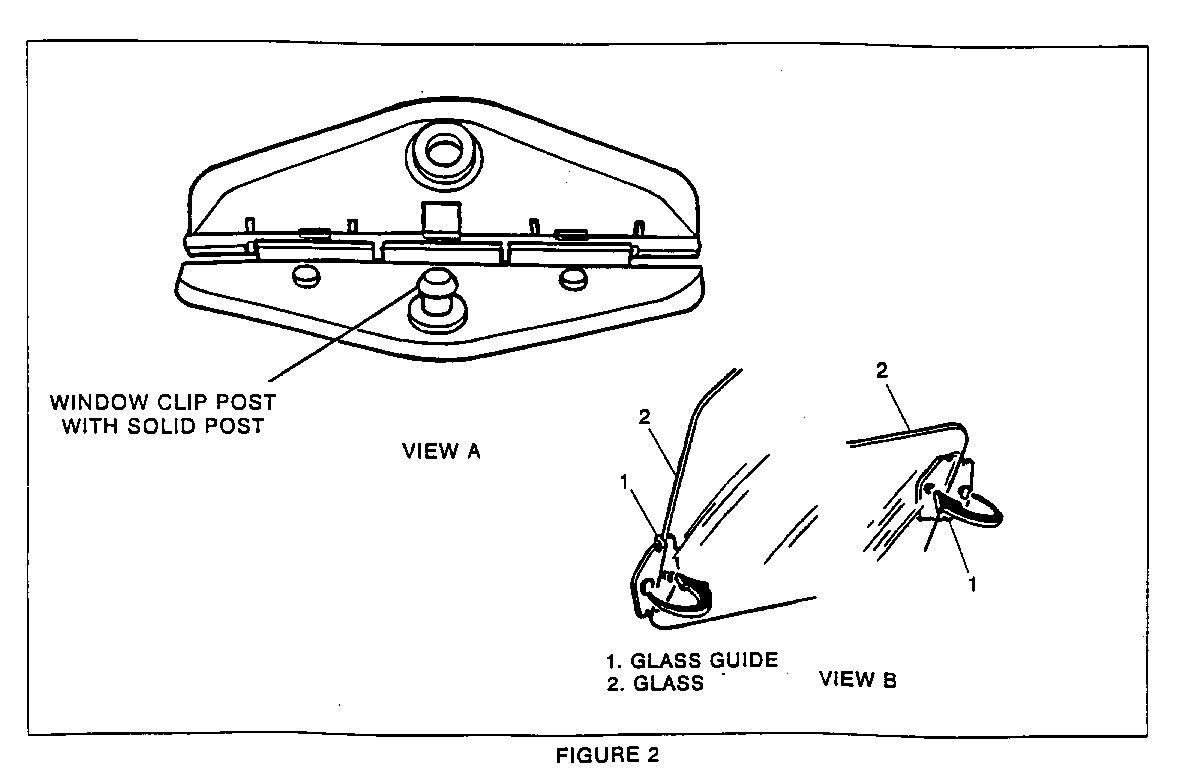
* The split post guide clips with new solid post guide clips (Figure 2, Views A and B). The material in the new clip has been changed and the post redesigned. The material change is not evident, but provides additional strength in the clip hinge area. The new post is solid instead of split providing better fastening characteristics (Figure 2, View A). The purpose of the guide clips is to keep the glass parallel to the door frame when the glass is cycled.
SERVICE PROCEDURE
1. Remove the window glass. Follow the "Front Door Window Replacement" instructions in "Section 10A1-Door" of the applicable Service Manual.
2. Install new redesigned guide clips on the new glass.
o Glass P/N's 15960877-LH and 15960878-RH for non-export vehicles or P/N's 15962245-LH and 15962246-RH for export vehicles (RPO A26).
o Align the clips with the holes in the glass and carefully snap together securely at each fastener location. The clips attach to the rear upper edge and front lower edge of the front door glass through holes in the glass (Figure 2, View B).
3. Remove three screws from the weatherstrip in the run assembly and remove the weatherstrip (Figure 1).
4. Install a new low friction run assembly weatherstrip, P/N 15960867-LH or 15960868-RH (Figure 1, Section A-A). Torque the fastening screws to 1.6 - 2.2 N-m (13 - 18 lbs. in.).
Ensure the weatherstrip is properly seated in the door run channels. (Special care should be taken to ensure the weatherstrip below the door daylight opening is also properly seated). Apply silicone spray lubricant to the lower portion of the run assembly as indicated in Figure 1.
5. Install the new glass assembly (with new guide clips). Follow "Front Door Window Replacement" instructions in "Section 10A1-Doors" in the applicable Service Manual.
6. Check for proper window operation.
PARTS INFORMATION
Part Description QTY/ Number ----------- Window ------ ------ 15953718 Guide Clips 2
15960867 Run Asm. Weatherstrip-LH 1
15960868 Run Asm. Weatherstrip-RH 1
15960877 Side Door Glass-LH 1 (Non-Export)
15960878 Side Door Glass-RH 1 (Non-Export)
15962245 Side Door Glass-LH 1 (Export)
15962246 Side Door Glass-RH 1 (Export)
Parts are currently available from GMSPO.
WARRANTY INFORMATION
For vehicles repaired under warranty use:
Labor Op. C-01 52-RH C-01 53-LH
Labor Time: 0.6 Hrs.


General Motors bulletins are intended for use by professional technicians, not a "do-it-yourselfer". They are written to inform those technicians of conditions that may occur on some vehicles, or to provide information that could assist in the proper service of a vehicle. Properly trained technicians have the equipment, tools, safety instructions and know-how to do a job properly and safely. If a condition is described, do not assume that the bulletin applies to your vehicle, or that your vehicle will have that condition. See a General Motors dealer servicing your brand of General Motors vehicle for information on whether your vehicle may benefit from the information.
