REAR DOOR CHUCKING NOISE REAR DOOR INOPERATIVE

SUBJECT: Rear Door Chucking Noise/Rear Door Handle inoperative
MODELS: 1985-1990 M/L Vans
Some 1985-1990 M/L Vans may experience a rear door chucking noise/ rear door handle inoperative. The chucking noise is caused by the door striker contacting the door lock assembly at the fishmouth area. The inoperable door results when corrosion on the inner lock assembly or latch assemblies causes an increased handle effort or when the spring loaded pivot mechanism separates from the handle.
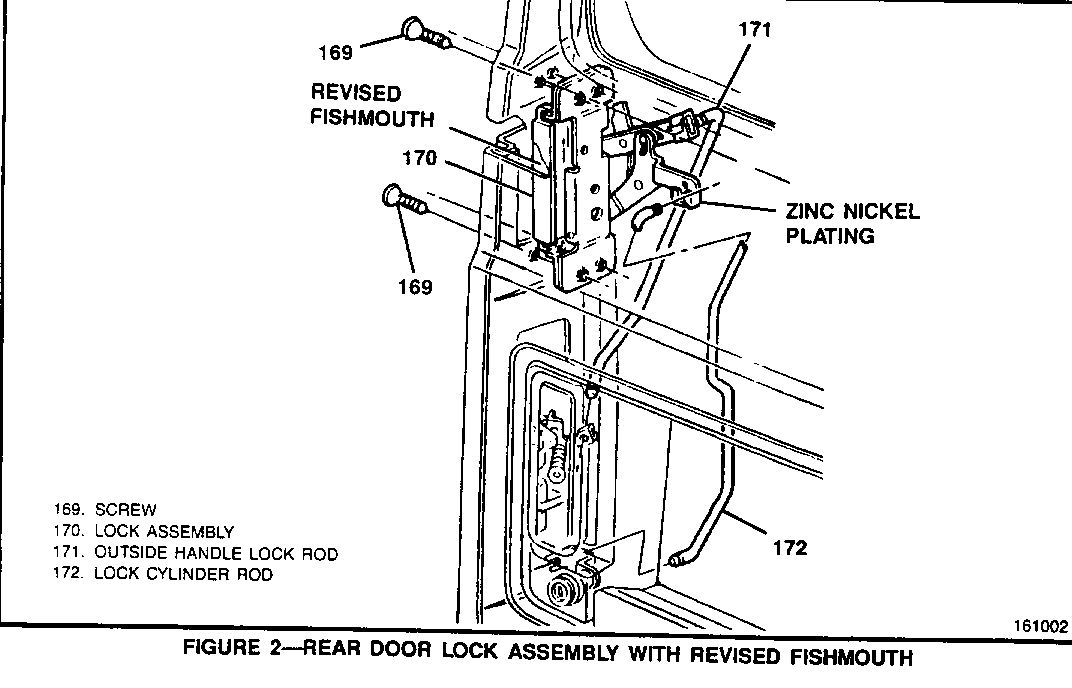
To repair these conditions a new door lock assembly has been developed which includes a revised fishmouth to allow the door striker to pass more smoothly through the fishmouth, and a zinc nickel plating to improve corrosion characteristics (P/N 15650814). This new part can be identified by a green tint where the lock cylinder rod attaches to the door lock assembly (Figure 2).
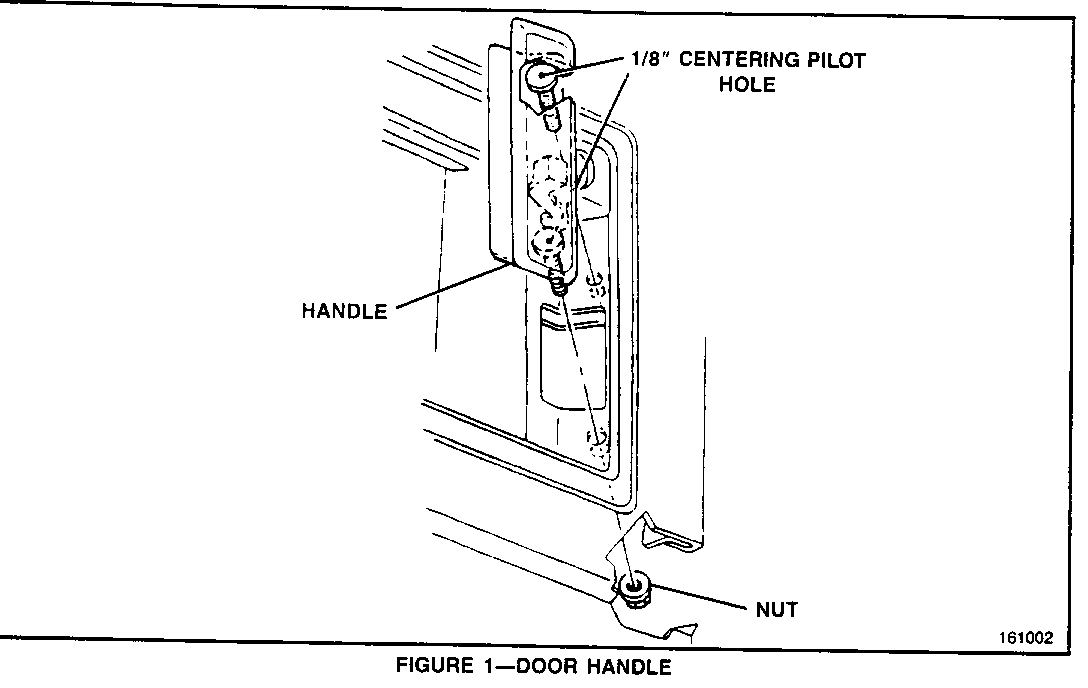
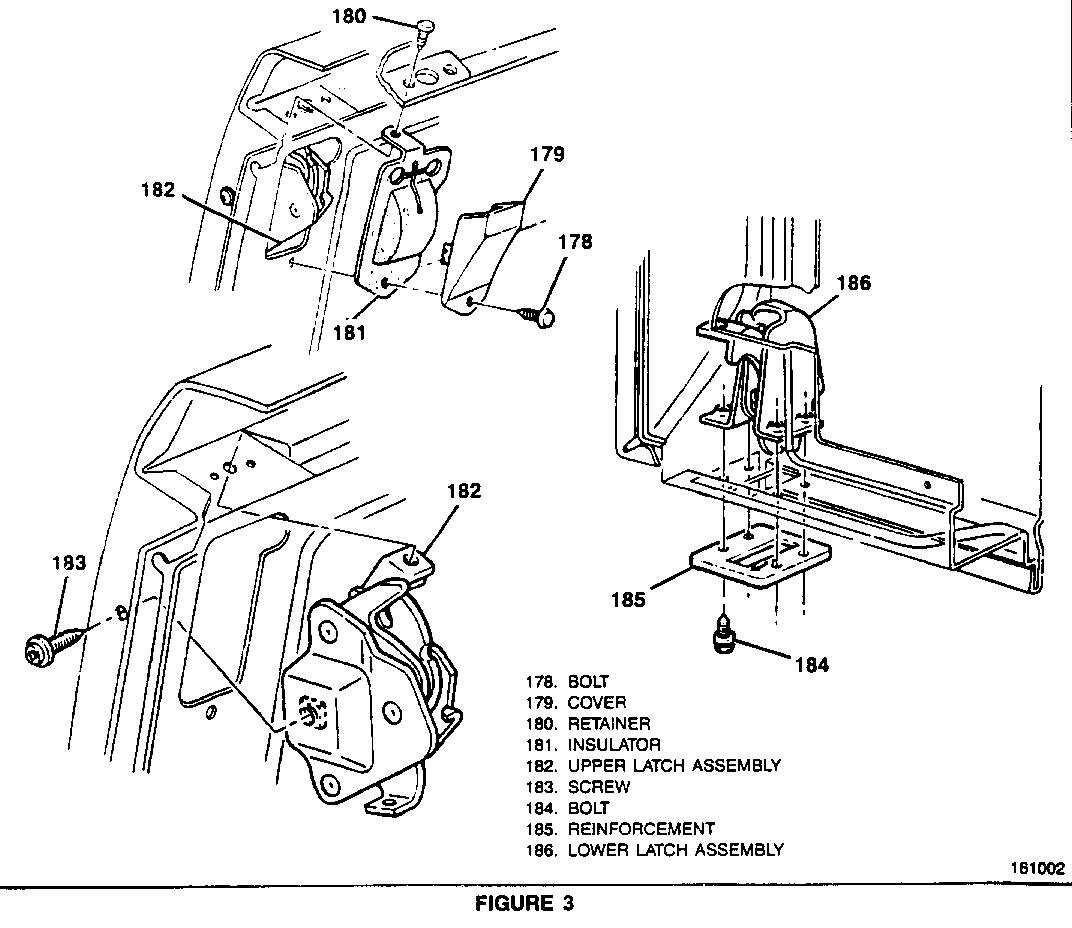
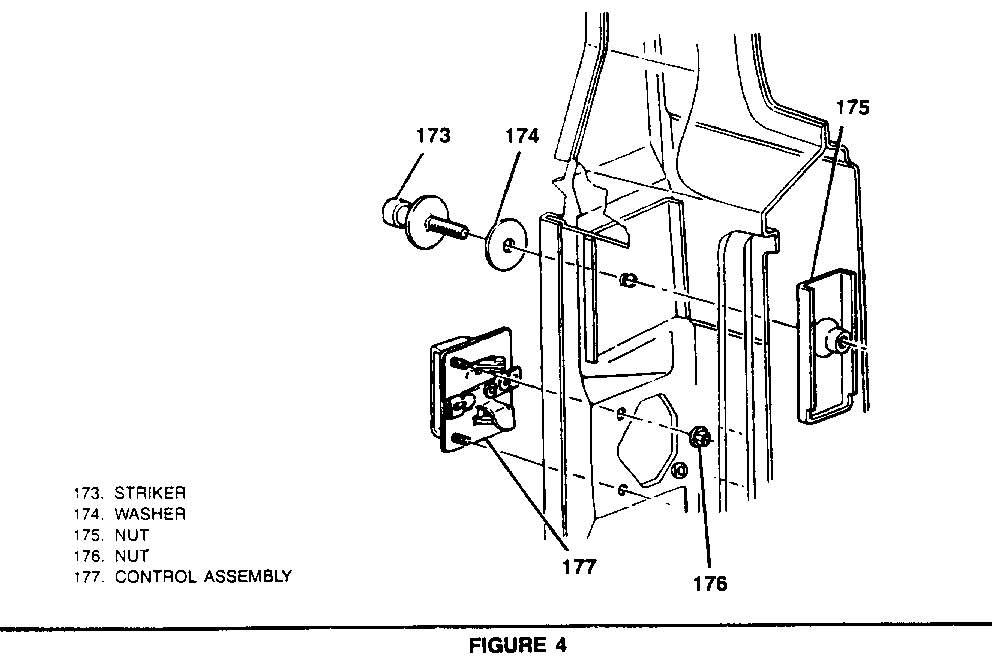
If the door is inoperative, upon inspection it may be necessary to also replace the left rear door handle, upper/lower latch assembly, or the remote lock assembly (Figures 1, 3, 4).
VEHICLES INVOLVED
Vehicles built after the following VIN breakpoints have the new parts incorporated into production.
Chevrolet LB215149 GMC LB540623 SERVICE PROCEDURE (Figures 1-4):
Remove 1. Negative battery cable.
2. If door can be opened, proceed to step 5.
3. Center punch the top and bottom bolts holding the handle to the door and drill a 1/8" centering pilot hole. Increase the drill hole size to 1/4." The handle will then be free from the door.
4. Reach inside the handle opening and manually release the lock mechanism to open door.
5. Remove door trim panel if equipped.
6. Disconnect the control rods from the lock assembly.
- Pry the clip anchor out of the hole and push the tip away from the lever.
- Pull the rod and clip away from the lever.
7. Door to lock screws (Figure 2, 169).
8. Lock (Figure 2, 170) from the vehicle.
9. Door jamb handle cover plate.
10. Inspect left rear door upper/lower latch (Figure 3) and remote lock assembly (Figure 4) for corrosion/inoperable assemblies. Clean all moving surfaces with a wire brush or equivalent and apply lubricant (GM P/N 1052497) liberally.
Note: If necessary replace left rear door upper latch assembly, lower latch assembly, or the remote lock assembly with the new part numbers listed in parts information below. Refer to section 10A1-doors in the appropriate service manual.
Install 1. Lock assembly (P/N 15650814) and retaining screws.
2. Clips to the lock.
3. Control rods to the lock assembly through the lock clips.
4. Door handle.
5. Door jamb handle cover plate.
6. Door trim panel if equipped.
7. Negative battery cable
PARTS INFORMATION
Old Part New Part Quantity Description Number Number Required -------- -------- -------- -------------------------------- 15630786 15650814 1 Right rear door lock assembly with revised fishmouth 15571270 15571270 1 Right rear door handle 15588054 15630782 1 Left rear door latch assembly (upper) 14075506 15630784 1 Left rear door latch assembly (lower) 15550255 15630788 1 Left rear remote door lock assembly
Note: The new part numbers with the exception of PIN 15650814 are identical to the old part numbers except for a green zinc nickel coating which contains superior corrosion characteristics. Parts are currently available from GMSPO.
WARRANTY INFORMATION
For vehicles repaired under warranty use: Labor Operation: B6160 Labor time: 0.4 hr. Add: 0.2 hr. with interior trim 0.2 hr. with inoperable door handle


General Motors bulletins are intended for use by professional technicians, not a "do-it-yourselfer". They are written to inform those technicians of conditions that may occur on some vehicles, or to provide information that could assist in the proper service of a vehicle. Properly trained technicians have the equipment, tools, safety instructions and know-how to do a job properly and safely. If a condition is described, do not assume that the bulletin applies to your vehicle, or that your vehicle will have that condition. See a General Motors dealer servicing your brand of General Motors vehicle for information on whether your vehicle may benefit from the information.
