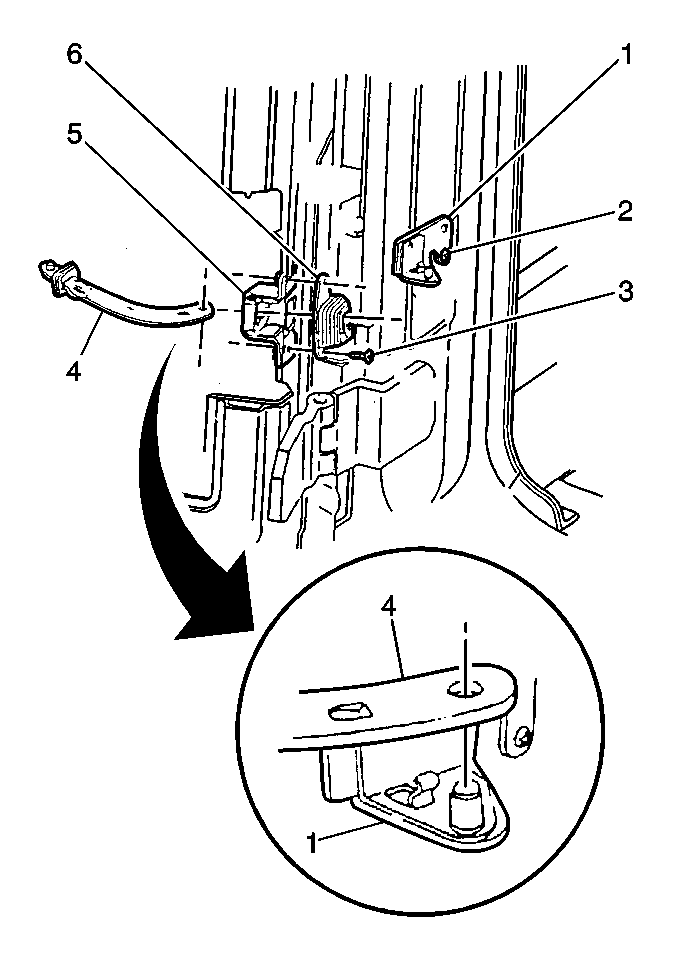
Rear Door Check Link Replacement Cargo Door
Removal Procedure
- Open the door.
- Remove the trim panel. Refer to Door Trim Panel Replacement .
- Remove the water deflector.
- Remove the check link from the check link mounting bracket by lifting upward to release.
- Remove the check link screws from the bracket (2).
- Remove the check link bracket (1) and the check link lock spring.
- Remove the check link bolts from the door.
- Remove the check link boot from the door (6).
- Remove the check link (5) from the inside of the door.

Important: Remove the one screw that retains the check link lock spring, if replacing just the check link lock spring. When replacing the check link bracket all three screws will need to be removed. Remove one screw at a time when replacing the check link bracket. If all three screws are removed at once this may cause the loss of the threaded anchor plate. If this occurs, remove the taillamp and the taillamp pocket in order to access the cavity where the threaded plate is located.
Installation Procedure
- Install the check link (5) to the door.
- Install the check link boot to the door (6).
- Install the check link boot bolts to the door.
- Install the check link bracket (1) and the check link lock spring.
- Install the check link bracket screws (2).
- Install the water deflector.
- Install the trim panel. Refer to Door Trim Panel Replacement .
Notice: Refer to Fastener Notice in the Preface section.
Tighten
Tighten the check link bolts to the door to 6 N·m (53 lb in).

Tighten
Tighten the check link bracket screws to 4 N·m (35 lb in).
Rear Door Check Link Replacement E54
Removal Procedure
- Open the door.
- Remove the door trim panel. Refer to Rear Door Trim Panel Replacement .
- Remove the water deflector. Refer to Water Deflector Replacement .
- Remove the check link from the check link mounting bracket by lifting upward to release.
- Remove the check link screws from the bracket (2).
- Remove the check link bracket (1) and the check link lock spring.
- Remove the check link bolts from the door.
- Remove the check link boot from the door (6).
- Remove the check link (5) from the inside of the door.

Important: Remove the one screw that retains the check link lock spring, if replacing just the check link lock spring. When replacing the check link bracket all three screws will need to be removed. Remove one screw at a time when replacing the check link bracket. If all three screws are removed at once this may cause the loss of the threaded anchor plate. If this occurs, remove the taillamp and the taillamp pocket in order to access the cavity where the threaded plate is located.
Installation Procedure
- Install the check link (5) to the door.
- Install the check link boot to the door (6).
- Install the check link boot bolts to the door.
- Install the check link bracket (1) and the check link lock spring.
- Install the check link bracket screws (2).
- Remove the water deflector. Refer to Water Deflector Replacement .
- Install the trim panel. Refer to Door Trim Panel Replacement .
Notice: Refer to Fastener Notice in the Preface section.
Tighten
Tighten the check link bolts to the door to 6 N·m (53 lb in).

Tighten
Tighten the check link bracket screws to 4 N·m (35 lb in).
