Removal Procedure
Tools Required
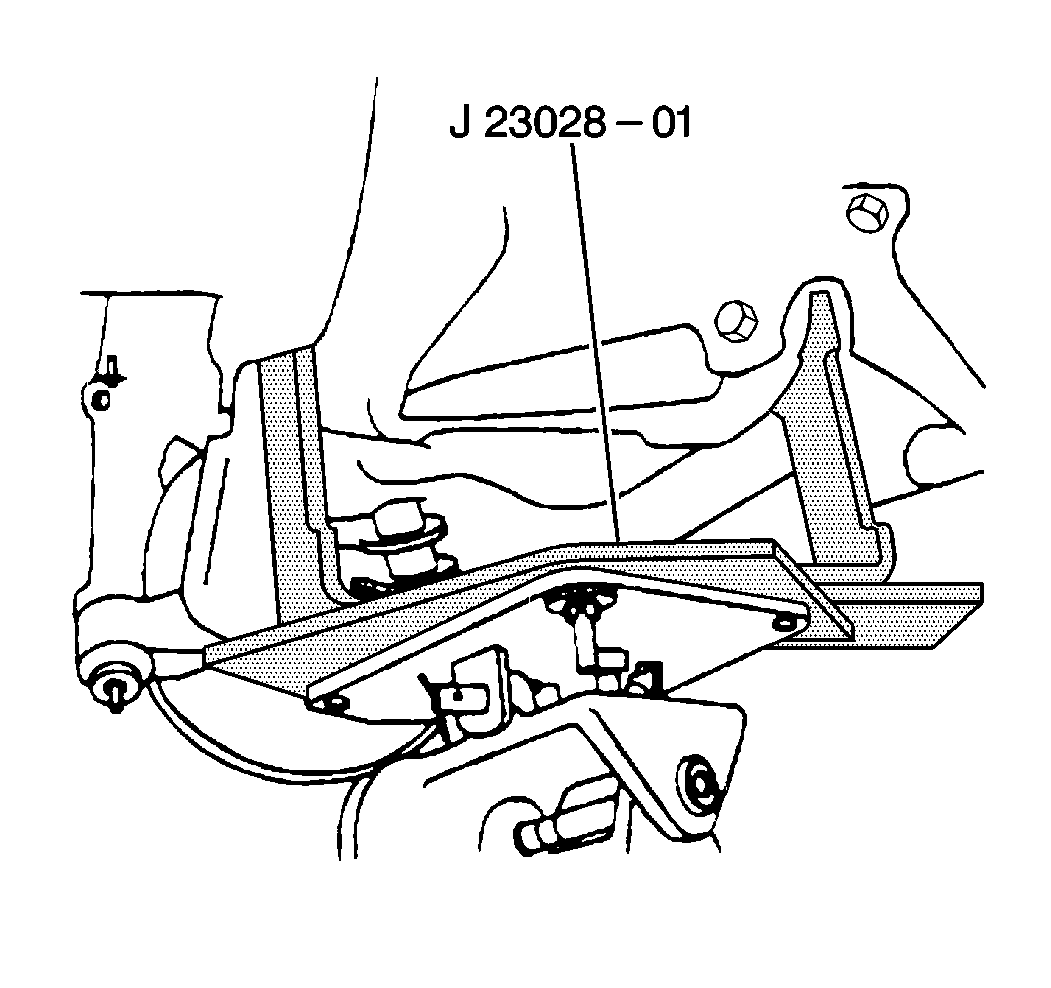
J 23028-A Coil Spring
Remover
- Raise the vehicle on a hoist so that the control arms hang free.
Support the vehicle with safety stands.
- Remove the tire and wheel assembly. Refer to
Tire and Wheel Removal and Installation
in Tires and Wheels.
- Remove the stabilizer shaft link pins from the lower control arm.
Refer to
Stabilizer Shaft Replacement
.
- Remove the shock absorber. Refer to
Shock Absorber Replacement
.
- Cradle the lower control arm. Use the J-23028-01, secured to the
end of a suitable jack.
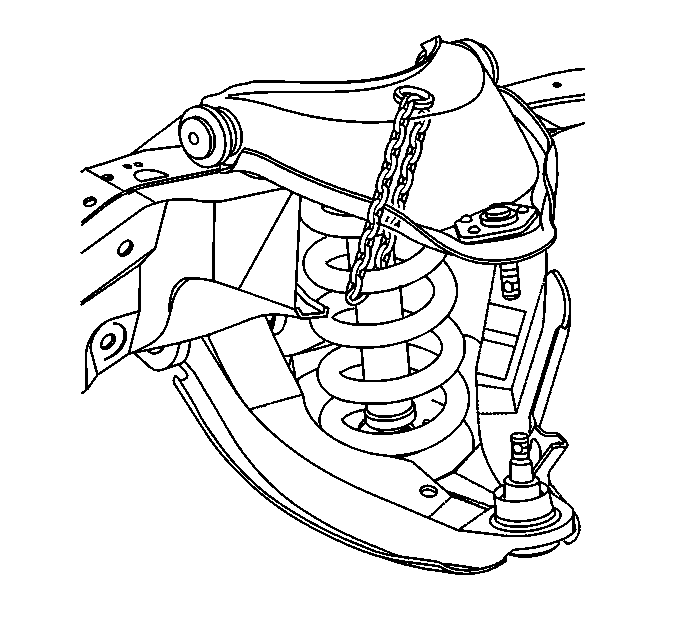
Important: The chain is not to take place for safety, but to retain the coil spring
to the upper control arm.
- Secure the spring with a chain through the spring and the control arm.
- Raise the jack in order to relieve tension on the lower control
arm pivot bolts.
- Remove the pivot bolts and nuts.
- Lower the control arm by lowering the jack.
- When compression is removed from the coil spring, take the chain
away.
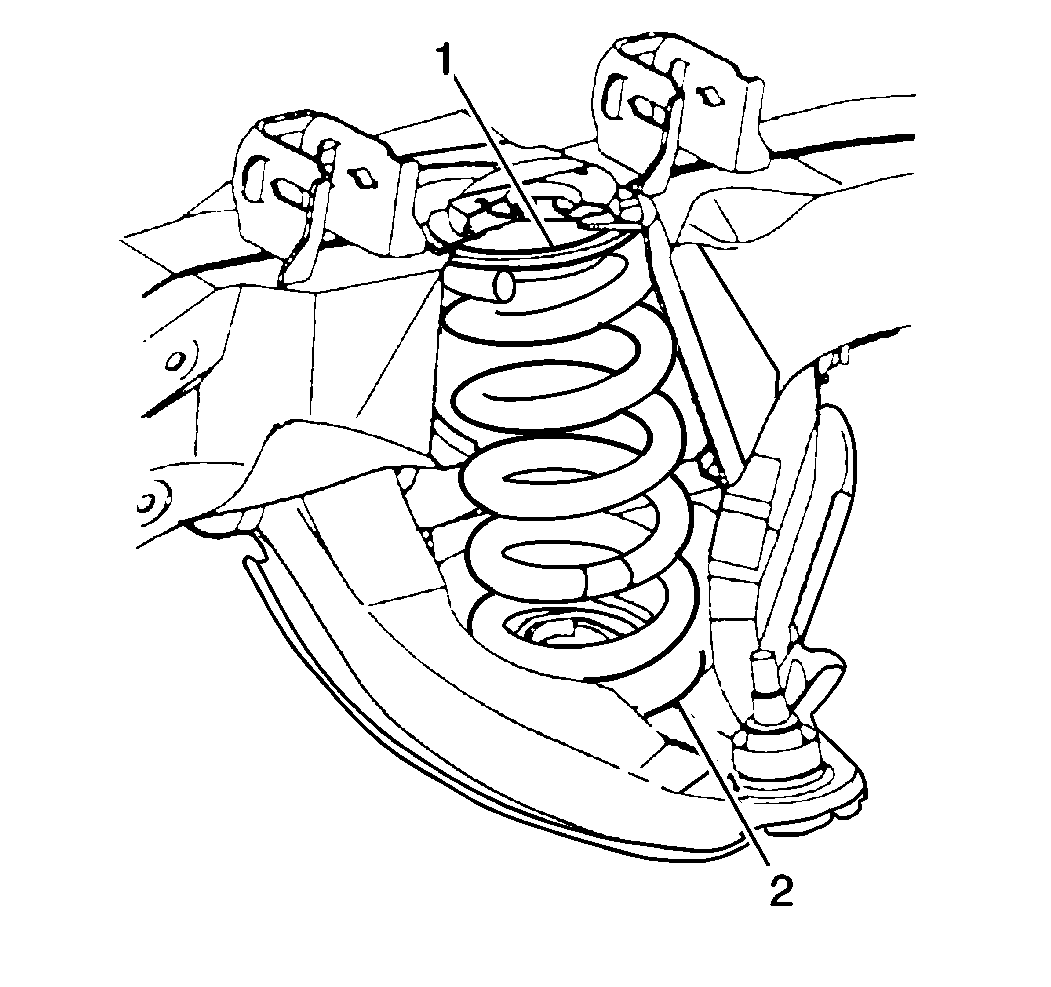
- Remove the coil spring
and the insulator (1). Position the coil spring properly for easy removal.
Installation Procedure
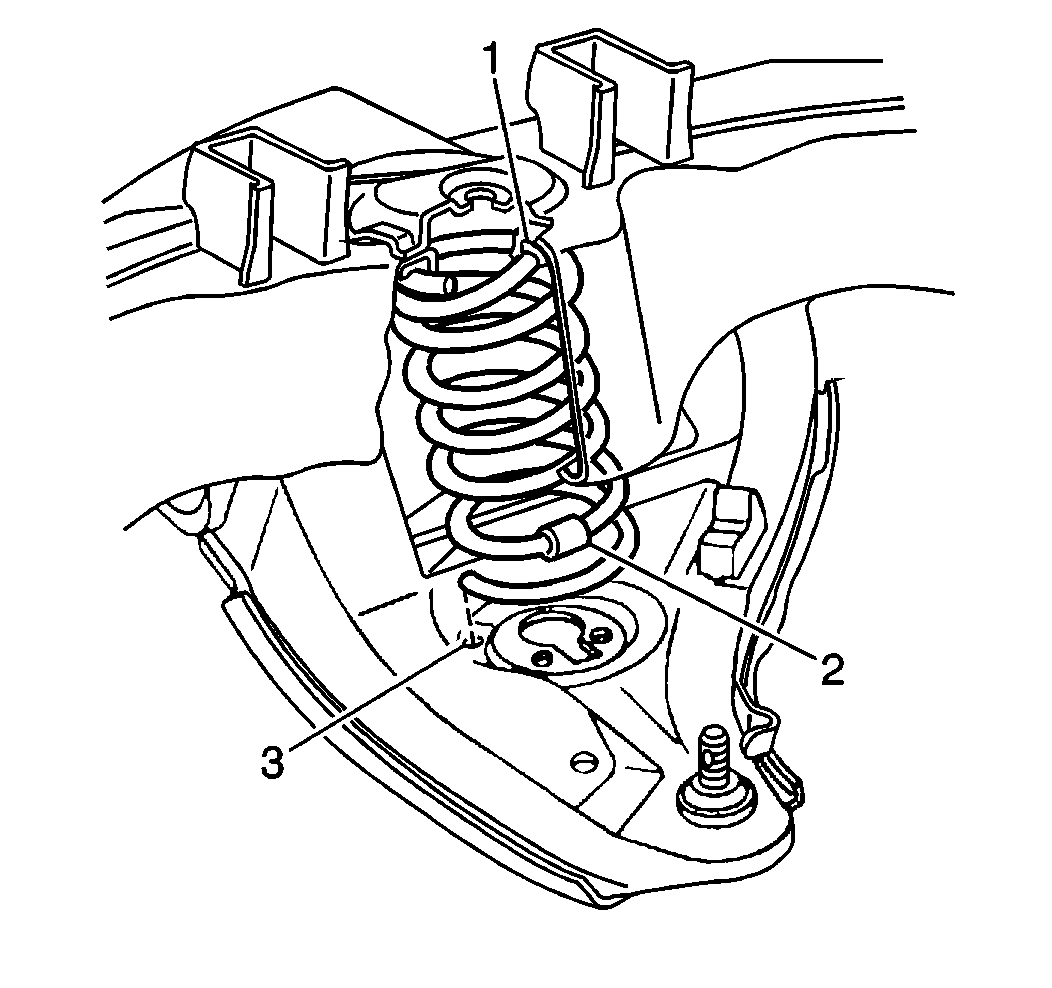
- Install the coil spring
and the insulator.
| • | The coil spring is installed with the taper at the highest position,
and a gripper notch at the lower position (2). |
| • | Inspect drain holes (3). One hole must be covered by the end of
the spring, and one hole must be open. |
| • | Make sure the spring insulator (1) is on top. |

- Secure the spring with
a chain through the spring and the control arm.
Important: The chain is not to take place for safety, but to retain the coil spring
to the control arm.
- Support the lower control arm using the J-23028-01.

- Raise the jack to install the control arm in place. Guide the
control arm into place with a pry bar.
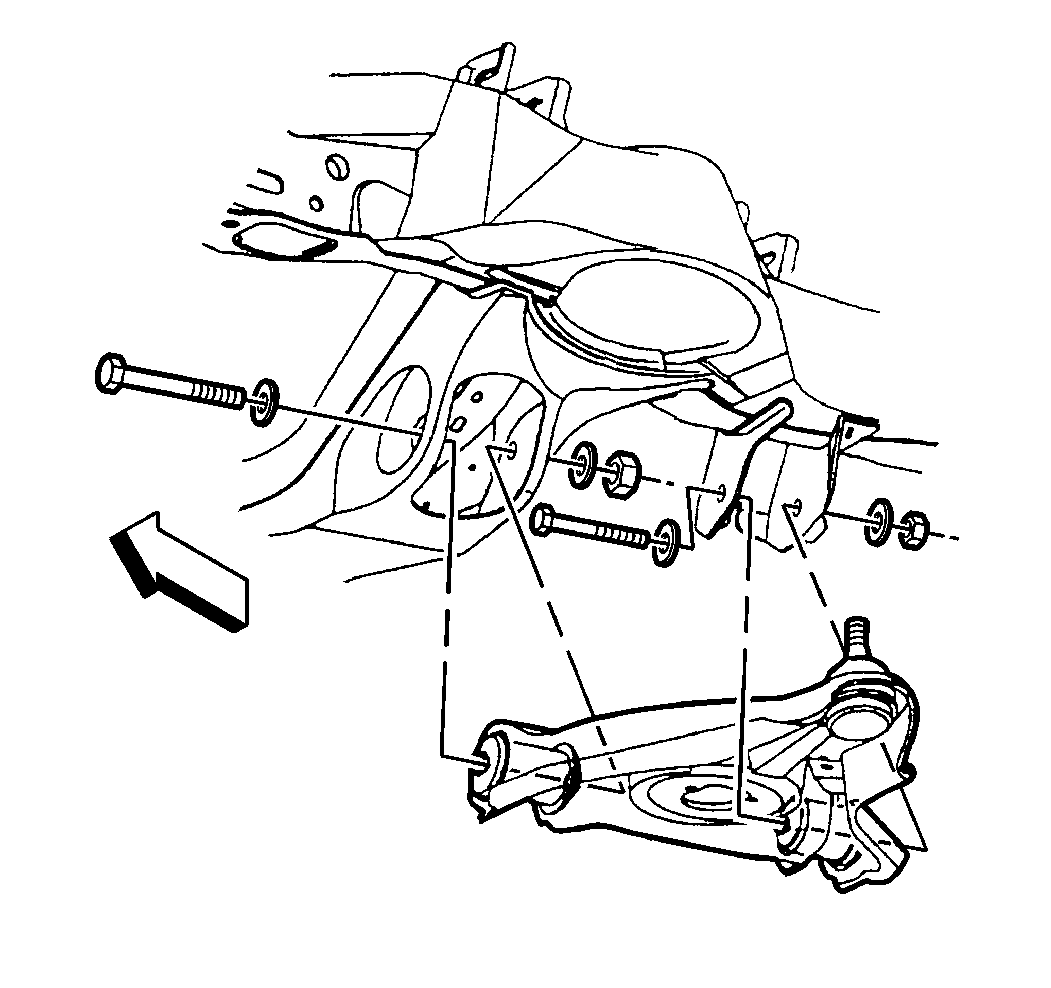
Important: The pivot bolts must be installed in the proper direction.
Notice: Use the correct fastener in the correct location. Replacement fasteners
must be the correct part number for that application. Fasteners requiring
replacement or fasteners requiring the use of thread locking compound or sealant
are identified in the service procedure. Do not use paints, lubricants, or
corrosion inhibitors on fasteners or fastener joint surfaces unless specified.
These coatings affect fastener torque and joint clamping force and may damage
the fastener. Use the correct tightening sequence and specifications when
installing fasteners in order to avoid damage to parts and systems.
- Install the new
pivot bolts and nuts.
| • | Insert the front bolt first. |
| • | Remove the chain and the jack. |
Tighten
The front nut must be tightened before the rear nut.
| • | The nuts must be tightened with the control arm at Z height. Refer
to
Trim Height Inspection
in Suspension General Diagnosis. |
| • | Tighten the nuts to 155 N·m 115 lb ft. |
- Install the stabilizer shaft. Refer to
Stabilizer Shaft Replacement
.
- Install the shock absorber. Refer to
Shock Absorber Replacement
.
- Install the tire and wheel assembly. Refer to
Tire and Wheel Removal and Installation
in Tires and Wheels.
- Remove the safety stands.
- Lower the vehicle.


