Quarter Panel Replacement Cargo Van
The quarter panel service part is supplied as a complete panel and should be replaced as a complete panel only in the event the roof panel and upper side rail are to be replace. Sectioning procedures have been developed to allow the replacement of the quarter panel without the removal of the roof panel.
Removal Procedure
- Remove all related panels and components.
- Visually inspect and restore as much of the damage as possible to factory specifications.
- Remove the following as necessary:
- Apply 50 mm (2 in) wide tape along the upper edge of the quarter panel (1) at the roof line.
- Cut the quarter panel at the lower edge of the tape (1) to leave a 50 mm (2 in) wide flange of the original quarter panel attached to the side reinforcement rail (2).
- Locate, mark, and drill out all factory welds around the perimeter of the quarter panel as necessary to remove damaged panel. Note the number and location of welds for installation of the service panel.
- Remove damaged quarter panel.
| • | Sealers |
| • | Sound deadeners |
| • | Anti-corrosion materials |
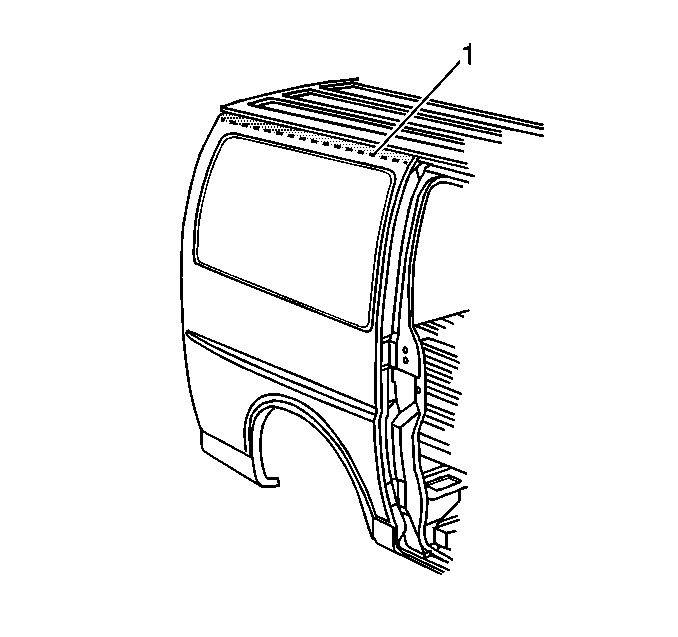
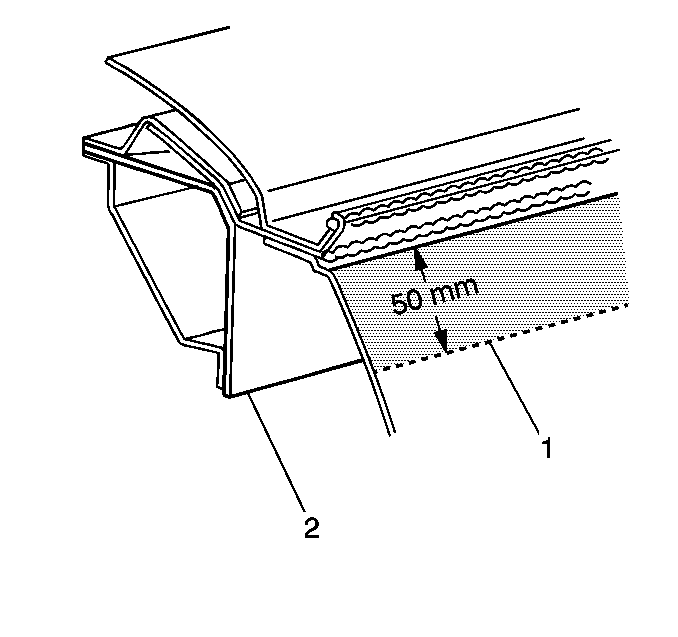
Important: Use care when cutting quarter panels not to cut the panels and reinforcements under the original panels.
Installation Procedure
- Trim and discard the upper mounting flange (1) on the service panel (2) so that it can fit over the 50 mm (2 in) tab left from the original panel.
- Drill 8 mm (5/16 in) holes for plug welding along the top of the quarter panel 25 mm (1 in) from the top edge, 40 mm (1½ in) apart (1).
- Apply anti-corrosion materials to bare metal weld flanges (2) as necessary.
- Prepare mating surfaces and check for proper fit and alignment.
- Plug weld accordingly.
- Apply 3M Ultra Pro Seam Sealer P/N 08361 or equivalent, to the sectioning joint.
- Seal quarter panel at the floor seam.
- Apply sealer materials and air baffles as necessary.
- Clean and prepare all surfaces.
- Prime with two-part catalyzed primer.
- Install all related panels and components.
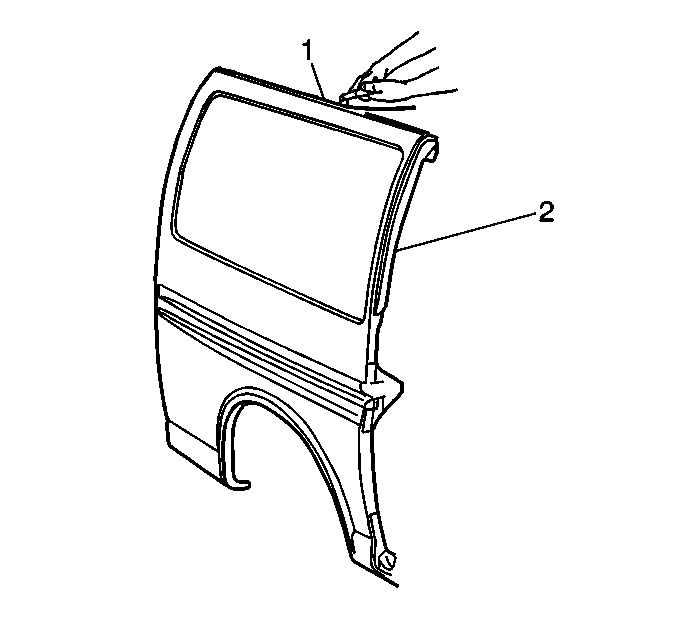
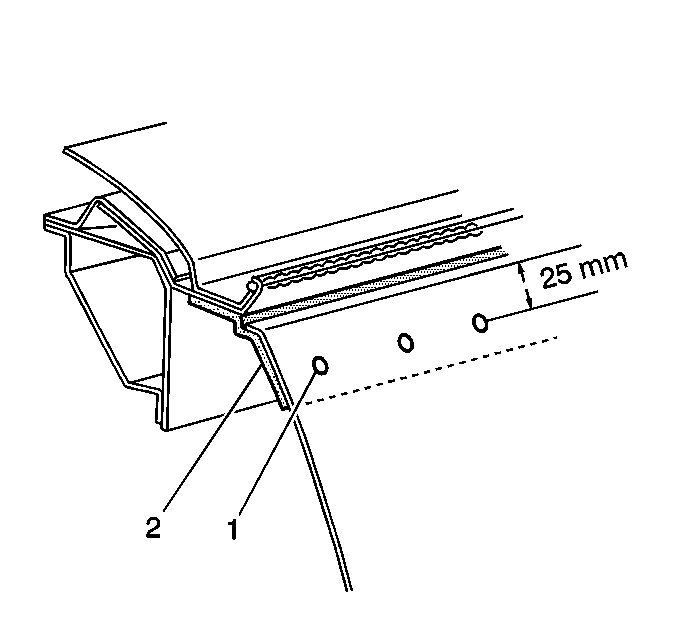
Important: The quarter panel must be sealed at the floor to prevent exhaust gas intrusion into the vehicle.
Important: Do not combine paint systems. Refer to manufacturers recommendations.
Quarter Panel Replacement Passenger Van
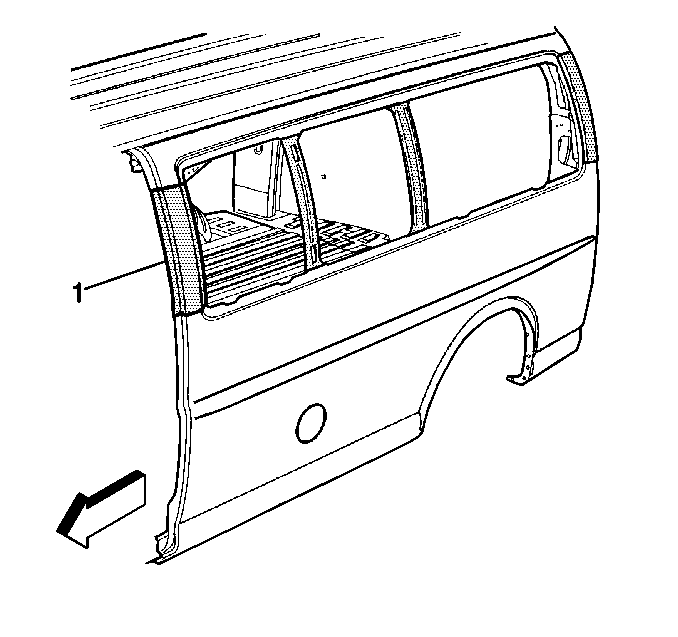
The quarter panel may be serviced as a complete panel only in the event the roof panel and the side rail are to be replaced. Sectioning procedures have been developed to simplify the repair. The service part can be replaced by making sectioning cuts at the window pillars (1).
Removal Procedure
- Remove all related panels and components, including the side glass.
- Visually inspect and restore as much of the damage as possible to factory specifications.
- Remove the following as necessary:
- Measure within the shaded areas on the pillars and mark the location to cut the original panel (1).
- Cut the pillars and window dividers. Take care not to damage the inner reinforcement panels.
- Locate, mark, and drill out all factory welds around the perimeter of the quarter panel as necessary to remove the damaged panel. Note the number and location of welds for installation of the service panel.
| • | Sealers |
| • | Sound deadeners |
| • | Anti-corrosion materials |
Installation Procedure
- Fit and align the replacement quarter panel with adjacent body panels.
- Trim the sectioning joint to allow a gap of one and one-half times the metal thickness at the joint between the service part and the original part.
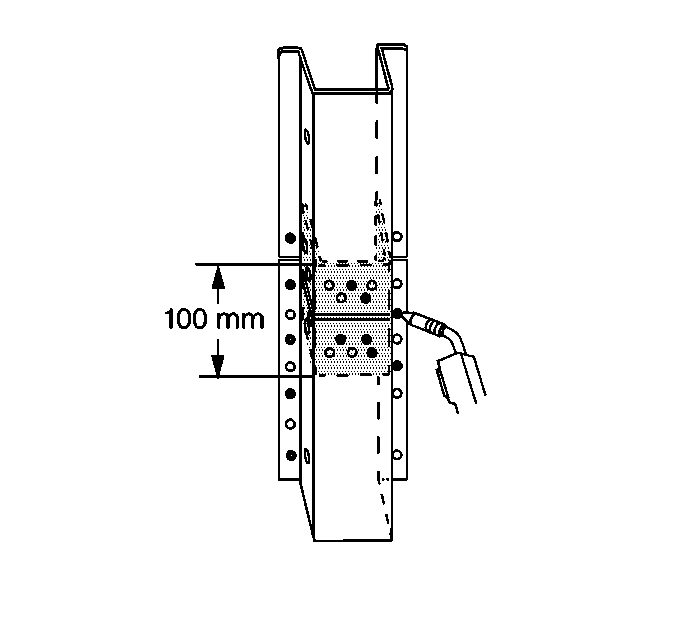
- Cut a 100 (4 in) backing plate from the unused portion of the service part.
- Trim the backing plate as necessary to fit behind the sectioning joint.
- Drill 8 mm (5/16 in) plug weld holes in the original part 25 mm (1 in) from the cut edge.
- Fit the backing plate halfway into the sectioning joint.
- Clamp and plug weld to vehicle.
- Drill 8 mm (5/16 in) plug weld holes in the service quarter panel as necessary in locations noted from the original panel.
- Drill four plug weld holes in the fuel filler neck pockets of the service panel for attachment to the inner reinforcement panel.
- Prepare all attachment surfaces as necessary.
- Align the quarter panel to adjacent panels and plug weld accordingly.
- Complete the sectioning by welding the joint gap closed with 25 mm (1 in) welds along the seam with 25 mm (1 in) gaps alternately.
- Go back and complete the stitch weld. This should create a solid weld with minimum heat distortion.
- Clean and prepare all surfaces.
- Apply sealers and anti-corrosion materials as necessary.
- Install all related panels and components.
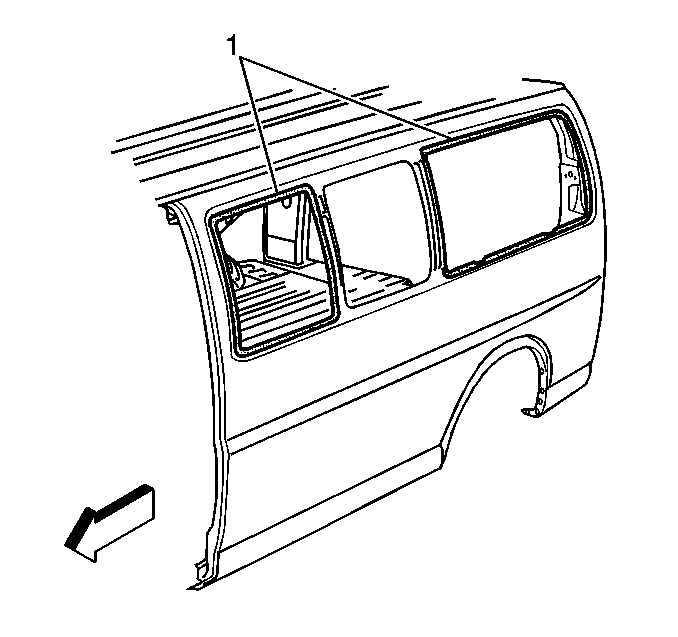
Important: The glass bonding areas (1) should be a primer surface ONLY, and NOT an aftermarket top coat (paint, or color coated) surface. Materials such as BASF DE17, Dupont 2610, or PPG DP40, or equivalent, are appropriate for this application.
Important: Do not combine paint systems. Refer to manufacturers recommendations.
